I theoretically manage to be paid to be a film and video professional of some stripe or other. I personally style myself as an editor but have been forced to provide camera services in order to maximize my client pool. As such, when I got my new external
HD for my digital video camera I decided to do a test video to make sure I was operating it correctly and decided to try and do up a video batrep so I could have fun while working.
Unfortunately I didn’t have everything working correctly, so all I have is a couple of stills I shot of the battle as none of the video recorded properly (back to the drawing board on that one). Still, why let a batrep go to waste? So here is the batrep with pictures and hopefully next time I’ll have the settings right and we can have a video batrep for all of you. This is my very first batrep so I tried to steal a couple of things I liked in other batreps - feel free to critique but be aware I cry very easily.
Regards,
Thor.
===========================Army Lists=============================
1850
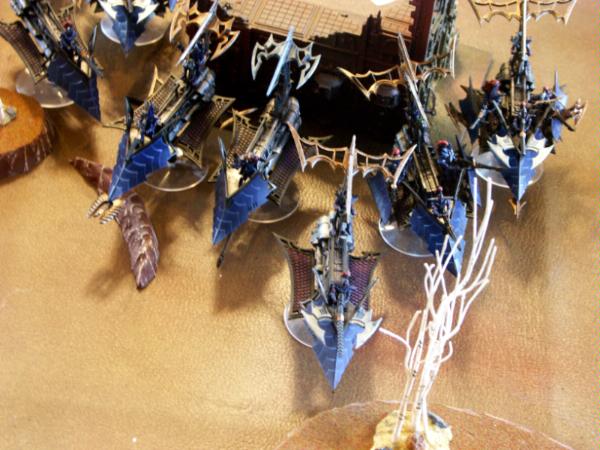
DE Army – The Cerulean Storm.
HQ: Archon
. .
1 Archon @ 172 pts (Splinter Rifle x1; Combat Drug Dispenser; Shadow Field; Tormentor Helm; Punisher; Plasma Grenades; Reaver Jetbike)
HQ: Haemonculi
. .
1 Haemonculi @ 45 pts (Scissorhand; Destructor)
HQ: Haemonculi
. .
1 Haemonculi @ 45 pts (Scissorhand; Destructor)
Fast Attack: Reaver Jetbike Squad
. .
4 Reaver Jetbike Squad (Splinter Pistol; Blaster x2; Splinter Rifle x2; Combat Drugs; Reaver Jetbike)
. . . .
1 Succubus (Splinter Rifle x1; Tormentor Helm; Punisher; Reaver Jetbike)
Elite: Wyches
. .
5 Wyches (Close Combat Weapon; Splinter Pistol; Wych Weapons; Blaster x2; Combat Drugs; Plasma Grenades)
. . . .
1 Succubus (Agoniser; Splinter Pistol; Wych Weapons; Plasma Grenades (Squad); Goblet of Spite)
. . . .
1 Raider (Dark Lance; Horrorfex)
Elite: Wyches
. .
5 Wyches (Close Combat Weapon; Splinter Pistol; Wych Weapons; Blaster x2; Combat Drugs; Plasma Grenades)
. . . .
1 Succubus (Agoniser; Splinter Pistol; Wych Weapons; Plasma Grenades (Squad))
. . . .
1 Raider (Dark Lance; Horrorfex)
Troops: Raider Squad
. .
6 Raider Squad (Blaster; Splinter Rifle x4; Splinter Cannon; Raider)
. . . .
1 Raider (Dark Lance; Horrorfex)
Troops: Raider Squad
. .
6 Raider Squad (Blaster; Splinter Rifle x4; Splinter Cannon; Raider)
. . . .
1 Raider (Dark Lance)
Troops: Raider Squad
. .
6 Raider Squad (Blaster; Splinter Rifle x4; Splinter Cannon; Raider)
. . . .
1 Raider (Dark Lance)
Troops: Raider Squad
. .
6 Raider Squad (Blaster; Splinter Rifle x4; Splinter Cannon; Raider)
. . . .
1 Raider (Dark Lance)
Troops: Raider Squad
. .
5 Raider Squad (Splinter Rifle x4; Dark Lance; Raider)
. . . .
1 Raider (Dark Lance)
Troops: Raider Squad
. .
5 Raider Squad (Splinter Rifle x4; Dark Lance; Raider)
. . . .
1 Raider (Dark Lance)
Heavy Support: Ravager
. .
1 Ravager (Disentegrator x3)
Heavy Support: Ravager
. .
1 Ravager (Disentegrator x3)
Heavy Support: Ravager
. .
1 Ravager (Dark Lance x3)
Thor’s thoughts on his army
Not the most efficient
DE build ever. The basic core (Raiders/Wyches) is taken straight from my usual tourney build. However I keep wanting to play with the
DE Lord and RJB retinue concept so adjusted the army to accommodate them. They look very scary but I imagine, as in most games, the battle will be decided by all the cheap squads and my Deathstar will mostly zip around and try to look intimidating while beating up on Devestator squads or something.
=========================================
1850 Ork Army - Zog'dakka Squatstompa's Waaagh!
HQ: Big Mek
. .
1 Big Mek ((C:Orks,
pp. 34 & 97); Choppa; Kustom Force Field; Furious Charge; Mob Rule; Waaagh!; Mek's Tools)
HQ: Ghazghkull Thraka
. .
1 Ghazghkull Thraka ((C:Orks,
pp. 58 & 96); Power Klaw; Big Shoota; Stikkbombs; Furious Charge; Mob Rule; Prophet of the Waaagh!; Adamantium Skull; Bosspole; Cybork Body; Mega Armour)
Elite: Lootas
. .
15 Lootas ((C:Orks,
pp. 43 & 100); Deffguns; Furious Charge; Mob Rule; Waaagh!)
Elite: Lootas
. .
15 Lootas ((C:Orks,
pp. 43 & 100); Deffguns; Furious Charge; Mob Rule; Waaagh!)
Fast Attack: Warbuggies
. .
1 Warbuggies ((C:Orks,
pp. 49 & 101))
. . . .
1 Warbuggy ((C:Orks,
pp. 49 & 101); Twin Linked Rokkit Launcha)
. . . .
1 Warbuggy ((C:Orks,
pp. 49 & 101); Twin Linked Rokkit Launcha)
Troops: Boyz
. .
18 Boyz ((C:Orks,
pp. 40 & 100); Big Shoota x1; Shoota; Furious Charge; Mob Rule; Waaagh!)
. . . .
1 Boyz Nob ((C:Orks,
pp. 40 & 100); Power Klaw; Slugga; Furious Charge; Mob Rule; Waaagh!; Bosspole)
Troops: Boyz
. .
17 Boyz ((C:Orks,
pp. 40 & 100); Big Shoota x1; Shoota; Furious Charge; Mob Rule; Waaagh!)
. . . .
1 Boyz Nob ((C:Orks,
pp. 40 & 100); Power Klaw; Slugga; Furious Charge; Mob Rule; Waaagh!; Bosspole)
Heavy Support: Battlewagon
. .
1 Battlewagon ((C:Orks,
pp. 55 & 102); Big Shoota x2; Armour Plates; Boarding Plank; Deff Rolla; Grabbin' Klaw; Red Paint Job)
Heavy Support: Battlewagon
. .
1 Battlewagon ((C:Orks,
pp. 55 & 102); Big Shoota x2; Armour Plates; Boarding Plank; Deff Rolla; Grabbin' Klaw; Red Paint Job)
Troops: Boyz
. .
11 Boyz ((C:Orks,
pp. 40 & 100); Choppa & Slugga; Furious Charge; Mob Rule; Waaagh!)
. . . .
1 Boyz Nob ((C:Orks,
pp. 40 & 100); Power Klaw; Slugga; Furious Charge; Mob Rule; Waaagh!)
. . . .
1 Trukk ((C:Orks,
pp. 41 & 100); Rokkit Launcha; Boarding Plank; Red Paint Job; Reinforced Ram)
Fast Attack: Deffkoptas
. .
2 Deffkoptas ((C:Orks,
pp. 48 & 101); Choppa; Twin Linked Rokkit Launcha x2; Furious Charge; Hit & Run; Mob Rule; Scouts; Deffkopta)
Devin’s thoughts on his army
Hey. I’m one of Thor’s usual local opponents. I really only put up with him because when he hosts he lets me play with his armies if I want to, since I only own an Imperial Fist army. I knew I was going to be fighting
DE but didn’t know his list. I decided to break out Thor’s orks to try out some of the new energy with battlewagons and deffrollas. The plan is to just muscle up on him and force him to engage me so I can bust up his paper air force with the rollas or with lots of dakka. I chose shootas for the wagon orks since
DE are sometimes hard to catch and having the ability to move 6, then shoot 18 with enough dakka to criple his armor 10 armor seemed like a very good plan. I figure the koptas and buggies will give me two fast elements to help compete with his speed and also multiple threats that can blast open raiders and ravagers.
=========================================================
Game Type: Seize Ground (5 points)
Deployment: Dawn of War
Both Wych Squads roll for drugs and both get +1 to their
WS (cool!)
The Reaver Jetbikes receive the Crazed result (meh!)
The Orks of Waaaagh Zog’dakka win the roll and opt to go second. They will decline the chance to seize the initiative. The
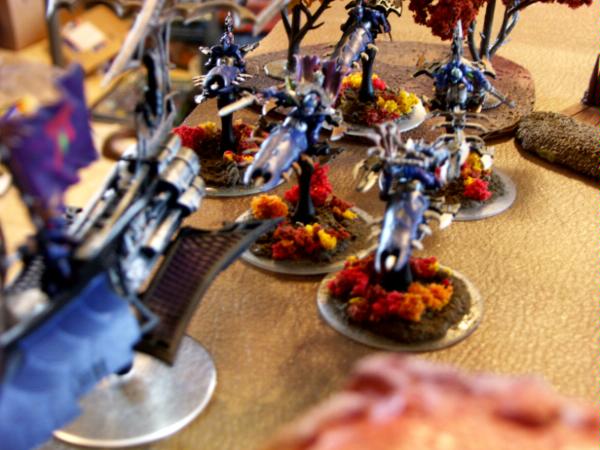
DE start with a single Raider on the board to push back the Ork deployment zone on one side of the map. The Orks start with nothing on the board.
DE Turn 1
I move on all my remaining forces. I personally am not a big fan of using reserves as I prefer to overwhelm by force of numbers when playing
DE, which works well with their multiple small unit concept. I also knew I was going to be mercifully spared any opening salvos from the Lootas and thus wasn’t too worried about being exposed, especially with night fight in effect.
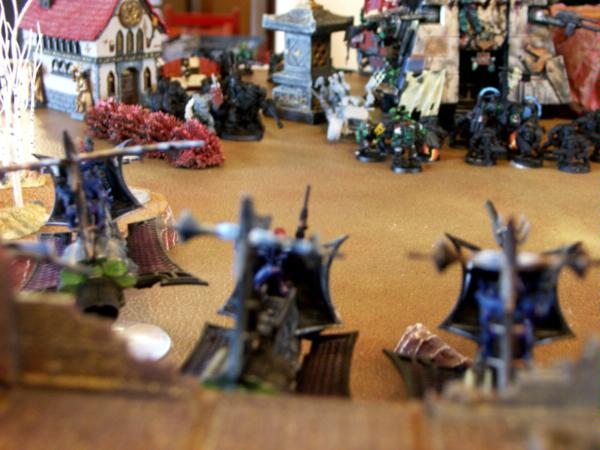
I intentionally wedge up on the more cluttered side of the battlefield. I can see how a couple of the “paths” can be clogged by my Raiders and am hoping to lock down the Battlewagons in the open center field as I lure them into a shooting death trap. Also, this brings the added advantage of hopefully dragging the Orks this way and away from two of the objectives which will hopefully be easy for me to claim via moving Raiders flat out near endgame.
Ork Turn 1
Devin’s stated goal is to “shove a pair of battlewagons down [my] throat” It doesn’t sound pleasant. He moves in with his entire army. Coming in first comes a pair of rokkit buggies that are planning to serve as a defensive screen for the wagons. Zog’dakka roars in with his custom Battlewagon Morkalith (or is that Gorkalith?), Big Mek Bolt’ead comes up alongside him in his own Battlewagon, each of the Orks looking forward to trying to use their shiny deffrollas to splatter their foes. The two trucks zoom in on their heels, staying close to the Battlewagons to take advantage of their ability to hide behind them as well as staying close to the kustom force field.
The Lootas, cursing the deployment type, hoof it in on foot and forgo shooting to run. One squad aims for a handy hill where they can see the bulk of the battlefield and get some cover at. The second squad hustles up behind the vehicle wall, knowing that once the wagons and trucks roar out they will be in perfect position to shoot up the
DE Raiders. The Deffkoptas take to the extreme flank and turbo boost up to a small pile of ruins. They have a kunnin’ plan to flank around and annoy the
DE from the side.
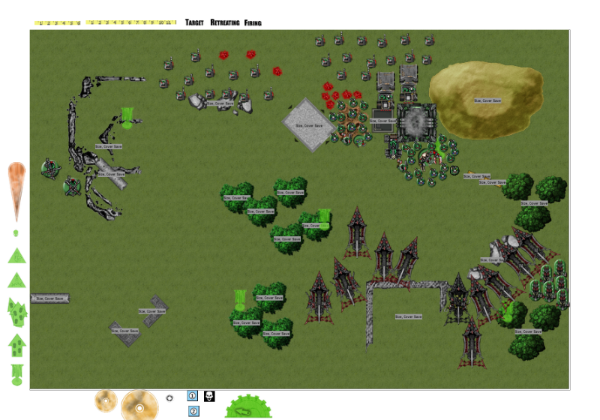
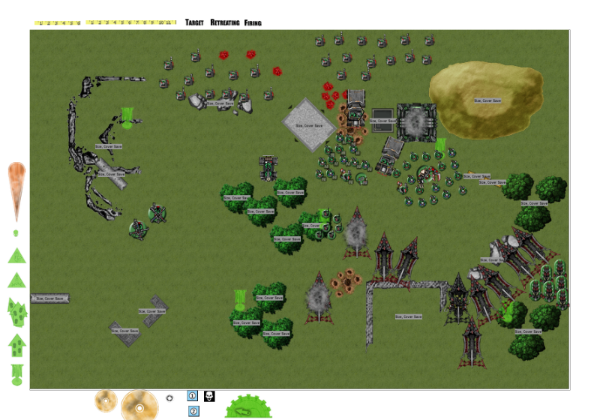
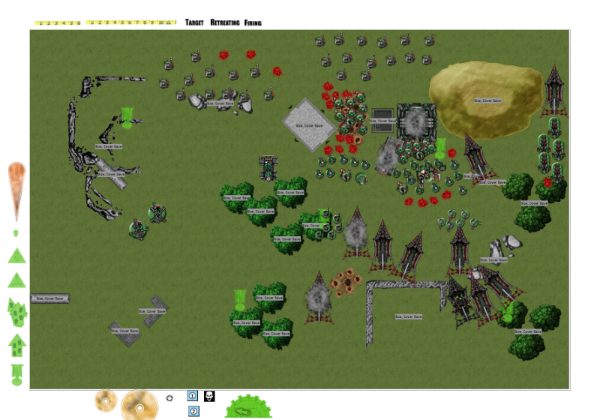
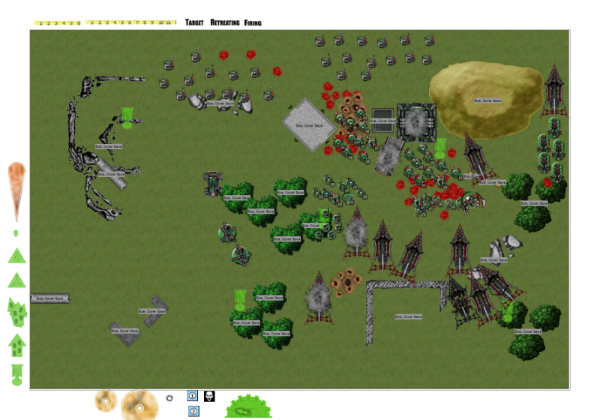
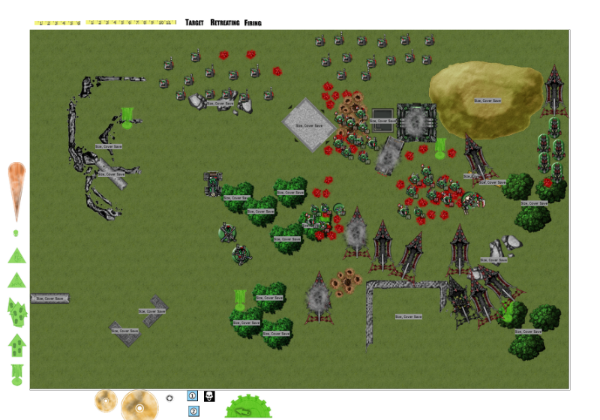
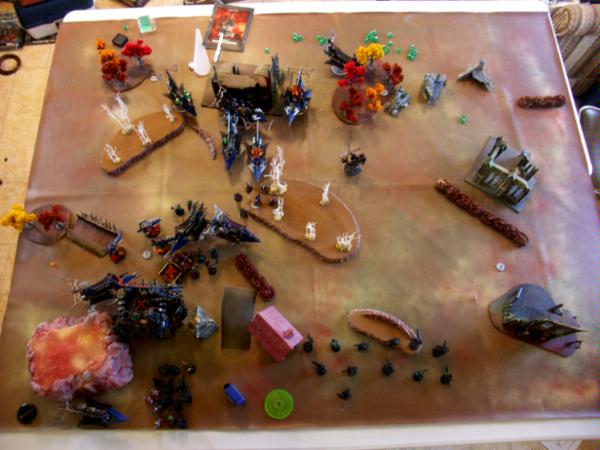
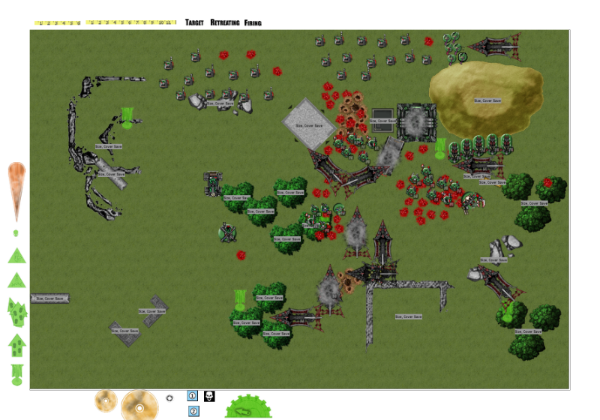
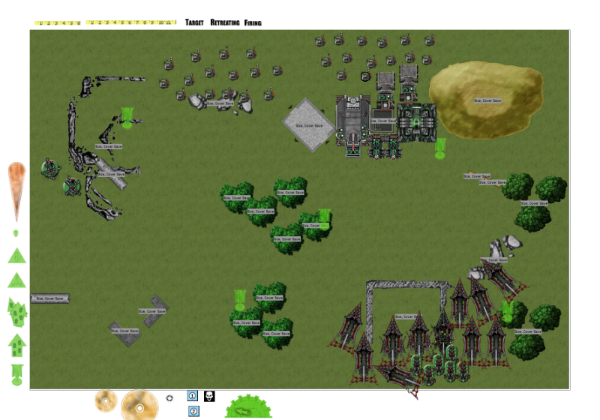 This is the board at the end of turn 1. I constructed these Vassal maps using the photos I had and my memories - hopefully paired with the pictures they will provide you a good idea of the flow of battle.
DE Turn 2
This is the board at the end of turn 1. I constructed these Vassal maps using the photos I had and my memories - hopefully paired with the pictures they will provide you a good idea of the flow of battle.
DE Turn 2
Stupid Deffkoptas are messing with my chi here. I basically decide to trust in the wonders that are Ork accuracy and choose to ignore them for now. Besides, I have Wagons and Lootas to kill.
I open up with my Ravagers popping out from behind the building they were using to hide. The triple lance ravager gets straight to business and targets the Big Mek’s Battlewagon. 2 hit, both penetrate, one is saved via cover, and the other rolls a 6 on the damage chart. Boom! Down goes the Battlewagon.
I become a raging idiot at this point and get excited by how closely packed the Orks are and proceed to fire a 3 Dissie Ravager at them, breaking my cardinal rule of ‘always kill those stinking gawdawful Lootas first’ I realize my error and look like an idiot as I have the second 3 Dissie Ravager fire at the visible Loota squad, killing 3 (if I’d just done that twice I might have gotten them to run away)
The first of my two ‘sniper boats’ decides to fire its two lances into the other Battlewagon. 2 hit, one glances, cover save is failed, and…I roll another 6. The Morkalith is wrecked and Ghaz and the boys stumble out wondering where the plan went wrong.
The other Raiders fire their lances with some less effect. They do manage to kill one of the rokkit buggies and score a weapon destroyed result on the other one, making the buggies basically useless. Overall an excellent turn of shooting.
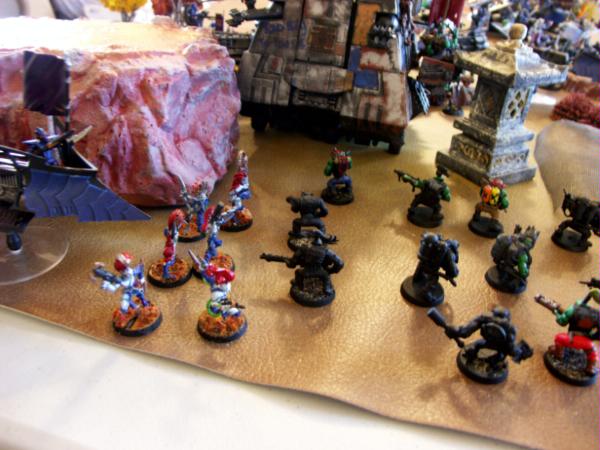
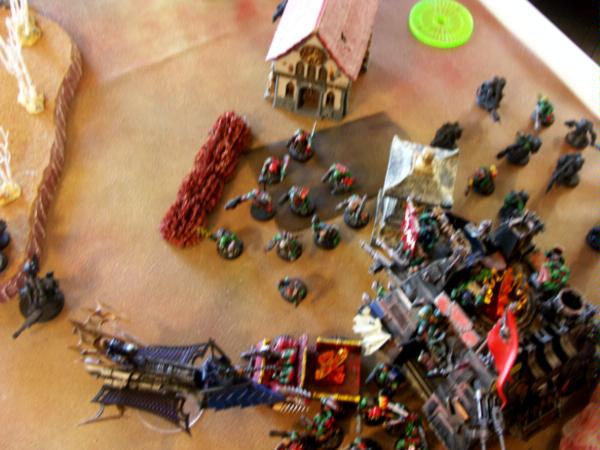
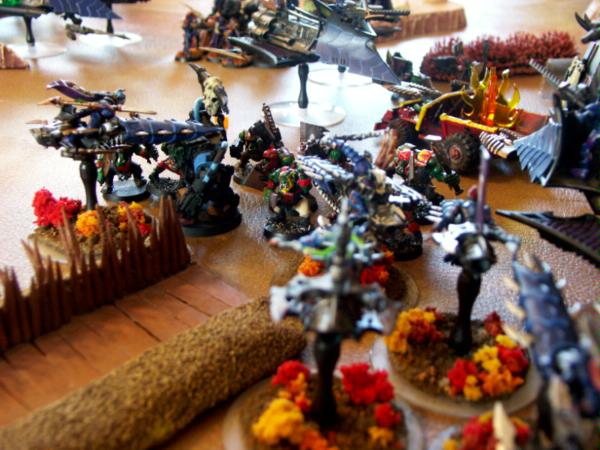
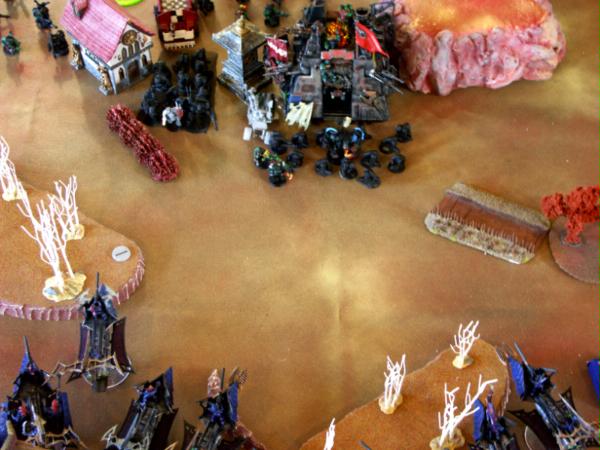 Footsloggin' into battle? Inconceivable!
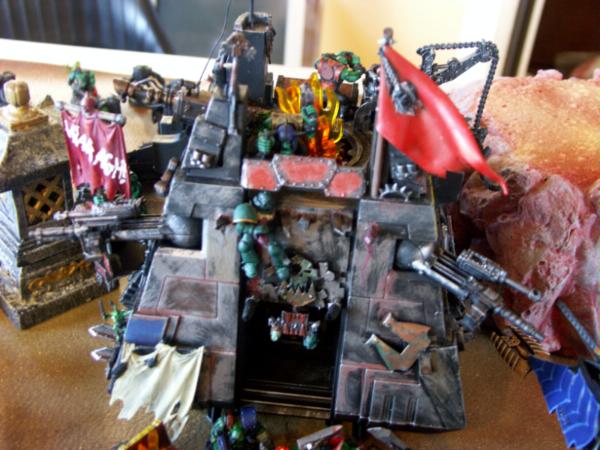
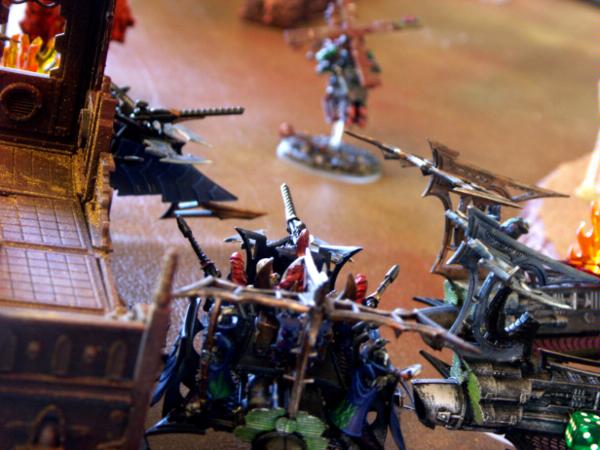
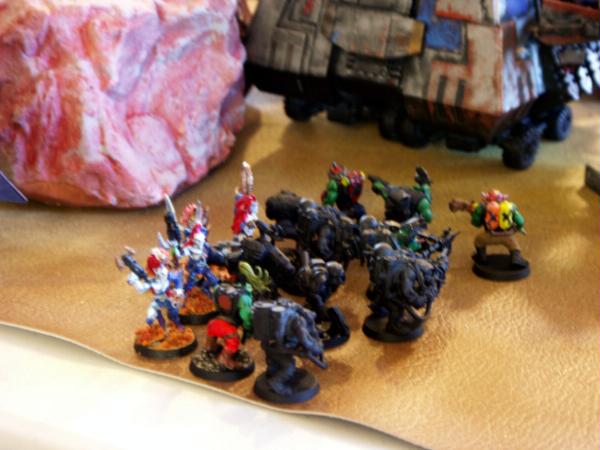
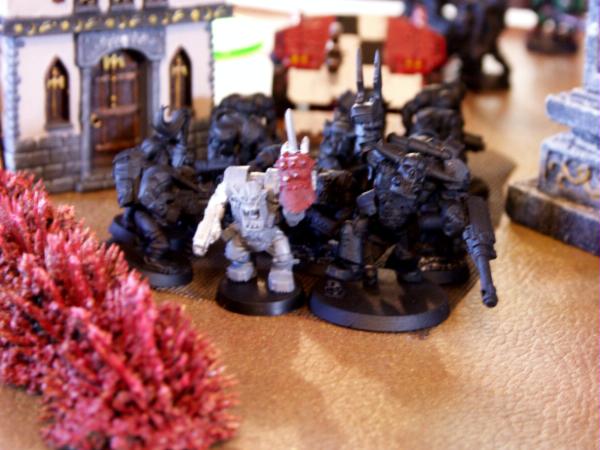 This Nob offers his choice assessment of the DE after they destroy both Battlewagons
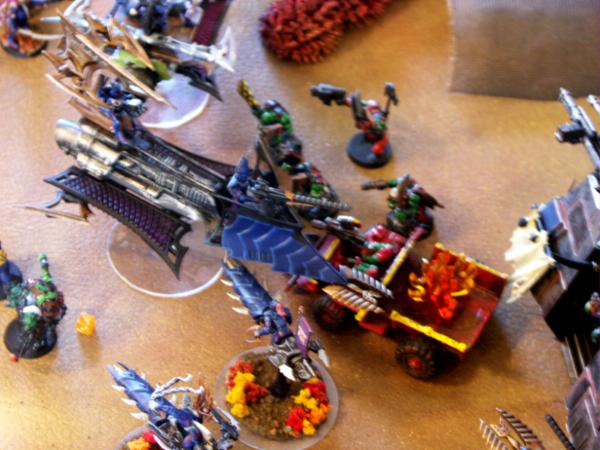
 Witness the glory of flying cardboard!
 Though I am certain it was dead killy, the mighty Morkalith is left a burning wreck early in the battle.
Ork Turn 2
Though I am certain it was dead killy, the mighty Morkalith is left a burning wreck early in the battle.
Ork Turn 2
Devin informs me that whenever I fire dark lances my dice are rigged and tries to salvage the situation. The boyz surge forward on foot, claiming the objective in the clearing and trying to clear a path for the trucks that are now slowly easing forward.
The Deffkoptas buzz out from hiding and fire rokkits into the side of the nearest Raider, managing to stun it.
The Lootas on the hill get three shots each and proceed to fill the sky with so much lead that the weight of the bullets alone probably manages to wreck the 3 Dissie Ravager that had fired at them (4 pens, 1 glance, I cover saved everything but one pen and they wrecked me anyway). Both of the trucks fire at the Raider the deffkoptas stunned and manage to wreck it. The crew disembarks into the nearby woods and claim an objective of their own. The 2nd Loota squad squints a bit through all the wreckage and opens fire on the other 3 Dissie Ravager and howl in glee as it bursts into flames (again, great cover saves but the two pens that slipped through exploded me)
Ghazzie’s mob opens up with small arms fire at the nearest Raider and manages to shake it. The Big Mek’s mob does the same and just shakes it again.
 DE Turn 3
And that is why you always need to kill Lootas quick – filthy little buggers.
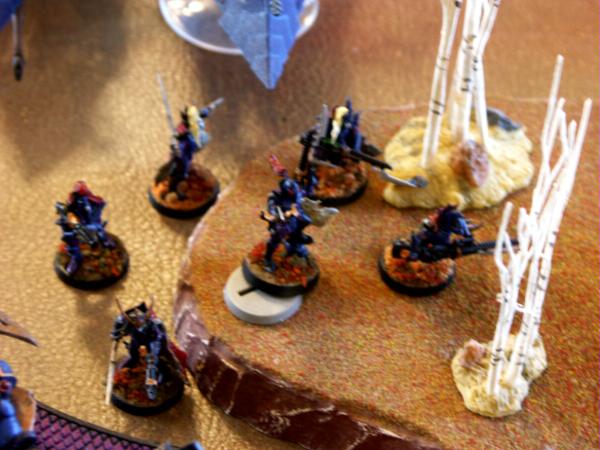
Realizing I had to get an answer to the Loota firebase I kick a Wych Raider into high gear down the right flank. The Archon and bike retinue follow along. Unfortunately I have to land a bit in terrain and one of the
DE bikers wipes out the hard way into a tree. The other Wych Raider decides to deal with Ghaz and leaps out to do battle with the Ork Megaboss.
 Be vewy, vewy qwiet, we're huntin' Lootas
A nearby gunboat tries to help, and with their shooting and the Haemy inside they drop 4 Orks, the Wyches manage to shoot and kill another 1 Ork (for the record, through the entire battle I think I only ever hit with 1 Blaster, which I feel made up for the double first turn Battlewagon kill – for some reason my opponent disagreed)
My lances continue to take their toll as I destroy both of the Ork Trukks (one via Kaboom and the other Kerunch). The Waaagh! Is declared in preparation for the Wych assault.
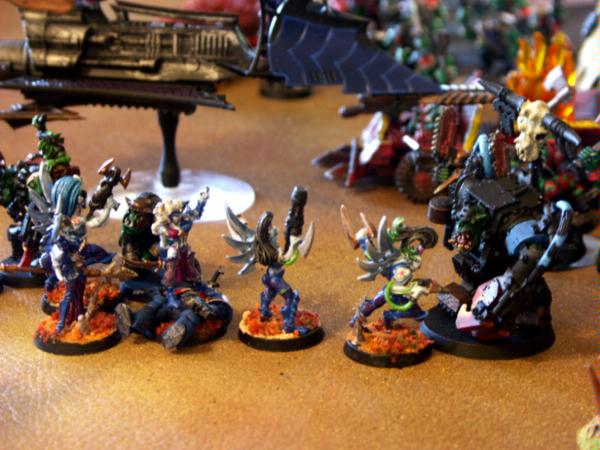
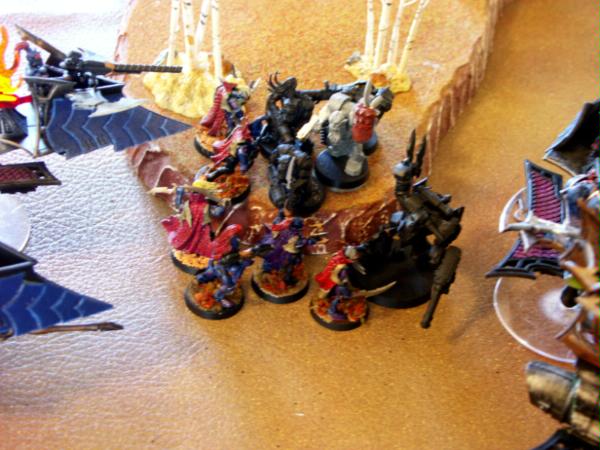
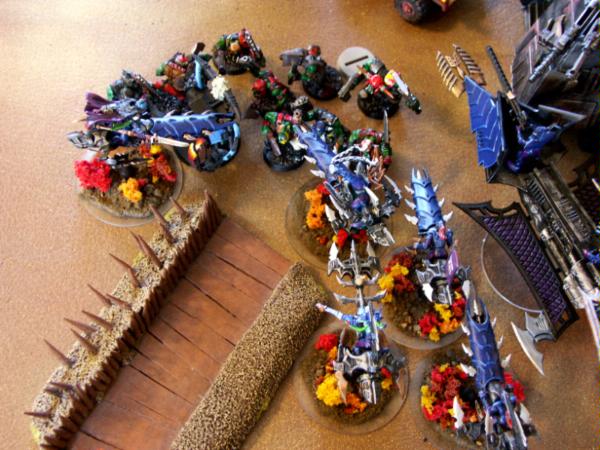
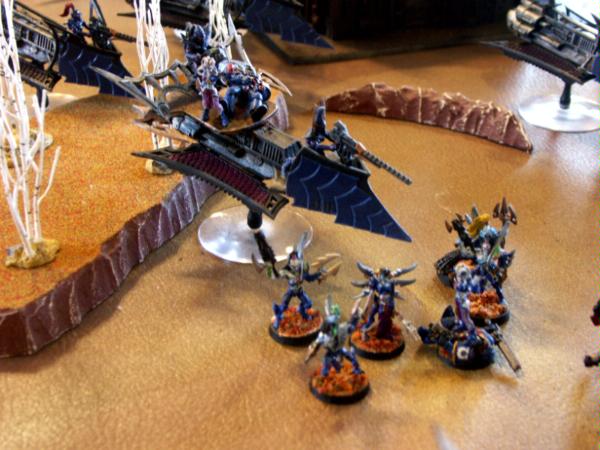 Assaulting Ghazkull? Sounds like a job for Wyches!
In the assault the Wyches aren’t quite able to lock Ghaz out and the big guy gets his swings. Still, with their
WS halved by the Wych Weapons the Orks need 5s to hit (and even Ghaz needs 4s). The Wyches kill 6 Orks. In return Ghaz manages to kill one Wych and the boyz do nothing. 2 more Orks are killed from fearless saves and the Nob also takes a wound but at least Ghaz doesn’t need to try to make a leadership roll at -5.
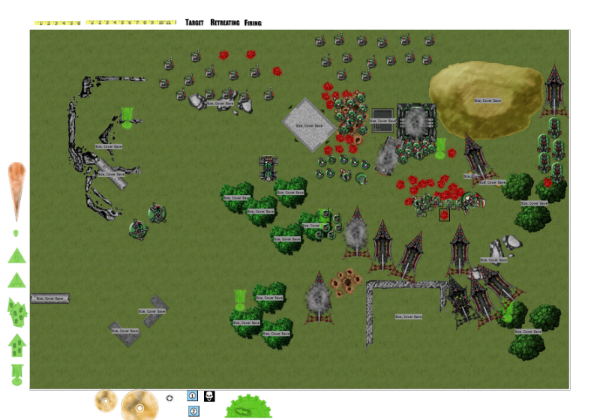
 Ork Turn 3
The Deffkoptas continue to make themselves felt as they advance and immobilize one of the Gunboats with a Haemy in it. The Lootas behind the Morkalith settle for shooting at this Raider as well and only manage to shake it. The other squad of Lootas fire at and immobilize and weapon destroy (lance) one of the sniper boats.
The Boyz from the yellow trukk decide to lend Ghaz a hand and assault into the Wyche squad. Ghaz and the boyz do themselves proud, losing only two trukk boyz and wiping out the Wyches which frees Ghaz.
The Big Mek surges forward with his mob and assaults the
DE in the woods, easily stomping them flat after only losing a single ork. That now makes it 2-1 on the objectives in the Ork’s favor.
 DE Turn 4
The 3 Lance Ravager decides to end the deffkoptas, but after rolling 2 hits it then manages to roll two 1s for damage! A second Raider fires and hits, and rolls 1 for damage! Mercifully the third Raider that fires finally manages a wound for me and instakills one of the koptas. The second kopta fails leadership and figures he can always come back later for another go as he hightails it away.
The Wych Raider swoops them out to face one of the Loota squads, and the Wyches disembark and eye the giant mob uneasily. Not an optimal use for Wyches – but I just really wanted to silence those guns for a turn. They assault into the mass and kill 2 Orks for 2 Wyches lost and the battle will last till next turn, huzzah!
The Haemy and his crew disembark, shoot at, and assault the Big Mek. Despite the Orks getting first swings due to cover they do no damage and the Haemy uses his Scissorhands to easily gut the Big Mek. The Orks break and are run down by the Dark Eldar who reclaim the objective.
 Haemonculi Nhilltyrr and his squad reclaim the objective.
Gunboats cut off Ghaz and the trukk mob from any support and proceed to shoot up the other trukk mob. The Archon assaults into b2b with Ghaz while the RJBs assault the boyz to turn it into a multiple combat.
 One burning Trukk plus a gunboat equals a surefire way to make it hard for the trukk boyz to help out da prophet
The Archon shoots up on 3 drugs (+1 attack, +1
Str, and re-roll misses) and doesn’t
OD (whew) She inflicts 4 wounds on Ghaz of which he saves 2 (jerk) He and the Boyz swing on the Archon but though 3 wounds are inflicted all are saved via the Shadowfield. The RJBs suffer one wound but manage to kill 4 Orks. The Orks fail leadership twice and Ghaz and the boyz are run down (and I proudly declared that we had captured Ghaz to drag him back to Commorragh)
 Not much is left after the jetbikes do their work.
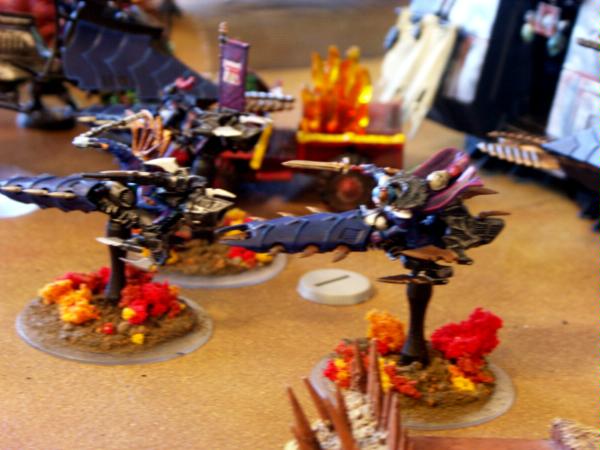 2nd Daughter Brizelya Maerret, the Thunderhead of the Cerulean Storm howls her victory after the fleeing Orks.
Ork Turn 4
2nd Daughter Brizelya Maerret, the Thunderhead of the Cerulean Storm howls her victory after the fleeing Orks.
Ork Turn 4
With only one squad of Lootas, a weakend trukk boy mob, and a weaponless buggy left Devin concedes the game to the
DE forces.
Devin’s thoughts on the game
One turn was all I needed the battlewagons to last, just enough to get the boys up into the
DE gunline and rip some stuff up. Instead both BWs were toasted on the turn they showed up and Thor left me stumbling around in a kill zone as his Raiders made it more and more constricted to accomplish anything. I never even got to try the new defrolla rules. Pretty much I think the game was lost by the middle of turn 2.
MVPs of the match were the Lootas. If I coulda just had a turn of shooting with them instead of having to run on because of dawn of war I coulda whittled down the air force enough to leave them unable to outmaneuver the orks as well.
Thor’s thoughts on the game
Mostly I’m kicking myself for being an idiot and ignoring the Loota squads like I did. Yeah, I was able to minimize their targets a bit, but I really just gave away both of my Dissie Ravagers and against Orks that’s unforgivable. No mater how tightly packed the Mek’s squad was I should have realized he was just going to be footslogging around at that point and would be easy prey for my Gunboats. If I’d fired both Dissie Ravagers at the one Loota squad I probably could have routed them off the board and then had my Wyches locking down the other squad by turn 4 which would have meant only 2 volleys of Loota fire instead of the 4 I received. Big difference!
Thankfully I was lucky with my lance shots and managed to create a good tarpit on the map that prevented Devin from bringing the full weight of his army in at me in any meaningful way. Getting to fight drips and drabs is always preferable to a fair fight after all.
As usual I had fun with the RJB assault squad, but also as usual I just can’t figure out how to make them work in a more competitive environment. They’re just so expensive that each loss is painful (and me being a reckless jerk that has them take an odd handful of dangerous terrain tests probably didn’t help). I wish I didn’t like my Lord model so much as then I might not bother so much with the squad. As usual my conclusion is – fun, but I’d rather have another Raider and either some Wyches or Incubi.


