| Author |
Message |
 |
|
|
|
|
Advert
|
Forum adverts like this one are shown to any user who is not logged in. Join us by filling out a tiny 3 field form and you will get your own, free, dakka user account which gives a good range of benefits to you:
- No adverts like this in the forums anymore.
- Times and dates in your local timezone.
- Full tracking of what you have read so you can skip to your first unread post, easily see what has changed since you last logged in, and easily see what is new at a glance.
- Email notifications for threads you want to watch closely.
- Being a part of the oldest wargaming community on the net.
If you are already a member then feel free to login now. |
|
 |
2010/04/28 23:11:37
Subject: Imperial Guard Griffon Conversion
|
|

Revving Ravenwing Biker
|
This is coming on very nicely indeed
|
|
|
|
 |
|
2010/04/30 09:39:05
Subject: Imperial Guard Griffon Conversion
|
|
Wrathful Warlord Titan Commander
|
terribletrygon wrote:GW PVA FTW!!!111
Yes GW PVA truly is the most cost effective way to stick wood and increase intawebs flames at the same time.  terribletrygon wrote:Anyways... flamebait aside, I like where this is going. Though do you have a mock up of the roof design? I think it is going to make or break this model, and I am interested in what you will do with it.
As you will see from the date of my last post I have slowed down a little this week and this is due to one reason only; I have picked up a copy of FW's Model Masterclass book. This has been an absolutely mind blowing read for me. Loads of ideas and techniques have been gleaned from it [graphite pencil to do worn edges of metal - simple but brilliant!] and so I have been reassessing my design. Having seen the Trojan model included in this book I am now thinking along the lines of a hard panelled roof along the length of the passenger compartment, with hydraulic rams to articulate/support them [modelled not real!]. My initial idea of a folding/concertina roof isn't easily achievable and the roller shutter roof, while simple to model doesn't seem like a "realistic" solution.  I now realise how close this project has been to the Trojan but was completely oblivious of the similarities until I read the MM book! 
|
|
This message was edited 2 times. Last update was at 2010/04/30 09:40:19
How do you promote your Hobby? - Legoburner "I run some crappy wargaming website " |
|
|
|
|
2010/06/11 14:56:48
Subject: Re:Imperial Guard Griffon Conversion
|
|
Wrathful Warlord Titan Commander
|
Time for an update! Well after not being able to do much hobby wise for the last month (Parenthood has its downsides believe it or not!), I have been able to spend a couple of nights catching up with my Griffon project and getting a little progress done. First off I have clad the interior of the fighting compartment. Looking at the Forgeworld Medusa in the Modelling Masterclass book really made me fell that my effort was a little plain so I decided to add a little bit of detail to the interior. I have scored a 20mm by 10mm grid into some 0.30 guage plasticard and fitted this to the walls. I also added a door to the driving/command compartment. This was made with some profiled plasticard and some lengths of plastrut angle to form the frame. All of this will break up the walls a little and hopefully catch the light when painted and provide a little texture. 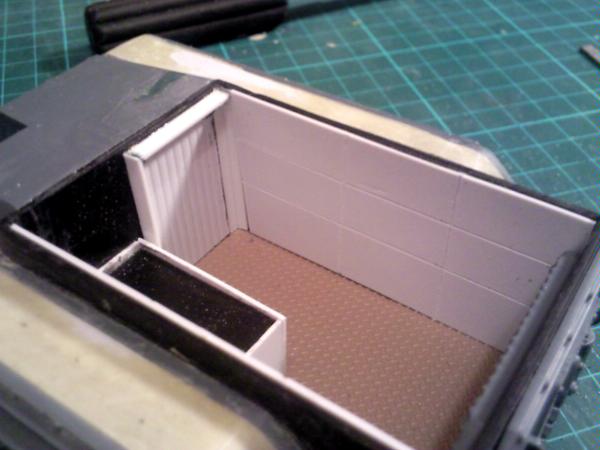 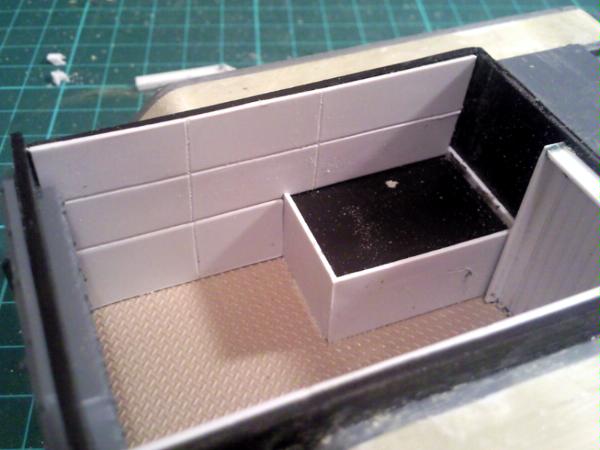 This done I returned my attention to the trackguards. As per my previous post these were formed by gluing plasticard in the track channel. Originally I envisaged that the 0.30 guage strips that I had fitted were the perfect thickness to sit on the wheels and be flush with the surface. Unfortunately either/both the thickness wasn't correct or the plastic was too thin and has not spanned between the wheels very well and sagged a little. I have corrected this with a bit of filling (using a PVA glue and Milliput mix - PVa helps sticl to the glossy plasticard) and sanded this smooth. 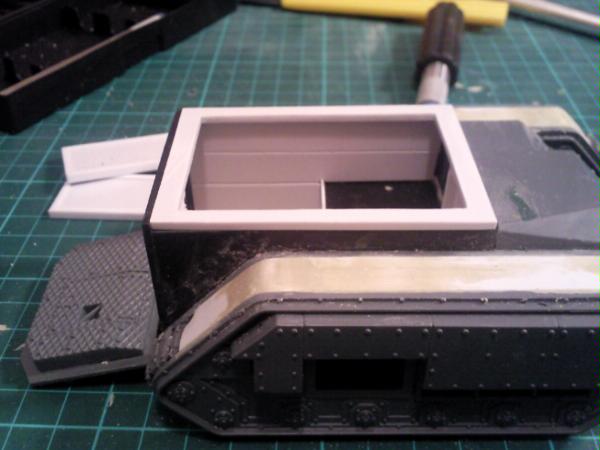 I have also started on the roof hatch and installed the hatch frame. 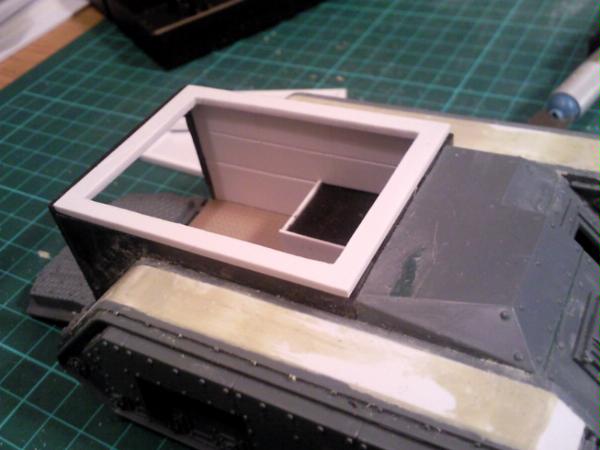 I'm not too keen on the lip at the front of the fighting compartment, but I can't really think of what to do with it at the moment? Hopefully it will be covered a little when the conmmanders hatch in installed. Finally I have made a couple of doors for the top hatch. I made these with 1mm plasticard and some 2mm C section plastrut. 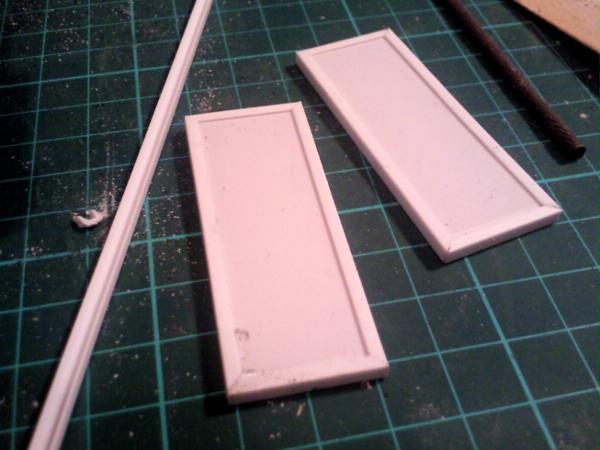 I am planning to mount them splayed completely open rather than vertical (ala the Trojan from my previous post for example) as this will show off the interior a little bit more. I have bluetac'd them inplace to show how they would naturally fall if open, plus an example of how they will sit if closed (not that they will be openable, but I like to think about these things!). Sorry about the line across the picture, bloody camera phones! 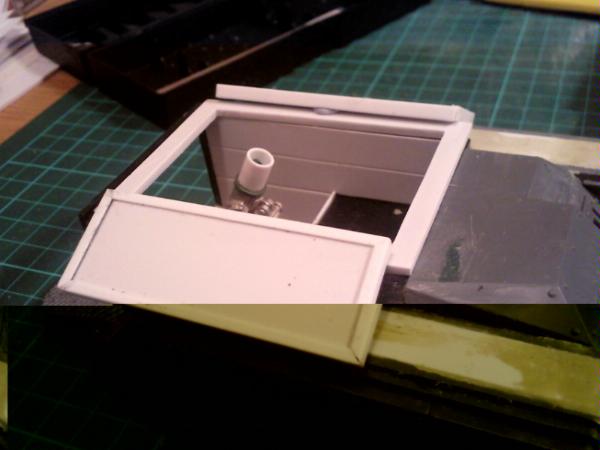 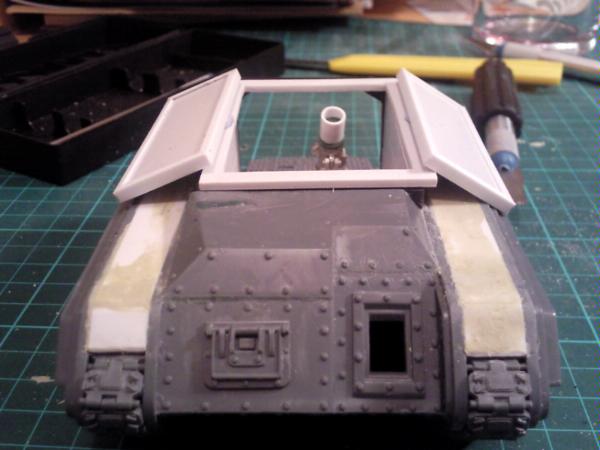  Well thats me for now. Next up I will be doing the crew and details which I will stick to the hull. I am also planning to start on the painting, which should also give me a opportunity to try out my new airbrush (woot for birthdays and generous partners  ).
|
|
This message was edited 1 time. Last update was at 2010/06/11 16:19:10
How do you promote your Hobby? - Legoburner "I run some crappy wargaming website " |
|
|
|
|
2010/06/11 16:11:22
Subject: Imperial Guard Griffon Conversion
|
|

Drop Trooper with Demo Charge
|
Wow I really like how this is turning out. I may have a few medusas in my army in the future and I hope it is ok if I steal a few ideas from you. Looking forward to the final product!
|
|
|
|
|
|
2010/06/13 02:26:27
Subject: Imperial Guard Griffon Conversion
|
|
Wrathful Warlord Titan Commander
|
Steal away my friend, but you are only stealing from the real world I fancy.
I was also thinking of doing a medusa next, I look forward to comparing notes or stealing from your screaming angles thead [which is awesome!].
|
|
This message was edited 1 time. Last update was at 2010/06/13 02:26:46
How do you promote your Hobby? - Legoburner "I run some crappy wargaming website " |
|
|
|
|
2010/09/20 10:45:26
Subject: Re:Imperial Guard Griffon Conversion
|
|
Wrathful Warlord Titan Commander
|
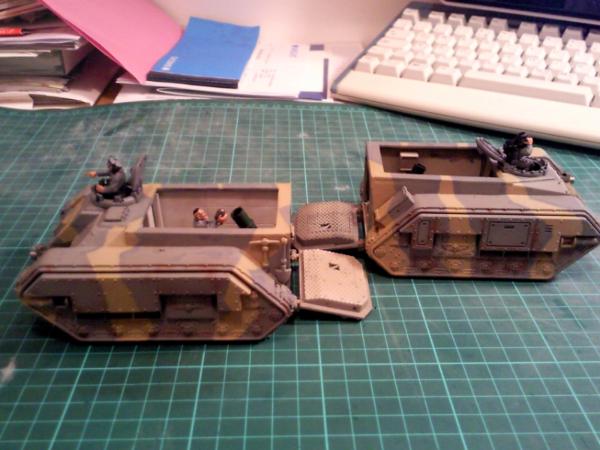
UPDATE! [Also sorryfor the text and no pictures in this post, work have tightened up the rules and the limited online time I have is preventing me from getting photos on Dakka atm, so I intend to update again later tonight.] It’s been a while since I have been able to update this plog [bloody hell June in fact, where did 3 months go?]. Unfortunately work and family commitments have meant that I have been otherwise focused and not updating but progress has been made. So what has been done in that time? First off we have had a new arrival; we now have two Griffons up and running. I went to Warhammer World for the Silver Sorcerer event in August and needed another Griffon for my list, so I set down another hull (based upon the new Chimera kit). The new kit was no harder or easier to convert; time saved upon not doing track wheels was instead used to adapt the tracks/sides to allow the track covers to match on the two machines. Secondly the roof has gone. I never found the final design [see previous post] satisfactory and discarded it in favour just having it open topped. Third the crew and weapons on both machines have been made. One has been made with the original GW Griffon model crew, with a little cutting and carving to make one fit in the hatch. The second crew have been made with parts from the Accessory, Cadian infantry, Cadian Heavy Weapons and Chimera Kits with a mortar bomb from the Kreig Griffon crew set. The Krieg kit was bought just for the bomb [ouch!] but the rest was just lying about. Next I added a bit of detail to the fighting compartment, in the form of some Aquila’s, doors, ammunition and display/auspex panels. Finally because I was taking them to WW I cracked out the paints and have put on a base coat to the whole thing. I copied the Medusa scheme from the FW Model Mastercraft book which I was rather taken by and brushed on a very rough base coat onto the crew and weapons. I also did 2 sentinals and a Leman Russ at the same time. 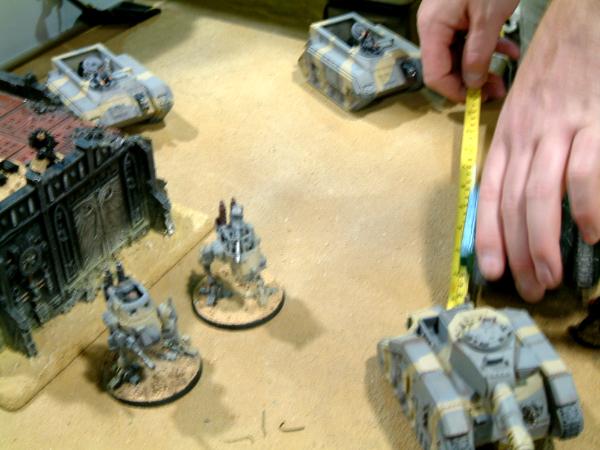 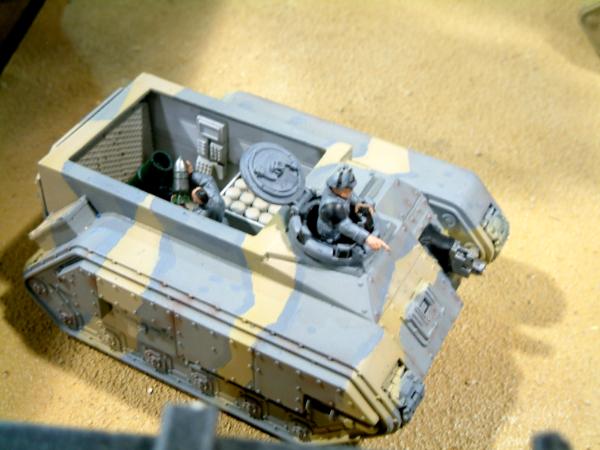  [Images from ArbitorIan's SS battle report, where he handed me my ass with his demons!] This was my first attempt at using and airbrush and overall I was quite please with the results. I didn’t get the shaded/patchy look as shown in the book, more of a flat base coat but will be going back to correct this when I do the highlighting. Further the masking was not 100% success full and some edges were touched up with a brush to straighten them out. While I had the airbrush out I started on the weathering. This is also new to me and it took some getting used to, spraying brown over the recently finish base coat. Still I’m reasonably please with where I am at the moment and have received some positive comments from my opponents which was nice.
|
|
This message was edited 1 time. Last update was at 2010/09/20 10:50:04
How do you promote your Hobby? - Legoburner "I run some crappy wargaming website " |
|
|
|
|
2010/09/20 18:56:43
Subject: Imperial Guard Griffon Conversion
|
|
Wing Commander
|
Good to see your return!
|
"In the Grim Darkness of the far future; there is only countless Requisition Forms, filled in Triplicate."
|
|
|
|
|
2010/09/20 20:35:46
Subject: Imperial Guard Griffon Conversion
|
|
Hardened Veteran Guardsman
|
These came out looking nice. I think you made the right call ditching the top hatch, you want to show off the interior detail all the time anyway.
|
|
|
|
|
2010/09/21 16:52:05
Subject: Re:Imperial Guard Griffon Conversion
|
|
Wrathful Warlord Titan Commander
|
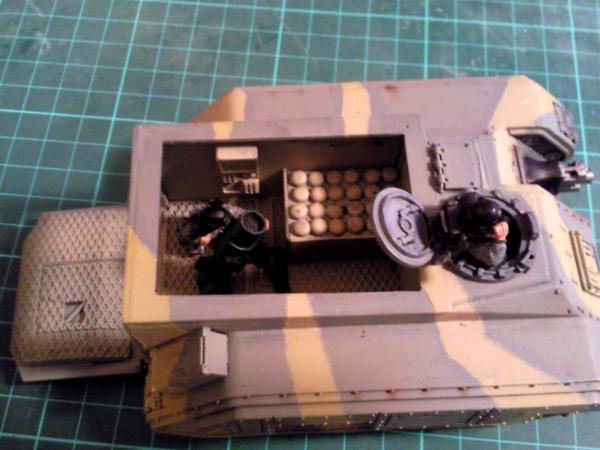
I have taken a few up close pictures of the Griffons.
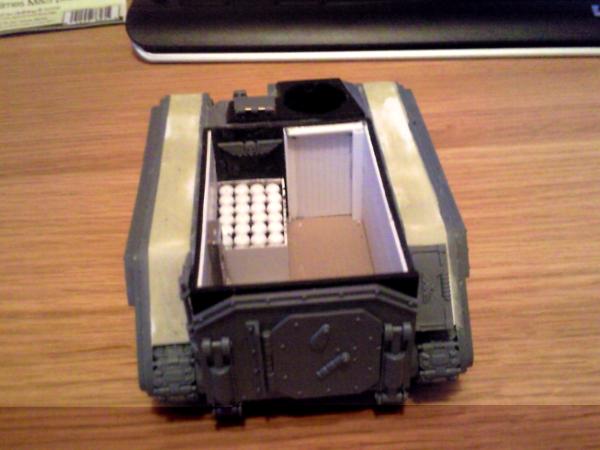
First up are a few pre-primer shots of the track guards. You can see that I used miliput to smooth over the gaps and variations in the plasticard. Milliput was a big mistake; it was far too difficult to apply but was all i had at the time. The second Griffon had Humbrol sandable filler, which was a much better product.
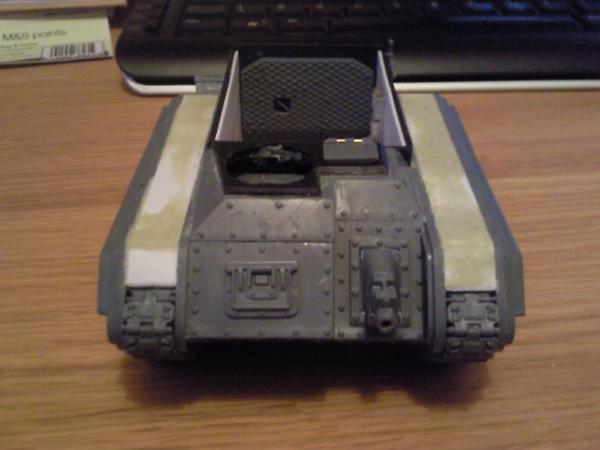
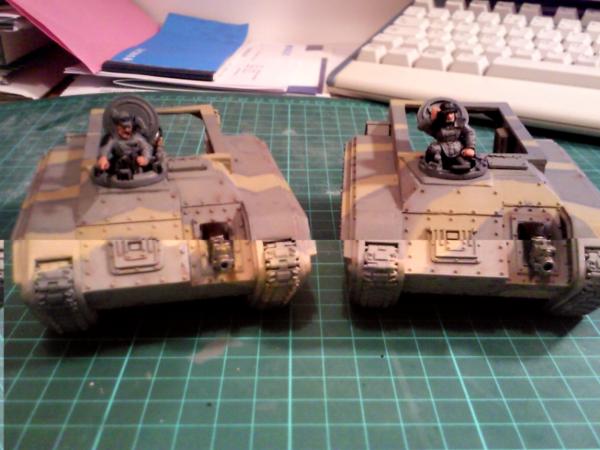
I also added an additional plate over the driving compartment. This was for two reasons; 1) the turret on the chimera is fitted on a "peg" and there is a raised area that needed to be removed to house the cupola flush. 2) the fighting compartment was proud of the driving compartment and 2mm of plasicard evened this out.
I then cut it to shape, angled the edges, cut a 20mm hole for the cupola and fitted a drivers hatch.
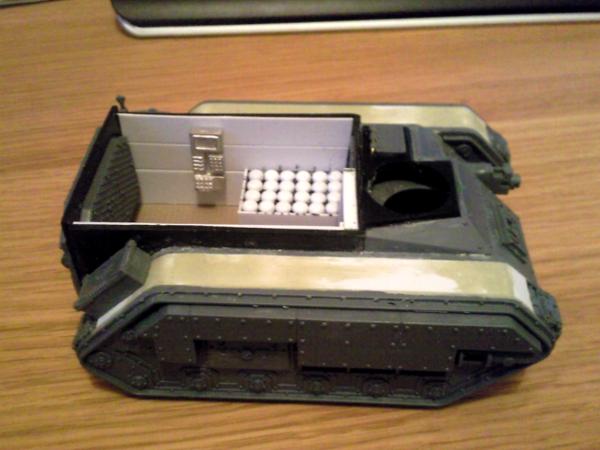
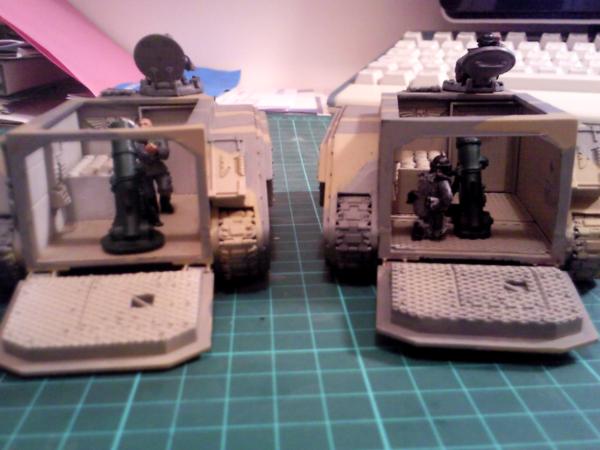
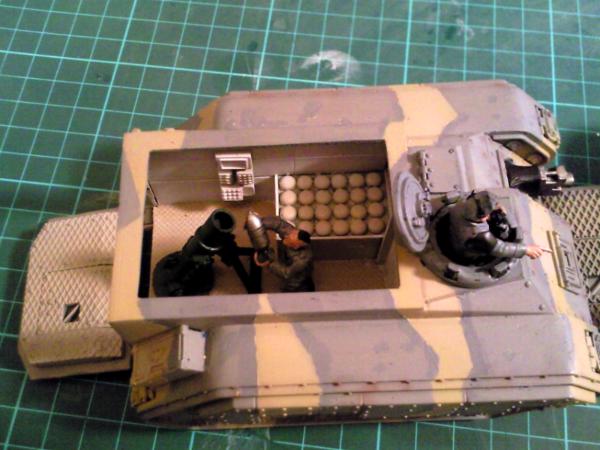
Finally I added some details from various sources. The door and ammo bin were formed with some plasicard and plastrut. The round caps in the ammo bin were made from some 4mm split head pins (from the girly section of Hobbycraft) set into a drilled grid.
Next up there is a selection of photos that show the base coat. The whole thing was sprayed Codex Grey and then a Codex Grey/Kommando Khaki mix was applied to raised and highlighted areas. As I said before this was my first use of an airbrush on a model and despite my best efforts I think that I used it more as I would a spray can and less like a brush, so the results are mixed but I will touch these up next time.
Once this was dried I masked the vehicles (using low- tac tape) and once I was happy with this a layer of Khaki was airbrushed on. This was followed up with a patched of yellow (I'll double check the exact colour) and a retouch with Kommando Khaki.
Finally some Brown (Bestial I think?) was lightly sprayed on the rivets and some of the armour plate joints. This was very stark and I wasn't certain at first but I finished up and could can see where this will goe when the weathering is advanced on a stage.
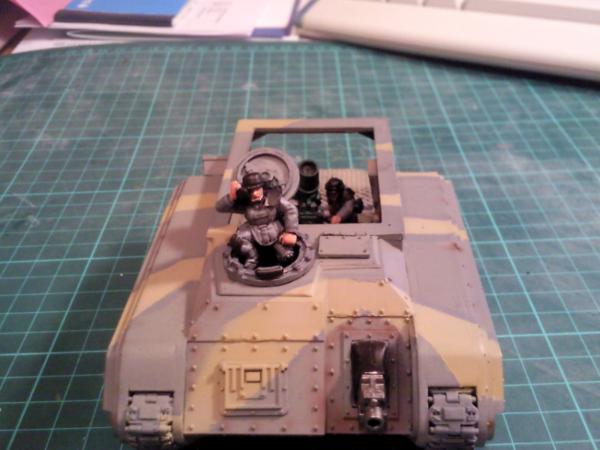
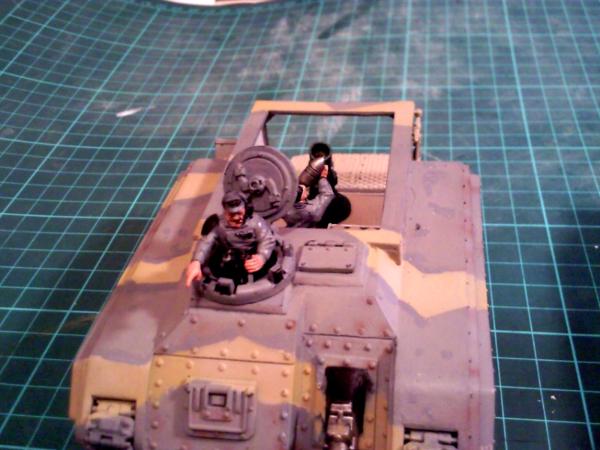
As I say the paint job was sort of rushed for the Silver Sorcerer tourney (day before infact!) so there are lots of blemishes that need to be sorted and the rough base coats on the crews need to be rectified but all in all I don't think that they look too bad.
Next stage is to sort that painting out and do some weathering!
|
How do you promote your Hobby? - Legoburner "I run some crappy wargaming website " |
|
|
|
|
2010/09/21 18:09:28
Subject: Imperial Guard Griffon Conversion
|
|

Boosting Black Templar Biker
|
So.....Freakin....Sweet.
Great work. Thanks for showing us each step along the way.
|
|
|
|
|
|
2010/09/21 18:10:01
Subject: Imperial Guard Griffon Conversion
|
|

Hard-Wired Sentinel Pilot
|
Nice griffons  I specially liked the custom track guards you made.
|
|
|
|
|
|
2010/09/21 18:12:54
Subject: Re:Imperial Guard Griffon Conversion
|
|
Fixture of Dakka
|
I think the Mortar should have been a bit bigger, but that said, Fantastic job! Full of win x 2!
|
"But i'm more than just a little curious, how you're planning to go about making your amends, to the dead?" -The Noose-APC
"Little angel go away
Come again some other day
The devil has my ear today
I'll never hear a word you say" Weak and Powerless - APC
|
|
|
|
|
2010/09/21 19:06:56
Subject: Imperial Guard Griffon Conversion
|
|

Drop Trooper with Demo Charge
|
Dude this is amazing, I hope you've had made this before I made my ghetto-mortar from a rhino  still, I salute you, my good sir.
|
 IG: 41st Teras Grenadiers (still VERY wip): IG: 41st Teras Grenadiers (still VERY wip):
http://www.dakkadakka.com/dakkaforum/posts/list/309198.page
"You're the all-singing, all-dancing crap of the world." - Tyler Durden

|
|
|
|
|
2010/09/21 23:13:25
Subject: Imperial Guard Griffon Conversion
|
|
Wrathful Warlord Titan Commander
|
Cheers for the feedback fellers. More soon.
|
How do you promote your Hobby? - Legoburner "I run some crappy wargaming website " |
|
|
|
|
2010/09/22 03:03:25
Subject: Imperial Guard Griffon Conversion
|
|
Lord of the Fleet
|
That looks awesome! Makes me want to make mortar carriers
|
|
|
|
|
|
2010/09/22 03:41:01
Subject: Imperial Guard Griffon Conversion
|
|
Awesome Autarch
|
Great work, borchacho! Those seriously look awesome. I want to get my hands on some Griffons but paying $60+ for the FW versions, even though it is a bad ass model, is too steep.
Where did you get those mortars?
|
|
|
|
|
|
2010/09/22 10:14:57
Subject: Imperial Guard Griffon Conversion
|
|
Wrathful Warlord Titan Commander
|
@Reccius - borchacho?
The mortars are the basic mortar from the original GW mortar teams from the 2nd edition range of metal Imperial Guard models. I extended the barrels with some plastrut tube and made a band around them with Green Stuff (all shown on page 1).
The basic mortar is still available from GW's collectors range I believe as part of the various mortar teams (except for the Cadian one?) they are still selling (but not on its own).
@alarmingrick - not sure exactly what you mean by bigger? The rear compartment is suprisingly limited especially once I put a few things in there so I am not sure how much bigger I could have been without leaving no room for the crewman. I wasn't that keen on the demolisher sized weapons that some have posted here and thought that the metal one fitted the bill perfectly when compared to the plastic one that you get with the Cadian Heavy Weapons teams. I did do a longer one (see page 1) but it was just too high for the crew to "use".
|
|
This message was edited 1 time. Last update was at 2010/09/23 09:03:17
How do you promote your Hobby? - Legoburner "I run some crappy wargaming website " |
|
|
|
|
|
|
 - in progress