Switch Theme:

Tyranids inspired from nature - Broodlord Conversion Complete "Devil of Fenris" Updated Sept 19  [RSS] Share on facebook Share on Twitter Submit to Reddit
»
Author Message
Advert


Forum adverts like this one are shown to any user who is not logged in. Join us by filling out a tiny 3 field form and you will get your own, free, dakka user account which gives a good range of benefits to you:
  • No adverts like this in the forums anymore.
  • Times and dates in your local timezone.
  • Full tracking of what you have read so you can skip to your first unread post, easily see what has changed since you last logged in, and easily see what is new at a glance.
  • Email notifications for threads you want to watch closely.
  • Being a part of the oldest wargaming community on the net.
If you are already a member then feel free to login now.


Made in nz
Tough Tyrant Guard


Auckland, NZ

Whoa. Nice work on those objective markers!

Love the slime effect and the alien eggs, looks really good

Hive Fleet Ngaro 4800 points
Cult of the Red Saviour 1700 points
Zerg Infested Terrans 2300 points

P&M thread http://www.dakkadakka.com/dakkaforum/posts/list/592277.page 
   
Made in au
Warning From Magnus? Not Listening!


Melbourne, Australia

The more I look at it the more the scheme grows on me - I really like what's been done so far! Keep up the good work

My P&M blog

DC:90S++G+++M+B+IPw40k04#+D+A+++/cWD241R++T(T)DM+ 
   
Made in ca
Irked Necron Immortal


Halifax, NS

Thanks for the comments, I appreciate them.


Made in ca
Irked Necron Immortal


Halifax, NS

It's been a long, long time since I've posted but I thought I'd get back into this. I recently started a narrative campaign of my Tyranids vs. Space Wolves. We designed a narrative that would see one character from each side continually pitted against each other with forces and each character increasing in stats for certain achievements (Levelling Up if you will).

My unit of genestealers distinguished themselves in the first skirmish we had. They decimated two squads of Space Wolves and eliminated the enemy warlord on the last turn. So I decided my Broodlord would become my designated character for the remainder of the campaign. After he survived two campaign missions with exactly 1 wound left and a close combat kill count of 20 space wolf marines I thought it was time to name my broodlord and make him more appropriate to the campaign.

I ripped apart the arms, bought a space marine commander kit, scrapped off some paint to re-do the job and now have a good work in progress for my first, real conversion. I've named my Broodlord "The Devil of Fenris"

This post highlights the progress of the customization and assembling of my converted broodlord.

This is a closeup of the decimated marine torso. Shows some of the battle damage I've carved into the armour to make it look like the Broodlord has torn him apart, but also highlights a new painting technique I was trying out for shading the cape. I found a few posts that talked about selective glazing. This is my first attempt and involved about 45 coats of differing shades of glazes I made to gradually bring out brighter and brighter shades of red in the cloak. I think this was a very time consuming process and I think I could've got a better effect with dry brushing in a much faster time. But it was an experience with a new painting technique and I learned a bit from it.
Spoiler:


Space marine head. Still needs some shading and some finishing touches but shows some of the work. I used some carved down parts from necron kit for the spinal column
Spoiler:


Here is the lower half of the marine body. One leg has been cut off completely. I used it to test cutting and repositioning the foot to give it a more lifeless droop. Instead a pinned the knee and painted it up to make it look like bone is sticking out. There's some battle damage cut into the body with a some wear and tear.
Spoiler:


To honour the fact that the Broodlord has survived two games in a row with exactly 1 wound remaining I thought I'd have him run through with a power sword to show that he takes a licking and keeps on ticking. Here you can see the power sword has been cut and set in between the ribs of the broodlord. I tried to line things up as best as possible to give it a more realistic look. You'll notice the space marine's hand still clutching the power sword with a pin sticking out of the wrist. That's to be painted up to make it look like bone and the hand has literally been ripped off the marine.
Spoiler:


Here you can see the assembled Devil of Fenris and the poor marine who tried to take him on. There's some shading on the Broodlord left to do. and the tusks I added to the head, along with the head in general need some more detailing and gore added to the parts of the marine (head, missing leg, arm, impaled power sword, and neck of the marine body).
Spoiler:


Made in ca
Irked Necron Immortal


Halifax, NS

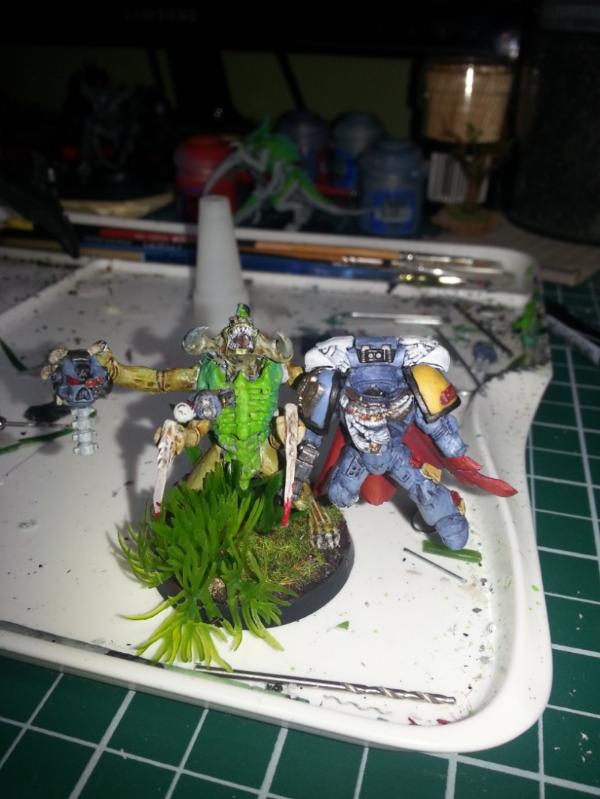
The Devil of Fenris is finally complete.

I put my first decal on for the space wolf capt. That was not a fun experience. I varnished the shoulder pad but I don't think I put a thick enough layer on or I did not let it dry long enough before attempting. My first decal was a disaster. It came apart, the paint peeled off the shoulder pad. I thought I had it down. I watched 10 different instructional videos but I was not prepared. On top of the difficulty of my first decale the placement is high up on the shoulder pad where there is more curve due to the ribbon on the lower part of the shoulder.

My second attempt fared slightly better. The decal still came apart but the paint stayed on. The result is my third attempt, which is not great, but not bad either. I had a lot of fun making this model and learned some new techniques.

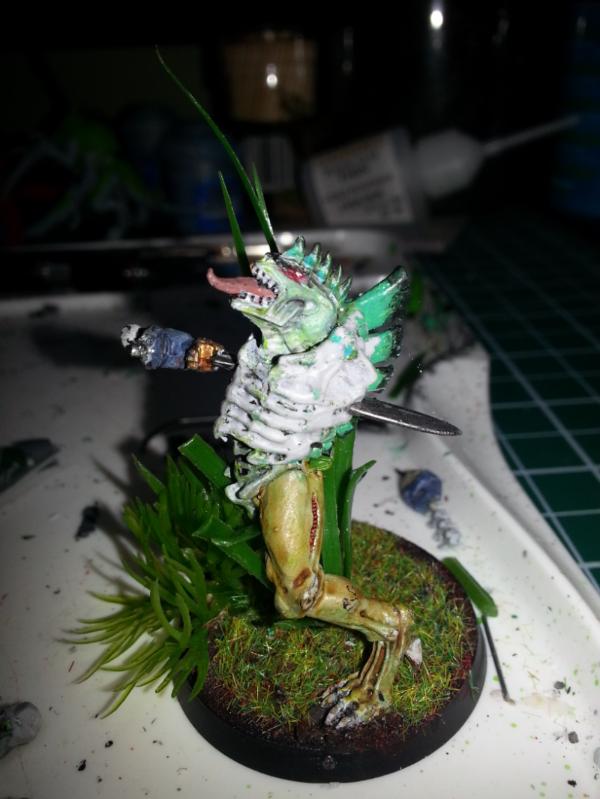
- I used the spine from some necron bits and cut it down a little bit to make it a little more organic looking and less square to make the spinal column for the poor space wolf
- I used a mixture of clear scrapbook glue, red paint and 'ard coat to get the glossy blood effects.
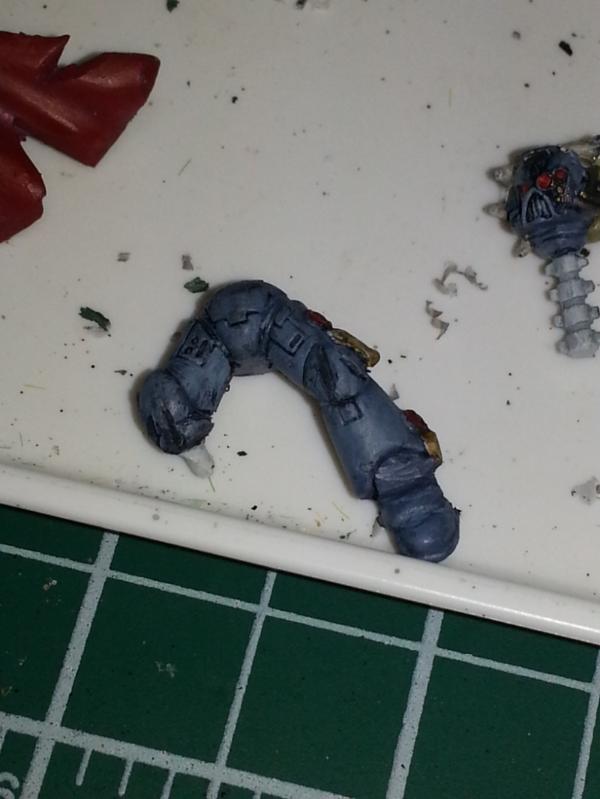
- A modelling drill and bits of paper clips were used to have bits of bone sticking out of the capt. ripped off hand and leg
- due to the extra weight of the SW body I had to pin the Broodlord's arms and sturdy up the base a little bit
- I also experimented with a different painting technique to get the shading in the cape. Selective Glazing (among other terms)
- my first use of greenstuff on the SW foot as a cut and re-positioned it to make it more dangly and lifeless looking
- cut some bits off left over carnifex arms to get the mandibles on the Broodlord's face

All in all this was a long and fun learning experience. I still have a long way to go to get my decals looking better but I'm happy with the final product.

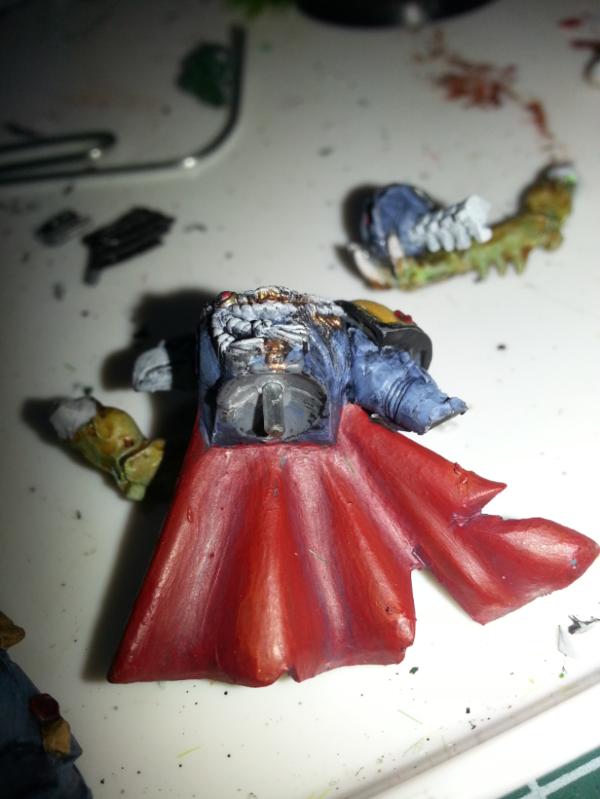
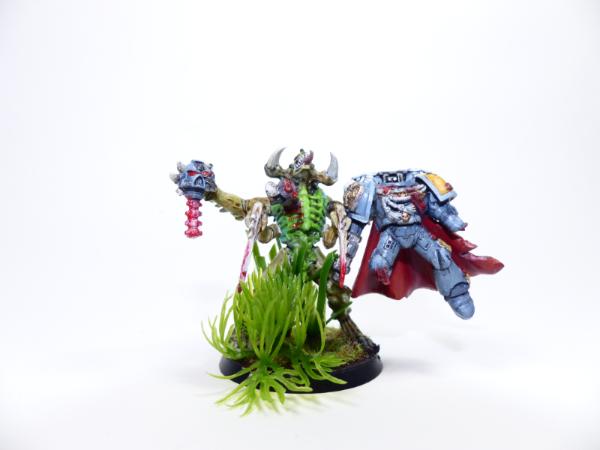
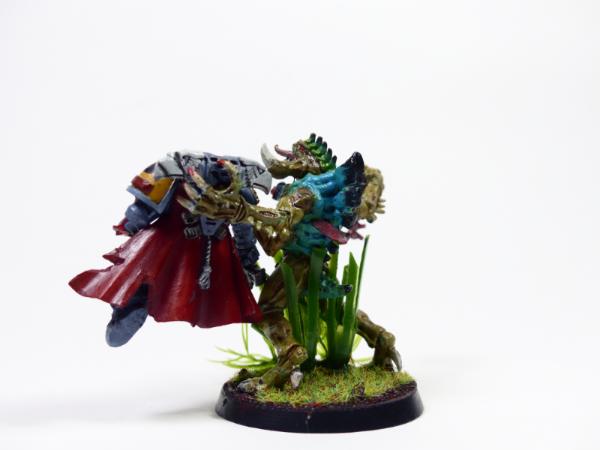
Here's a good lower front shot. You can see the gore on the leg, and hand stumps, the spinal column and some battle damage on the SW
Spoiler:


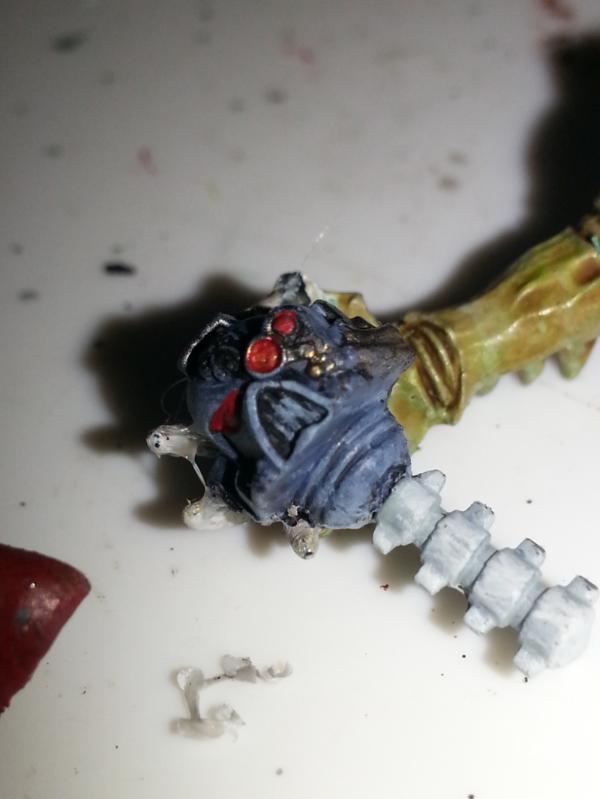
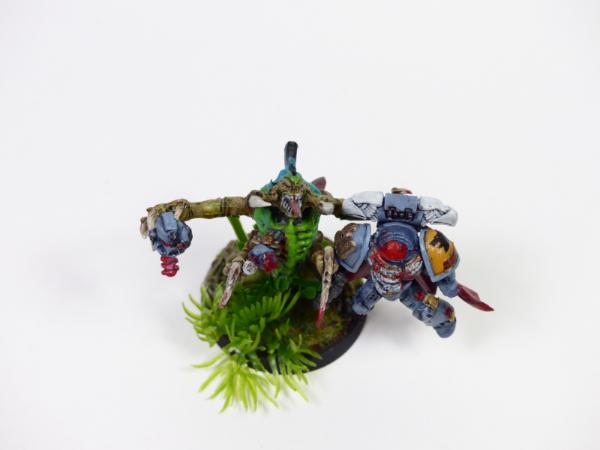
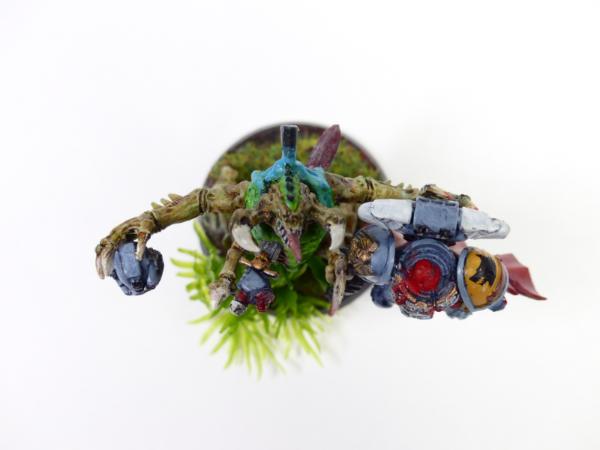
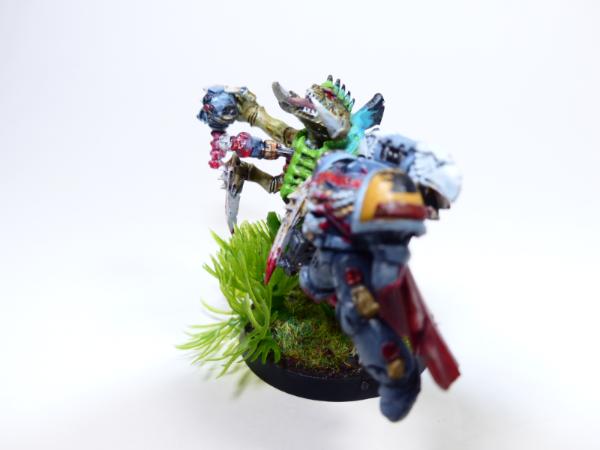
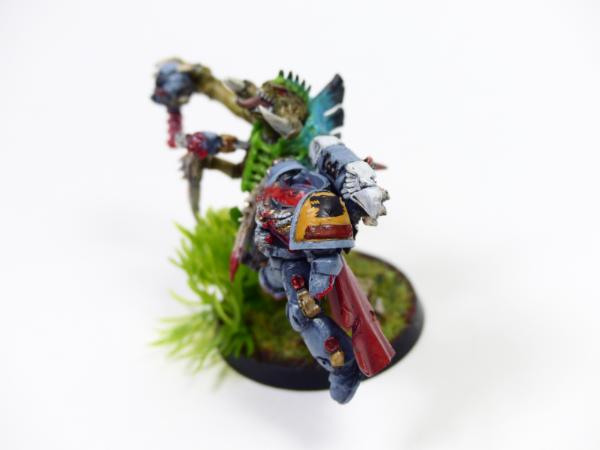
Here are a couple of top down shots where you can see the entrance and exit wounds of the blade line up as well as some more detail on the gore and damage the marine took in the battle.
Spoiler:


Here's the rear exit wound and some tears in the cape and damage to the back of the marine's pack
Spoiler:


Lastly a couple of side shots
Spoiler:


Made in us
Mysterious Techpriest


I really like the devil. Tyranid conversions that don't involve massive bugs (though massive bugs are nice) always make me happy!
   
 
Forum Index » Dakka P&M Blogs
Go to: