| Author |
Message |
 |
|
|
|
|
Advert
|
Forum adverts like this one are shown to any user who is not logged in. Join us by filling out a tiny 3 field form and you will get your own, free, dakka user account which gives a good range of benefits to you:
- No adverts like this in the forums anymore.
- Times and dates in your local timezone.
- Full tracking of what you have read so you can skip to your first unread post, easily see what has changed since you last logged in, and easily see what is new at a glance.
- Email notifications for threads you want to watch closely.
- Being a part of the oldest wargaming community on the net.
If you are already a member then feel free to login now. |
|
 |
2017/07/01 22:01:36
Subject: Could someone explain why the red was painted like this
|
|

Longtime Dakkanaut
|
Synthetic will do. I'll grab a pic of the ones I use when I'm back in the studio.
|
|
|
|
 |
|
2017/07/02 01:51:05
Subject: Could someone explain why the red was painted like this
|
|

Grizzled Space Wolves Great Wolf
|
 Neferhet wrote: Neferhet wrote:That is indeed a sensible advice. my concerns are two: i don't own (and not going to buy) an airbrush, so maybe to e it will take more time?
Yeah of course, if you don't own an airbrush preshading isn't a good technique. If you're trying to do that with washes/drybrushes then it'll take you ages. But the OP has an airbrush, and preshading is a "proper" technique to use when you have one. Even when you don't you can have a crack at preshading but I'd say it's not worth the effort and works better if you use enamels IMO. and maybe the whole preshading technique is better on large areas than on small models?
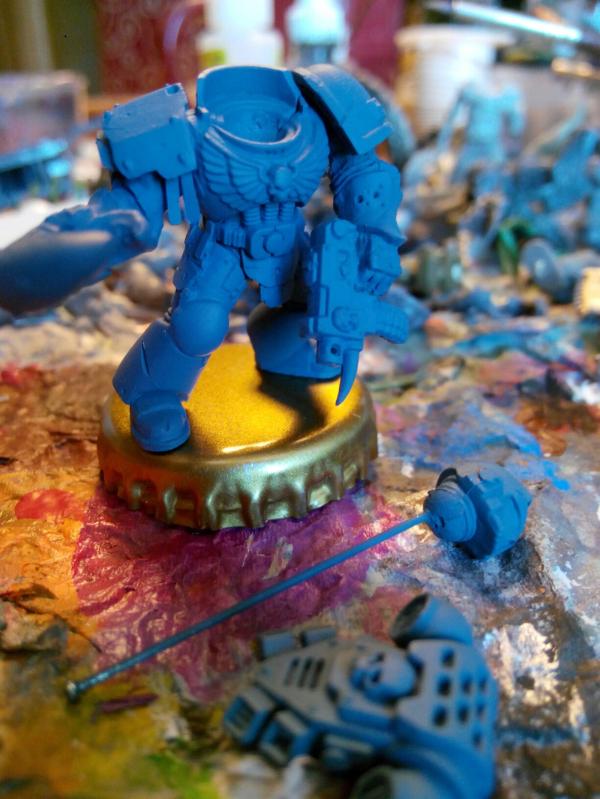
Preshading is definitely a good technique on large models, it's what the historic scale modellers use simply as a matter of course. But it works well on infantry sized models as well. This model was preshaded blue and white (not blue/white/yellow like the one in the OP) and then I applied a black oil wash. Most of the depth comes from the oil wash, BUT without the shading I did with the airbrush first it would be very difficult to softly blend the oil wash to achieve that look. Doing the oil wash probably took me an hour of work, doing the preshade only took me a few minutes, so it was definitely worth the effort of preshading prior to the oil wash. 
|
|
This message was edited 1 time. Last update was at 2017/07/02 01:53:30
|
|
|
|
|
2017/07/03 14:34:01
Subject: Could someone explain why the red was painted like this
|
|
Longtime Dakkanaut
|
These are the brushes I use for broad shading / glazing. They're cheap, quite soft synthetic.

|
|
This message was edited 1 time. Last update was at 2017/07/03 14:34:42
|
|
|
|
|
2017/07/05 09:35:05
Subject: Re:Could someone explain why the red was painted like this
|
|

Vlad_the_Rotten
|
|
|
|
|
|
2017/07/05 14:03:09
Subject: Could someone explain why the red was painted like this
|
|
Beast of Nurgle
u.k
|
how thin did you do the paint for the brushed on bit? in my very limited practices with pre-shading i'm always concerned that i might undo the pre-shading if i go on too thick with the undercoat and subsequent layers. p.s i really like how he looks oh and when thinning the paint what did you use substance wise?
|
|
|
|
|
2017/07/05 16:13:16
Subject: Could someone explain why the red was painted like this
|
|
Vlad_the_Rotten
|
alamandra wrote:how thin did you do the paint for the brushed on bit? in my very limited practices with pre-shading i'm always concerned that i might undo the pre-shading if i go on too thick with the undercoat and subsequent layers. p.s i really like how he looks oh and when thinning the paint what did you use substance wise?
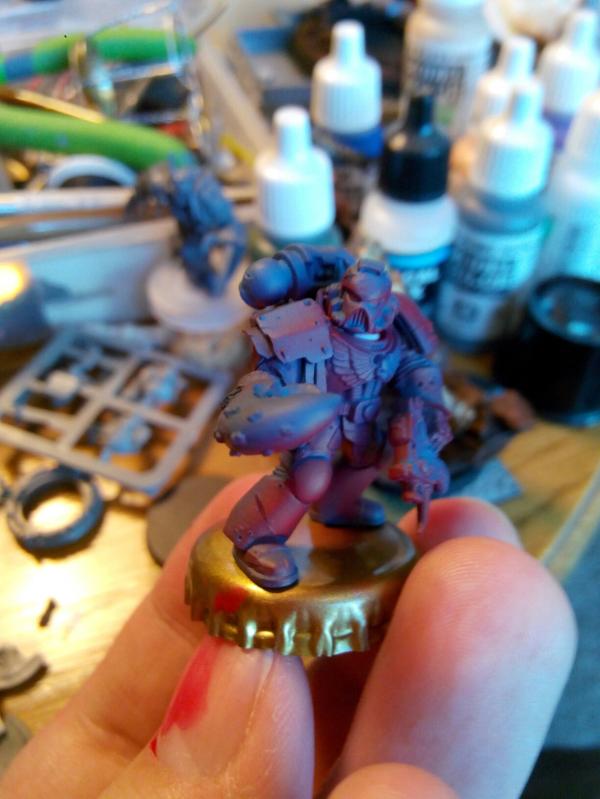
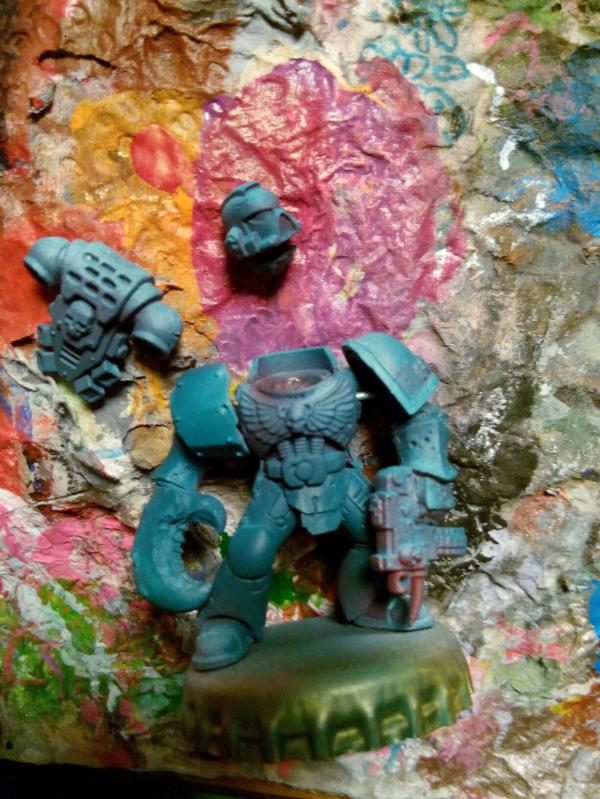
Well, all that's brushed on is some white. I tried to make it opaque because it needs to be strong enough to see through the final color. Details cover the preshading. You shouldn't be brushing on anything over the whole model. Automatically Appended Next Post: P.S.- Oh, and to thin the paint I just used filtered tap water, because I've got one of those pitchers so whatever. It's mostly Vallejo paint because I kind of hate GW's pots when I'm trying to actually mix paints.
|
|
This message was edited 1 time. Last update was at 2017/07/05 19:34:12
|
|
|
|
|
2017/07/05 21:02:38
Subject: Could someone explain why the red was painted like this
|
|
Beast of Nurgle
u.k
|
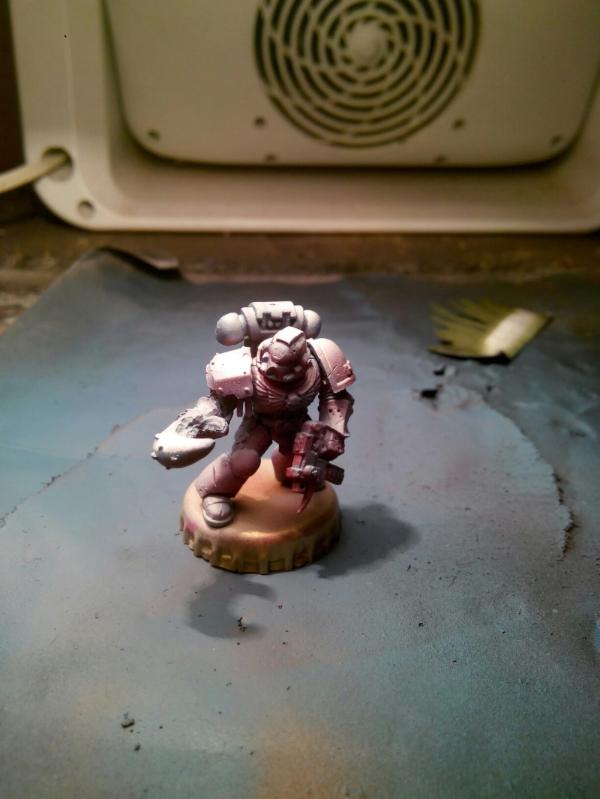
oh you only painted the chest emblem eyes and the white bits, the last airbrush was actually your main colour on the main body. When i have done pre-shading i've painted over it with very thin paint with glaze medium mixed in, so its transparent enpugh for some of the pre-shading to come through. Which i'm not sure this actually counts as proper pre-shading and its easy to hide it by going on too thick, its probably not the best way to learn how to do it.
|
|
|
|
|
2017/07/05 21:35:58
Subject: Re:Could someone explain why the red was painted like this
|
|
Vlad_the_Rotten
|
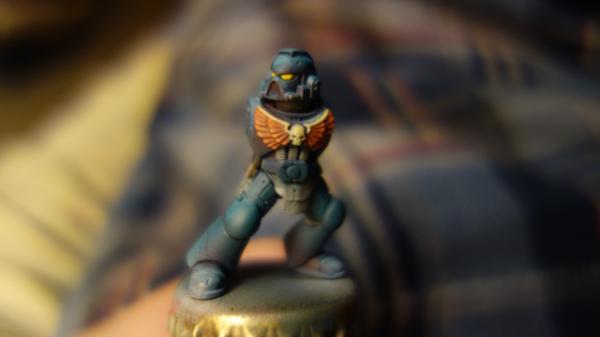
Yeah. I feel like painting over the whole thing would destroy some of the effect. I've only tried this once so far and these pictures are it, but I feel like you shouldn't brush over it and introduce brush strokes and such. I'll peek at your gallery to see how it works for you though. The airbrushed paint just looks so much smoother and thin.
Automatically Appended Next Post:
Hey wait you don't have any! Upload some!
|
|
This message was edited 1 time. Last update was at 2017/07/05 21:37:19
|
|
|
|
|
2017/07/06 12:37:49
Subject: Re:Could someone explain why the red was painted like this
|
|
Beast of Nurgle
u.k
|
Salabasama wrote:Yeah. I feel like painting over the whole thing would destroy some of the effect. I've only tried this once so far and these pictures are it, but I feel like you shouldn't brush over it and introduce brush strokes and such. I'll peek at your gallery to see how it works for you though. The airbrushed paint just looks so much smoother and thin.
Automatically Appended Next Post:
Hey wait you don't have any! Upload some!
Well i 've only finished one miniature in my life and it was a space marine, it looks good at a distance but when i took a photo it showed all the flaws. It was kind of all bobbly and uneven and kind of fluffy as weird as that sounds, i blame tryingt to wipe off mistakes with tissue paper i think tiny fibers can be left that you don't really see until photo time. So i'm not showing pictures of that lol.
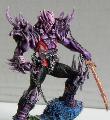
However check the link here for some pics of the plague drone https://alamandrablog.wordpress.com/2017/06/28/a-spot-of-painting-old-chum/ as you can see more of the pre-shading is apparent on the legs, the wings didn't get any pre-shading and the only thing i haven't had to paint strip. the brush strokes havn't been an issue, but sometimes coverage wasn't even. you can get away with two coats it seems anymore and a majority of the pre-shading is gone, perhaps it would just be easier to darken the crevices with washes. i don't feel i would learn as much doing it that way though, I've had a go at spraying up close and basic black and white pre-shading, and then washing on a larger model like an all over wash which went wrong i had to start again.
|
|
|
|
|
2017/07/07 07:18:35
Subject: Could someone explain why the red was painted like this
|
|
Grizzled Space Wolves Great Wolf
|
Salabasama wrote:alamandra wrote:how thin did you do the paint for the brushed on bit? in my very limited practices with pre-shading i'm always concerned that i might undo the pre-shading if i go on too thick with the undercoat and subsequent layers. p.s i really like how he looks oh and when thinning the paint what did you use substance wise?
Well, all that's brushed on is some white. I tried to make it opaque because it needs to be strong enough to see through the final color. Details cover the preshading. You shouldn't be brushing on anything over the whole model. Automatically Appended Next Post: P.S.- Oh, and to thin the paint I just used filtered tap water, because I've got one of those pitchers so whatever. It's mostly Vallejo paint because I kind of hate GW's pots when I'm trying to actually mix paints.
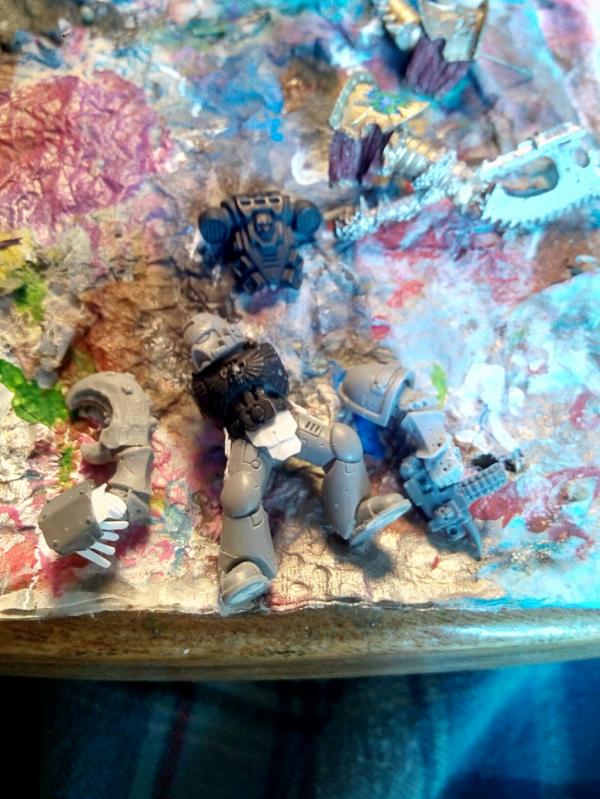
The preshading colour order in the OP (brown -> blue -> white -> yellow) is specific to painting red models. If you're painting blue/green like that it's probably not going to work quite the same way, to be honest I don't know what colours you'd use to preshade blue/green. Blue Is a much stronger colour than red, so I normally just preshade it with black, when I paint green I'm usually painting military models so I preshade either a very dark brown or again just do black. A black preshade on red can look too stark because red has worse coverage. Maybe for green you could try purple as your preshade colour as purple can give a more natural look to green, not really sure though, need to ask someone more artistic than me. The purpose of the blue/white/yellow preshade is specific to painting red though, red is a weak colour so you use yellow because red is more vibrant when painted over yellow, you use white because both yellow and red are weak and prefer to be over a light coloured base, then blue because blue is a good natural shade for red. And in general you cover the entire preshade with your base colour, but you spray your base colour nice and thin so the preshade still shows through it. You said you thin with water, when painting really thin coats though it's much easier to thin with an airbrush thinner. The reason being surface tension and drying time, airbrush thinners are tuned to have a lower surface tension (spreads easier) and better drying time (less likely to pool up or grain up) compared to using water.
|
|
This message was edited 1 time. Last update was at 2017/07/07 07:19:25
|
|
|
|
|
2017/07/07 20:06:04
Subject: Re:Could someone explain why the red was painted like this
|
|
Vlad_the_Rotten
|
I might ought should try picking up some airbrush thinner sometime, then. I used water because it's the best thing on hand, unless a drop of the acrylic flow improver I picked up for washes could help.
As for the comment about the yellow, I get the color selections going on. I deliberately deviated from the color wheel's suggestion of orange preshades because I wanted to get purple shadows. Interesting about the weak color thing, though. I'm gonna come up with an excuse to paint some red and play with it some time. It's the best way to learn.
|
|
|
|
|
|
|