 tauist wrote:
You've covered the side seams perfectly now! Good work.
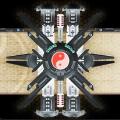
The driver window does indeed look a lil off center looking at the photos. Its easy to determine the offset by taking a picture from the front face and counting the pixels in photoshop, paint or other pixel based graphics program.
If you cannot reposition the vision slit anymore, you could consider adding some purity seal or a small targeter etc technopiece next to the slit to hide to fact that its not 100% centered if it bothers you? Making the negative space around the slit unsymmetrical and all that..
But you're doing great dude!
PS: I believe smoke launchers are a stratagem now in 9th edition (?)
PPS: I am zooming in to the top hatch and it also looks like the new hatch up there isn't in a perfect 90 degree angle in relation to the top plate either? Ever so slightly tilted to one side.. but it could just be the picture, dont stress about it! I dont think these small things will catch anyone's eye at the tabletop (I'm just OCD like that, apologies!)
Thanks.
Like you said it won't look too bad on the tabletop.
EDIT: Just measured the vision port, before putting some more paint down, with my calipers, and they sit at the same distance, bar a tiny fraction of a millimetre, between the vision port and the edge of the tracks, so it's not actually off center as such. Just seems to look it for some reason. Same with the top hatch, if it is off, it's by a tiny fraction of a degree.
Still doesn't change the fact that my work hasn't been anywhere near as precise as a moulded kit would be or even other people's scratch building!
Good call on the stratagem for the smoke launchers.
No new photos but this is now coated in Vallejo Game Air Leather Brown, so imagine everything but the tracks, and exhausts, looking brown.
The next coat of paint, another day (because I want the layers to dry properly, and when I've given my compressor's tank a clear out (think it's got water in it as my compressor was turning on every time I pulled the trigger on my airbrush!!)) will be Vallejo Game Air Bone White...
I'm leaving the tracks, wheels and the spaces in between, grey for the moment, and I'm not sure how to approach painting them. I know I want to base coat them in Vallejo Metal Color Steel, but I'm not sure if I should mask up and do it with an airbrush, or don't bother masking up and carefully brush it on with a hairy stick...
I won't be taking further photos though because the further along with the painting I get means I may as well do a "final reveal" as there'll be little difference. So y'all have a bear with me for a while...

