Buddy is visiting from 1/2 way across the country so we've been getting our Warhammer on pretty extensively this weekend. Going from a game a month to 4 in two days frazzles the mind a bit, so apologies if something isn't quite right.
The Armies:
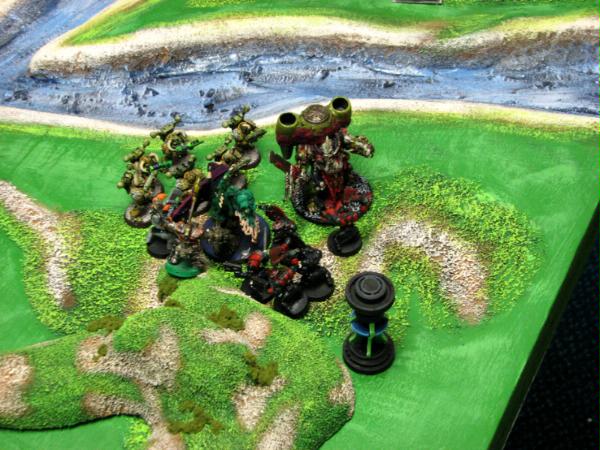
CSM
I just couldn't quite finish painting the whole mess in time. The red rhino just has a basecoat spashed onto it to change it from primer white and I wasn't able to get to the detail work on the 3rd defiler. I blame finishing 12 Berzerkers, working on an 8x8 board for a massive multiplayer game Monday, and having to fiddle around trying to fix the Defiler's arm (I guess now it's custom

)
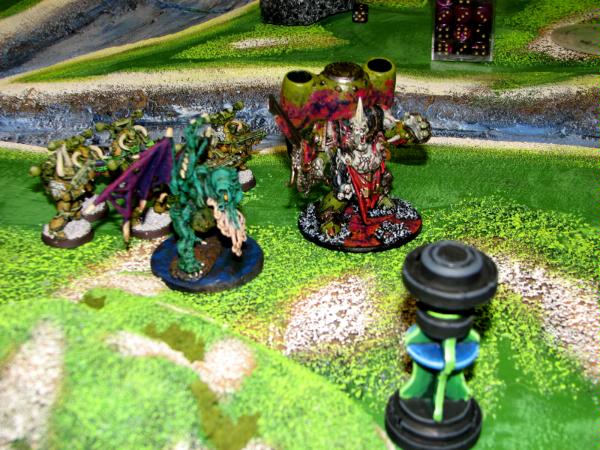
2x Lash Princes (My Nurgley prince is standing in for one - he's very sensual)
10x Berzerkers w/ fist and rhino
10x Berzerkers w/ fist and rhino (w/ a Havoc Launcher)
7x Plague Marines (2 Meltas) w/ fist and rhino (w/ a Havoc Launcher)
7x Plague Marines (2 Plasma) w/ fist and rhino (w/ a Havoc Launcher - represented by sposons)
1x Greater Demon
3x Defiler
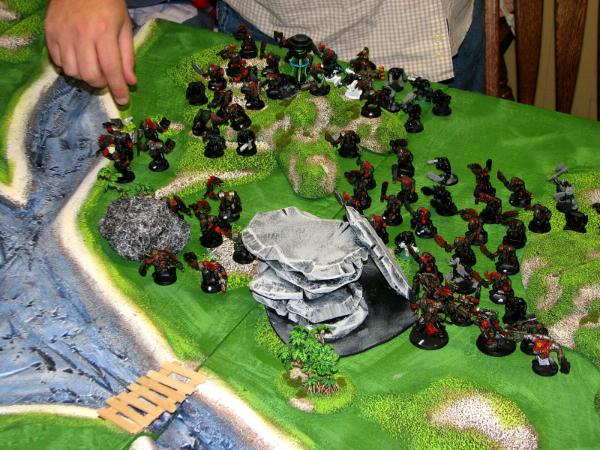
Da Orkz
Mad-Doc Grotsnik w/ 30 Choppa Boyz
Old Zogwort w/ 30 'ard Boyz + Nob w/ Claw
10 Nobs w/ Painboy and Big Choppas
15x Lootas
15x Lootas
He also paid to have everything get a 5+ invulnerable save via the Doc.
Think that's everything. Probably missing a special.
Mission Setup
Rolled Pitched Battle, Seize Ground.
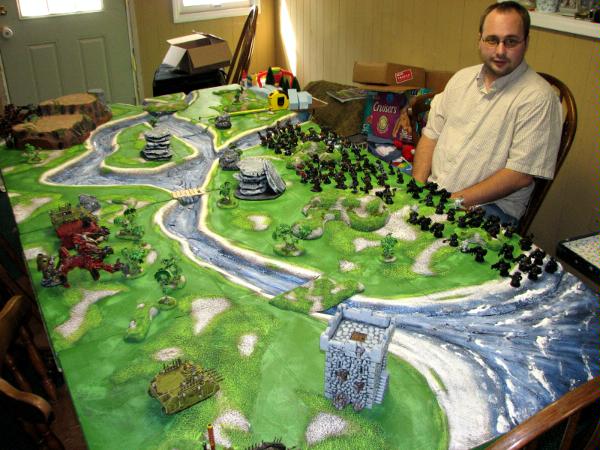
He stuck the bulk of his force in the middle with the Loota's all based in the corner with the surf nearest my objective. Not sure if this was good deployment or not. It was a pain having my objective basically be a shooting gallery, but I was able to break line of site for most of the battle by hiding behind the tower.
I placed a Prince, Plague Rhino, and Khorne Rhino near my objective. Part of it was to play defense, but I also had some misguided notion that I was going to want to occupy that tower. A Prince, Defiler, Plague Rhino2 and Khorne Rhino 2 got place in the middle behind a screen of trees. I figured the woods would provide cover and I could spear-head into his objective using a conveniently place bridge. The last two Defilers I placed behind a cliff in anticipation of climbing up and having a most excellent fire base.
TURN 1:
Orks1:
Lootas did horrible, horrible things to my defiler. I'd never faced them before and 45 s7 shots made short work of it, cover or not. The other Lootas popped the plague rhino near the tower. He should have gotten my zerker rhino I think, but I ended up not using it wisely anyway so whatever. Other stuff moved. I believe he managed a Waagh! from Old Zog, but he only got 2" or so from it.
CSM1:
Defilers reach out and touch some Lootas, causing 8 or so casualties. Enough to take a good amount of punch out of one squad, but they're still pretty lethal. Othewise just some lame movement. For some reason I held my berzekers back near the tower. In retrospect I should have steamed that rhino up and into their face as quickly as possible. Lootas aren't nearly as scary in
CC as they are shooting things. Oh well.
Turn 2
ORKS2
He moves his nob squads in the direction of the Defilers. I think he realized how much damage they were going to be putting out and he didn't really have anything else around to handle it. His Mad-Doc squad stayed around his objective while Old Zog and the 'ard boys moved towards the infantry I had in the center of the table. Lootas proceeded to pop two more rhinos.
CSM2
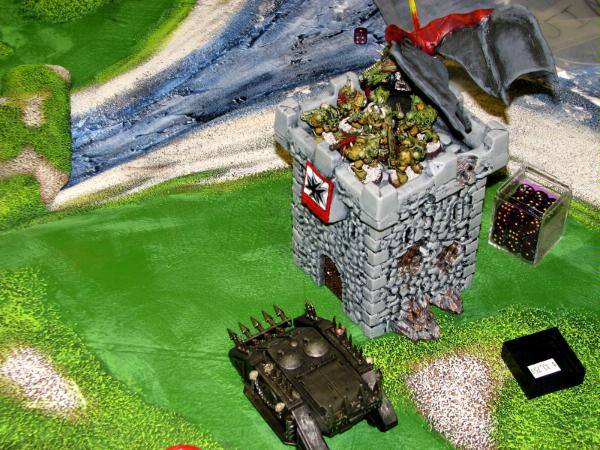
I move my Plagues and Prince into the tower and continue to dither over the Berzerkers (now rhino-less) and whether to use them as a guard or an assault unit. I get a weak lash (5") and group up his Loota squads before sending over Defiler Love. The Lootas lose another 4 or 5 goons. The other Defiler shot goes into the nobs that come my way. I believe they took 2 casualties from the blast. I begin to move up my plagues (still in a rhino) and berzerkers to meet the Ork Mob.
Turn 3
ORKS3
Lootas decide that being lashed is no fun and proceed to blast my Demon Prince into a fine paste. The very weak loota squad also puts some shots into my plague marines, causing 1 casualty. I'm starting to think the tower was a terrible idea. Nobs move closer to my Defilers but are slowed by the river. Zog's group moves as well, but is just out of range of an assault.
CSM3
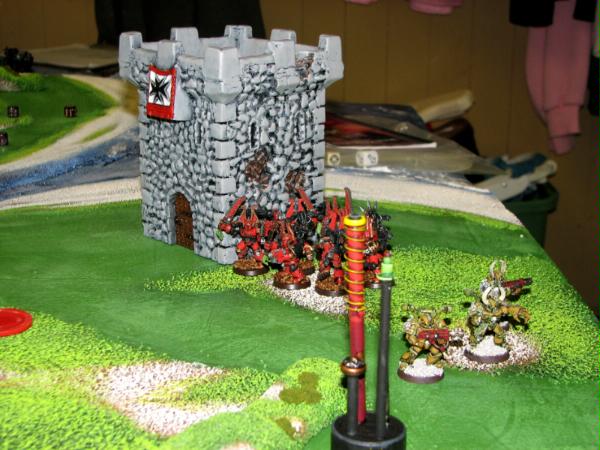
Deciding discretion may be superior to valor, I disembark from the tower hide behind it with my remaining plagues. They find themselves keeping my Berzerkers company. I really should have just pounded them forward the first 2 turns, but I came to the conclusion that trying to run them across the board into the Loota Pile was just asking for trouble.
I decide those nobs need to be whithered down a bit and put an ordinace blast into them. They're tough little guys but still take 3-4 casualties. I keep my Plague Rhino stationary and kill another 2 between plasma and the Havoc Launcher. I also decide Zog's fist of death needed to be someplace else, so Lashed him away to buy myself some breathing room. Looking at the board, I decided the Ork Lootas were now more or less too far out of position to do any more *real* damage (It was an objective game after all) and put a pie plate into the 'ard boys to try and thin them down a bit. Oh, and my Greater Demon decided to arrive. He was somewhat out of position, but close enough to charge into the nobs and finish them off.
Turn 4
ORKS4
My opponent begins to realize the position he's in. He has to make a decision. He can either try and make it to my objective (which will probably require a 'Ere We Go" roll), he can assault my berzekers who are out of position to the left of the objective, or he can move to intercept the Plague Rhino,
GD, and
DP moving towards his objective. He decides to go defensive and moves to reinforce his objective. Very little damage is done this turn by the Orks, although some Lootas must have popped a plague or two.
CSM4
Realizing the game is starting to reach the final stretches, I move my very weak Plague Marines back towards my objective.
I use the lash prince to move his boys off of his objective and towards Zog's squad. From there I lay down two more Defiler plates. The carnage was immense. I move closer to his objective.
Turn 5
ORKS5
That darn hill is blocking line of site to where the real action was happening, so like I predicted, the Lootas did very little. Orks move back to reinforce his objective. Old Zog's squad decides he's going to be hit by the Berzerkers before they can reinforce so they go ahead and grab the charge into them.

I can't for the life of me recall how that combat went. I think the zerkers were wiped out after taking their pound of flesh. It didn't have much bearing on the game unless we went into extra turns.
CSM5
I have victory within my grasp. If I can get to the ojective and contest it I should have the game wrapped up. Both Defilers shoot into the guards, decimating their ranks. The survivors are looking at a
DP,
GD, and Plague squad eyeballing their stuff.
The assault is short and sweet.
The troops were just out of range of claiming the ork objective, but the dice declared the game was finished turn 5.
CSM: 1 objective to Orks: 0
Reflection on Tactics
A lot of the game hinged on my two defilers throwing out a massive amount of damage. Turn 3 the Orks had the option for a "ere we go" (Deepstrike). They may have been better off had they taken it over to my Defiler area and started harassing them. They may have also been better off had they warped onto my objective. The problem in both cases though was that the squad was simply too large to make a deepstrike a very sure thing. Even when it was whittled down to 15-18 orks, that's a lot of models to fill. My Rhinos left a lot of craters in my backfield and there just was no good area to drop down at. He also failed to deploy anything that could really have been dangerous into that area (He really should have guessed I was going to try and make that cliff a firebase, although maybe he was thinking I wanted more armor near my objective). This makes me appreciate the power of reserves.
The Invul save makes orks cost an additional +5 points. I have no doubt that a lot of people will criticize his list for that. Let me tell you though, that +5 has been a royal pain all weekend. They make it damn difficult to wipe out the squad and turns combat into a nasty morass.
Painboys are quite possibly the most irritating unit in the entire game. 30
FNP boys in 'ard armor are a nightmare.
The game would have been a lot different had his Lootas been in a better position. 5 turns seems like a lot, but if you haven't put things in place to be where they need to be by the end of the game by about turn 3, you're in trouble. See: My berzerker squad.
I may add to this if I think of more, but I think that covers things pretty well.


 Death to all!
 anyone else think this looks like an upside down Marathon symbol?....classic
 1750pts