A few days ago I walked into my
GWS and was told that a tournament was going on, Apparently it was an ongoing tournament over the last few months where you played one game a month and at the end of three months (this one), the results would be sent in and the top three people in the country would get a ticket to Las Vegas. I didn't play the 2 games before this one but someone else did, so the manager paired us up so he could get a match. Fine by me, a game is a game, and God knows I don't get enough of those.
It would be a throwdown between my tau and his vanilla marines
Tau:
HQ:142
Shas'
El commander (Airbursting Frag Projector, missile pod, targetting array, bonding knife, positional relay, stimulant injectors,
HW drone controller)
....Gun drone
....Shield drone
Elites:581
Crisis teams Blaze and Burn @236 each
..Team leader (plasma rifle, missile pod, targetting array,
HW multi-tracker, bonding knife,
HW drone controller)
....Gun drone
....Shield drone
..Shas'ui (plasma rifle, missile pod, multi-tracker)
..Shas'ui (plasma rifle, missile pod, targetting array)
Crisis team @105
..Shas'ui (burst cannon, missile pod, targetting array)
..Shas'ui (burst cannon, missile pod, multi-tracker)
Troops:500
2 squads of-
..8 Firewarriors (pulse rifles) @80
....Warfish (
SMS, multi-tracker, targetting array, disruption pod) @120
10 Kroot (5 kroot hound) @100
Fast Attack:160
Piranha Squadron @85
..piranha (fusion blaster, flechette dischargers, targetting array, disruption pod)
Heavy Support:435
Broadside team @265
..Team leader (targetting array,
HW target lock, bonding knife,
HW drone controller)
....Shield drone
....Shield drone
..Shas'ui (targetting array)
..Shas'ui (target lock)
Hammerhead Gunship @175 (railgun, burst cannons, multi-tracker, disruption pod, built in targetting array, target lock, flechette dischargers)
Marines (by memory):
HQ:
Company commander (Relic Blade, Storm shield, digital weapons)
Captain? (Relic Blade, Bolt pistol, standard?)
Elites:
5 terminators (stormbolters, chainfists)
Drednought (
CCW, Multi-Melta)
..Drop Pod ( missile attachment)
Troops
2x 10 man tactical squad (melta, flamer, plasma, missile launcher)
..Sergent (melta bombs, bolt pistol,
CCW)
5 man
tac squad
..Sergent (melta bombs, bolt pistol,
CCW)
5 scouts (4 sniper rifles, missile pod)
Heavy Support:
Vindicator (Cronos?, extra armor)
Vindicator (extra armor)
Predator (Autocannon, 2 x lascannons, heavy bolter)
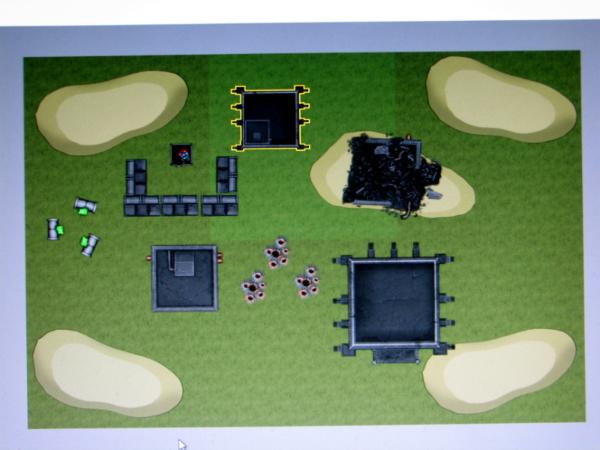
Deployment: Pitched Battle
Game Type: Annilation
He wins the roll off and makes me go first.
I deploy with the kroot and broadsides on the left. My suits, hammerhead, and piranha deploy on my right flank.
FW squads are in reserve
He deploys his two 10 man
tac squads and his terminators deploy opposite of my broadsides. He tries to hide his vindicators from my broadisdes
LOS and place them behind a large mound and outpost where he places his company commander. His predator deploys opposite of my hammerhead with his 5 man squad to the right of it.
(The bins with the toxic waste spilling out of it counts as impassible terrain)
This is my first time writing a battle report and my first time using VASSAL, so any critque is aprreciated
Also sorry for the blury pics, something wrong with my computer I guess
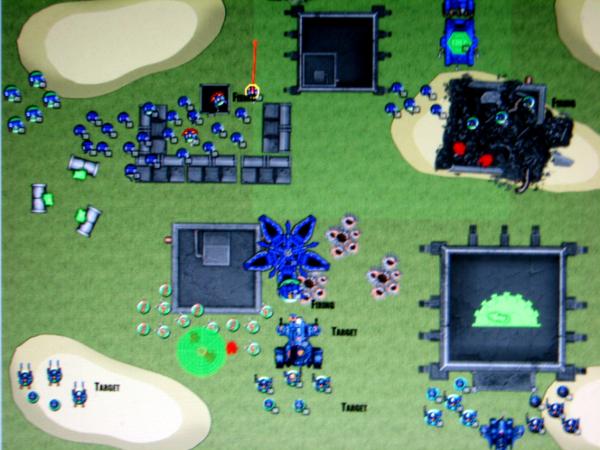
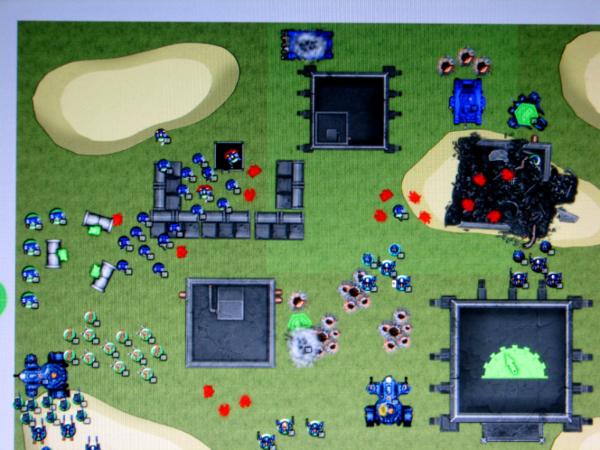
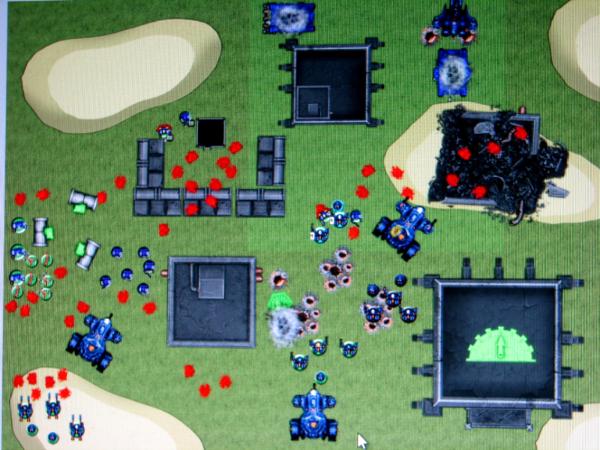
Board Setup
Turn 1:
My opponent failed to seize, so I will continue to go first
*pre-turn assesment-
Seems as though he will try to go after my left flank and attack my bait, the broadsides. I'll start to take out his weaker left flank so I'll be able to him on two sides when he advances. Fingers crossed that the drop pod will not do much damage.
Tau:
Hammerhead moves up and to the left
All suits move into firing positions
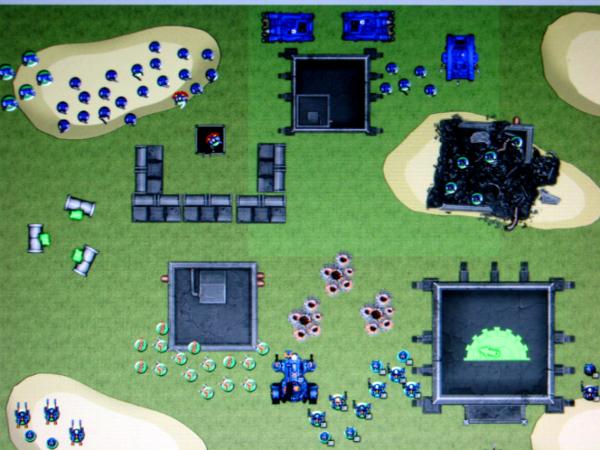
Army deployment and first tau movement phase
Broadsides splite fire and take on the left vindicator and the predator. They manage to wreak the vindicator and shake the predator. Cronos disembarks from his vindicator
Crisis team Blaze fire ineffectivly at said predator, however.
Command squad and the Hammerhead fire into the right vindicator, and shake it.
Crisis team Burn down two scouts
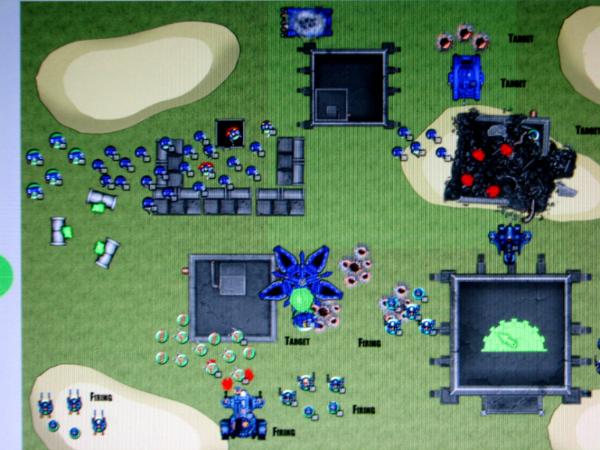
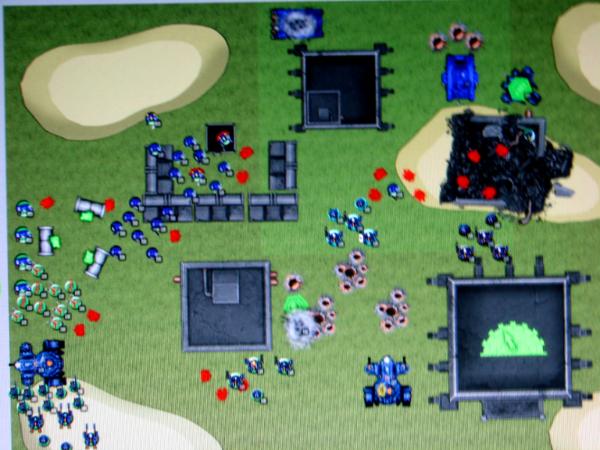
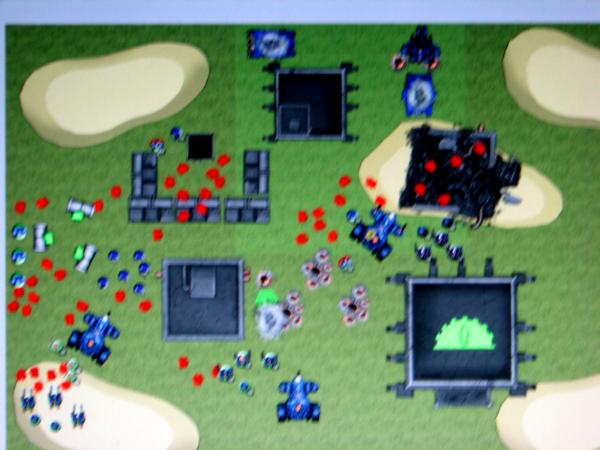
first tau shooting phase
Suits dance back into cover
Tau-1 Marines-0
first tau assualt phase
Drop pod comes in right in front of the hammerhead
All marines except scouts move up, Cronos joins green squad
Predator moves up a bit so that the vindicator can sneak in behind it.
Dred shoots at the hammerhead, but fails to hit

Scout missile launcher does nada to the command team
Company Commander calls in his orbital bombardment on the broadsides, but it scatters off and kills three kroot.
Nothing in assualt phase
Tau-1 Marines-0
marine first turn
Turn 2:
*pre-turn assesment-
Thanks to getting rid of his big guns, his shooting was ineffective. Time to get rid of that dred, finish off the vehicles, and take out the assualt squad. With that, I would be able to flank them.
Tau:
Both
FWs rightfully decide to stay out of the action
All Crisis teams move up
Hammerhead moves away from dreadnought
piranha starts to make its move to find some back armor
The command squad and Crisis team blaze fire at the dread and manage to destroy its multi-melta
Hammehead also fires at the dread, and immobilizes it
Crisis team Burn offs two more scouts
Broadsides split fire again and destroy the last vindicator. Yet do nothing to the predator
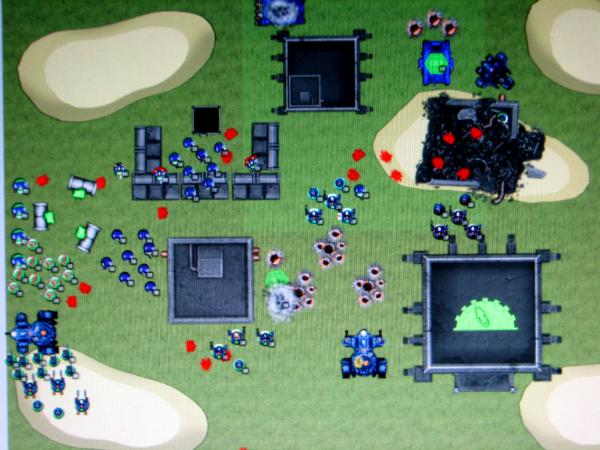
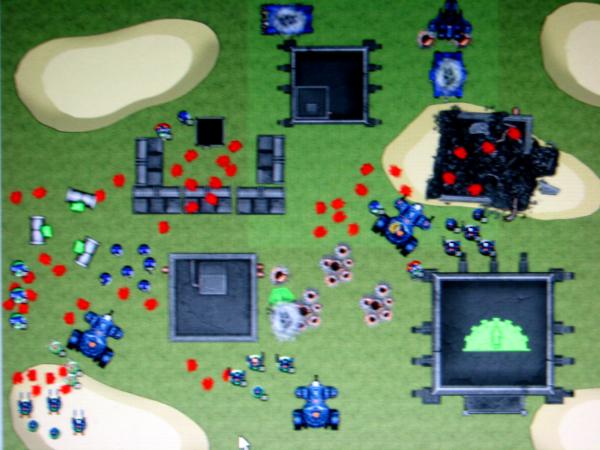
tau 2nd turn: movement and shooting
Crisis teams Blaze and Burn move up to start sweeping left
Command team moves back behind the hammerhead
Tau-2 Marine-0
Marine:
Everybody moves up
Cronos detaches from green squad (don't get why)
marine 2nd turn: movement
5 man assualt squad takes a wound from the multi-tracker suits from Crisis team Blaze
Missile launcher from green squad gets through the hammerhead's disruption pod and takes off the railgun
lone scout shakes the piranha
Predator takes out a gun drone from the Command squad
Nothing in assualt
Tau-2 Marine-0
marine 2nd turn: shooting and assualt
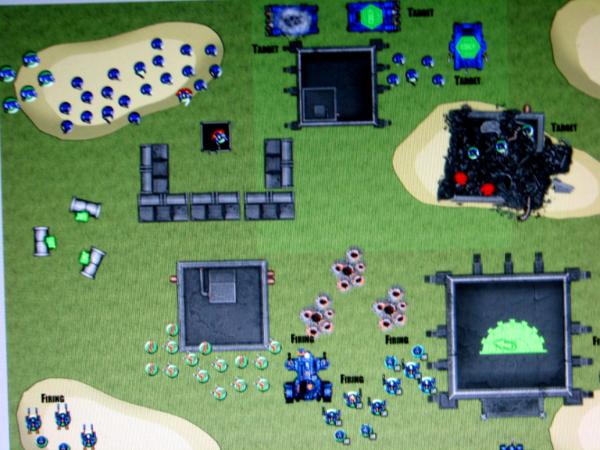
Turn 3:
*pre-turn assesment-I will miss the submunition from the hammerhead because of all of the clumped up marines, yet the burst cannons are still formitable. Gotta wipe out the flank so I can start to make progress on my left
One
FW team decides it is time to shine and comes in from reserve. I move them on in front of the broadsides to support the kroot's charge.
Kroot move to intercept terminators
Suits move into firing lanes
Hammerhead moves to the right
Piranha moves foward near the predator, next turn=back armor
Broadsides pop the drop pod and wreak the drednought
FWs are unable to kill a single terminator in the shooting phase, poor kroot
Fire from suits down two marines from black and green squads.
Crisis team Blaze's fire leaves only the sergent from the 5 man squad standing
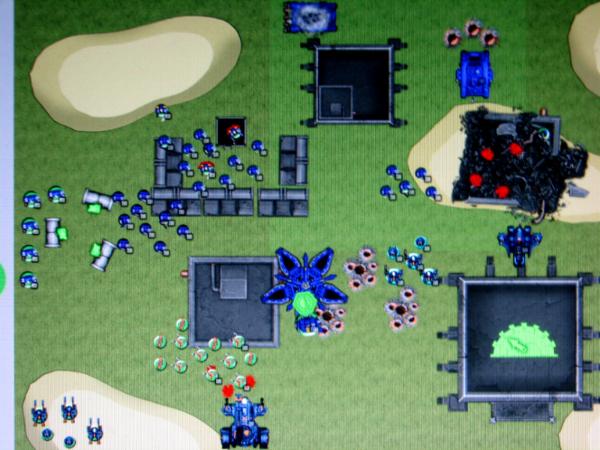
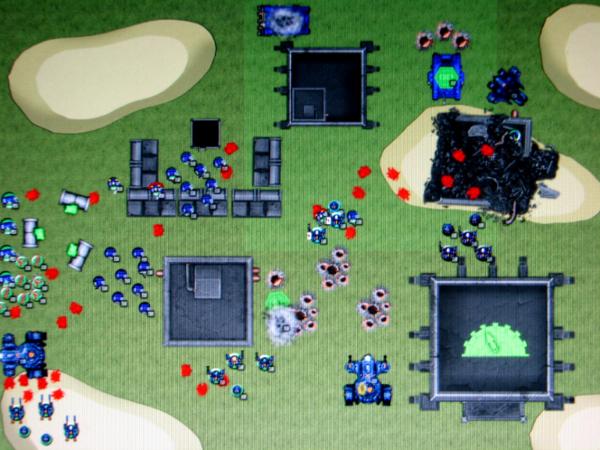
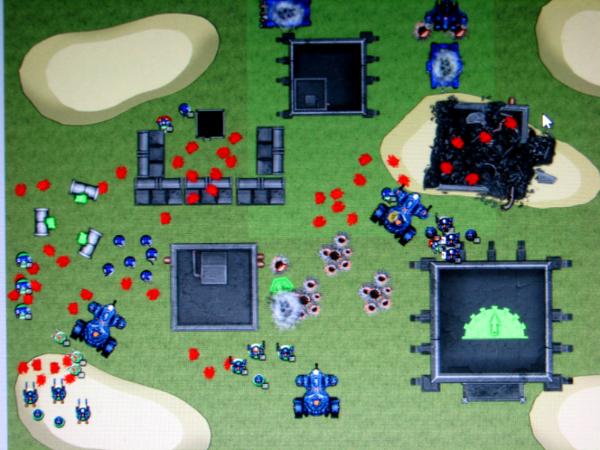
tau 3rd turn: movement and shooting
Suits do a jig in assualt pahse
Kroot assualt terminators and kill one, however they lose two kroot. Thankfully they stay in combat
Tau-4 Marines-0
tau 3rd turn: assualt
Marines:
Commander moves out of building towards Crisis team Blaze, so does green squad
Black squad moves foward towards broadsides
marine 3rd turn: movement
Black squad annialates
FW team to two,
FWs start to flee off of the table
Green squad opens up on Crisis team Blaze, wounding the targetting array suit and killing the gun drone.
Scout fire at Crisis team Burn, but misses
Commander has an amazing assualt roll and makes it into combat with suits, sergent also joins the fray. In this combat a wound is done to the last unwounded suit, the multi-tracker suit dies. No wounds are done in return
In the kroot combat, another termie goes down but takes down two more kroot. The brave kroot stay in combat
Tau-4 Marines-1
marine 3rd turn: shooting and assualt
tau 4th turn: movement and shooting
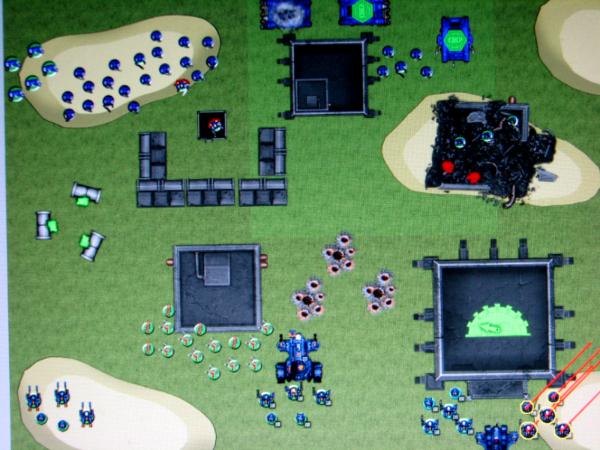
Turn 4:
*pre-turn assesment-
I was a little risky with my suit placement and it bit me in the butt. Those Kroot aren't going to last long so I have to be ready to get rid of the terminators. Also, have to take out the IC to get those easy KPs
Other
FW squad comes on and I place them in the middle of the field away from the action
Command suits move to fire at green squad
Crisis team Burn targets Cronos from across the map
Hammerhead moves up to try to protect Crisis team Burn from assualt just in case Blaze can't hold on
Piranha manuvers into the back arc of the predator
Combined
SMS fire from the warfish and broadsides take out two marines from black squad
The Command Squad, trying to enact vengence for the
FW squad, take aim at green squad and reduce them to two models! the missile launcher marine and a commander look around, ear drums popping from the noise of carnage all around them, and see nothing but the remains of their brother marines.

Hammerhead's burst cannons rip into the last scout and score me another
KP
The piranha wreaks the predator with close range melta
Crisis team Burn pop Cronos with missile pod fire
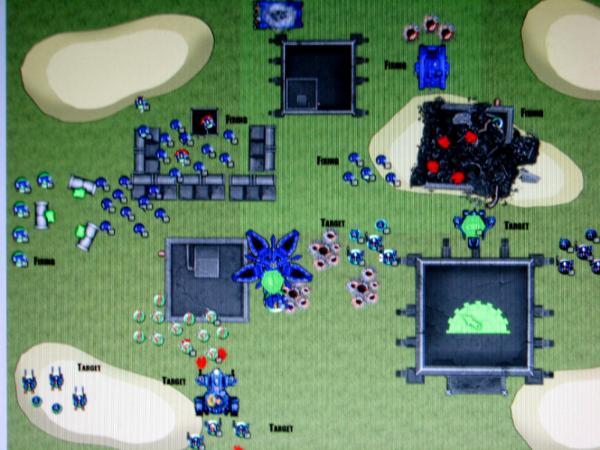
Tau 4th turn: movement and shooting
In
CC, Blaze are routed and the kroot flee from combat. In a display of awesome rolling, the commander gets within charge range of Crisis team Burn after their assualt move.
Tau-7 Marines-3
tau 4th turn: assualt
Marines:
Green squad regroups, terminator move foward
Company commander moves close to Crisis team Blaze
All marine shooting does no damage to my units
marine 4th turn: movement and shooting
In assualt, the sergent charges the hammerhead but fails to do anything
Company commander assualts into suits and wound 2 of them, taking non in return
Tau-7 Marine-3
marine 4th turn: assualt
The rest of the game is pretty cut in dry with the commander wiping out Crisis team Burn but getting IDed by the piranha (Piranha also took out sergent)
endgame

Tau victory
Tau-8 Marines-4
All in all everything went to plan with just a few hickups on my part
1.I was too aggresive with my suits and it got 2 squads killed, I've got to be much more conservative with them to keep them alive. As with them I could of done a lot more damage against my opponent
2. I placed my
FWs out of their fish and they got destroyed by shooting the next turn. I've got to begin to realize that my
FWs aren't that tough and try to keep them in their transport for as long as possible.
C&C appreciated


 Brothers of Sanguinor
 Purifiers
 Bad Wolves
  "And they shall know no fear"
  Imperial Guard-3537pt.

 3100+
3100+


 Officially elevated by St. God of Yams to the rank of Scholar of the Church of the Children of the Eternal Turtle Pie at 11:42:36 PM 05/01/09

