whalemusic360 wrote:Interesting, I'll watch and cheer your progress on. May have to do the same thing if it works.
Automatically Appended Next Post:
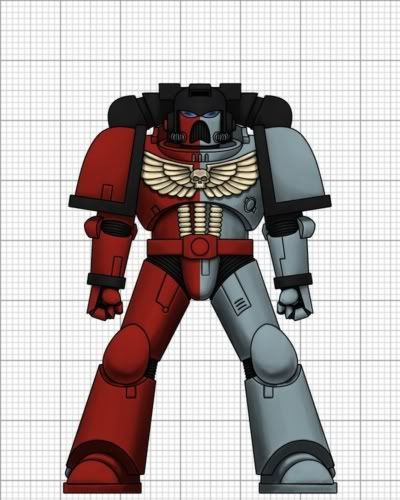
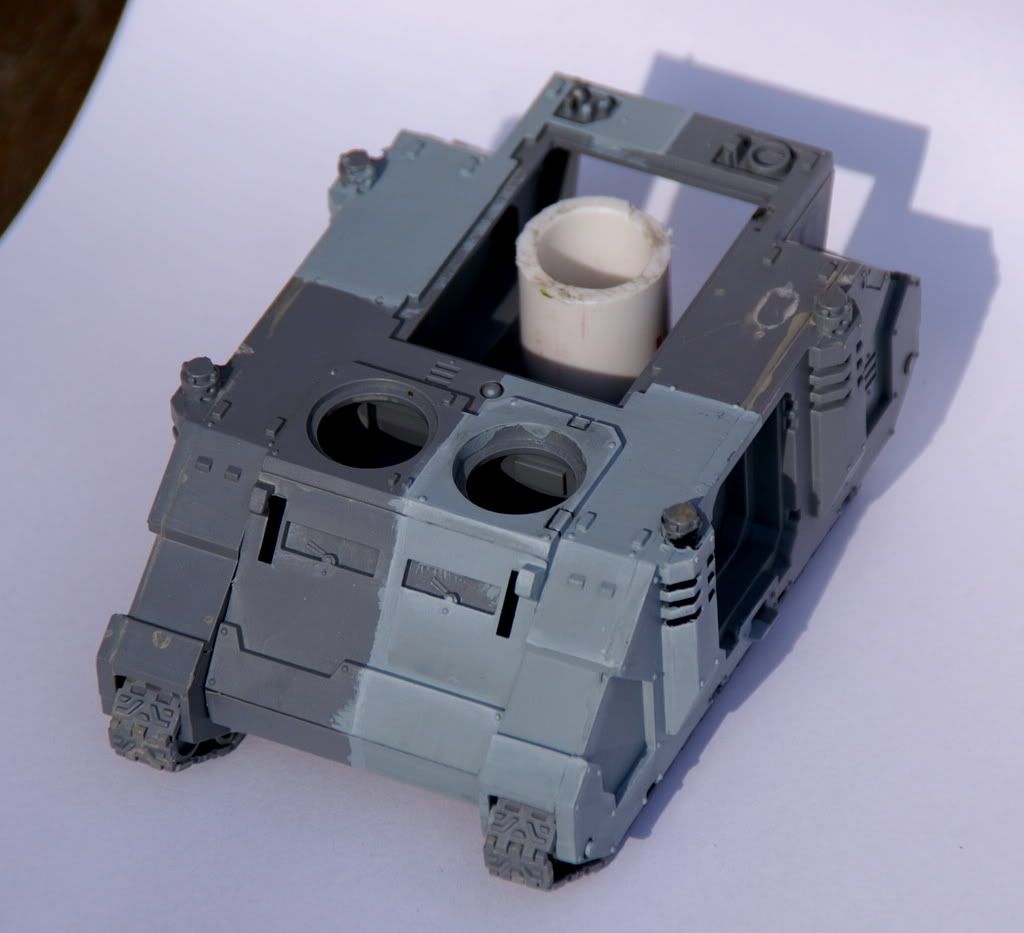
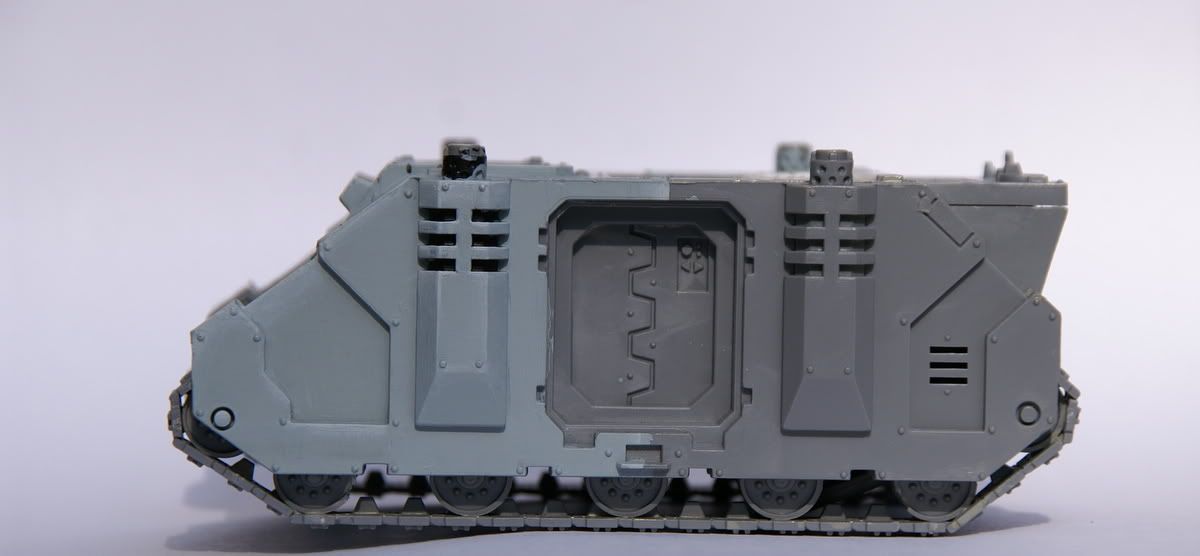
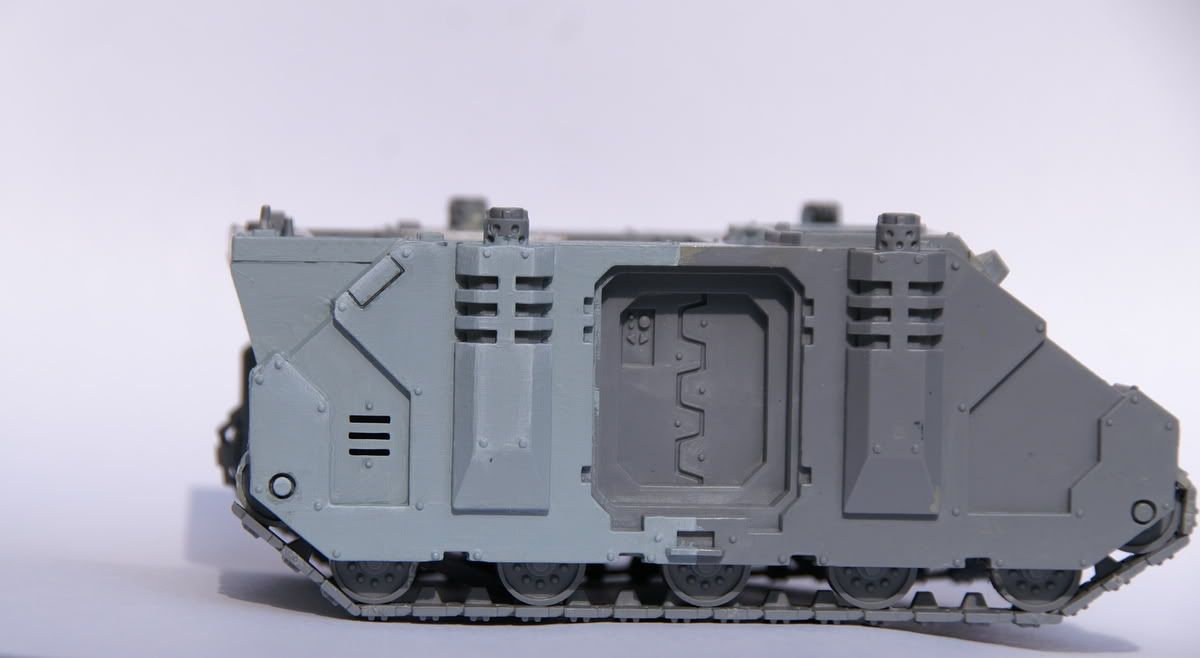
Qucik question, why did you quarter your rhino if your colors are halved? Id stick with the halves on vehicles as well.
I just thought halves might be too boring on a vehicle, I'll make a decision for halving or quartering once its finished I think.
I also have a battle report update!
I had a battle today with the new list and wrote it up with vassal pictures for the blog. Enjoy!
My army list was:
Wolf Lord [Thunderwolf, Storm Shield, Thunder Hammer, Runic Armor, Saga of the Bear] 240
3 Wolf Guard [2 with Powerfist and Combi-melta, 1 Powerfist] 124
9 Hunters [Meltagun, Wolf Standard, Rhino] 185
9 Hunters [Meltagun, Wolf Standard, Rhino] 185
9 Hunters [Meltagun, Wolf Standard, Rhino] 185
4 Thunderwolf Cavalry [Storm Shield] 260
2 Speeders [Multi-Melta] 120
5 Long Fangs [4 Missile Launchers] 115
5 Long Fangs [4 Missile Launchers] 115
His was (from memory)
Shas'
el [TLMP, Positional Relay]
3 Crisis Suits [TLMP, Targetting Array]
2 Crisis Suits [TLFB, Flamer]
12 Firewarriors [Devilfish with Disruption Pod and
SMS]
12 Firewarriors [Devilfish with Disruption Pod]
12 Firewarriors [Devilfish with Disruption Pod]
6 Pathfinders [Devilfish with Disruption Pod and
SMS]
Hammerhead [Railgun, Burst Cannons, Disruption Pod]
Hammerhead [Railgun, Burst Cannons, Disruption Pod]
We each had mobile armies with three troops so it looked to be an interesting game.
The mission was Seize Ground with Spearhead Deployment.
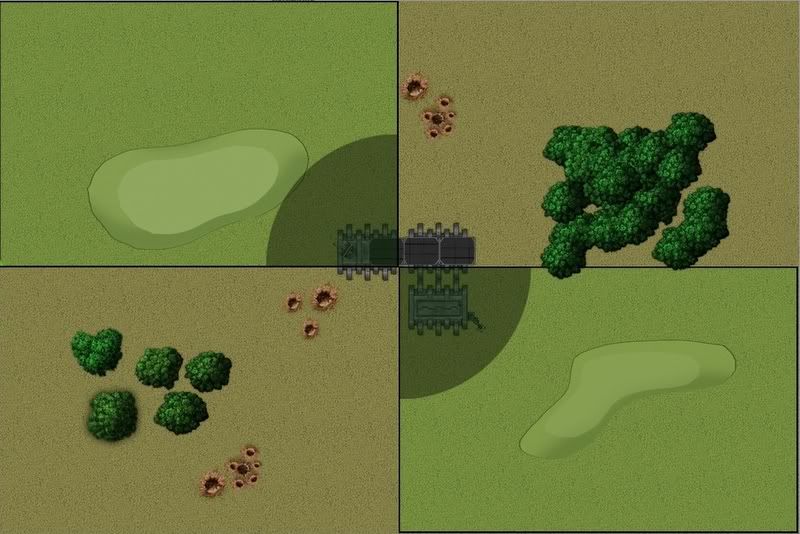
We rolled and determined 4 objectives and decided mutually to place a 5th objective that would be worth 2 on top of the central building. I'm not much of a fluff writer but immediately the idea of my Army trying to recapture a command post with vital information springs to mind.
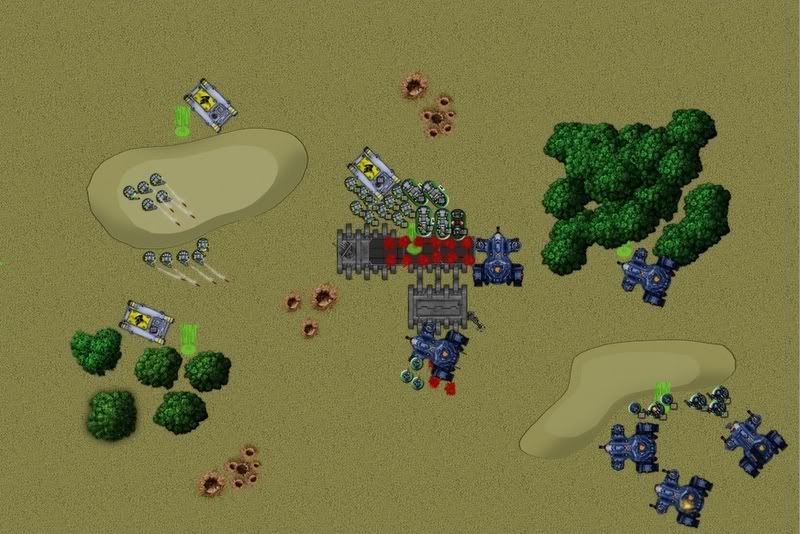
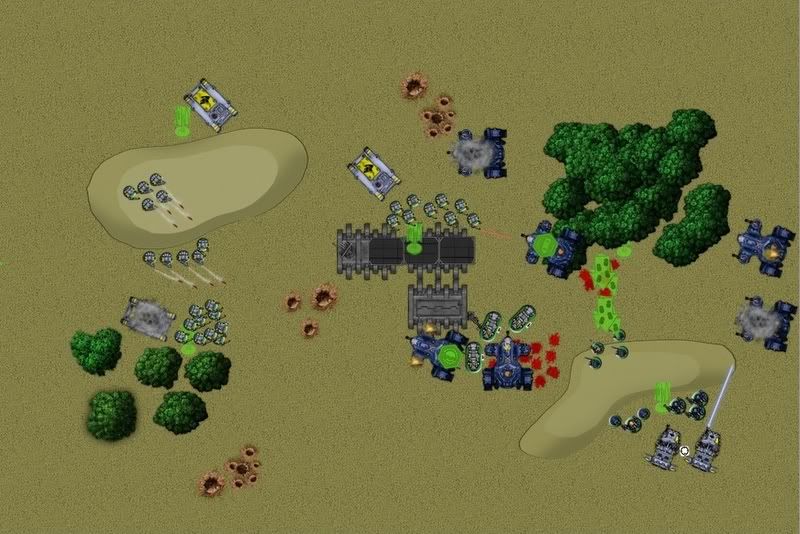
He won the roll-off and decided to go first. Deployment looked like this:
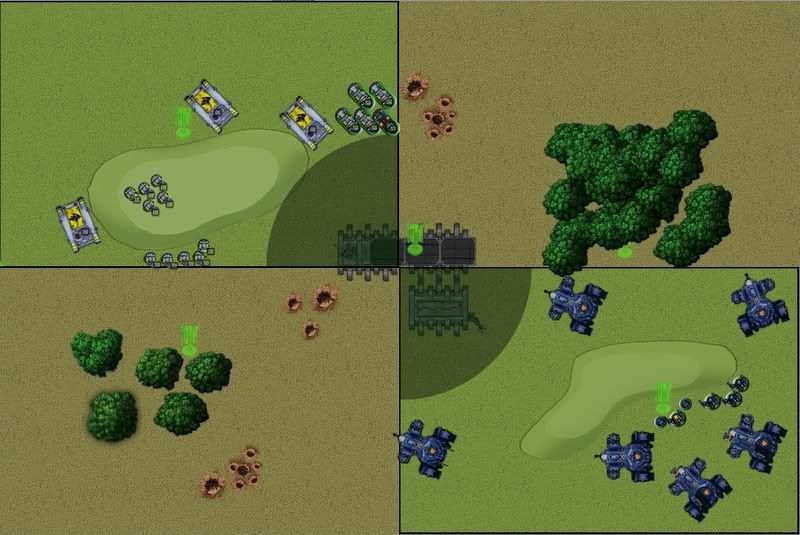
His Turn 1:
Movement: He moved the pathfinders devilfish up to the command post and moved two firewarrior’s dfish up to the central and top right objectives.
The crisis suits hopped up on the hill
Shooting: Both the left hammerhead targeted my leftmost rhino and the right hammerhead targeted my Thunderwolf Cavalry, both tanks thankfully missed.
The firewarriors on the central objective and their dfish fired on the thunderwolf cavalry and put three wounds across the squad.
The pathfinder’s dfish fired its
SMS at the long fangs below the hill but failed to penetrate their battle-hardened armor.
The crisis suits and Shas’
el hopped back down behind the hill to end the turn.
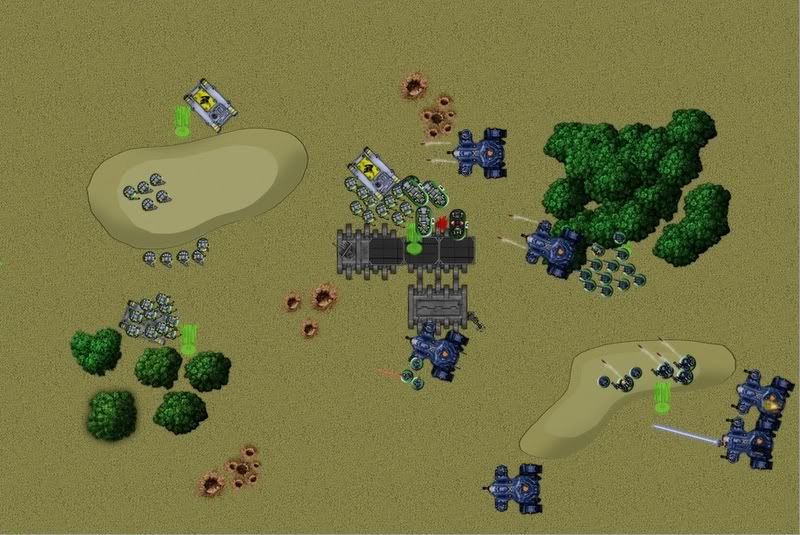
My Turn 1:
Movement: I moved the right-most rhino to take the central objective and I spilled the hunters out at the command post. The left-most rhino sped towards the bottom left objective but the hunters stayed inside for protection.
The thunderwolf cavalry moved towards the firewarriors on the central objective.
Shooting: The long fangs on the hill fired at the pathfinders with krak missiles, killing 3. The long fangs below them fired at the left hammerhead blowing its dangerous railgun off its mount. The grey hunters fired into the firewarriors but with little success, only two or three of the xenos infantry fell.
Assault: The thunderwolf cavalry slammed into the firewarriors massacring all of them by the time the lord’s thunderhammer was done swinging.
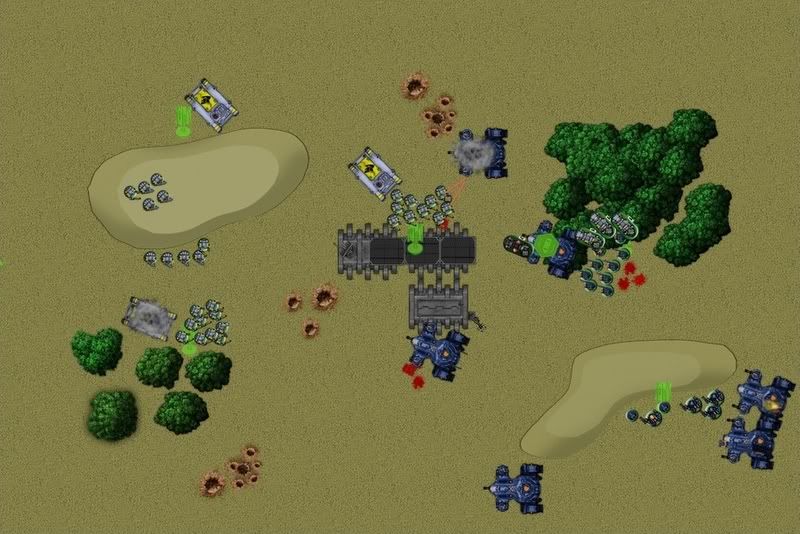
His Turn 2:
Movement: He swept the central dfish up to fire on my rhino’s side armor. The dfish to its right disembarked the firewarrior squad and moved forward slightly to try to block a charge from the thunderwolves. Both hammerheads swept up and to the right. The suits hopped up on the hill (they did this every turn so I will stop mentioning it haha). The Shas’
el’s positional relay kicked into action and brought the two fusion suits out of reserves. They deepstruck right behind the cavalry but scattered into the grey hunter’s rhino where they crashed, sending up two plumes of fire. (He rolled a 2 on the mishap table)
Shooting: With the aid of a markerlight, the hammerhead’s railgun’s solid slug tore a clean hole through the tank’s front armor and hit the engine, tearing the tank apart in a violent explosion. Thankfully all the passengers staggered out of the wreckage unharmed. The suits, firewarriors, and a dfish all fired on the cavalry which after the dust settled left a thunderwolf dead and the lord wounded twice.
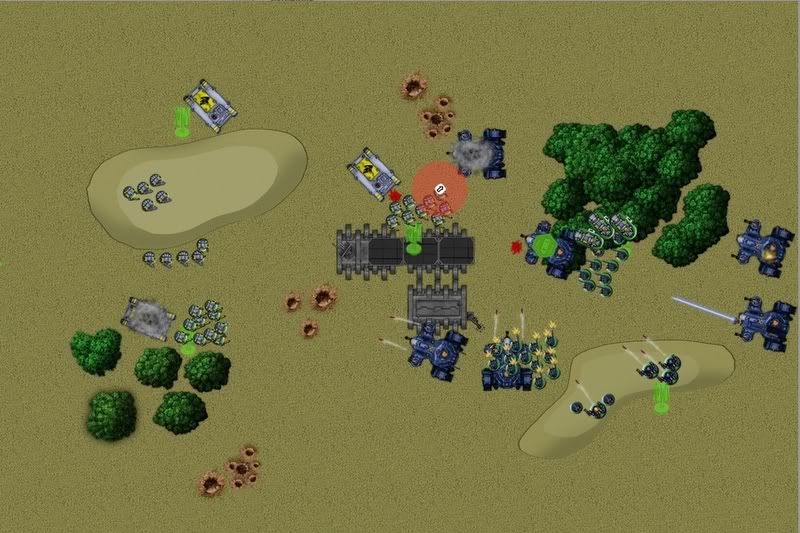
My Turn 2:
Movement: The lord broke off from the cavalry squad to assault the dfish and the cavalry squad maneuvered to charge the firewarriors behind it. The grey hunters at the central objective shifted around to put the meltagun and combi-melta within 6 inches of the dfish’s side armor.
Shooting: The two melta shots reduced the dfish’s side armor to melted slag and one hit the main power drive sending the whole transport up in flames. The long fangs on the hill failed to even scratch the paint of the dfish by the woods while the other long fangs finished off the pathfinders with well placed krak missiles.
Assault: The lord was distracted by the explosion behind him as he only landed one hit on the dfish with his thunderhammer and proceeded to stun the crew. The thunderwolf cavalry mimicked their lord’s underwhelming performance by only killing three firewarriors on the charge while taking no wounds in return (this actually was to my benefit as the firewarriors did not break and kept me from the tau guns bristling all around the combat).
His Turn 3:
Movement: Once again he moved both hammerheads up. The last dfish with a squad inside zoomed straight up to disembark the squad just in range of my lord.
Shooting: A submunition exploded over the hunters (after scattering 2 inches) but unspectacularly left one dead. The dead pathfinder’s dfish failed for a third turn to kill a long fang. Everything that was left fired at the lord because he made an amazing number of saves before finally succumbing to pulse rifle fire from the firewarriors (the last thing he had left to shoot with).
Assault: The cavalry got their act together and killed 5 firewarriors, breaking them. (The cavalry somehow failed to catch the fleeing firewarriors). This is not shown on the picture, sorry!!!
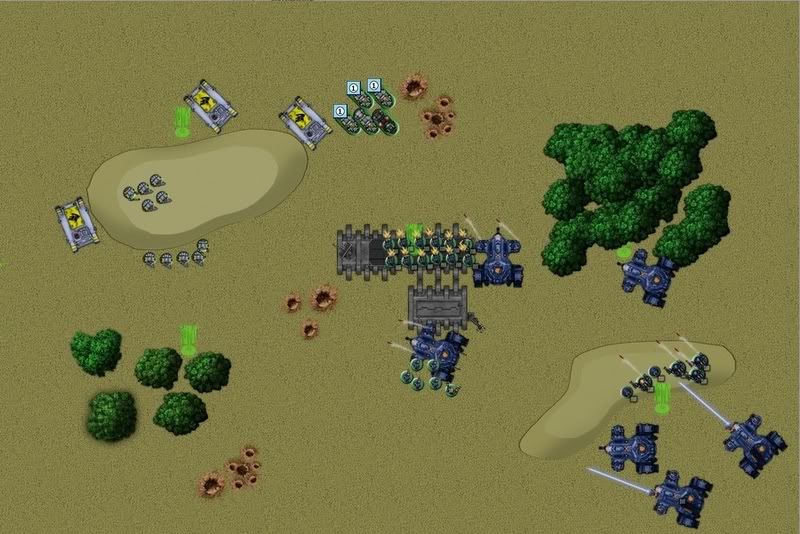
My Turn 3:
Movement: My two speeders came out of reserves and deepstruck right on target behind his suits. I moved the cavalry into position to avenge the lord’s death by charging the full strength firewarriors. Lastly, the central grey hunters shuffled once more to put the meltagun within 6 inches of the shaken dfish’s front armor.
Shooting: The grey hunter’s meltagun melted an engine, immobilizing the dfish. The long fangs (all 10) focused their fire on the pathfinder’s dfish and achieved disappointing immobilized and weapon destroyed results. The speeders performed much more satisfactorily by wrecking the hammerhead after a penetrating shot on side armor.
Assault: The cavalry had their finest moment. They charged the firewarriors, killing 6 and breaking them. They then ran down the survivors, leaving none standing. They consolidated behind the devilfish for a cover save next turn. (The only remaining firewarriors continued to fall back)
At this point my opponent conceded since he had one scoring unit left (that was fleeing and under half-strength) while I had three full strength scoring units in control of 3(4) objectives.
It was definitely great to achieve victory my first time playing space wolves but I know I didn’t play perfectly. I forgot to ever use my wolf-standards, my long fangs were poorly deployed and didn’t have target rich lines of sight and I didn’t allocate wounds very well on the cavalry. Those are just the things I identified as mistakes, I’m sure I made more! I would really like input on how I could play better next time I field my wolves.
I hope you enjoyed the report and criticism of my play really would be appreciated, I want to get better!
Until next time,
~Scyth3


 . I went to my