In a world were there is only War you must kill to survive. You must develop skills in order to became the hunter instead of hunted. It was this simple concept that sparked my imagination. Although the Tau is a young race, there were pioneers in the art of war. Veterans that would become Icons for the following generations of warriors.
"In a landscape torn by endless battles, an engine sounds rumbling in the distance. Vibrating the surroundings with a roaring low-frequency. And a high pitch tune, screaming trough the valley as a Dark shadow skims over the vast lands. Enemies would run and hide only by hearing it. A long body, build for speed. A glimpse of 2 small wings pointing slightly downwards.
A one-man vehicle only earned by greatest of hunters: The "O Mont'korar". They are build for only 1 thing:
"Search and Destroy". A warrior that earned a
"O Mont'korar" will be given the tittle of:
"O Y'eldi Mont'yr" and is considerate one of the highest honers a Tau warrior can achieve."
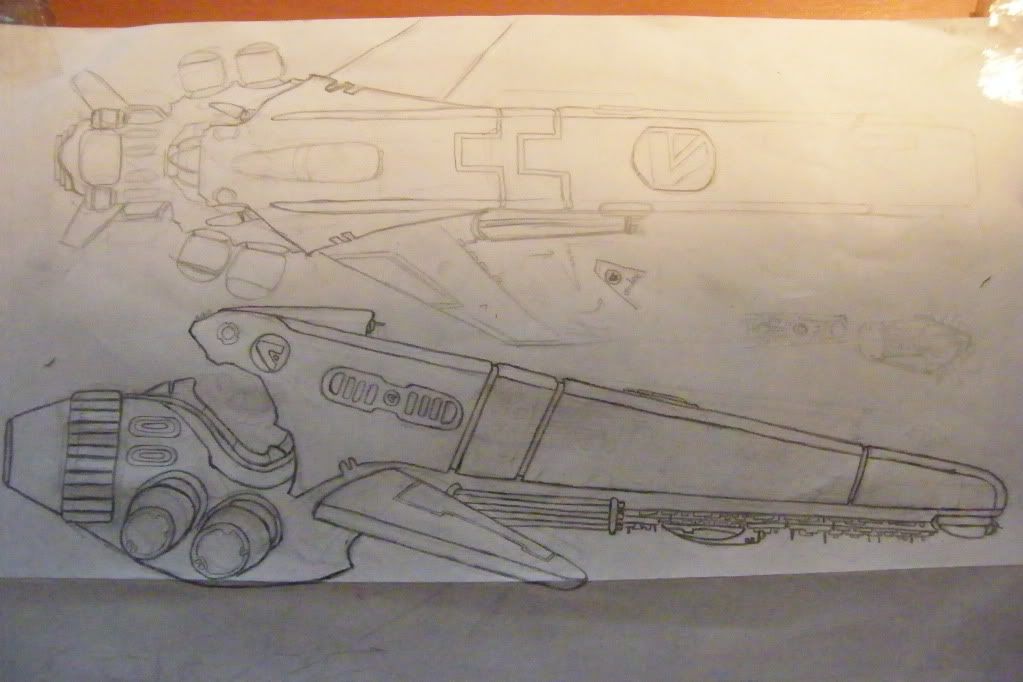
This is the original sketch, updated along with the progress I made in the last few months. A one man Tau combat ship. A long slim body for speed, 2 wings for stabilisation. The ship is powered by an new type of engine that runs on a new mineral. The engineers had
4 things in mind while developing it:
Speed; it needs to be able of outrunning almost everything.
Hovering; it needs to be able to hover in mid-air and engage all weapon systems.
Shield; it needs to sustain heavy fire without a second engine.
Stealth: although it doesn't have a cloaking device the ship can go as silent as the crave and kill from the shadow's. The engine is located in the middle of the hall. Air is sucked in trough the belly underneath. This model has 2 heavy burst cannons witch is standard equipment on any
"O Mont'Korar". The wings have a build-in
SMS rocket system. Tau and technology become 1 because of the build-in Drone that allows for precision movement at high and low speeds. The ship will almost "feel" what his driver wants to do next. The main Drone sensor is located on the top and feeds all battlefield information directly to the control screen of the
"O Y'eldi Mont'yr". And there's a second Drone sensor located under the tip of the nose of the craft. This is the real "Search and destroy" aspect of the the Drone computer. This weapons guide system helps his driver to locate and terminate his prey. The 4 shield generators on the side are powered by the same engine and generates a strong forcefield. Also there's room for an EMP and smoke grenade launcher for tactical warfare. This baby is a personal battle cruiser.
I started this Project in march 2009 and its evolved into what you see here now. This treat will follow, if you guys like it, my work in progress from the first cut till the last brush of paint. I'm planning on making a full Diorama for this, complete with terrain and dynamic pose.
dimensions: 5
cm wide by the seat. hall 3
cm wide. full length: 28
cm. Wingspan: 14
cm. (a tau fire warrior fits perfectly within the seat)
I hope that you like my first project

I'm very curious on what you think/like/don't like/tips/ is this a cool mini or not? :eek:
Feel free to ask me questions.
Daan
ps: I left out 1 aspect of the design. This I will unveil later when the time is right. If you like this concept, then you are going to love thís.
Well Hello everyone. ,, thanks for the welcomes and the compliments. I understand that you like the concept then aye? haha. very glad.
Most epic first post? haha, thats very kind. really?
ZoomDakkaDakka: I'm going to build it entirely out of plastic card, so I will be making a "skeleton" to work with. Also ill be adding some W40k bits.
A Black Ram: thanks mate. I made it count didn't I? 
ChrisWWII: let me know if it does mate 
Vindicator#9: thanks for the kind words, I put some effort in the story as well. that way it feels even beter 
Some_Call_Me_Tim?: I sure hope so mate, I will do my best! thanks. keep an eye on this one and tell me what you think!
alarmingrick: thanks mate
Waaagh_Gonads: thanks, you like the sketch aye? tell me what you think when this thing takes shape!
joker8911: thanks nice, thanks mate!
now this WIP treat is running on www.AdvancedTauTactica.com (http://www.advancedtautactica.com/viewtopic.php?f=46&t=16530) you all must now this Tau forum, so If you want to follow it there thats not a problem. for the DakkaDakka fans I thought, lets share it with you as well.
so here's an update: I remember starting with the Skeleton the same night I drew up the concept. It was early in the morning when I finally went to bed.
The following pictures are from the first steps of the project. I needed a soled base to work on so I came up with a plan to build the structural skeleton. I will be building the ship entirely out of plastic card. This is going to be a challenge for me because this is going to be the first time working with the stuff. And as I said before, I'll jump in the deep when I start something new. Exploring ways and new ways to get the pieces I need to assemble the hole thing is an adventure and I'm learning new skills every day. Also I'll be adding some Original Tau and Warhammer bits, as well as anything that I think is suitable to get the job done.There will be a description with each picture on what and how I did the particular piece. Some of my methods you will do differently, this way just worked for me best. All right, here we go: Skeleton.
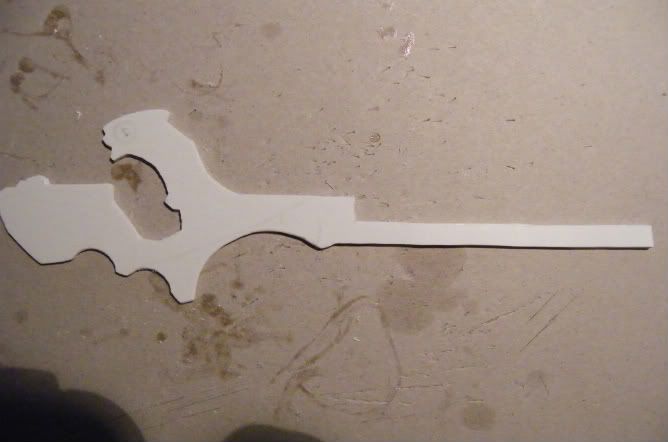
I drew a rough outline on plastic card and cut it out with scissors and using a sharp hobby knife. Very tricky business and a lot of work.

I needed 2 of these pieces. I placed the first piece all sanded and finished up on top of another piece of plastic card and glued them together.
This way I could sand down the second piece to match the first. The next step was to drill 2mm holes. I chose the holes location in a way they wouldn't get in the way of further construction. And if they would I could cut out 1 or 2 without damaging the structural integrity.
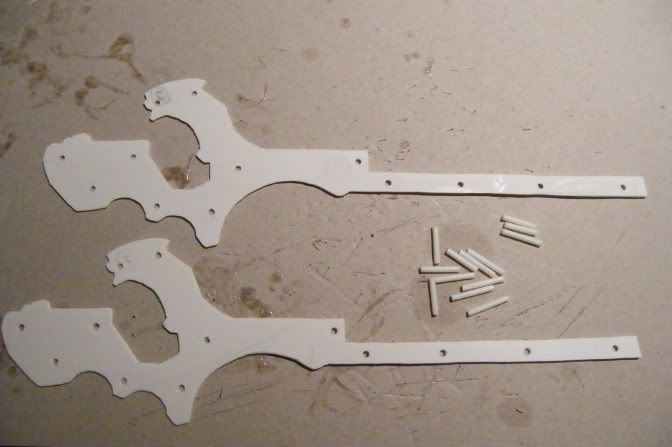
Next was getting the 2 separated to never to touch each other again. And voilà. 2 identical pieces with perfect aligned holes.Next I got myself 13 pieces of pipe of 1
cm long to put in the holes and hold the 2 together.
Finished product:
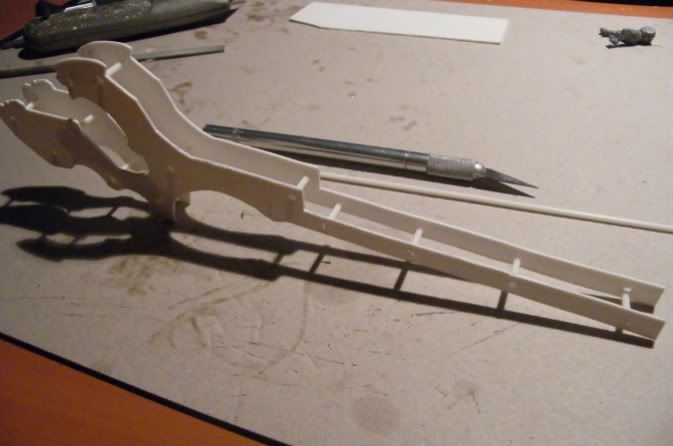
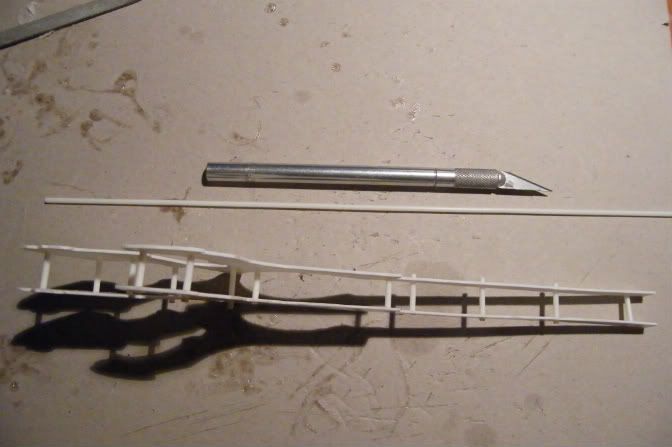
With this Skeleton I could get started. Its exactly 1,2cm wide. This way it would be easier to work with pre-cut existing plastics of all shapes and sizes. Next up: top and side panels.
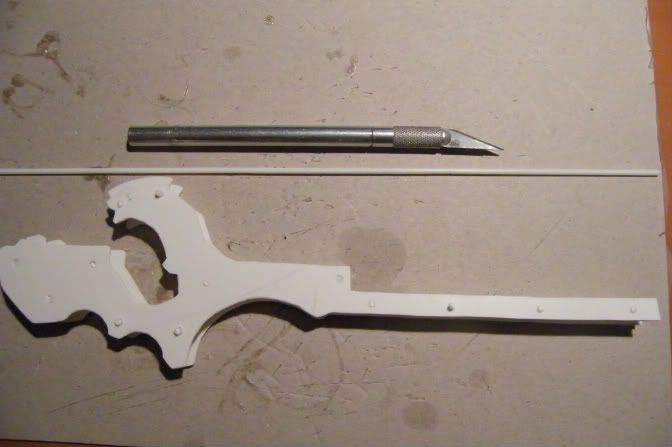
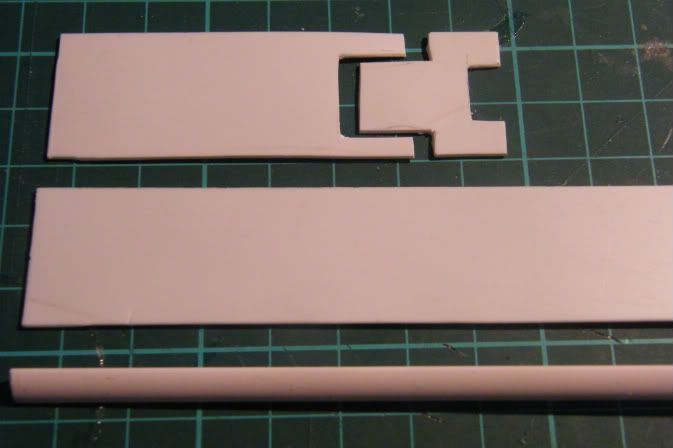
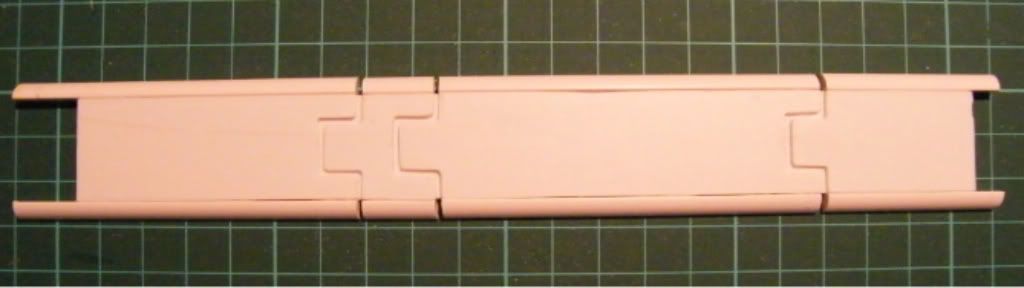
Al right. Side panels time.
I wanted them to be not just on a 90 degree angle. No, I wanted a more dynamic flow and curve. So this is what I did:
I took measurements from the left top, all the way to the tip. Since I'm a perfectionist I want to do everything as slick and smooth as possible. Especially with the aesthetic of the Tau I think it's essential to be as accurate as you can. I Took the measurements on to the plasticcard and cut them out with scissors. I didn't want to use the "glue-on-duplicate" technique because I didn't want to have to sand to much. Instead I just did the process twice.

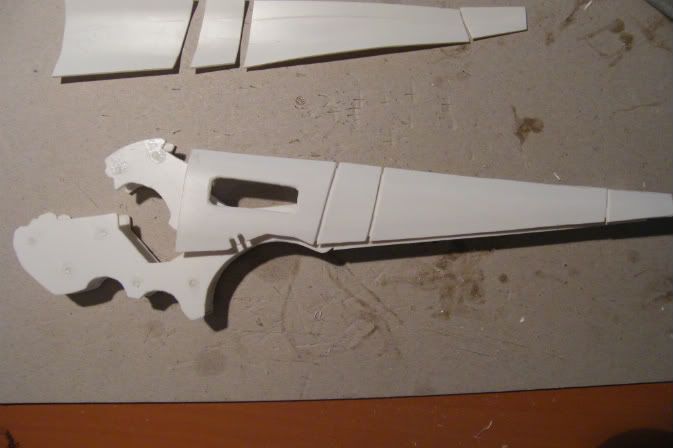
I drew on lines were the 3 ridges needed to come and cut them trough with scissors. Sanded them down with a little curve and placed a piece of plasticcard behind them, leaving a rim of 1mm between one another.
Then cut a space were the side panel would overlap the base of the wing.
(and added the first little detail, quite nice touch aye? they broke off on me, while further working on the engine heat exhaust.. ill fix it later

)
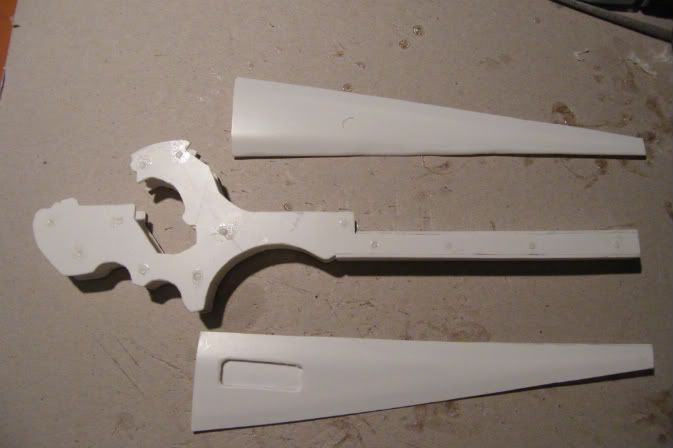
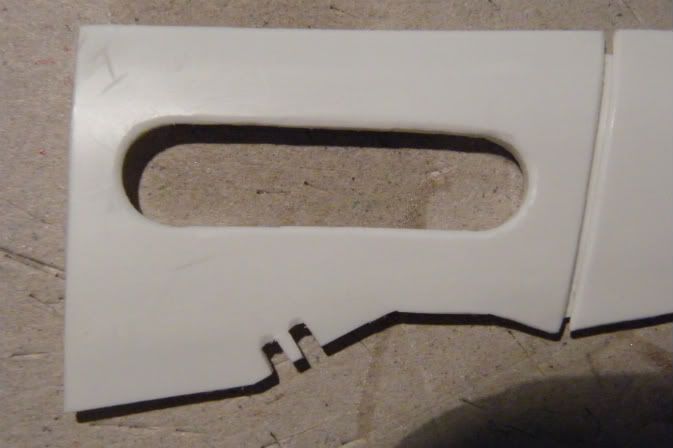
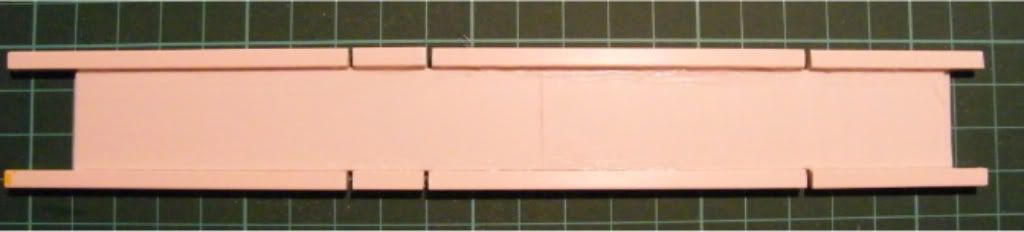
The hole for the engine heat exhaust in the middle of the hall was 1 of the hardest parts of the project and it took me quite some time.
First determinant were the hole needed to be and very carefully, trying not to damage the rest of the surrounding plastic, cut it out with a sharp hobby knife. These panels are very important because they'll cover 1/3 of the hole ship. I think they turned out to be pretty nice.

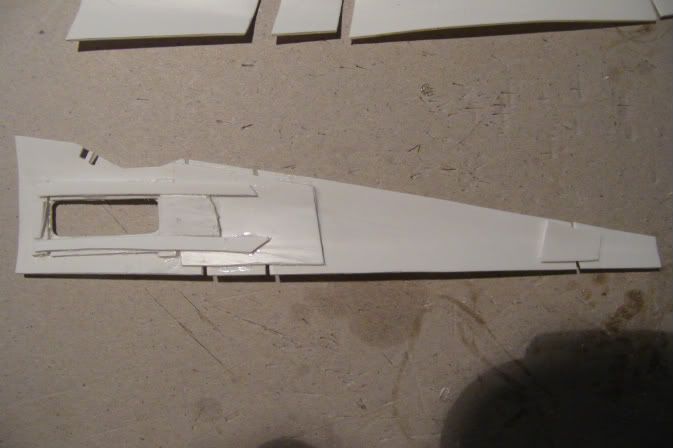
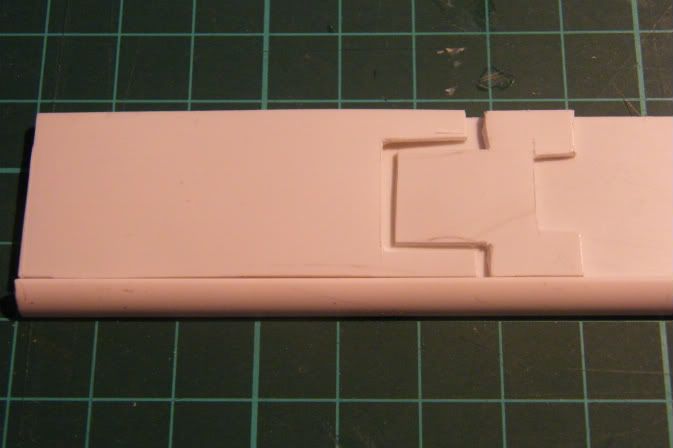
The pieces of plasticcard that holds the 3 pieces together are less wider then upper parts of the panel. This little line of space, about 2mm wide, is the place were the panel is going to be glued to the rest of the model. You'll see what I mean later on.
As you may probably have noticed in the pictures, the side panels have a curve. (the hall will look like this: (""") instead of: [""] if you catch my drift?
I bended the panels horizontally every 1/3 following the top line to the tip. This way the ship will feel more dynamic and streamlined.
little preview? :eek:

Top:
So far so good, the side panels are looking like I wanted them to. On to the top. This piece was going to be easy. I really got in to it now and got myself some new supply's. My first cutting mat, and some new tools + material. I discovered a hobby store and I was like a little kid in a candy store. I took a piece of plasticcard (really getting tiered typing "piece" and "plasticcard" :crafty: ) haha.
Well, I took 2 pieces of plasticcard and cut it 2,2cm wide, this was essential because this way it would all fit perfectly on the skeleton.
The rims on the side panels were going to flow over the "top" creating that familiar Tau feeling. I'll show you.
Of course made sure that the pieces were well sanded, sharp and the measurements were correct.
Glue, glue and glue
Top view:
bottom view:
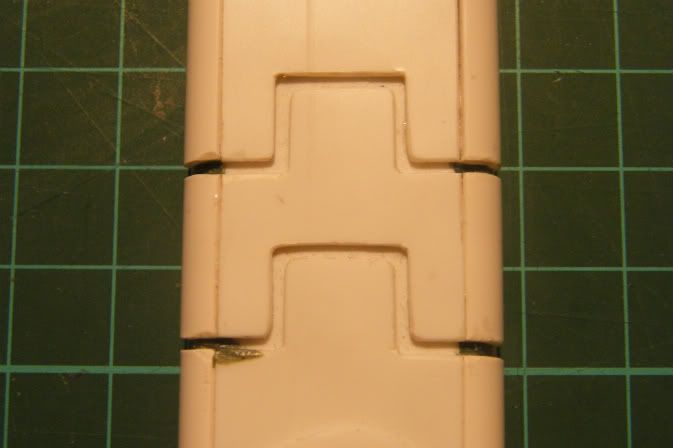
Rims detail:
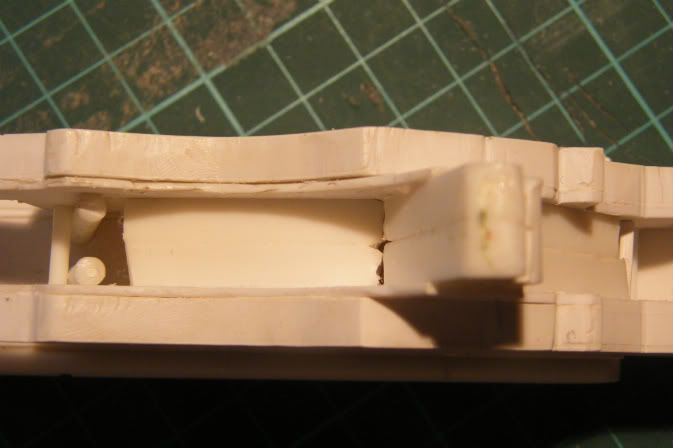
Hope you can see what it is. It shows structural reinforcement between the 2 first layers. Because there is exactly 1cm between them it was fairly easy to put 2 0.5cm pieces together and put it in. its now soled as a kroots skull.
As you can see I put pieces of curved plastic on the side to give it the "round flow" im looking for. I think on the "how" its officious right? measured the length from rim to rim and cut curved pieces accordingly.
Alright, thats all for now.
tell me what you think of my progress so far.
Daan


 707th Lubyan Aquila Banner Motor Rifle Regiment (6000 pts)
 Battlefleet Tomania (2500 pts)

 Thousand Sons 10000
 Grey knights 3000
 Sisters of battle 3000
