Switch Theme:

Hive Fleet Manticore + Whatever I feel like (updated 09/12/10)  [RSS] Share on facebook Share on Twitter Submit to Reddit
»
Author Message
Advert


Forum adverts like this one are shown to any user who is not logged in. Join us by filling out a tiny 3 field form and you will get your own, free, dakka user account which gives a good range of benefits to you:
  • No adverts like this in the forums anymore.
  • Times and dates in your local timezone.
  • Full tracking of what you have read so you can skip to your first unread post, easily see what has changed since you last logged in, and easily see what is new at a glance.
  • Email notifications for threads you want to watch closely.
  • Being a part of the oldest wargaming community on the net.
If you are already a member then feel free to login now.


Made in gb
Fresh-Faced New User


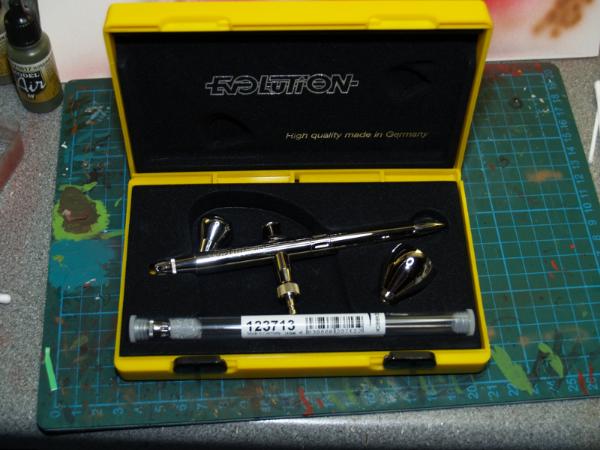
Thought I'd make a painting/modelling blog about my most recent army, so here we go.

After playing Black Templars for a longer time than is healthy, I thought it was time for a change. As no one was playing Tyranids in my local area at the time I picked them about 4 months before the new codes came out, I bought god knows how much because I really wanted to have a good apocalypse sized force as playing apocalypse games had become the new BIG thing to do. So I bought everything I wanted, spending an obscene amount of money, treating myself to two beautiful forgeworld models at the same time as the Trygon had just come out (Resin one) and I instantly fell in love with it. (Most of the stuff was bought at Salute, any Uk bros should really take the time out in their calendar and go to this as it's well worth it.)

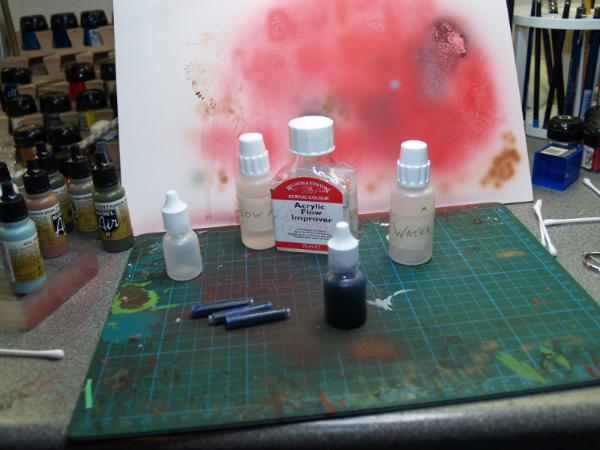
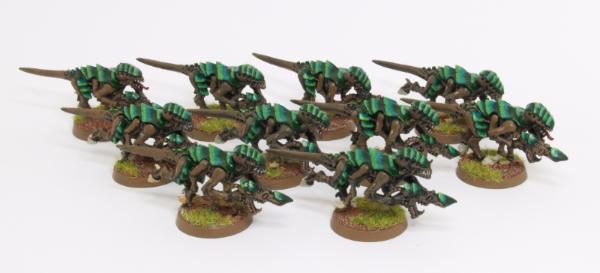
After a good week of thinking, I decided to shy away from grimdark colours as I was really sick of painting black, but I didn't really want them to be unnaturaly vibrant either, eventualy settling on an earthy brown/green colour scheme, something that would fit nicely in a densely jungled Death World. (Scenery to come later)

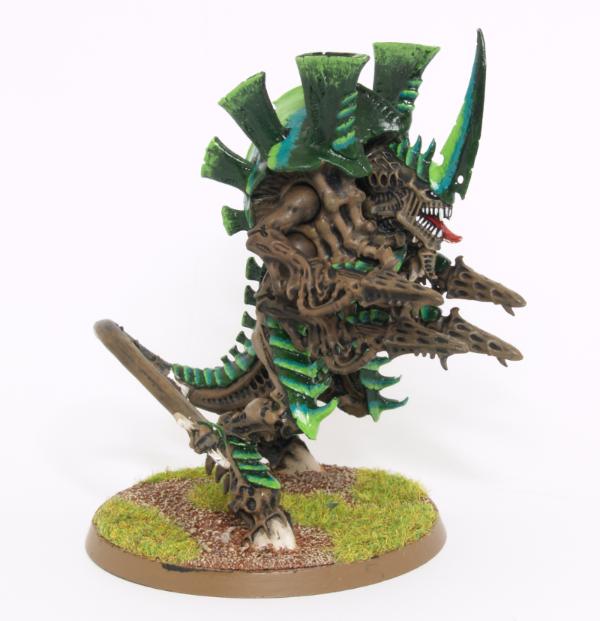
Paint scheme: Black undercoat
Body: Drybrushed Desert Yellow, drybrushed graveyard earth, badab black wash, light gaveyard drybrush
Carapace: Dark Angels green, streaky jade green, streaky scorpion green, 2-3 coats of watered down shiny varnish
Claws: Graveyard earth base, lightened 4-5 times progressing down to the tip
Base: Modeling sand, bestial brown, drybrush bleached bone, static grass, graveyard earth around the edges

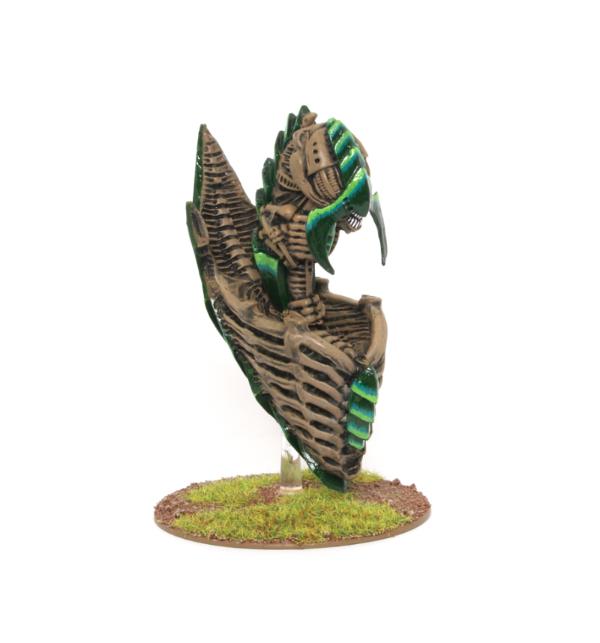
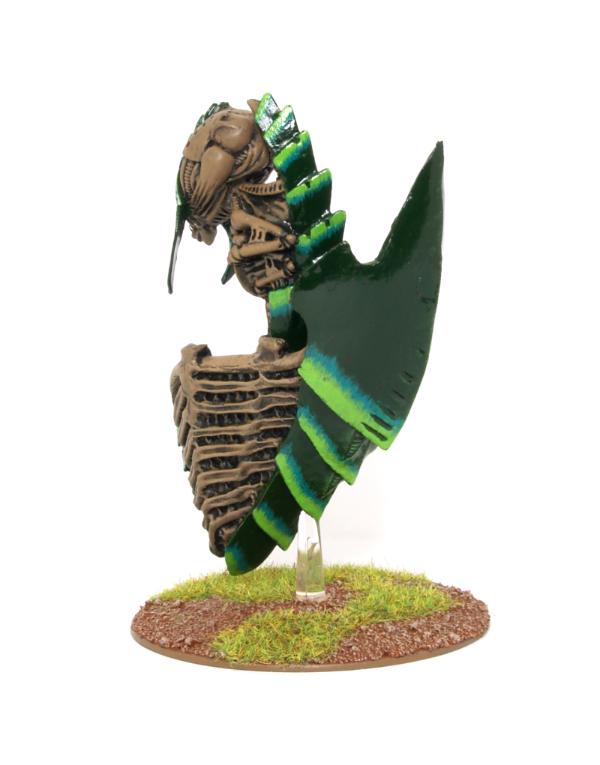
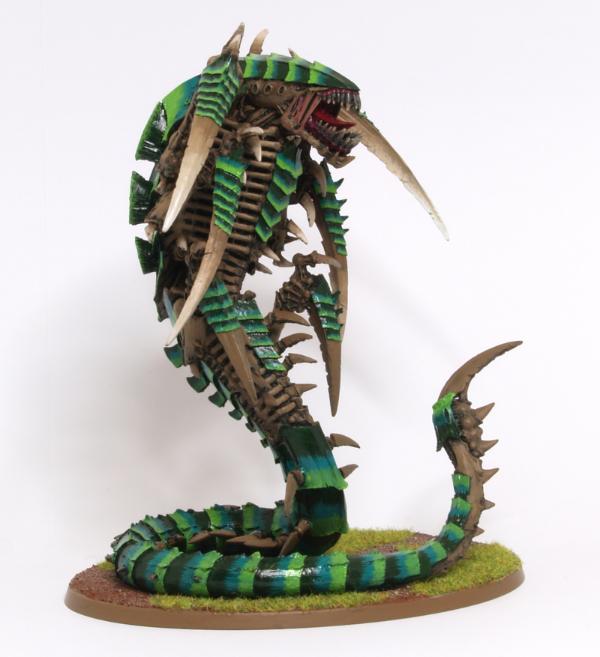
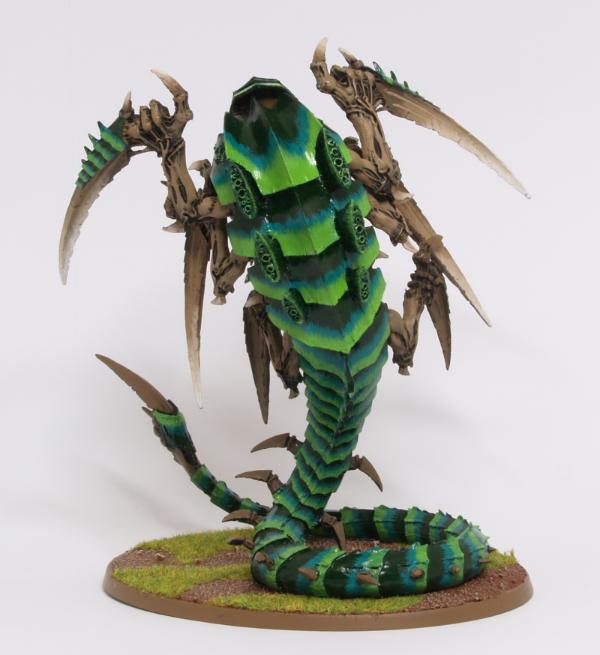
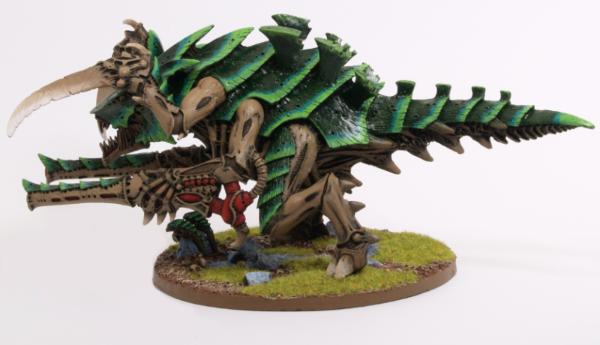
After a few test models, the first thing I had a proper go at was the Trygon. The detailing on this model is AMAZING! SO SHARP! It's a shame in a way, as it puts the older Tyranid forgeworld models like the Heirodule to shame, making them look rather messy and unrefined, ah well.

Painting and assembling him turned out to be easy, there was no blemishes or holes in the resin, and the only things that needed bending where the claws, and only alittle. There is one bad thing about this model and thats the TINY TINY claws at the base of the main body, each has to be stuck on, and they are absolute for snapping off even if you're really really really careful. The first and third set of scything talons where pinned and glued in, then the gap between them and the body was smoothed over with green stuff, I think this gives a much nicer finish and makes it look more natural, the second set where magnetised for ease of transport. The body pops in half at the waist too, held in place by a large pin, this is very easy to do and I highly recommend it, as transporting the whole model is abit of a pain.


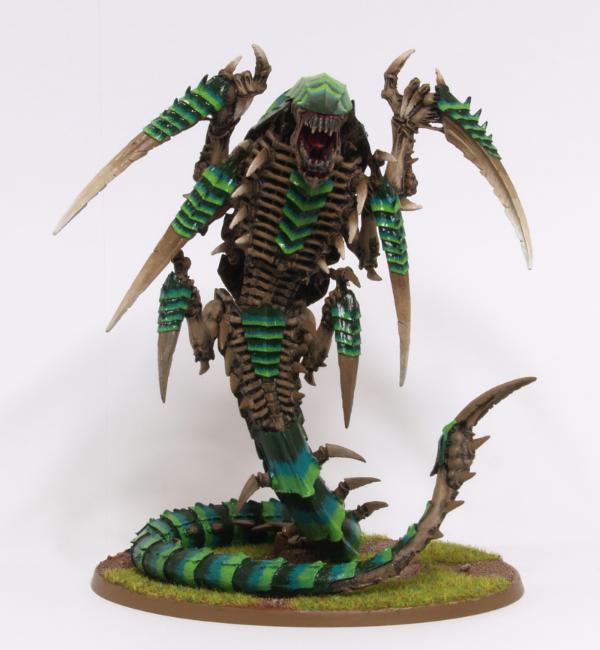
(The observant among you will notice the missing tiny claws on his lower body, I'm pretty sure he lost these whilst tunnelling under some space wolves)

He still needs to be finished, the shading on the lowest set of scything talons and the lower claws needs to be completed along with the tail scythe, but other than that he's finished.

After the Trygon was done to satisfaction I moved onto the Barbed Heirodule, I was really treating myself painting this instead of the MILLIONS of gaunts I had assembled. This one wasn't as easy however, as it was a much older model, from a time when forgeworld didn't care much about ease of assembly, each leg had to have multiple pins before it would behave and the guns and talons where horribly warped, the body itself was in good nick though, no holes or bubbles, and very little flash. All 4 arms where pinned and magnetized, along with his feet to the base (for ease of transport), they didn't really need the magnets actually, as they mostly stayed in by friction. I can't remember how I painted the rocks on the base and for the life of me I wish I could, as I REALLY liked how they came out, gonna have to do more experimenting and see if I can't remember what I did.


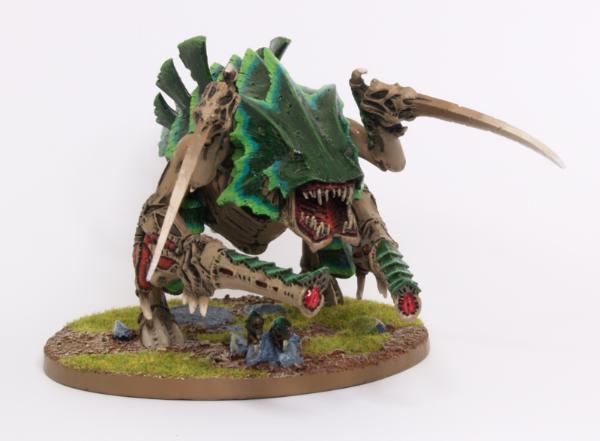
I'l probably do some more detail over time, like on the underside spines or something, but it's pretty much finished as far as I'm concerned.

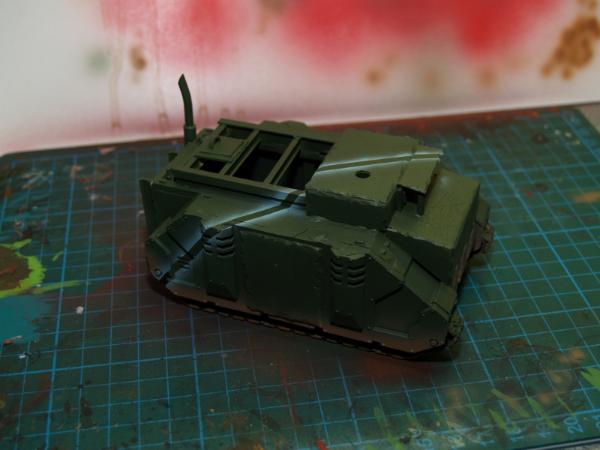
Haven't really got into the converting side of things yet, well, not for nids anyway, I'l probably end up making my own tyrannofexs though, as GW seem to be determined not to release models for this.

Thats all for now! Will post more later

This message was edited 4 times. Last update was at 2010/12/09 23:35:30


Made in gb
Blood-Drenched Death Company Marine


They look venomous!
They look pretty cool overall. Possibly darken the bases as they seem to contrast a lot with the rest of the mini? But I think it's a lot better than most if not all of my minis!
   
Made in us
Legendary Master of the Chapter


Chicago, Illinois

Nice job! I love it XD

From whom are unforgiven we bring the mercy of war. 
   
Made in ca
Phanobi


Canada,Prince Edward Island

Nice looking 'nids, Keep up the good work.

   
Made in gb
Fresh-Faced New User


More pictures!

First is a gunslinger Hive Tyrant, with the new rules though I tend to use him as a swarm lord, all arms are magnetised (as they should be). Yes that is a nice big silver area on his tail, it's where it keeps popping off, no matter how much I pin and glue it. This is a candidate for the acetone dip, I'm really not happy with how the paint came out.


Next up are Zoanthropes! I love these, 60 points for an amazing synapse unit. 3 of these make up the majority of my synapse in most games as they don't like to die and mince through special/heavy units up close.


And lastly, some table-acceptable painted gaunts, I'm not going to go into great detail with these as I have over 100 to paint. This is where I think the colour scheme really pulls through, when they guys are all amassed together, you can't tell how many there are because of all the stripes, it's just like a pack of zebra! I'l have to get some table shots some when to show it.


Next up will probably be some workshop shots and some wip projects, getting abit sick of painting green :d


Made in gb
Paladin of the Wall


COOL
I like the colour choises

This message was edited 1 time. Last update was at 2010/10/31 19:39:49


thornfall alliance: 30pts bringing home the bacon
menoth: 134pts "burn heretics, BURN!" 
   
Made in ca
Blood Angel Chapter Master with Wings


Sunny SoCal

Nice scheme, a pleasant, jungle-y break from all the reds and purples. Great job!

   
Made in gb
Fresh-Faced New User


Workshop! This is where I spend most of my day if I'm not at my computer (I'm so lonely....). It basically consists of cheapo kitchen work surfaces bought from B&Q for not a lot (ask for offcuts and damaged pieces, they will love you like a son and give you a huge discount), a 2x2 timber frame for it to sit on, 2 sets of cheap draws and two wall cupboard. Including the little strip lights, the whole thing came to around £250 (Bargin' mate!). If you're going to do this, use kitchen surfaces instead of MDF, it's only a little more expensive for the cheapest stuff and gives you a wonderfully cleanable abusable surface, you can even do resin casting on it without buggering it up too much. Most useful thing I own is that positionable magnifying lamp, best £30 I EVER spent.


My two lightboxes, on the on the left is how you do it right, the one on the right is how you do it rong. Never bother with the cardboard box approach, you will never get as nice an effect as you do with the foamcore box, just go down to staples and buy a 5-pack of A3 foamcore and you're done, I use the one on the left for all my photos along with the magnifying lamp as the only light source, it's superb. The foamcore as two sides, a gloss and a matt/satin, I found that if you use the satin for the inside of the box, it gives a much smoother lighting effect than the gloss side, which has a tendency to shine.


Here's some scenery for my deathworld board. Sort of went for the abandoned for centuries look as I wanted to have buildings as well instead of just jungle, but I didn't want to turn it into a cities of death board, I think the overall look came out fine, though I much prefer the building on the right to the one on the left, I think I went a little too flock happy.

   
Made in us
Chalice-Wielding Sanguinary High Priest


Arlington TX, but want to be back in Seattle WA

Gorgeous Trygon! I love the color gradient on the scales! Fantastic work! -- consider yourself rated!

4250 points of Blood Angels goodness, sweet and silky W12-L6-D4
1000 points of Teil-Shan (my own scheme) Eldar Craftworld in progress
800 points of unassembled Urban themed Imperial Guard
650 points of my do-it-yourself Tempest Guard
675 points of Commoraghs finest!

The Dude - "Jackie Treehorn treats objects like women, man."

Lord Helmet - "I bet she gives great helmet."


Made in gb
Fresh-Faced New User


Thanks, hopefully I plan on getting the gradient smoother when I get an airbrush (and I get good at it)
   
Made in gb
Fresh-Faced New User


Sorry for the lack of updates, been throwing around alot of job applications so I haven't had much time to paint or otherwise enjoy myself. (On the plus side, if I get this job, my first pay cheques going on a biotitan!)

I woke up this morning to a wonderful surprise, the alien brain I ordered from Troll Forged Miniatures 2 weeks ago arrived! In one way it was a bad thing as i had things I had to do today, but this thing was begging me to paint it and I just couldn't help myself.

The miniature came in good packaging, a nice solid little cardboard box with a few peanuts in. The quality of the miniature itself was alittle ehh..... Many parts where bent and there where a few bubbles in the carapace that needed filling as well as a nice big mould line along the back of the carapace that needed to be scraped and filled. The detail on the model is fantastic and it blends in seamlessly with games workshops nids, it will make a very nice Doom of Malan'tai.


Made in us
Grey Knight Purgator firing around corners


United States

Cool brain thing, lol as much as tyranids scare me now this thing just freaks me out. Probably on the board and off. I really like the way you painted all of them.
   
Made in us
Awesome Autarch


Las Vegas, NV

Very nice army! I like it.

   
Made in gb
Fresh-Faced New User


Sorry I haven't been active, anyway I have some nice stuff!

About 2 weeks ago I bought myself a starter mould making kit from Sylmasta as I wanted bone sabres but didn't want to buy 4 Hive tyrants. After buggering up a few times making newbie mistakes and making test moulds, I ended up with only enough silicone to make one proper mould.


The mould turned out perfect! No air bubbles and the mould comes out with very little flash as I use two sheets of sign board to even out the pressure on the mould when I tie it together with elastic bands, preventing warping. I have a few problems though with airbubbles though as I have no way to crush or remove them bar banging the mould on the table, but each cast uses less than 2g of resin so I'm not massively fussed.


Now I have two right arms I needed a left, I found the best thing to use was the lash wip, lopping off the wip whilst saving the long index finger holding it, chopping it down on the underside and wrapping it carefully around the hand, the sword attached is temporary as it was a bad cast, I'l be replacing it with one with less airbubbles.


On another note, my dad very kindly treated me to an airbrush set for christmas so I lavished out on a Harder and Steenbeck Evolution silverline, OH MY GOD IT'S SO BEAUTIFUL I NEVER WANT TO USE IT BECAUSE IT'S SO SHINY!! Having only ever used terrible horrible cheapo badger £10 airbrushes, this is something else, it's wonderful and I can't wait to have myself a proper project to splurge over.


Heres a test piece I played with, I need to get alot better before I start doing it seriously.


And for something different, some homemade navy blue ink! I was inking some white detail on an eldar weapon and using badab black wasn't working, after looking through the codex I decided that blue would look much better, but blue ink didn't exist on my pallet.

Then huzzah! I remembered that we had some old ink cartridges used in fountain pens in our stationery draw, inks ink right? Anyway heres my recipie for 10ml of mulled navy blue ink.

5ml of neat Flow Aid (This stops the ink pooling and lets it stick to plastic and smooth paint, hence the high concentration)
5ml of water (Use distilled if you have it)
3 small cartridges of blue pen ink
enough badab black to dull down the colour till you get something you like.


I'm really really impressed with the results, you could add some matt medium too if you wanted, but I found it dried matt enough anyway, I'l post some examples when I finish my next project.


This message was edited 1 time. Last update was at 2010/12/10 00:52:19


Forum Index » Dakka P&M Blogs
Go to: