I met a new
40k player last night for a game, Hellspawnsp aka Shaun. Shaun hasn't been playing long (about 3 months) and doesn't know all the rules, so through-out this game I'll be helping him with deployment, tactics and rules so pretty much everything you see is down to my advice, obivously it's down to Shaun to take it or not

Also, I'm using a modified Tyranid list tonight. I've switched the Tyrants wings for a Tyrant Guard, taking three Zoanthropes instead of two in a Myceptic Spore and ditched a few Termagants and a Tyranid Warrior along with the Trygon Prime and got a Tyranid Prime. Will see how that goes.
Tyranids "Hive Fleet Krakken" - 2,000 points
HQ
Hive Tyrant bonesword & lashwhip, devourers, old adversary
Tyrant Guard
Tyranid Prime bonesword, lashwhip & deathspitter
Elite
2 x Hive Guard
2 x Hive Guard
3 x Zoanthropes
Troops
4 x Warriors rending claws, deathspitters & toxin sacs
24 x Termagants fleshborers
20 x Hormagaunts toxin sacs
20 x Hormagaunts toxin sacs
Heavy Support
Trygon adrenal glands
Trygon adrenal glands
Trygon adrenal glands
Total: 2,000 points
Imperial Guard
Company Command Squad w/ Chimera - 4 x plasma guns & carapace armour
Elite
6 x Storm Troopers - grenade launcher
Troops
Veterans w/ Chimera - 3 x plasma guns
Veterans w/ Chimera - 3 x plasma guns
Veterans w/ Chimera - 3 x flamers
Veterans w/ Chimera - 3 x flamers
Fast Attack
Valkyrie - multiple rocket pods
Hellhound
Heavy Support
Basilisk
Manticore
Leman Russ Executioner
Leman Russ Battle Tank
**Shaun only brought 1,200 points with him. I borrowed him the plasma Veterans and Hellhound, but because his list didn't look quite 2,000 points we agreed he could take the Basilisk extra. Still not sure if the list is 2k or not, can't be far from it.**
Game: Pitched Battle + Annilation (we agreed to do this as it's the easiest game to play)
Deployment
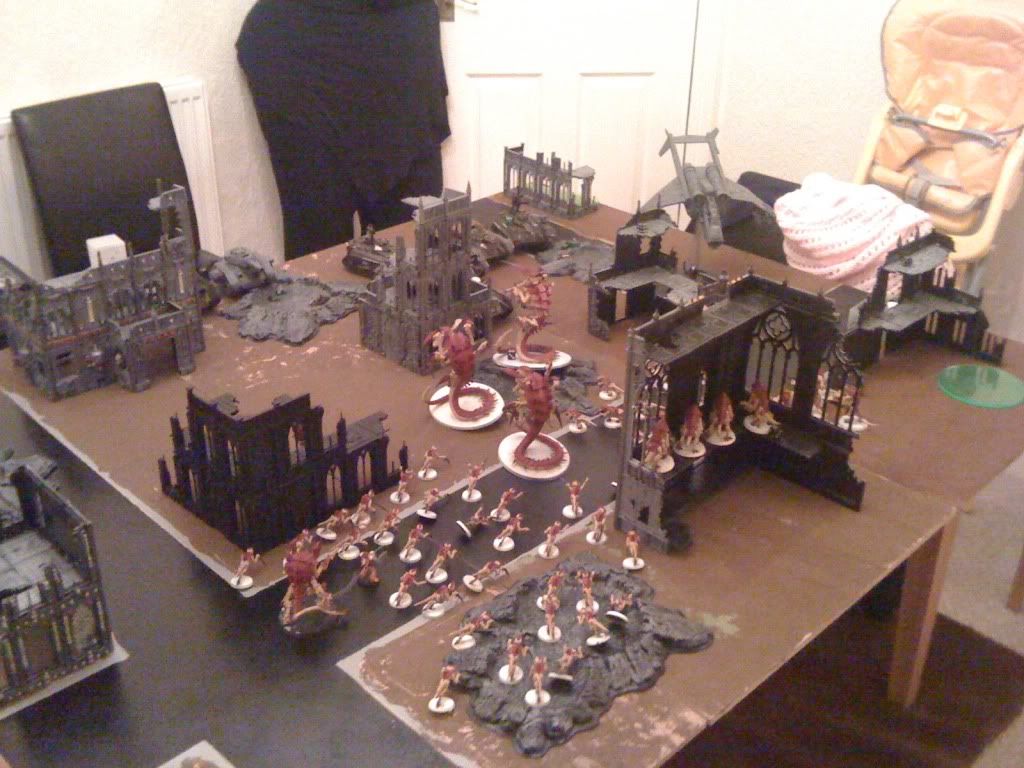
I won the roll off and decided to go first to get the charge in quicker. I deployed both units of Hormagaunts around the Tyrant to use the old adversary power, plus they can give 4+ cover save to the Tyrant also. I deployed the Zoanthropes in terrain and the Trygons in front of them hoping to block
LOS and use the Trygons as shields. In a centre ruin I deployed both Hive Guard and then the other side of that the Termagant horde with the Warriors behind for cover.
Shaun deployed his forces, I suggested he put both artillery pieces in terrain behind a ruin so I cannot see them and then support them both with the Executioner and Russ which both have direct
LOS to the Trygons. Shaun deployed the rest of his armour top right away from my shooting threats and combat threats meaning I've got a walk.
 *Tactical Notes
I'm going to move the Termagants and Warriors forward and hopefully they can blast some infantry once the Hive Guard have done some damage. I'll have to run the Trygons across the field, hopefully they can maul some tanks or infantry, though others I'll send to the Russ variants as the Zoanthropes cannot deal with both of them in a single turn, then with two Trygons that far forward both can tackle the artillery.
Target priority is the Hellhound as my Gants and Warriors cannot get into range with that posing a massive risk. I'll then tackle the plasma units, including the Executioner, after that I'll take it as it comes.
I have suggested to Shaun he bomb the Hormagaunts with the Manticore for the time being and use mass plasma to tackle the Trygons and the flamers against the oncoming Termagants - I've literally just thought but he should have used the Manticore against the Warriors, ah well my excuse is I don't use one! :(
Turn 1
I explain to Shaun what seize the intiative is but I tell him not to bother, reason is he'll only get a few shots in as his armour is all at the back - if he moves his armour towards me it means I get into assault quicker.
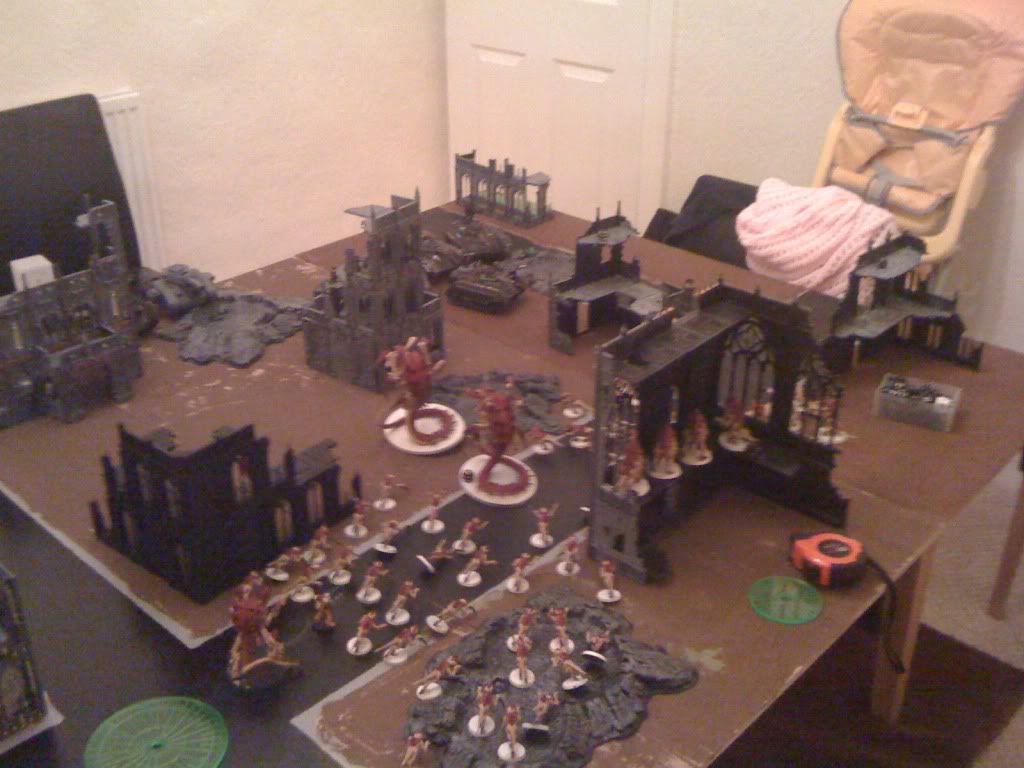
First turn I run everything forward except the Hive Guard which move out of terrain.
Shooting I blast the Hellhound with a unit of Hive Guard and manage to immobilise it and crew shake it.
Shaun moves his armour out read to unleash plasma on a Trygon, the Valkyrie moves out ready to bomb the Termagant horde. A flamer Veteran Chimera does get immobilised in terrain.
Shooting the plasma units luckily are out of range on the Trygon, though because placed well one will get a cover save from a flamer Veteran Chimera in front, the other pops smoke. The Valkyrie unloads its payload into the Termagants hitting with both blast templates and reduces the horde by half, good shooting! Manticore kills some Hormagaunts along with the Basilisk, a Trygon takes a wound, can't remember how, so does a Hive Guard thanks to a scattering Leman Russ shot! Executioner doesn't hit anything though except a single Hormagaunt.
Kill points are Tyranids 0: Imperial Guard 0
 * Tactical Notes
Ok I've taken some wounds and lost some models but nothing major. Pain in the ass at the moment is the Hormagaunts are out of assault range and the Chimeras because deployed against the board edge are out of Hive Guard range.
Next turn I'll assault the flamer Veterans Chimera with the Trygon, it's a kill point I guess. I'll move the Zoanthropes closer, hopefully they'll be in range. The Hive Guard I'll blast the Valkyrie, hopefully down it and unleash deathspitters at the Storm Troopers inside.
Turn 2
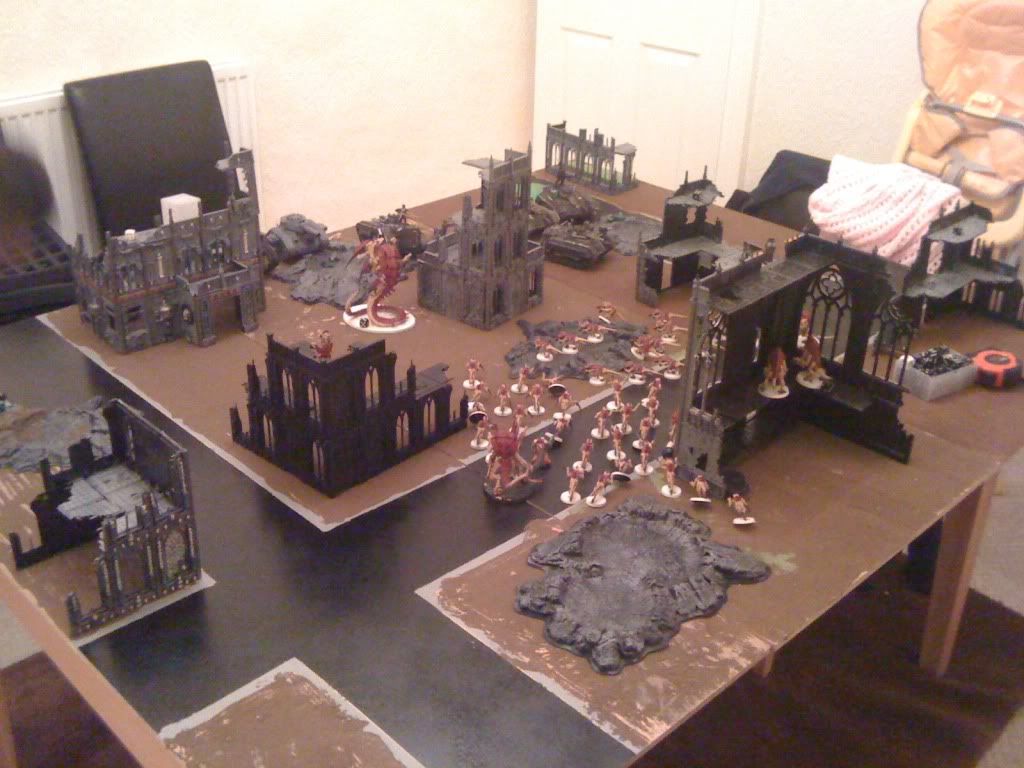
I move and run majority of things again, Zoanthropes get a poor terrain move so fail to be in range this time.
Shooting Hive Guard down the Valkyrie netting my first kill point and killing a Trooper in the blast, Warriors follow up the volley with deathspitters wiping them out giving me another point. Other Hive Guard fire at the flamer Veteran Chimera by the Trygon hoping to pop it and expose them, they fail to blow it up.
In assault Trygon charges the Chimera, only scores one hit because it moved 12" but it's enough and it goes boom!
Shauns turn he moves the plasma units in Chimeras around and moves the exposed flamer Veterans into the tower ruin.
Shooting he blasts the Trygon which wrecked the tank and kills it earning him a kill point. One of the Trygons following behind takes a wound from the Executioner, more Hormagaunts are slayed and a Hive Guard from another unit takes a single wound, some Termagants are also roasted by the Hellhound.
Kill points are Tyranids 3: Imperial Guard 1
 * Tactical Notes
Impressive second turn taking out the Valkyrie, Storm Troopers and Chimera, bit gutted as lost a 210 point mosntrous creature in the process would have been better if I could have assaulted those Guardsmen too, ah well.
Next turn I'll move the Trygons up to assault and the Hormagaunts too, the Zoanthropes should be in range now also. I'll move the Warriors up hoping to pop Chimeras with Hive Guard and follow the volley up with deathspitters like before.
I suggested to Shaun to keep bombing the hordes as they will make a mess of his troops in combat once those Chimeras are popped and plasma the Trygons so his tanks cannot me mauled and blow the Zoanthropes away, unfortunately he has little besides artillery and the Russ which can get the Hive Guard and they're in terrain.
Turn 3
I move the bugs further up, getting Hormagaunts and Trygon to assault the flamer Veterans in terrain.
Shooting Hive Guard pop a plasma Veteran Chimera, other Guard fire are the exposed rear of the
CCS Chimera but aren't in range. Warriors gun down the plasma Veterans with deathspitters, but two still remain and pass morale! Zoanthropes fire at the Executioner and immobilise it, cannot believe it!
In combat Trygon charges and mauls the flamer Veterans killing them, only flamer unit left is the other Veterans hiding in their tank like cowardly custards!
lol!
Little movement from the Guard again.
Shooting plasma guns blast the Trygon which mauled the Veterans and it's dusted, the remaining Trygon takes a wound from the Executioner. More punishment on the smaller bugs seeing the Termagants with only 7 left! Leman Russ blasts the Zoanthropes and kills two with instant death.
Kill points are Tyranids 4: Imperial Guard 2
 * Tactical Notes
Bummer my Zoanthropes failed to pop that Executioner which means the Trygon has started taking punishment, but it's in range now and the Executioner is immobilised so that means auto hits. I also should have charged the Hormagaunts into the flamer Veterans and kept the now dead Trygon hidden, would have benefited me better and then next turn the Trygon could have rush a tank.
Turn 4
I move the solo Trygon up ready to eat the Executioner or Leman Russ, I move the remaining Hormagaunts towards the
CCS Chimera, I move the other Hormagaunts up to the two remaining plasma Veterans in the open, I move the Warriors up to attack the immobilised Hellhound.
Shooting single Zoanthrope fails to hit the Executioner, Hive Tyrant and both Hive Guard units blast the rear of the
CCS Chimera, luckily the last unit does it getting me a kill point.
In assault the Hormagaunts do there business killing the solo Commander (plasma guns had over heated during the game) and wipe him out and the plasma Veterans fall to the other Hormagaunts while the Warriors smash up the Hellhound making it a wreck. The Trygon charges the Executioner and wrecks it.
Shauns turn, he bails out the flamer Veterans from the back of the Chimera ready to toast some Hormagaunt while the remaining plasma Veterans move in their Chimera ready to blast some Trygon and heavy flamer some Hormagaunt (all tanks have hull heavy flamers
btw!)
Shaun bombs the Warriors with the Manticore and wipes out the Warriors leaving the Prime alone, Trygon gets blasted with plasma but still lives, Hive Tyrant gets blast by the Leman Russ but it scatters and misses, heavy flamer from the plasma Veterans Chimera wipes out the Hormagaunts which killed the Commander and the flamer Veterans kill the other Hormagaunts.
Kill points are Tyranids 9: Imperial Guard 5
We call it a day as Shaun has to go, though I swear we got up till turn 5, ah well. Tyranids win with 9 kill points to 5.
Summary
Well that was interesting, despite the anti tank Tyranids have they can still struggle particularly if the opponent out deploys you, as Shaun did with me. New unit wise I think the Prime is wicked, I didn't use him much but making the Warriors BS4 helped a lot and made them a lot better than they usually are. The walking Tyrant isn't too cool just to get a cover save, probably take a barbed strangler if anything, maybe, but I'm going back to wings. Zoanthropes on foot I'm not sure as I didn't get in range until turn 3 and by that time the Pod probably would have come down anyway, plus when firing the first time one missed which means the normal two hit - probably go back to Pod I think. The Trygon Prime I don't miss, but if I've got the points I'll put it back on as it's modeled like that.
Mistake wise I should have assaulted those flamer Veterans with the Hormagaunts and "leap frogged" them up the board while keeping the other Trygon in cover - I just fed a Trygon to Shauns plasma just to kill some weak Guard.
Shaun did ok considering he hasn't played much, granted he was following my suggestions but he started to catch on well and started doing stuff on his own. More importantly he learnt the rules and which units are better in the Imperial Guard codex, one of those are not Storm Troopers!


 Blood Angels - 2000
  Iron Warriors - 2000
  Orks -2000
  Imperial Guard - 2000
 Eldar - 2000
  Hive Fleet Krakken - 2000
  Dark Eldar - 2000
  Necrons - 2000
  Grey Knights - 2000
  Daemons - 2000
  Ravenwing - 2000