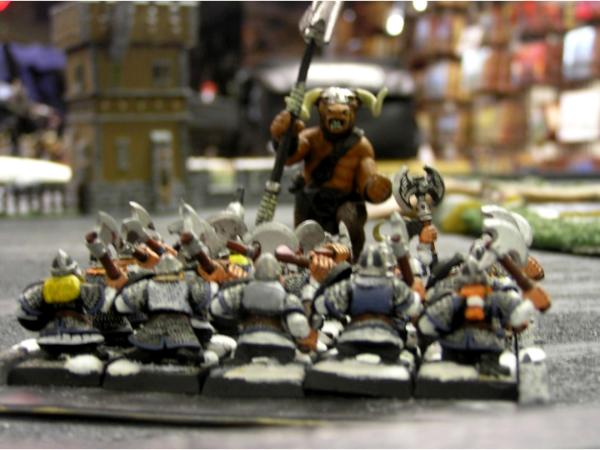
Back with another entry in Relentless- including an 8th edition first for the series: Beastmen.
This game was actually played several days ago, so apologies if things end up a little vague. Some of the specifics are a little hazy this far on.
The dwarfs of Relentless stubbornly stuck to the
exact same list I've been running. I've been doing some thinking about some change-ups, but still need to catch the painting bug anew.
Here's what I was facing:
Doombull general, w/Sword of striking, Gnarled hide, Ramhorn helm, 4+ ward
Gorebull
BSB, w/Int 10 sword, 5+ ward, 3+ armor save
Slugtongue <Purple Sun, Caress of Laniph>
Brayshaman,
Lvl 2, Chalice of Dark Rain <Doom & Darkness, Fate of Bjuna>
40 Ungor, spears, full command
20 gors, full command
20 gors, full command
5 Minos, great weapons, full command, stone of spite
5 Minos, great weapons, full command, blackened plate
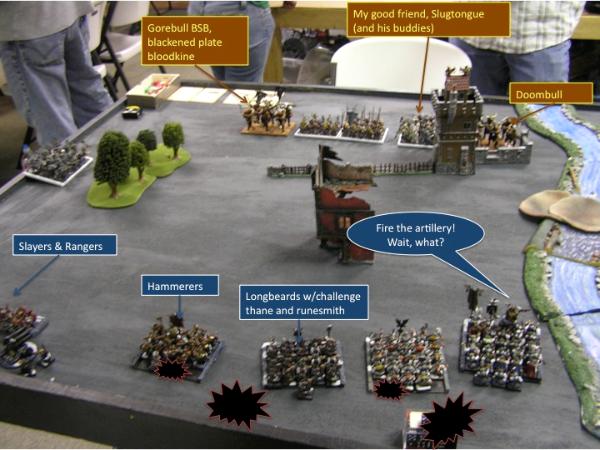
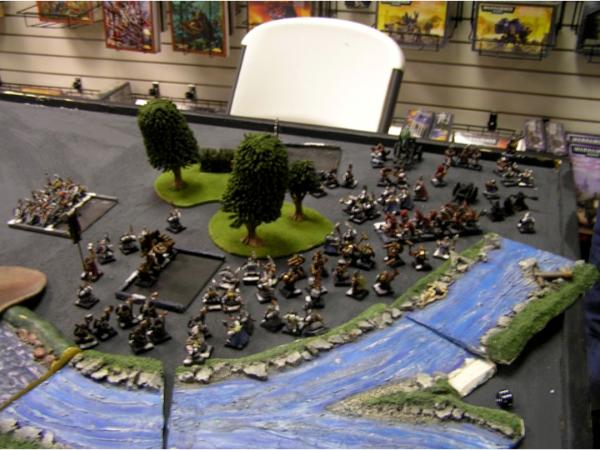
We decided to roll scenario and use the terrain chart. Aaron's a great opponent for setting the board up in an interesting theme rather than "strategic" terrain. We used the rolls to put down a ruined river crossing settlement, and rolled up a basic battleline.
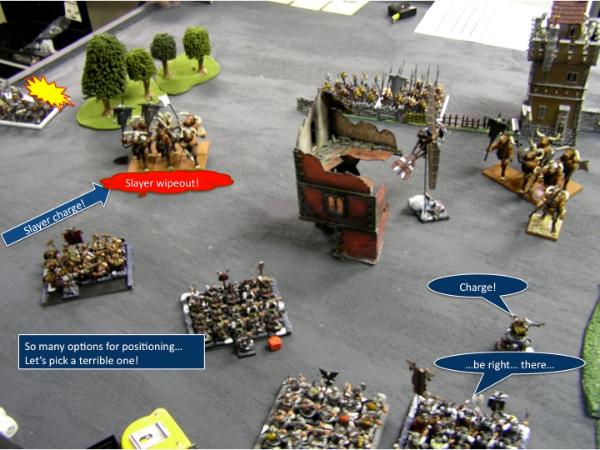
I had deployment issues right off the bat, and almost tried to drop everything on the small side of the river, but in the end decided more room to maneuver would benefit my more numerous blocks. The other notable challenge was that Slugtongue and ambushing gors make for a bit of a conundrum. If I protected my machines with blocks, they'd almost certainly end up in Slugtongue's aura range*. If they dropped away in the corners, they'd be exposed to packs of roving beastmen.
*For those unaware- Slugtongue has a chance to inflict wounds on anything within 36" before the game starts.
In the end, I decided not to sweat Slugtongue too much. Two of my war machines had 4 wounds so would only get dropped by his top result, and then on only half of those. I did expose the organ gun a little, but if any machine could help deter ambushing herds, that was the one. So how did this plan work out?
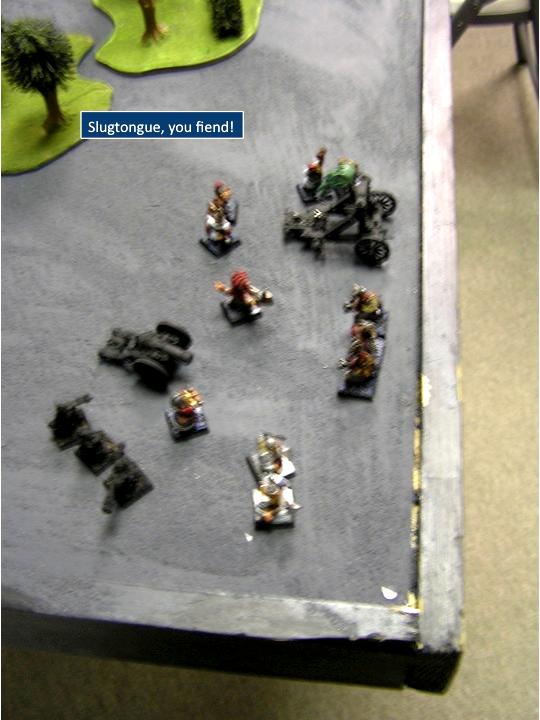 Slugtongue accounts for almost 400 points of models. My sobbing makes it difficult to hold the camera steady.
So, lost the cannon, grudgethrower, dragonslayer, 3 hammerers, and 2 warriors. Can't wait for turn one!
 Errrm. Poop.
The beasts were done deploying about 4 drops before me so took an easy first turn. My Strollaz move was more or less insignificant, with just some minor shifts.
Turn One
One gor herd appeared from ambush on my left, but were blocked from the organ gun by rangers. Minos stamped forward and Slugtongue and his retainers set up in a tower for miscast protection. The magic phase was kicked off with an irresistible Purple Sun that puttered out 6" away and drained the rest of the pool dice.
In my turn, I was at something of a loss. I figured I might be able to pull a win on the left if I could drop a couple minos then combo up the
BSB's unit to pick up
VPs there. On the right, I figured I'd delay as long as possible with gyro redirects and try to smack the doombull's unit in the flank with my general,
BSB, and warriors. So off went the gyro and it was on to the shooting phase. Which consisted of the organ gun. Which was rained out by the Chalice.
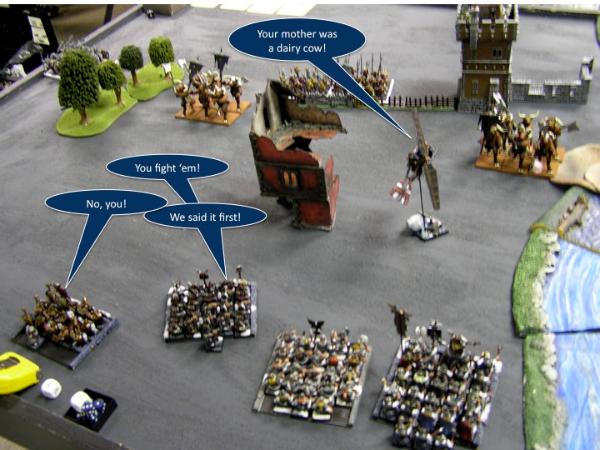 Gotcha right where I want ya. You should probably just concede now.
Turn Two
Gotcha right where I want ya. You should probably just concede now.
Turn Two
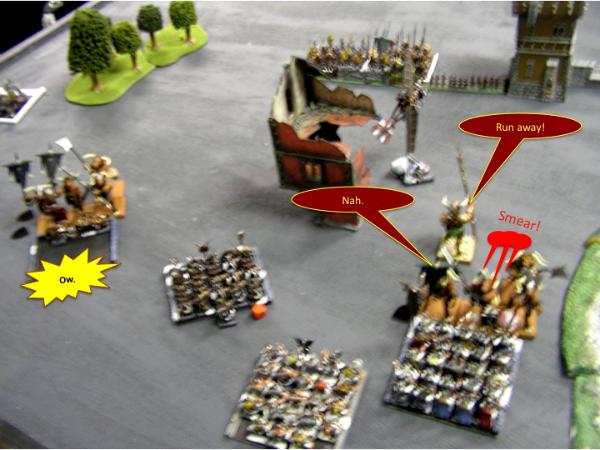
The gyro failed to bait a charge from the Doombull’s frenzied unit, though the Doombull voluntarily charged solo to send it away, then redirected for a long charge at my lord’s block but fell short. Not sure on the wisdom of this move- I think he may have been underestimating the durability of my lord’s build.
On the left, the gors and minos advanced far enough to make for comfortable charges next turn, but leaving mine all a little too far out to count on.
A second IF purple sun only travels 6” while the miscast further reduces numbers in the tower.
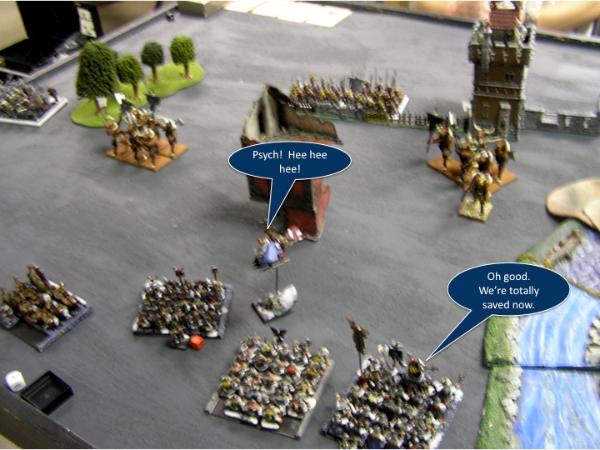 Well, there was my one trick. Try it again next turn?
Not to be outdone in reckless solo charges by generals, I charged by general out at his (needed about a 9+ on the dice to make it). My only explanation is that, unbeknownst to me, Slugtongue had inflicted
D6 wounds to my brain. I was drastically overestimating the durability of my lord- something I’ve done more than once before, mostly because I think I’m doing something cool and clever that will catch people out…
I declare a slightly more sane (but very long charge) with my longbeards at the flank of the
BSB minos- with
WS 5, strength 4, they have a chance of winning that combat if they hit the flank early, and a failed charge doesn’t really lose me anything. On a lark, I also try to send the slayers at the same unit of minos, thinking that they should drop some before the bulls even swing. Wish I’d done the mental math on that one. The only successful charge turned out to be the slayers- and successful for slayers doesn’t really mean successful for me…
Remaining moves consist of trying to bait the minos away with the gyro again while picking an angle for my hammerers based on the terrible assumption that there would be any slayers left at the end of the turn.
In the shooting phase, I’ve missed my chance to shred some minos off the
BSB’s unit so fire on the approaching gor herd. I kill a healthy 5 or 6, but they pass panic on the
BSB re-roll. The slayer combat goes poorly- I inflict only a single wound and lose the entire unit, giving a free combat reform and an additional attack token. Oh dear.
 How to make a bad situation worse: Exhibit 1
Turn 3
BSB
How to make a bad situation worse: Exhibit 1
Turn 3
BSB minos head into my hammerers, and Aaron passes a Frenzy test to do a nice charge that I haven’t quite blocked. His doombull blows past my lord ( I assumed we’d fight that one out) and hits my
BSB block behind. Instead my general gets a face full of 5 minos with great weapons.
The gors on the left fail a charge, but it’s really all about the fights with the minotaurs. I dispel or use runes on the magic to keep my general’s leadership from being bumped down by Doom & Darkness.
The hammerers’ gatekeeper challenges the gorebull to keep as many hammerers alive as possible to swing simultaneously at the end of combat. It’s enough to bag two minotaurs, but I lose combat, and give them all another attack.
The next fight is the Doombull who fails to wound on impact, and only manages 4 wounds on my champ in their challenge. This translates to a tie that I win on musician and send him running! A spot of hope that I totally don’t deserve…
…is somewhat blotted out when I fail to catch him and my general is absolutely creamed by 16 strength 7 great weapon attacks. The pursuing minos hit my
BSB unit quite comfortably.
 Who needs generals?
I do have a good opportunity here- the unengaged warriors charge the doombull who must flee again- right in front of the gyro who promptly runs it down, landing in a River of Light and gaining Time warp to boot. Just like that, I’m back in it. The warriors redirect into the minos that just trampled my general, giving me a nice 50 vs. 4 scenario.
On the left longbeards counter charge the
BSB minos, but because of weak positioning earlier, I can’t get their flank.
The organ gun lets rip again, shredding the gors down to eight strong, so I’m feeling good there as well.
The hand to hand phase goes surprisingly well on the left- my longbeard champ challenges out the gorebull who can’t manage to kill me (8 attacks score 4 hits, score 2 wounds, with one saved and one parried, and the stomp fails to wound!). The challenge lets the hammerers swing one last time before getting wiped out and they manage to drop another bull. With the amazing performance from the greatbeard, and only 4 hammers available to kill, the
BSBs unit loses the combat , frenzy, and all their extra attacks.
On the right, though I inflict two wounds, enough to drop one before they hack huge chunks out of my
BSBs unit I hold, but things look a little sketchy.
Turn 4
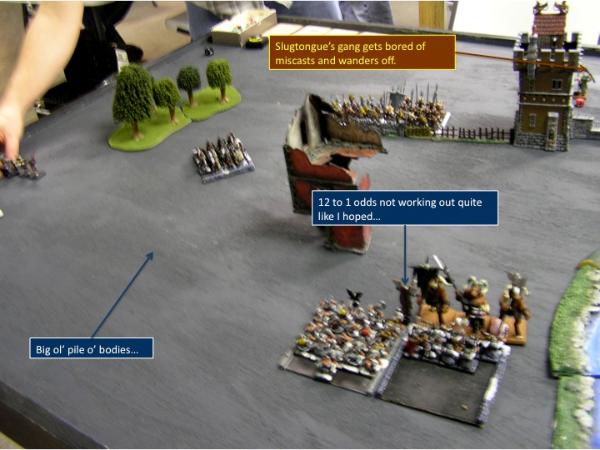
The gors on the left fail another charge, which is about all the movement for the phase. Magic is a mixed blessing- a purple sun comes just short of the gyro (the third 6” sun) the shaman irresisitibles Doom and Darkness on my healthy warrior block, but the miscast panics his unit out of the tower.
In hand to hand, the minotaur on the right lose one but have so many attacks they still shred my good warriors down to 12 plus the
BSB. A very shaky break test is passed for both (steadfast 6 re-rollable on the big unit, re-rollable 6 on the attacked unit).
The longbeard champion heroically survives another storm of attacks, finally succumbing to a stomp, while the rest of the longbeards generate enough wounds to win the combat, break the unit and wipe them out, saving what remains of the left flank and possibly the game.
The longbeards turn to eyeball the ungor horde, feeling great with two characters and a very healthy 18 models. The gyro rockets around and draws a bead on the fleeing shamans and their surviving herd members, but can’t quite drop them below 25% to put them on double 1s for rallying. I also take the opportunity to hit the gors with a third organ gun blast, and bring them to just three models.
Unfortunately in combat, I can’t generate the wounds on the right, and the
BSB’s unit is no longer steadfast, while the partner warriors can’t help much with too few in contact to generate any kind of attacking power.
 Fought back to close to even, but I’m about to lose the units on the right.
Turn 5
Fought back to close to even, but I’m about to lose the units on the right.
Turn 5
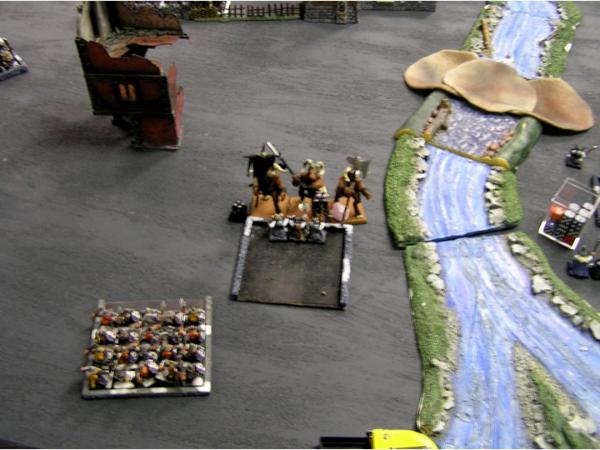
The ungor horde charges my longbeards, and the 3 gors charge my rangers hoping to get lucky. In a stroke of great luck, the shaman herd rolls a 9 to rally and runs even closer to the board edge, but is sitting right in front of the gyro…
In combat, the ungor don’t get primal fury, but kill 3 to only 4 losses in return, putting me on a no re-roll 7. Failure would loses me about 550 points. Definitely didn’t expect to be worrying about the ungor… but I pass.
On the right, my
BSB makes way to the front to try to help drop two wounds from a minotaur and reduce the incoming attacks, but I only get one. The
BSB dies, and the large supporting block flees, while the last three warriors from his unit stay to fight to the last.
 Fighting minos is a fools game, I tells ya!
The gyro gets my spirits up by chasing away the shaman herd, but the minos hack up the last of the warriors and get ready to go after the second rallied warriors. The longbeards lose again but pass on an 8. While the rangers wipe out the last of the gor.
Turn 6
The longbeards take one more crack at losing to the ungor, but I pass on another 8 check. I reduce the minotaur to just the Bloodkine, but at this point he has about a hundred attacks from bloodgreed and breaks the unit.
 Let’s never do this again…
They flee off the board, but he can’t pursue fast enough, which means…
…I blow him away with the organ gun. In the bottom of 6, my rangers fail a long charge to try to bail out the longbeards, but they go crazy and break the ungor and catch them, which means the beasts are tabled. Of course, my dead pile isn’t exactly tiny either:
 That’s not my deadpile. I’m just running tons of skirmishing dwarves.
That was that- possibly the bloodiest game I’ve ever played, and just a couple models away from total mutual annihilation. I’ll give full post-game thoughts tomorrow, but I really didn’t deserve to win this after I took a rough start and made it worse with some really poor moves in Turn 2. But the dice came up happy at some very key junctures, and I got the cheeky victory.
As always- thanks for reading.
RZ


 65/4/6,
  10/2/1,
  10/3/0,
  2/0/1,
  0/1/1
0/1/1
 1/0/0
1/0/0


 .
.
 . Bloodgreed on both sides, right?


