Mission: Annhilation
Setup: Standard deployment
The Eldar rolled highest and decided to setup/go first.
SWs tried to steal the initiative but failed.
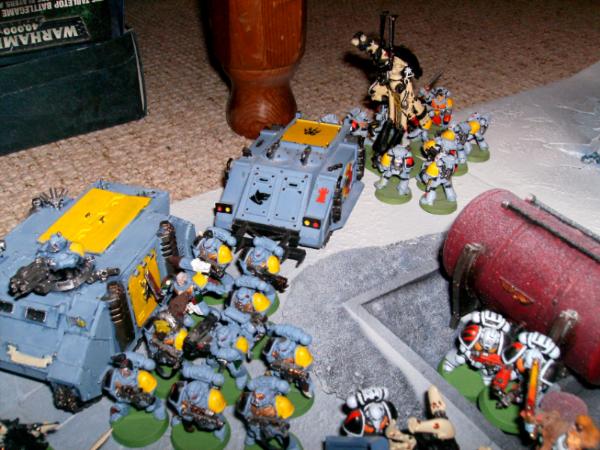
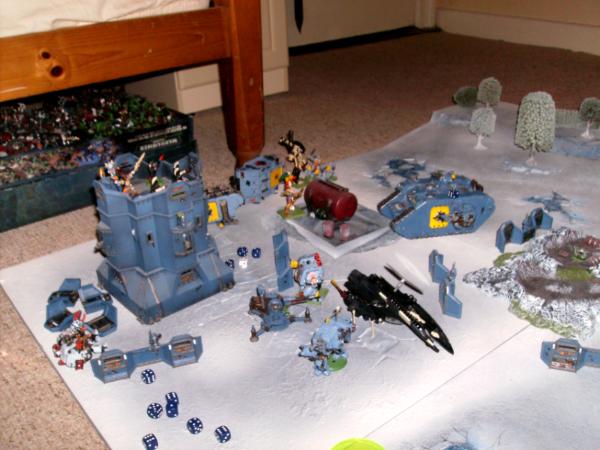
Deployment.
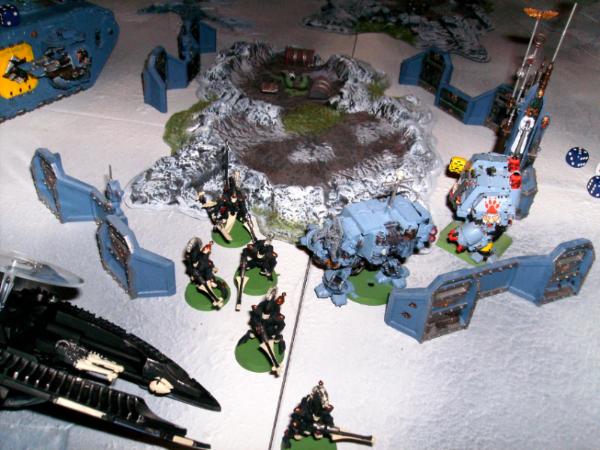
The Reapers setup in the bunker with a good field of fire, supported by the Guardians,
WG and Seer council around its base. The Avatar and
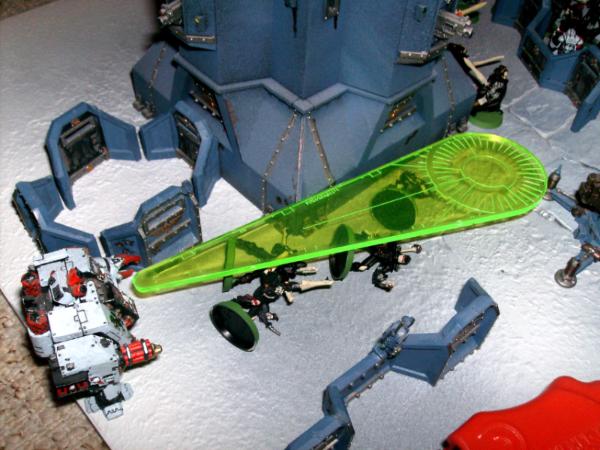
DAs set up slightly to the right ready to use the 2nd bunker as cover. The Falcon setup intending to get some early side armor shots if the Marines deployed where they thought they would and could redeploy quickly if things changed.
The
SWs deployed all three tanks on the Eldars left flank and got ready to charge.
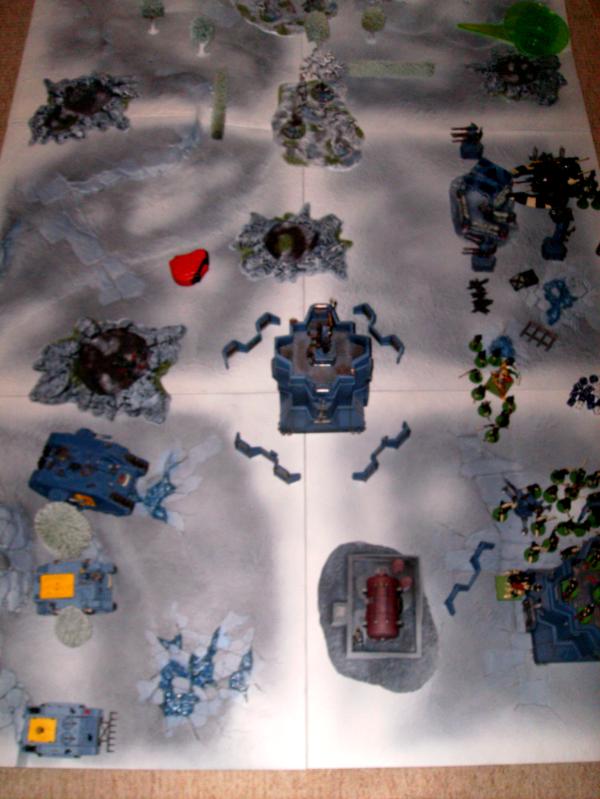
Eldar deployment tactics:
I wanted to use the bunkers as fortified anchor points with a lane of death between the two. The idea was to form a strong fire base and use the Avatar,
WL and Falcon/dragons as the tank hunting element pushing them out to engage the enemy. Once the transports were popped the Reapers/
DAs (using the bunkers as firepoints) and Guardians could hopefully go to town. My troops were tightly packed and I did fear two Dreads podding in and unleasing hell but figured they would be badly beaten in the ensuing rounds and couldnt see how the Wolves were going to earn more then 2 points from this suicidal tactic (with a potential of 4 to be earned in retaliation).
 SW
SW deployment tactics:
The idea was a straight charge into the middle of the Eldar. I figured 1vs1 there was nothing that could take the
LR squad and backed up with 20 more marines and some Dreads, it seemed like a good idea. Getting a charge off into the right unit would be key as would a good consolidation move as the Eldar were tightly packed. I had considered cutting diagnolly across from mid table to use the bunker for cover but manouvering through the terrain meant a third turn
charge, the less time the Eldar spent shooting the tanks.....the better.
Eldar turn 1:
The Falcon moved 6 inches into a position to get shots on the
LR. The
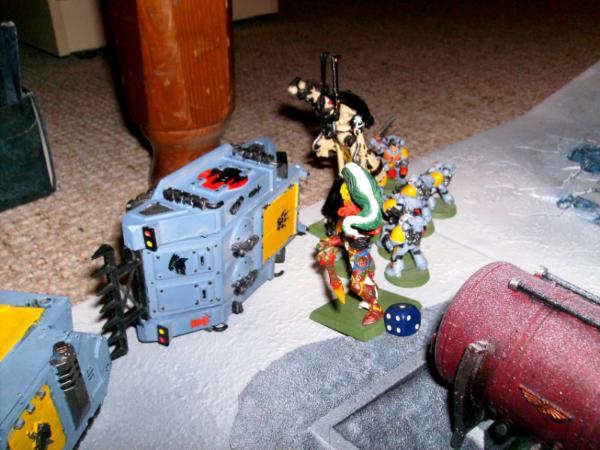
DAs moved up to the door of the second bunker ready to enter it next turn with the Avatar in support (doors were declared open all game). The
WL moved up to close the entry lane for the first Rhino and the
WG moved behind cover. The Farseer cast guide on the weapons platform rolling a 6,6,2 (thank God for RoW). 3 brightlances, the Falcon cannon and
WL missile launcher opened up and even with guide scored a measly glancing hit which stunned the
LR.
Eldar t1 tactics:
A really poor round of shooting to be honest, 4(5) heavy weapons opening up on 2 Rhinos needed to do more. However with no way of the
SWs getting a charge this turn, on the next I would have a very well dug in and mutually supported force.
SW turn 1:
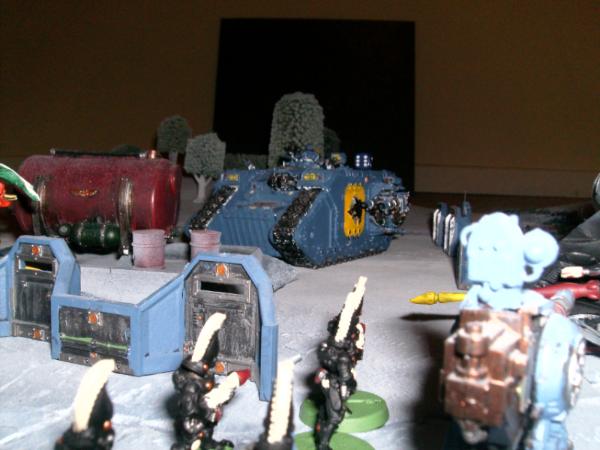
2 Dreadnoughts podded in, one landing perfectly and the second scattering slightly to the rear of the Falcon both hoping to pop it early.
The
LR could still moved due to extra armor reducing the stunned result and easily passed a difficult terrain test. Both Rhinos also moved up to the half way point and all 3 tanks popped their smoke launchers for cover. The Dreadnoughts fired on the Falcon but could only manage a crew shaken result.
 SW
SW t1 tactics:
I had strongly considered podding both Dreads right into the heart of the Eldar and opening up with 2x
HFs and
MMs. I didnt think I could fully wipe anything out but might severly weaken the Eldar foot troopers and could tie down other units for a turn or two. However, eventually I decided to try and pop the Falcon, figuring the loss of one Dread for the gain of a Falcon/6 Dragons was worth it. Unlucky rolling proved otherwise though. Have to love inertial stabilisers though.
Eldar turn 2:
The
DAs moved onto the top of the 2nd bunker ready to fire next turn. The
WG moved from behind their aegis line to get range on the
LR and try and pop it. The Falcon resigned itself to being shot at again by the Dreads but decided to try and take out a Rhino in the meantime. The Seer council moved to block the first bunker door (to protect the Reapers) and the guardians retreated to try and get out of the
LR charge range. The Farseer cast guide on the weapons platform and a warlock cast enhance on his
WG unit. After a torrent of anti tank fire the Eldar had shaken the
LR and plan B had to be implemented. The Avatar charged the
LR and the
WL charged the first Rhino. as expected no further damage was inflicted and things were looking bad for the Eldar.
Eldar t2 tactics:
Another shocking turn of shooting. 9 potential tank popping shots and 1 shaken result was a poor return and with the
WL/Avatar not doing much better I resigned myself to getting charged. Moving the
WG in hindsight was a mistake since I discovered they were actually within range and just gave the
SWs a juicy target, however it might save the Seer council being charged. They themselves had moved to the bunker door to block it since I feared the
SWs making a run for the bunker, slaughtering the reapers inside and then having a secure firebase of their own. I did have the option of moving the Falcon fast behind the 2nd bunker to try and get rear armor shots in future turns on the vehicles but figured the sooner they were destroyed the better.
However I was happy with the guardians being unmolested and the
WL/Avatar in good positions.
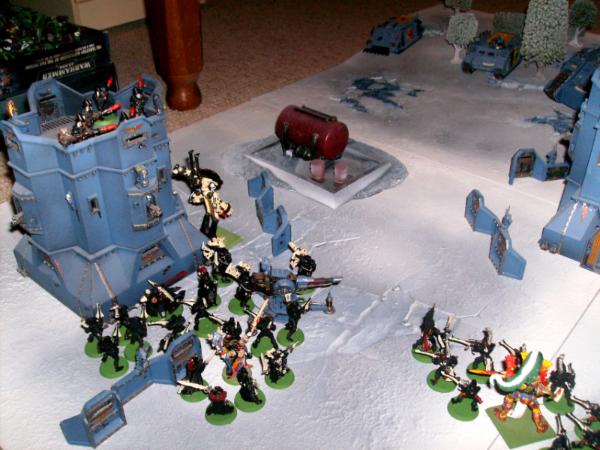
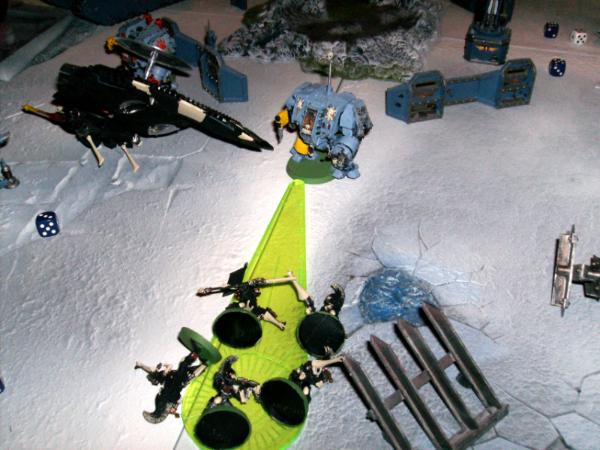
SW turn 2:
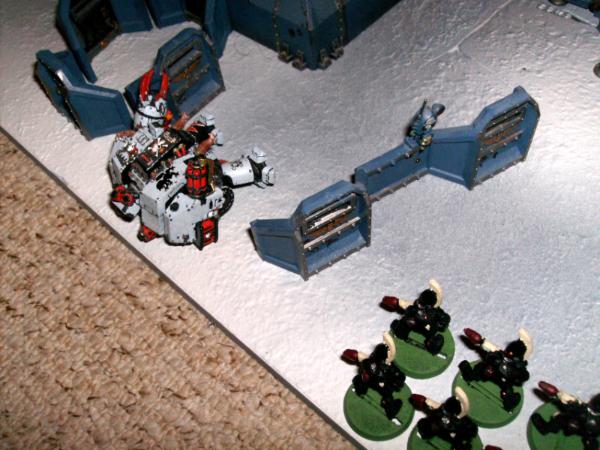
With a lucky roll the third Dread arrived landing perfectly on target behind the guardians. Unleashing its
HF it killed 6 of them forcing a break test, which they failed and then promptly fled off the board. The first
GH squad dismounted from their Rhino and decided to charge the
WL. Their Rhino then moved further towards the Eldar to provide future cover from the reapers should they win and consolidate. The second Rhino also moved up and its
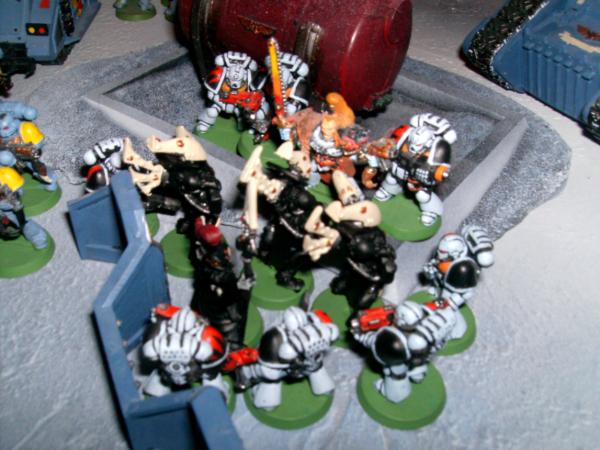
GH squad deployed pouring fire into the Seer council and killing two warlocks. The
LR failed its difficult terrain test and was immobilised (both Rhinos had passed theirs). The third
GH squad/leader dismounted, made a good difficult terrain test, got into combat with the
WG and slaughtered them wholesale. Their consolidation roll was poor however and all they could do was move behind the aegis line. The
WL killed one
GH in hand to hand.
 SW
SW t2 tactics:
Failing the difficult terrain test was a real pain. The original plan was to bypass the
WG altogether and leave the second
GH squad to shoot them up from behind, charging the seer council instead and with a hopeful victory, consolidate into the bunker. However wiping out the
WG along with the excellent Dreadnought attack on the guardians put me 2-0 up. I had also weakend the Seer council quite nicely for the coming turns and the three Dreads were all relatively secure although two of them were finding themselves a little out of position at this point. In hindsight charging the
WL was a huge mistake, I actually forgot S4 vs T8 was impossible and overall that squad looked to be now badly tarpitted.
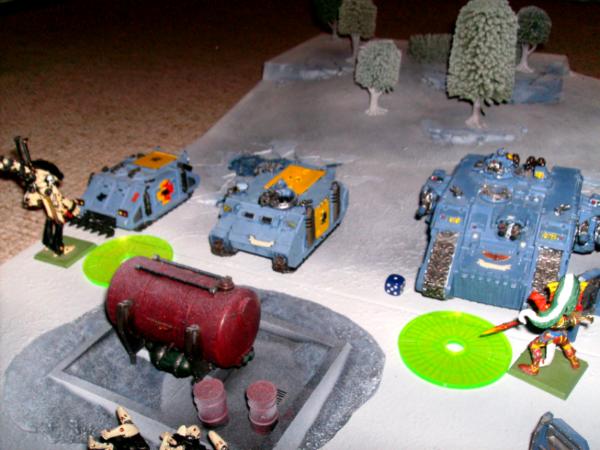
Eldar turn 3:
The Falcon dropped off the Fire Dragons and then manoevered to try and take out second Rhino that had exposed its side armor. In the shooting phase the
FDs duely reduced the third Dread to a smouldering hulk whilst the Falcon again failed to damage the Rhino. The
DAs (who used bladestorm) shot the second
GH squad along with the remaining Seer council who used destructor on them killing 6. They passed their test.The Farseer cast fortune on his squad and charged the remaining
GHs. Stalemate ensued.
The Reapers opened up on the main
GH squad killing two of them before they were charged by the Avatar. In the swirling melee the remaining
GHs were wiped out and the Avatar was reduced to one wound, as was the
SW leader. The
WL/
GH tarpit yielded another wound for the
WL. The
GHs failed their test but stood firm taking another casuality as a result of no retreat.
Eldar t3 tactics:
I was happy popping the third Dread which had the potential to cause trouble being right behind my lines. It also meant the next turn the
FDs could easily pop the drop pod for another easy point. (In hindsight this was overkill and I should have used the Falcon for this). I resigned the
WL fight to a tarpit and hoped later on could back him up using the Avatar. However I was happy wiping out the main
GH squad and should kill the Lord in the next round, striking first.
Having one wound remaining was a concern though. I could do very little to the two other Dreads currently and figured I'd try and simply avoid them (as they had relatively short ranged weaponry). If the council could hold out for one more turn the Avatar should back them up nicely. I had pulled it back to 2-3.
SW turn 3:
Most of the
SW units were enganed at this point. The two Dreads moved forward attempting to knock out the Falcon. Both Rhinos remained stationary (which was a mistake) but unloaded their storm bolters along with the
LRs firepower killing three reapers who passed their break test. With some lucky rolling the Dreads destroyed the Falcon which exploded unceremoniously. In combat the Lord couldnt hold out against the Avatar who consolidated towards the Farseers fight. The Farseer himself was reduced to 2 wounds in the combat and the
WL/
GH fight was a draw.
 SW
SW t3 tactics:
I really needed more squads at this point! I couldnt do much with the Lord or two
GH squads as they were already engaged which left me with some pot shotting from the vehicles and an attempt to down the Falcon which worked very well. I should have moved the Rhinos back and out of danger in hindsight. I had a nice idea for the remaining Dreads however next turn, I'd have to wait to see if it worked. 4-3 at this point to the Wolves.
Eldar turn 4:
The Avatar charged the second
SW Rhino hoping for an easy kill point and duely obliged. The
Fds opened up on the destroyed Dreads droppod gaining another easy point. The Farseer/
GH fight continued with the
GHs killing the last of the Warlocks, however the Farseer passed his break test. The Falcon fired on the
LR hoping to destroy it and stop its weaponry being brought to bear but again failed its rolls. The
WL/
GH fight was another standoff with poor rolling again by both sides.
Eldar t4 tactics:
The gamble to charge the Avatr at the Rhino and hope the Farseer could hold out paid off and with the
FDs killing the drop pod suddenly I was leading 5-3. The Reapers werent prioving their points though unfortunately and having used bladestorm the
DAs were impotent this turn. At this stage I was relying heavily on the Avatar but the
SWs had very little to take him out with (both Dreads had
MMs/flamers and he wads out of sight of the immobilised
LR).
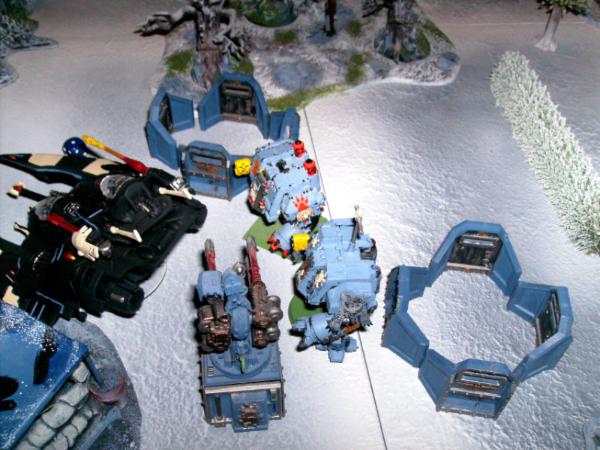
SW turn 4:
Both Dreadnoughts charged the bunker which contained the
DAs and obliterated it under a hail of
MM/powerclaw blows. Two of the
DAs were killed in the destruction and unceremoniously failed their break test and began running.
The
LR opened up on the Reapers in the second bunker killing two of them. The Farseer managed to kill another
GH but they passed their break test. The
WL/
GH fight.....well you can guess how that went.....
The
SWs had no other units to move/use so the turn ended.
 SW
SW t4 tactics:
The tactic of charging both Dreads on the bunker worked brilliantly. Breaking the
DAs was a nice bonus but having them now in the open was the main goal. I couldnt really do much else this turn as everything else was tied up or dead. However having two free Dreads romaing for the last two turns and a
LR as a firebase was looking good and if they could pick off one or two more choice units a win was insight.
Eldar turn 5:
The
FDs moved forward to try abnd take out the
LR but being outside of close range meant they failed to dnmage it. The Avatar charged the
GHs fighting the Farseer and wiped them out consolidating out of view of the
LR. The Reapers opened up on the last Rhino immobilisng it.
Eldar t5 tactics:
Finishing of the
GHs was another hard earned point but everything else was not going well. Not having the
DAs rally meant they were pretty much dead the nex turn and the Reapers were having a hrd time killing any of the remaining
SW troops.
SW turn 5:
The Dreadnought flamed the
DAs killing the remainder of them. The
LR again opened up on the reapers having nothing else to shoot at and killed another who passed their test due to the Avatars presence. The
WL killed another marine who again passed their break test.
 SW
SW t5 tactics:
Things wre tight and it could still go either way I fely. I was one point up however with a turn to go and the Eldar only had a few effective combat units left, one of which I feared - the
FDs.
Eldar turn 6:
The
DAs failed their rally test with a woeful roll off 11 and continuedn fleeing. The Avatar found himself slightly out of position and was unable to charge anything else. The
FDs deciced to try and take out a Dreadnought which would have meant 6-6 in points, however they missed badly and those that did hit failed to damage the Dread in any significant way. The Reapers tried for some side armor shots on the last Rhino but unluckily failed to damage it.
SW turn 6:
The Dreadnought fired upon the
FDs surprisingly wiping them all out. The
GH/
WL fight continued to a final stalemate. With nothing else to do the game drew to a close.
SW t6 tactics:
Overall a fun game and a 7-5 win was great. Im not sure in hindsight how I'd have changed things, it was a basic armor rush game, needing to close the distance with the Eldar quickly with the Dreads in support. In hindsight I should have bypassed the
WG and went straight for the Council and followed up into the bunker to take out the Reapers. The second
GH squad would have dealt with the
WG easily enough. Getting bogged down with the dam
WL is a lesson learned!
Eldar final toughts:
Overall I probably should have fought a more fall back style of game, not popping any of the
SW tanks early meant they were right in amongst things quite early. The twin bunker tactic was a good idea but those tanks needed to go down earlier to maximise its potential. The last two turns I could have prevented more points being lost and probably should have had a draw but towards the end found it quite hard to pop the reamining
SW armor. Not killing the Dread on the last turn was quite disappointing as it would have meant the game being a draw. In hindsight I should have consolidated the Avatar closer to the
WL/
GH fight in t5 and got a charge off against them. It could have swung the battle.
 SW
SW MVP:
Has to go the Dreadnoughts, they earned 3-4 points giving away only 2. In hindsight I probably should have given them alternative weaponry as the two that came down early found themselves out of range for a couple of turns. However they are tough cookies and able to shoot/
hth very well. Taking out the bunker was a great game moment!
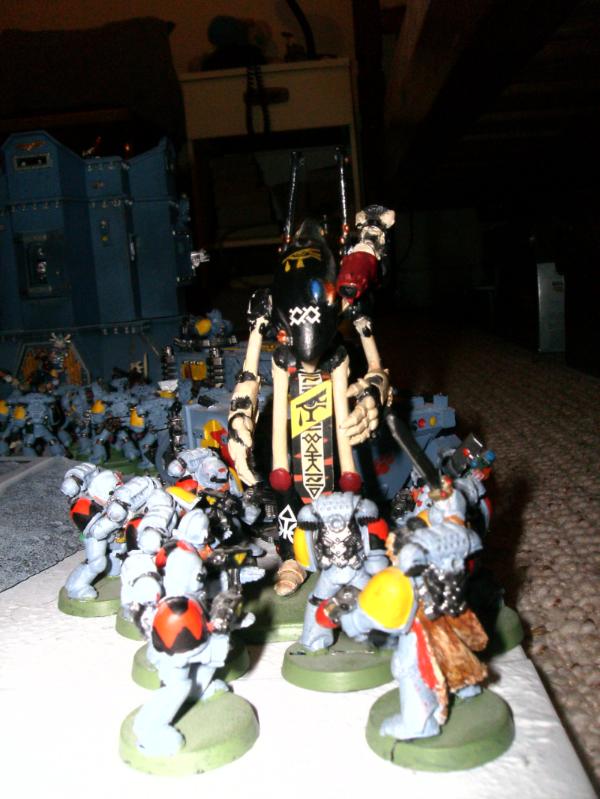
Eldar MVP:
The Avatar, he was everywhere taking out whatever he attacked (barring the
LR!). A very tough cookie and with the
SWs not having any real weaponry to take him down he had a free hand. The
FDs did well too.


 3000 Points
 500 Points
