| Author |
Message |
 |
|
|
|
|
Advert
|
Forum adverts like this one are shown to any user who is not logged in. Join us by filling out a tiny 3 field form and you will get your own, free, dakka user account which gives a good range of benefits to you:
- No adverts like this in the forums anymore.
- Times and dates in your local timezone.
- Full tracking of what you have read so you can skip to your first unread post, easily see what has changed since you last logged in, and easily see what is new at a glance.
- Email notifications for threads you want to watch closely.
- Being a part of the oldest wargaming community on the net.
If you are already a member then feel free to login now. |
|
 |
2010/12/12 11:07:47
Subject: Question regarding the painting on of highlights on tanks (WIP photos included)
|
|

Steadfast Grey Hunter
|
I'm painting up a tank for my marine army but am encountering some difficulty with highlighting it. I tried drybrushing, but perhaps I didn't do it correctly, it ended up looking bad with some streaking. So I tried painting on the highlights, similar to how I did for my power armour marines. However, after 2 hours, I'm not even done with the first layer of highlighting yet! With a 2-tone highlight and 8 tanks to paint, I think that this is going to be a quick road to much frustration.
Does anyone have any advice on how to highlight tanks? Most tutorials seem to focus on drybrushing, but I'm not that sold on drybrushing yet, given my poor first attempt.
Thanks.
|
|
This message was edited 1 time. Last update was at 2010/12/13 16:21:45
Check out my Space Wolves army P&M blog here
 350 points and growing 350 points and growing
|
|
|
 |
|
2010/12/12 11:22:27
Subject: Question regarding the painting on of highlights on tanks
|
|

[MOD]
Anti-piracy Officer
Somewhere in south-central England.
|
IMO, drybrushing works well on cloth or skin type surfaces which have complex folds and some type of surface texture (imagined, if not actually on the moder).
Tanks usually have flat, smooth surfaces with simple folds, if any.
If you want the GW hard edge look, then hard edge highlighting is the way to do it.
An alternative technique, used by AFV modellers, is to paint a layer of darker wash over the panels, then sponge it off the panels with tissue or sponge, before it dries. You use a light pressing or dabbing action rather than wiping. This leaves a reverse highlighting where the centre of the panel is the lightest part.
|
|
|
|
|
|
2010/12/12 11:31:33
Subject: Question regarding the painting on of highlights on tanks
|
|
Steadfast Grey Hunter
|
Thanks for the advice!
Yeah. Drybrushing seems to work well on IG tanks with all the rivets and such, but I find that the smooth tanks of marines don't really seem to benefit that much from drybrushing.
If hard edge highlighting is the only way, then I guess i'll have to prepare myself for the long haul... Haha. Maybe I'll try this reverse highlighting technique one day. I'll post a picture of the tank once it's done and get some feedback.
|
Check out my Space Wolves army P&M blog here
350 points and growing
|
|
|
|
|
2010/12/12 15:59:49
Subject: Re:Question regarding the painting on of highlights on tanks
|
|

Calm Celestian
|
When dry-brushing tanks, use a swirling motion to avoid the streaks. Done well, it can add texture to the model.
|
 The Little Sisters of the Apocalypse in the Triple EX! Road Show The Little Sisters of the Apocalypse in the Triple EX! Road Show
 The 10K Waagh! The 10K Waagh!
 Iron Warriors Local 631: Khorne-forsaken CSM Iron Warriors Local 631: Khorne-forsaken CSM
 The Tallarn 2nd (Hand): "Towel Heads" to you! The Tallarn 2nd (Hand): "Towel Heads" to you! |
|
|
|
|
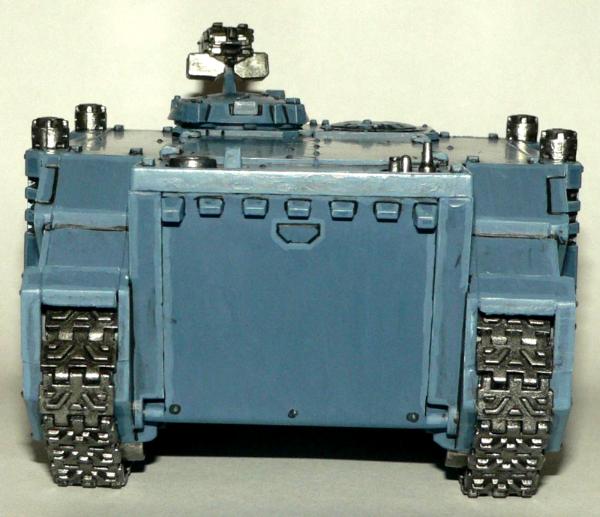
2010/12/13 16:18:21
Subject: Re:Question regarding the painting on of highlights on tanks
|
|
Steadfast Grey Hunter
|
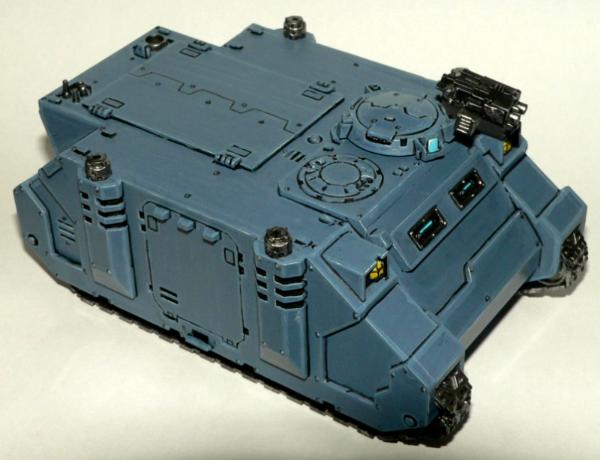
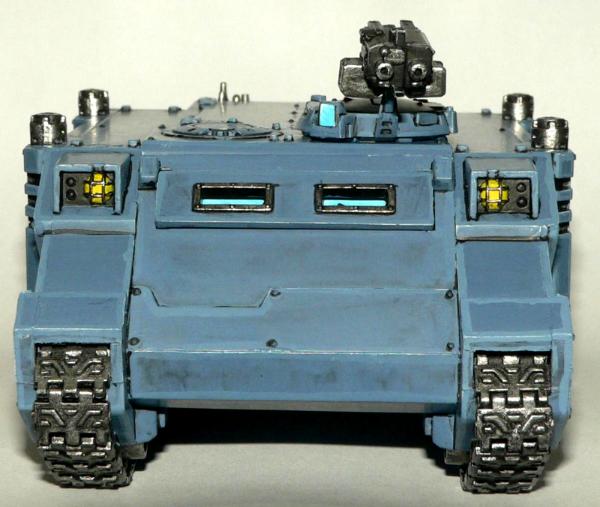
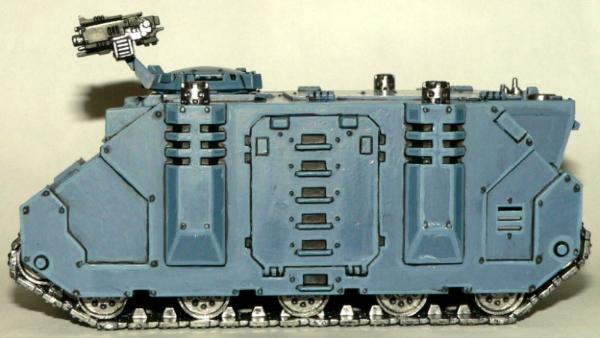
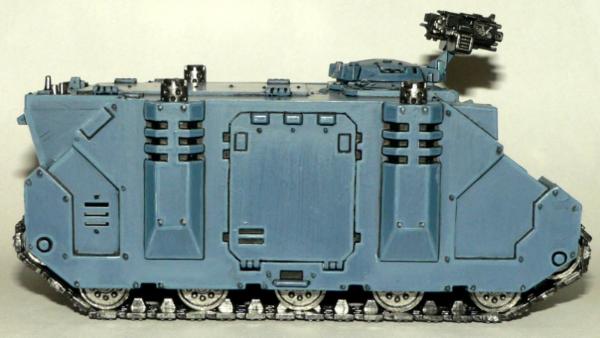
|
|
This message was edited 1 time. Last update was at 2010/12/13 16:18:44
Check out my Space Wolves army P&M blog here
350 points and growing
|
|
|
|
|
2010/12/13 17:53:49
Subject: Question regarding the painting on of highlights on tanks (WIP photos included)
|
|

Rotting Sorcerer of Nurgle
|
You can use either the side of a brush (rather than the tip) to line the highlights or use coloured pencils. Sounds daft but works & is quick & easy.
Just remember to varnish after or you'll rub off the pencil.
|
Check out my gallery here
Also I've started taking photos to use as reference for weathering which can be found here. Please send me your photos so they can be found all in one place!! |
|
|
|
|
2010/12/14 16:23:50
Subject: Question regarding the painting on of highlights on tanks (WIP photos included)
|
|
Steadfast Grey Hunter
|
I generally use the side, though it's still hard to have a nice straight line.
I happened to browse a hobby shop today and the idea struck me of using masking tape to help me paint the highlights on straightly, so I've bought a small reel to try. Hope that works.
|
Check out my Space Wolves army P&M blog here
350 points and growing
|
|
|
|
|
|
|