Oh hi there,
You should know this part by now. It’s been a long time since the last installment because blah blah blah busy yadda yadda yadda real life yak yak yak exploding goat etc, etc, etc.
I finally took enough pictures of a single game to make for an actual installment. As usual, I got caught up at the midway point, so you’ll have to make do with my indescribably eloquent prose to get you through the middle turns. In an effort to make it up to those faithful readers who even remember this column (his name is Darryl), I've made sure to post it all in one go instead of the dreaded "teaser" deployment.
Game for the day was against, Will, an opponent I’d played before,
once even for Relentless. He’s known in our local scene for using the Drakenhoff, graveguard deathstar build with his
VC, but I was surprised to find him bringing Lizards. He’s just started them, and this was his first game with them, which should be kept in mind through out the report. The lists looked like this:
Slann “Miss Cleo”, Loremaster (Light), Becalming, Free dice when casting, Ethereal, Cupped Hands, 2+ ward vs. ranged, Dubious Jamaican accent
Scar Vet,
BSB, Light Armor, Shield, Sword of Strife, Potion of Initiative, Massive debt to Psychic Readers Network
Skink Priest, Level 2, Cube of Darkness [Iceshard Blizzard, Comet],
Skink Priest, Level 2, Dispel Scroll, Cloak of Feathers [Harmonious Converg., Chain Lightning], Real estate listings
30 Saurus, Full command, Heard lore of light was going to be around
30 Saurus, Full command, Heard the same
8 Cold One Cav, Full command, flaming banner, Amazingly low chance of actually failing stupidity
10 Chameleons, Trendy army surplus camo jackets
10 Chameleons, Custom blowpipes
Baby Steg, Just happy to be here
No salamanders?! Yeah!
Regular readers should already be familiar with the Relentless list, but its been a while, so a quick recap may be in order:
Runelord, Shield, Rune of Stone, Spelleater, Spellbreaker, Master Rune of Balance, questionable work ethic
Thane,
BSB, 1+ re-rollable save, immune to killing blow, poison, 2+ ward vs. flaming, flaming hammer, pocket knife
35 Warriors, standard, musician, shields, just glad to not be facing pit/sun/dwellers
30 Warriors, full command, great weapons, remarkable likeness to miners
10 Ranger quarrelers, musician, jungle animal identification guides
10 Warriors, shields, musician, growing sense of unease
20 Hammerers, full command, 5+ ward vs. shooting bubble, horde envy
20 Hammerers, full command, runic banner envy
Grudgethrower, rune of accuracy, 2 x rune of penetrating, engineer, appalling price tag
Cannon, rune of “forging”, rune of burning, engineer, discount gunpowder
Organ gun, lots and lots of discount gunpowder
Gyro, well practiced crash landing routines
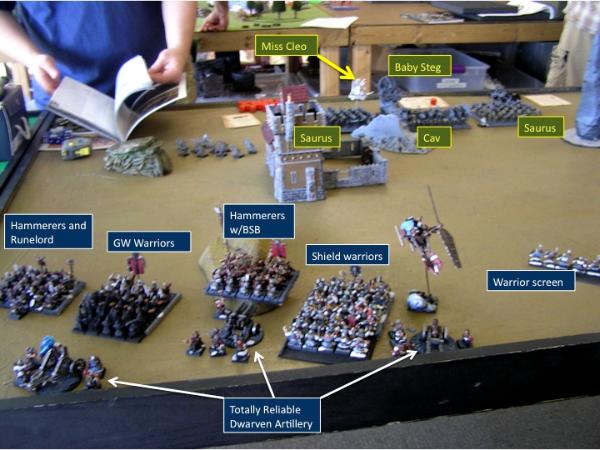
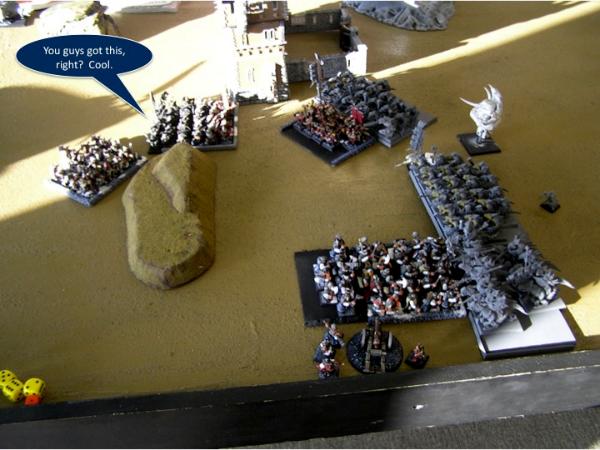
We ran a normal Battleline scenario. With a whole lot more drops, I was able to make myself feel clever by throwing my deployment off to one side to make him come around or through the building.
Usually when I play against Lizards, I don’t like what I’m looking at, and feel like I’m not sure how to pull a win off. Here I felt better. Initial thoughts were that it was going to hinge on smart management of the magic phase, and whether a bunch of comets dropped on me before we got to fight. And of course, there’s always the “chaff” battle with the chameleons.
 What do you mean it’s going to be hard to get my left flank in to the fight?
What you can’t see off to the right is my rangers deployed in a small woods, pushing chameleons pretty far out to the right (and away from war machines). The lizards easily won first turn, and we were off and running…
Turn One
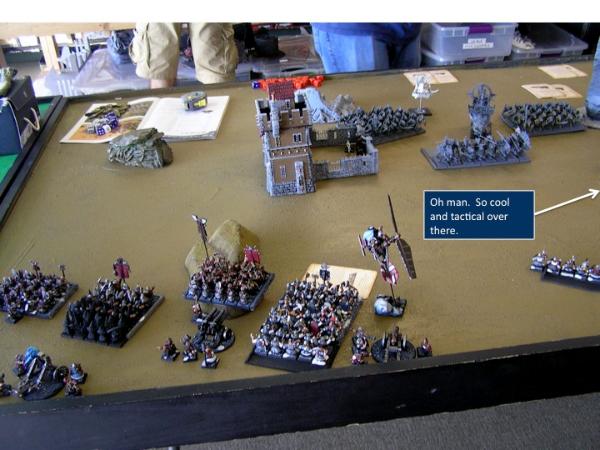
Not a lot to do for the lizards. They mostly advanced up the middle, looking to sweep around the building, and come at me along one side. The cav were going to be threatening by next turn for sure, with some possible long charges (into bad matchups) already beginning to present themselves. The chameleons split up, one going after rangers and the other trying to make it to the war machines, but having to worm around to avoid my protective screen of warriors.
I dispelled the big version of Pha’s Protection and let the Net land on my warriors, who didn’t have dramatic movement plans in mind anyway. Two rangers and four screening warriors were poisoned by skinks, and then it was my turn.
 Gray legions approach…
I pushed forward my units on the left, and did a little angling with the hammerers towards the center. My screening warriors began their swift reform dance to keep the skinks on the move, and they gyro swept over for a tasty looking shot. The rangers also swift reformed, staying in the woods, and made sure they’d have to march to get out of charge arc.
The gyro only managed to bag three of the tightly packed skinks, and they passed their panic check. The cannon zeroed in on the steg and misfired. I re-rolled with the rune of forging and misfired again. I decided to let the “doesn’t shoot next turn” result stand, since the thing seemed hell bent on blowing itself up. The organ gun was just in range of the cold one cavalry, and blew up. The grudgethrower couldn’t see much, even with true line of sight, thanks to the hammerers standing on top of the small hill, so fired at the cav, missed by 10” and came within about ½” of pasting the rangers.
Solid.
 Artillery engages in unprecedented levels of buffoonery…
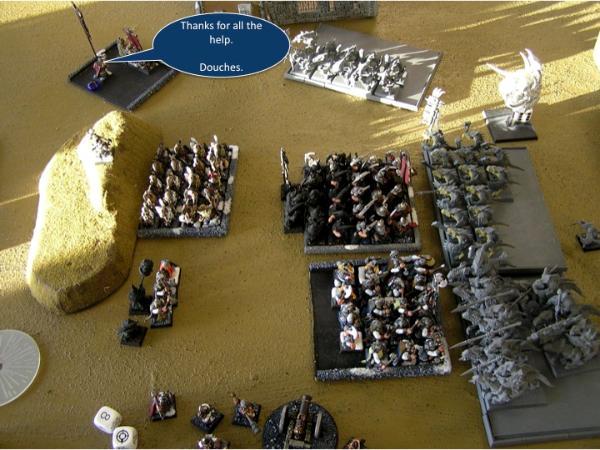
Turn Two
Artillery engages in unprecedented levels of buffoonery…
Turn Two
So. It’s going to be like that…
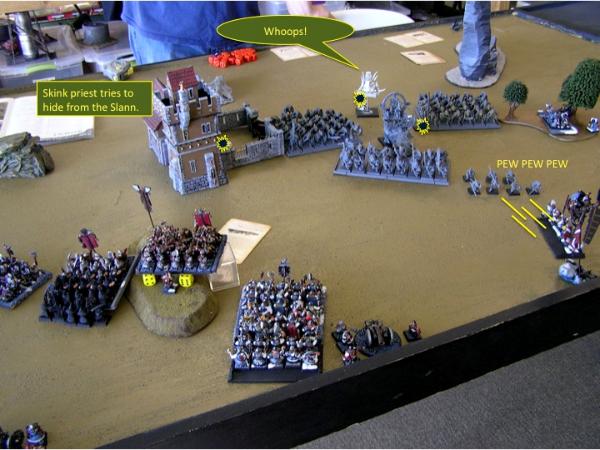
The lizards advance again, with the cav holding back slightly, now that the organ gun is no longer a concern. The chameleons off on the far right, fail to march, and so are going to be vulnerable to a potential charge from the rangers. There is also a bit of a mistake made, with a skink priest stepping in to the building on his own.
The only magic that gets through is an irresistible Net on the hammerers. Miss Cleo fails her cupped hands check, gets sued for bad business practices and lays a wound on herself and both priests. The chameleon units cause no significant damage.
 Well at least we’re both inept.
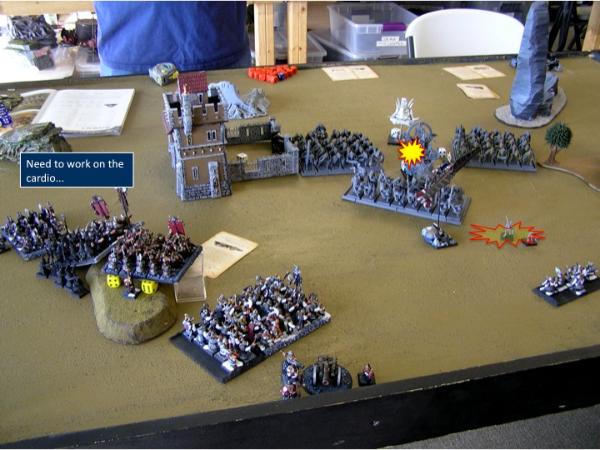
I charge a unit of hammerers (12” charge req’d) and the great weapon warriors (10” charge req’d) at the skink priest in the building, who is stuck holding (gwahahah). This is going to be good- bag me 150 points and put a unit in the building to drop in behind the lizard battle line. Both fail, however.
On the right, the rangers charge the far chameleons and make it with minimal casualties from stand and shoot. I set the gyro up to blast the other chameleons and prevent the cold ones from charging my cannon.
I drop a rock on the steg for a crewman killed and 2 wounds on the dino. Five more chameleons are smoked by the gyro, and in the combat phase, I dice up the chameleons on the right, running them down with 5 rangers.
All things considered? Fairly happy with the situation. We’re tied on points now that I bagged the chameleons, though I am about to lose the gyro and probably my screening warriors. But it should buy me a little more time to improve the matchups.
 You’re gon-na make it after all!
Turn 3
You’re gon-na make it after all!
Turn 3
The Saurus Cav head in to the gyro, and the skink counts his lucky stars and bails back out of the building. One saurus block works in towads the dwaf line, but the other is stranded out further, and can’t really get in the mix yet.
Miss Cleo is clearly distracted by her pending lawsuits, and only narrowly avoids getting removed from the game through a dimensional cascade while Timewarping the nearby saurus
The cav can’t wreck the gyro, so decide to pursue. They catch it, but leave their flank open to the full stack of shield warriors.
This is the stage where my picture taking fell short… so apologies. I’d say I’m rusty at this, but even when I was doing lots of these reports, Turns 3-5 were typically sparsely documented.
In my turn, the big block warriors headed over to do some cow-one tipping, with an easy charge. On the left, I positioned to give the saurus a bad choice of charging warriors or hammerers and getting flanked by the other. I was even set up to flee the warriors back through the second hammerers to make it a double hammerer team up on the saurus if they chose that route. All in all, I was pretty happy with it.
On the right, I moved the remaining six screening warriors up to delay the second saurus block from getting involved. The cannon got back in the game and knocked down the steg, and the grudgethrower killed a handful of saurus.
In combat, I lost a warrior to no casualties caused, but this still put the cav on a re-rollable cold-blooded 4. Unfortunately, they passed, though they weren’t able to reform to face me. Disappointing, it could have been worse.
Turn Four
The lizards don’t like their odds and elect not to charge the great weapon trap. My screening warriors on the right are charged by the saurus in the front, and skinks in the rear (thought that was a mistake).
Winds of magic blow too low to do anything, so I get off easy on this one.
Unfortunately, in combat, I can’t bag the 120 points for the skinks when I only kill one, and the warriors are run down. This puts us right back at a dead heat, points wise.
The cav lose again, pass their re-roll cold-blooded 5 to stay, but still can’t reform to face.
In my turn, I flinch, and decide to charge the saurus now that they don’t have any buffs, and try to get an advantage before they do. Unfortunately, the warriors snake-eyes their charge roll (needed anything but!) and the hammerers go in alone. They also have to maximize, preventing any one else from getting in on that combat in future turns. The scar vet
BSB gets challenged out by my
BSB accomplishing two things- keeping him from slaughtering rank and file, and pulling him out of 12” from the cold one cav. Unfortunately, they still have no trouble passing the test, and even manage to reform to face my warriors. Dang.
Turn Five and Six
Critically, I manage to continue to shut down magic to prevent any buffs, but have to send my hammerers and warriors around the long way to get into combat, and it may be too late. After grinding back and forth, I can’t get a supporting charge in to try to save the hammerers, because his other Saurus get into my warriors first, and are blocking the wheel to close.
 All in the balance, and I’m out of position!
My final turn arrives with my
BSB on a single wound and three hammerers left fighting a depleted saurus unit. My great weapon warriors charge in to the still continuing combat with my warriors, the other saurus, and the cav.
I manage to bag the skink priest who hadn’t bailed out early enough (though this helped him, as it was the priest who kept me from being able to close the door on the saurus), but the saurus and cav had a monster round, though I was able to pass both break tests. This put me about 150 points up before the final combat.
The scar vet hit four times, wounded twice, and I only saved one wound on my
BSB, losing him at the last. This gave up 265 points with the
BSB bonus, so unless something crazy happened, I was losing the game. For rank and file, twelve attacks rolled at the last three hammerers- 9 hit, and 5 wounded. A valiant 2 saves were made, but it was curtains for the hammerers, and now I was put very close to a massacre.
 I taste the bitterness of a final turn loss…
In the final totaling it is about 495-965 making it a…
Dwarf Loss
And as you can see, just a few points away from being a massacre. Still, it was incredibly close- at a dead heat in points coming in to the bottom of the 6th turn.
I still felt pretty good, but think I made a few critical mistakes:
1- Deploying behind the building was okay, but I choked up my line of advance a little too much. After dropping the stegadon, I was at a 4-3 advantage in combat units, and even better than that, considering that the cav were stuck, and the other saurus block was too far away to help.
2- I probably shouldn’t have charged in to the saurus on my turn. The trap was still set, and I could have sat and waited him out. Instead I pushed forward and would have had a draw or win with one less round of combat.
There were a few places where luck had a role- certainly the war machines didn’t help early on, the cav insisted on holding, and the failed charges on the building let the skink priest escape after a significant mistake, but I think I got a bit of that bad luck back in the magic phases, so all’s fair there. It’s also, important to note that I could have been in a position to win anyway with a little more savvy management. So a big loss, but not one I feel too terrible about.
Some quick grades, and I’ll call it a night:
Unit of the match: Gyrocopter. Crippled the skinks that could threaten my war machines and then set up what easily could have been game winning matchups.
Chump of the match: Organ Gun. First turn detonation.
Villain of the match: Scar vet. I didn’t dwell on it much, but this guy was swinging 7 times a turn, hitting and regularly getting 4 or 5 wounds on my
BSB, while needing 4s and 4s to make it happen. Just too high a volume of attacks. Dropping my
BSB and keeping the cav in the game until I could pull him away with the challenge were big.
Well, thanks for reading. I'll do my best to get another installment in quicker. We have some games coming up on Tuesday, and I'll see if I can't get a Relentless Lite out of those. I am starting to bump up on painting backlog before the Lonewolf
GT, so we'll see how that plays out...


 I was looking at the wrong piece of gear, haha. Disregard.


 Vermin Swarm : :
  Dwarven Holds, Infernal Dwarves, Empire of Sonnstahl, Warriors of the Dark Gods, Sylvan Elves