Jackal wrote:Has to be one of the best conversions ive seen on the AoBR warboss.
Any chance of a small tut on the parts?
Granted it costs more, but i see nothing wrong with buying 5 dreads and 5 warbosses (AoBR) and making a unit for him too.
Lol. I had every intention of doing a tutorial but my excitement made me impatient and I only took one picture in the beginning right after I sliced up some dreadnought parts. Most of the top half was done Tuesday night from 8pm to 2am on a work night. (Don't tell my boss!) Then I stumbled a bit with the hydraulics in the back and the tubing.
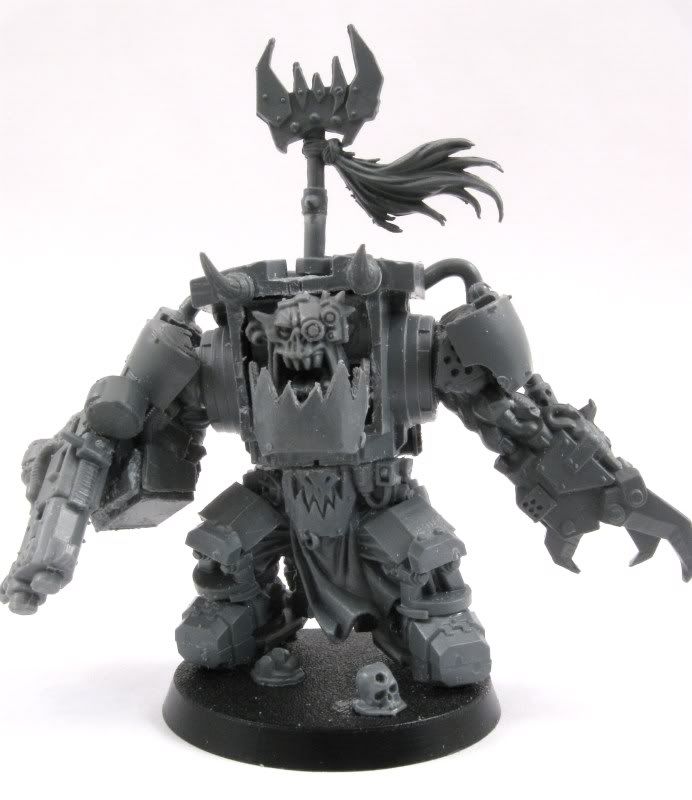
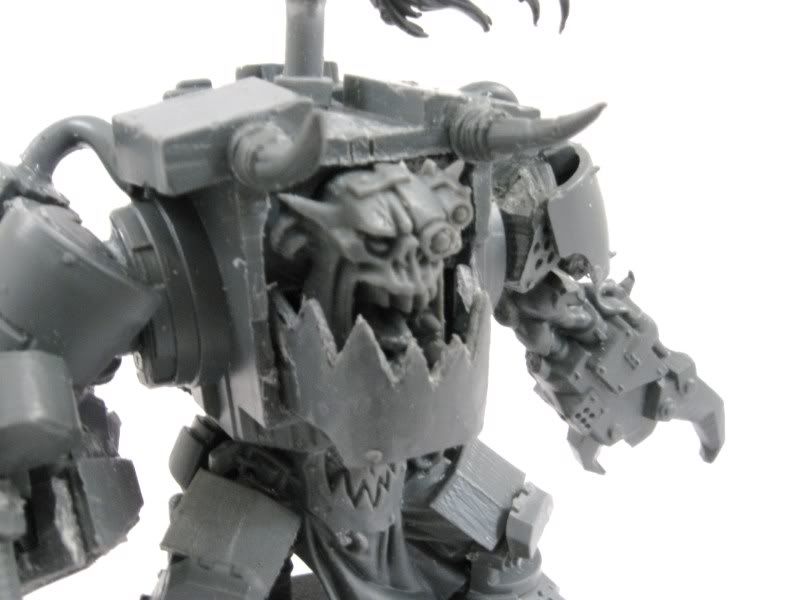
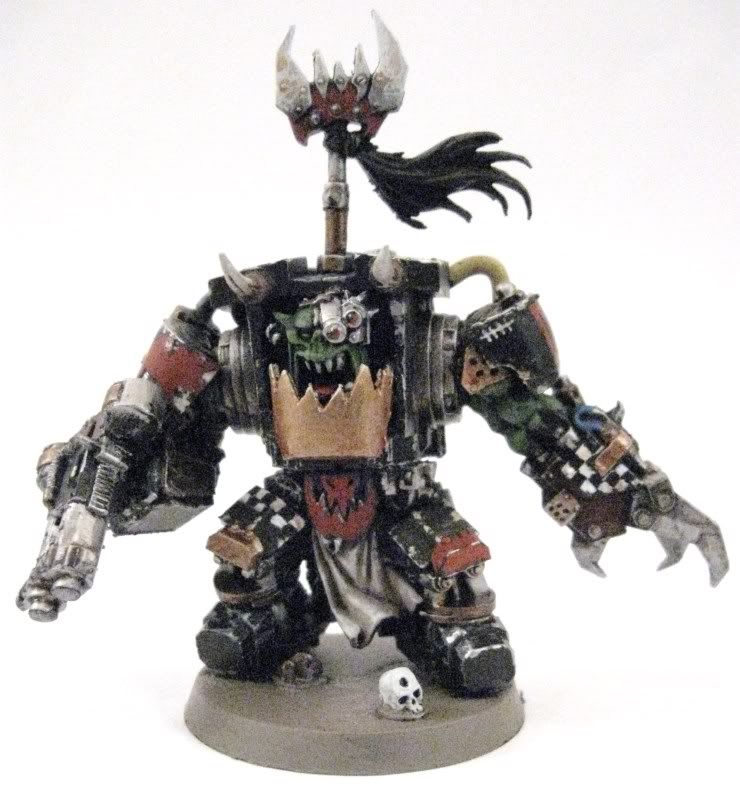
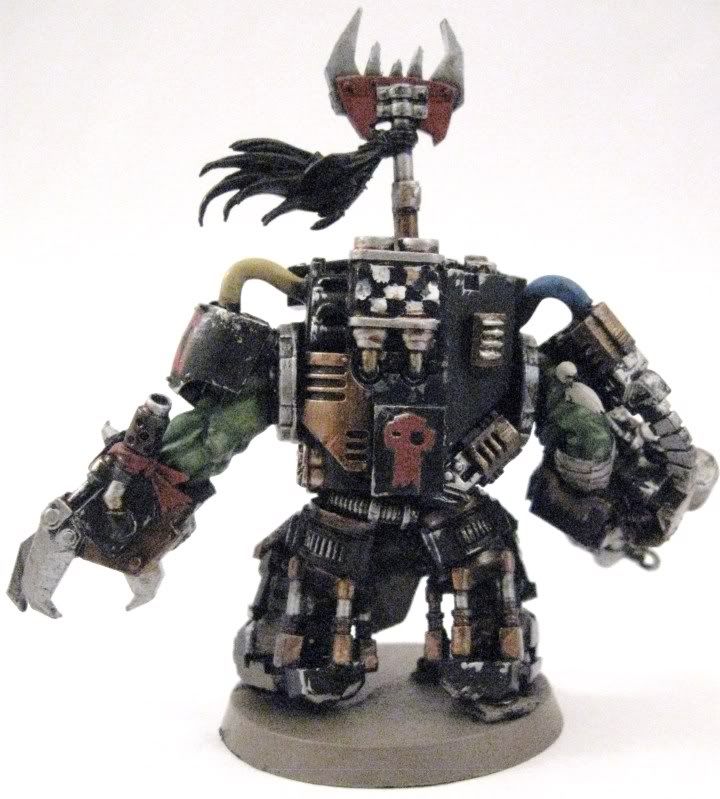
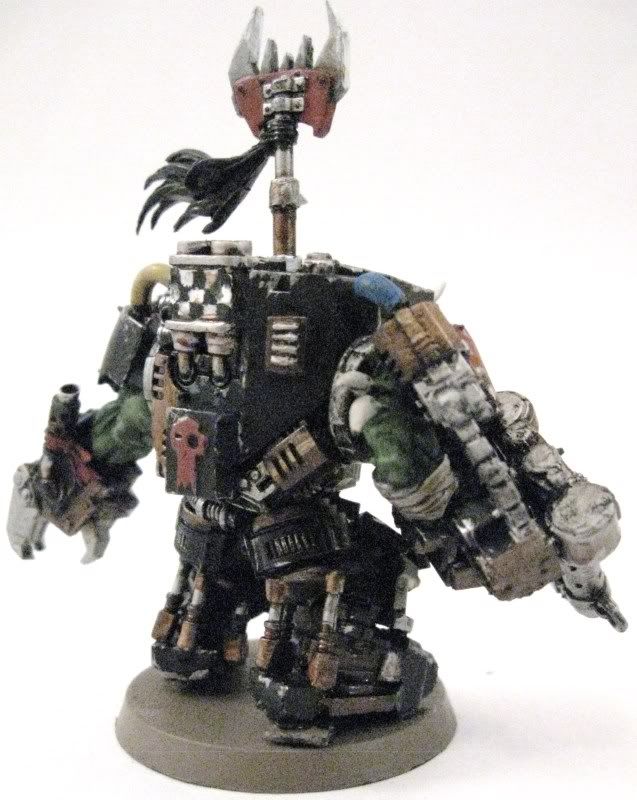
Here is an overview of the parts from top to bottom left to right.
-The boss pole is the boss poll but it had to be raised using the bottom part of a nob axe shaft.
-The gun is the Boss shoota minus the back end, and I added to cut down nob pistols to bulk it up and add ammo.
-The "Machine-gun Arm" is the dreadnought close combat arm with the hand cut off and the storm bolter shaved down. The hand end making up the shoulder plate
-The hand is the shoulder chopped away to a suitable size and enclosed with the dread's top rear middle plate and flat bits of the deffkopta landing... skies (?)
-The hose is from the dread's close combat hand, cut to fit into place.
-The Boss's arm, minus the gun and hand, was glued to the underside of the arm and set to the torso.
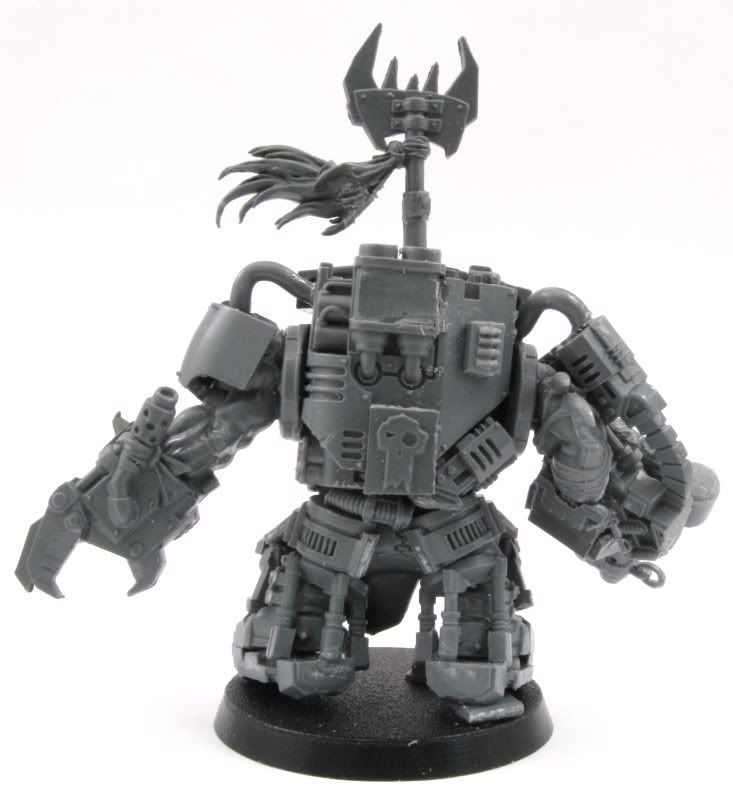
--The torso was cut from the rear half of the dread
First use a saw to remove it from the circular hip section
Second saw off the engine along the rear of the top armor plates
Then cut top to bottom along the middle plate on top along both side. (sorry if it seems confusing but this part was really key in making it come together.) I will try to get the picture up.
Glue the two halves together and you got your torso. You will need to clean out the remains of the engine block and also the two little nubs under the torso along with the big chunk between the nubs. Otherwise it will look anorexic.
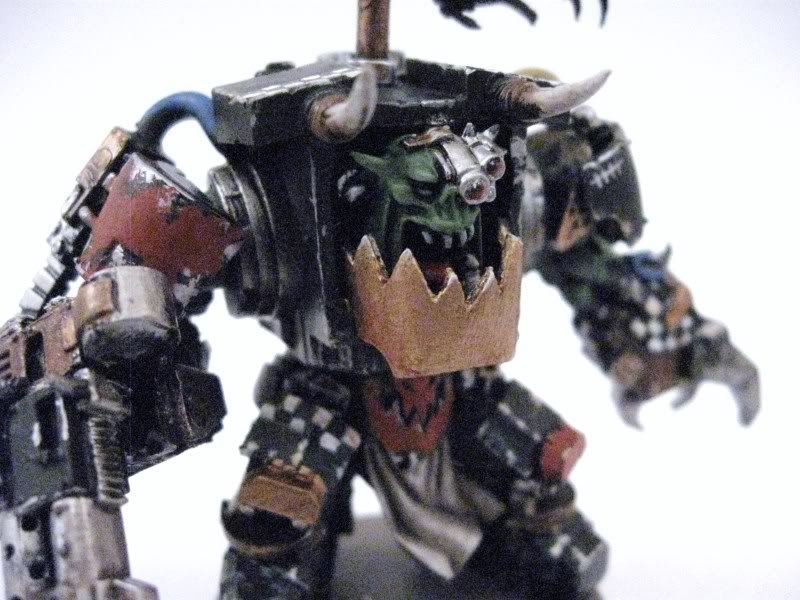
-the horns were taken from a nob helmet
-The head is the boss head mounted on the trimmed down sarcophagus plate glued inside the torso since there is nothing inside there to glue the head to
-I was pretty happy with the iron gob which was made from the scrolled dreadnought leg plate, flipped upside down.
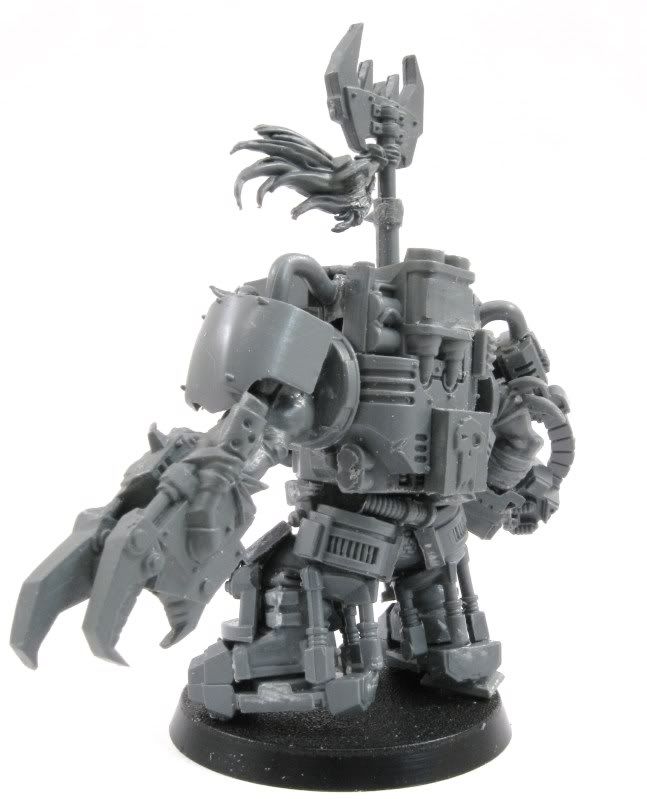
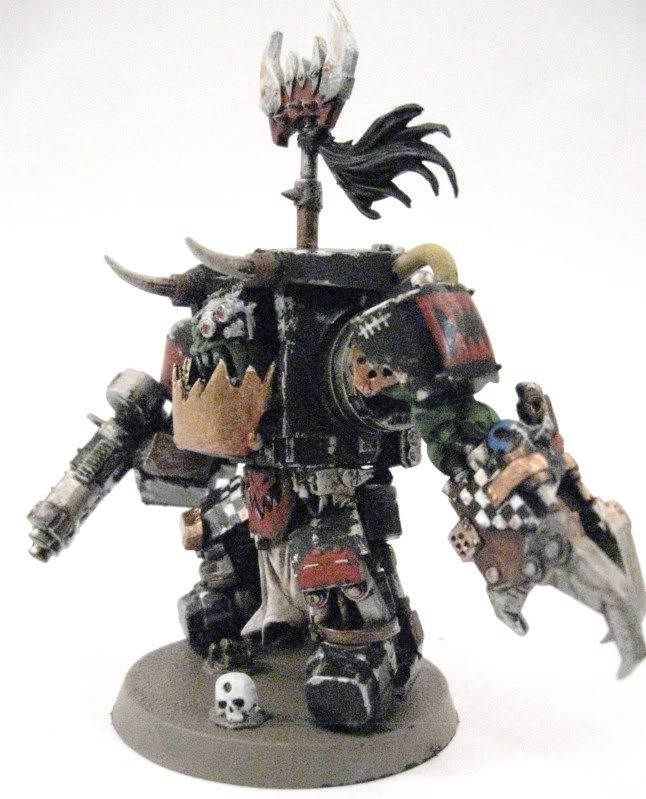
-You will see another close combat hand tubing connecting the klaw arm. This was left over from deff dread conversions.
-The Klaw arm is just the klaw arm but you have to keep the shoulder to extend it out. Notice the familiar hole punched armor under there?
-The arm was then bulked up with the other leg plate. You have to do a lot of shaving to get some of this stuff to fit the way you want.
-The legs are the boss legs just with a bunch of bits glued to it. It was cut across the top just above the icons head...maybe a little through it.
-The thighs were plated with more of the kopta ski bits, the fronts I think.
-The knee caps are the very front part of the dread's toes
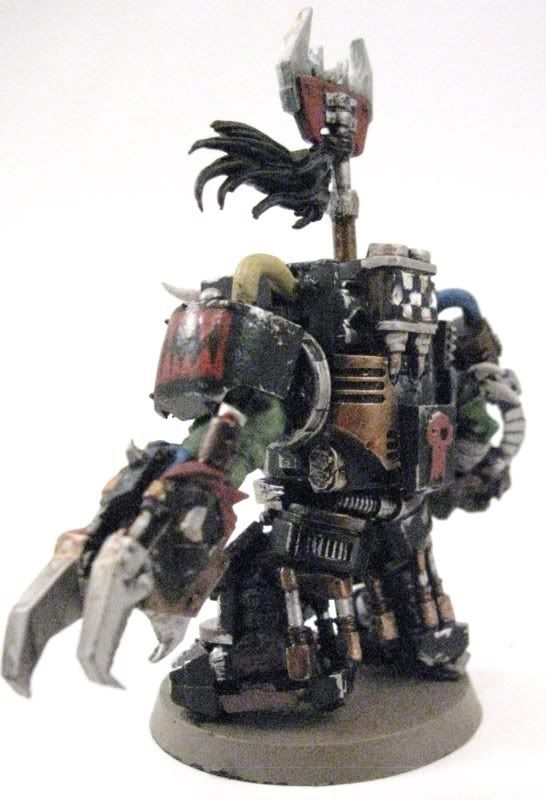
-The hydraulics are from rear hip section
-The feet were done with the dread feet. I cut the left and right sides of each, flipped the foot upside down, and glued one of the toes mirroring one end. The heel end is the end that is missing the furthest section (toe nail?) in order to get the proportion right.
-On the back I put in the multi melta arm, shaving off bits to make it fit and removed the purity seal.
-The rounded end of the melta ammo was shaved down and drilled to look like exhaust.
-the bottom of Shoot magazine was glued to that plain flat area on the right.
-The icon section of a nob axe was cut into a block and glued to the lower middle of the multi melta
-An extra storm bolter from that other project was glued to fill in the gap in the armor.
-The multimelta hose was also used to fill the gap between the backpack and butt plate
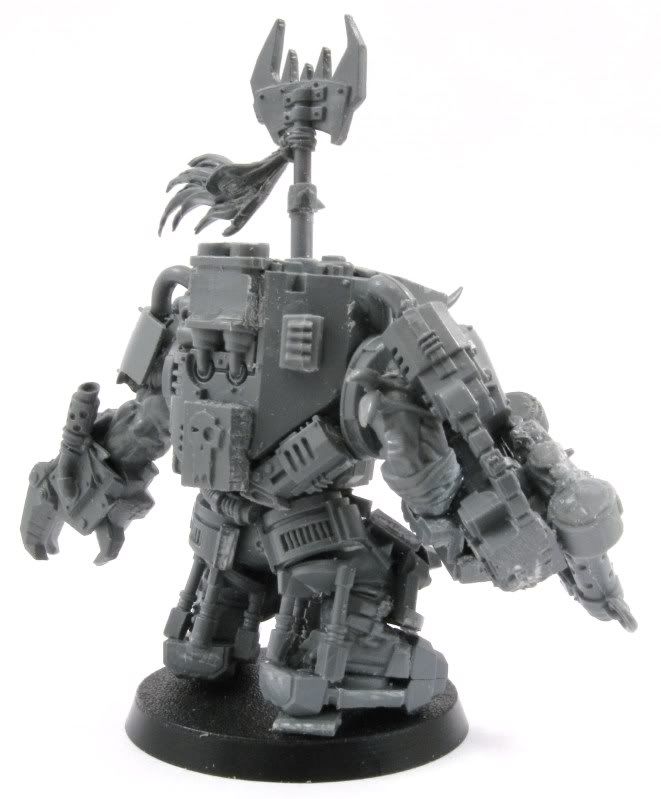
-The butt plates were taken from the rear hip section like the shin hydraulics. *Notice that the missing third section of the butt plates were kept on the hydraulics on the shins to help fill the gap between the foot armor and the boss foot. Did I mention I cut the toes off the warboss feet? Well, I did.
-The hard part was getting the hydraulics from the dreadnaught legs to fit properly around the calf area. By some miracle, it eventually found a place, so I glued it.
-Note that contrary to how I listed the steps, the leg bits are easier to glue on if you do it from the bottom of the leg and work your way up. And then glue the knee plates last.
I think that just about does it. I wonder if I will stumble across a clone of this model in the near future. Thanks for looking. Oh, it's 4:30... Tournament starts in less than 7 hours. yayyyyyyyy...