| Author |
Message |
 |
|
|
|
|
Advert
|
Forum adverts like this one are shown to any user who is not logged in. Join us by filling out a tiny 3 field form and you will get your own, free, dakka user account which gives a good range of benefits to you:
- No adverts like this in the forums anymore.
- Times and dates in your local timezone.
- Full tracking of what you have read so you can skip to your first unread post, easily see what has changed since you last logged in, and easily see what is new at a glance.
- Email notifications for threads you want to watch closely.
- Being a part of the oldest wargaming community on the net.
If you are already a member then feel free to login now. |
|
 |
2011/04/09 23:57:31
Subject: Lukez Ork Log
|
|

Regular Dakkanaut
|
Hello all! This is my first real painting project, I've attempted to paint a few minis before but these guys will be the first I've ever completed!
I first want to say that the primary reason I'm starting this log is to get advice, so feel free to tell me what I'm doing wrong as long as you you cna suggest how to improve  .
I also wanted to open with some personal criticisms and questions for you guys:
-I need to spend more time on each layer of paint, one coat is not enough!
-I have a lot of trouble colouring the eyes, even with a small brush,need advice on this please!
-I am not good at taking pictures and my camera sucks 
-I find a lot of the 'official' paint schemes for Orks make their skin too yellow(they use goblin green) I like snot green as an alternative and have been experimenting with making it just a touch lighter, so I was wondering how do people consistently get equal part mix's every time? Is it just experience? Also I find using a brush to pull paint out of a pot for mixing very time consuming(and a little wasteful), is there a better way?
-I also can't decide between using badab black or devlan mud to wash metal and cloths
Anyway On to the pictures:
First batch:
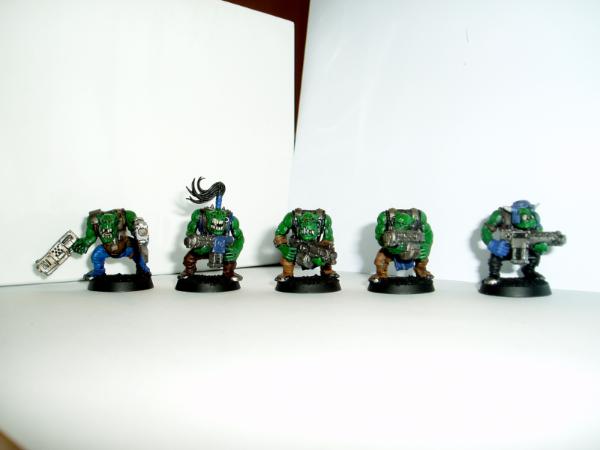
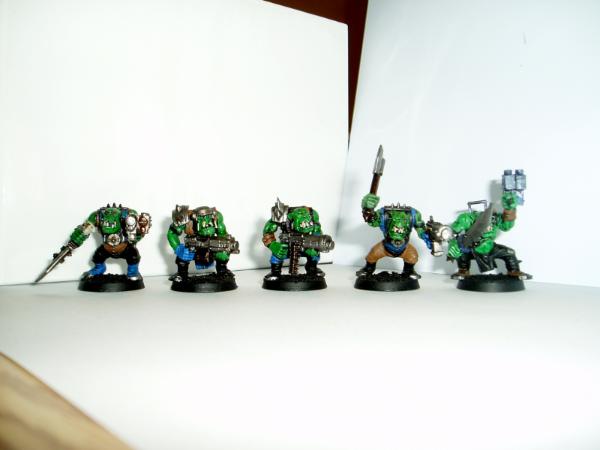
That's all for now, I'll be able to starting painting again once my exams are over, so will hopefully have some new stuff to post early next week. I may post some army shots in the mean time as most stuff is at least partially assembled!
Thanks for reading,
Lukez
|
DC:80+s---GM--B--I--Pw40k09-D+A++/eWD-R+T(M)DM+
|
|
|
 |
|
2011/04/10 01:23:31
Subject: Lukez Ork Log
|
|
Mekboy Hammerin' Somethin'
|
When you're mixing your own colour, and you want it the same every time, you're best to make a big batch.
First, figure out the ratio of paint using small amounts, such as 2 parts x to one part y. Then using a measuring spoon or some such (or eyeballing it if you're willing to settle for close-enough), measure out your parts and mark them on a clean paint pot. So, in the 2:1 example, put 1 tablespoon of water into the pot, mark that line, then put 2 more tablespoons of water in and mark that line. Dump the water, fill the pot to the first line, then the second with the corresponding colours, mix the heck out of it, and you're set.
When mixing the paint this way, it helps to put a bit of cut off metal sprue or something in there to get things moving. Just don't use anything that may change the colours.
|
|
|
|
|
|
2011/04/10 18:14:35
Subject: Re:Lukez Ork Log
|
|
Regular Dakkanaut
|
Ahh, thanks very much!! That sounds like a pretty solid technique, how do measure the parts during the initial test mix?
|
DC:80+s---GM--B--I--Pw40k09-D+A++/eWD-R+T(M)DM+
|
|
|
|
|
2011/04/11 05:56:01
Subject: Lukez Ork Log
|
|
Mekboy Hammerin' Somethin'
|
Well, if you wanted to be perfect you could use a dropper, but it's fairly easy to lay down even blobs of paint off a brush, then mix them together.
|
|
|
|
|
|
2011/04/11 06:07:16
Subject: Lukez Ork Log
|
|

Old Sourpuss
|
As for your issue with eyes, I've found an interesting tutorial that I have yet to try, but it makes sense. I know many painters use a big picture down to small details style (I fall in this category), but I saw a tutorial about painting the eyes first, this way any mistakes are covered up in larger paint coats (as long as you don't accidentally paint over your eyes lol).
|
DR:80+S++G+M+B+I+Pwmhd11#++D++A++++/sWD-R++++T(S)DM+
 
Ask me about Brushfire or Endless: Fantasy Tactics |
|
|
|
|
2011/04/11 17:01:54
Subject: Lukez Ork Log
|
|
Mekboy Hammerin' Somethin'
|
Alfndrate wrote:As for your issue with eyes, I've found an interesting tutorial that I have yet to try, but it makes sense. I know many painters use a big picture down to small details style (I fall in this category), but I saw a tutorial about painting the eyes first, this way any mistakes are covered up in larger paint coats (as long as you don't accidentally paint over your eyes lol).
This is good advice. Looking closer at the pics you've got at the top of the thread, it looks like your biggest problem is brush/paint control. This'll come with practice, but if you paint the eyes red, then carefully paint the green skin around them, you may get a better result than trying to hit the eye with a tiny dot of paint and praying you don't muck it up.
|
|
|
|
|
|
2011/04/11 17:17:22
Subject: Lukez Ork Log
|
|
Old Sourpuss
|
I'm not sure what your reservations are about signing up for multiple websites, but miniwargaming.com's sign up bonus is a 'free painting' book (pdf) that will detail how to paint the eyes first before you paint everything else. (Thats where I saw it)
|
DR:80+S++G+M+B+I+Pwmhd11#++D++A++++/sWD-R++++T(S)DM+
Ask me about Brushfire or Endless: Fantasy Tactics |
|
|
|
|
2011/04/11 18:30:46
Subject: Lukez Ork Log
|
|

Death-Dealing Devastator
London
|
I must say that the miniwargaming method has always worked for me. Depending on how brave you are (and if you have one), I have seen people draw round the eye in a thin black pen as well to give it more depth.
And I usually avoid badab black except on metals, but this is personal choice. I would imagine the devlan mud would make them seem more dirty, which is what my "mental image" of an ork is
|
|
|
|
|
|
2011/04/11 20:50:44
Subject: Re:Lukez Ork Log
|
|
Regular Dakkanaut
|
@hungryp yeah you're right a brush does seem to be good enough
@that sounds like a great idea, will deff be doing that on my next batch. I should certainly look into those miniwargaming videos, I already have account with them from buying stuff so hopefully I can still get that pdf
@taffiarti yeah devlan mud makes metals look pretty oily, but as you point out also more orky, good bye badad black! 
|
|
This message was edited 1 time. Last update was at 2011/04/11 20:51:00
DC:80+s---GM--B--I--Pw40k09-D+A++/eWD-R+T(M)DM+
|
|
|
|
|
2011/04/11 21:14:22
Subject: Re:Lukez Ork Log
|
|

Liche Priest Hierophant
|
If you can't Lukez, I'll email them to you! (maybe)
|
|
|
|
|
2011/04/11 21:30:58
Subject: Lukez Ork Log
|
|
Phanobi
Canada,Prince Edward Island
|
Solid advice from everyone! My only piece of extra input would be to perhaps skip the mixing colours to start with, I find that a lot of paint gets wasted that way.
I belive my basic recipie for Ork skin is something like;
Basecoat orkhide shade (foundation paint),
Paint all but the most rescessed areas snot green,
Fine highlight of goblin green
Shade the recesses in the face with hawk turquoise.
The technique seems to work well for me, I am working on more elaborate recipies but have not got round to trying them out!
|
|
|
|
|
|
|
|