This was a straightforward battle-line clash between my beastmen and the empire. I’m still not fully up to speed on 8th so if you spot any errors or have any advice on force composition and tactics please do post. My apologies for the fact that not all of the photos are taken from the same table edge which makes things a little confusing. The 2,000pt lists were:
Beastmen
Beastlord: Amour of Destiny, Shield, Sword of Battle, Gnarled hide
Great Bray Shaman: Dispel scroll, Lore of beasts (Wildform, Pann’s pelt, Savage beast)
Wargor: Dragonhelm, Heavy armour, Great weapon
Wargor:
BSB, heavy armour
28 Gor: add
HW,
FC
29 Gor: add
HW,
FC
20 Bestigor: Great weapon, Heavy armour,
FC
6 Minotaurs: Light armour, add
HW,
FC
10 Ungor raiders: Short bows
1 Tuskgor chariot
Empire
General: Armour of meteoric iron, Speculum; 4+ Ward, Great weapon
Wizard Lord: Dispel Scroll; Lore of shadow (Melkoth, Enfeebling, Occam’s)
Priest: Heavy armour, add
HW
Captain: Plate armour,
BSB
30 Halberdiers:
FC
29 Swordsmen:
FC
28 Greatswords:
FC
14 Handgunners
10 Knights:
FC
5 Pistoliers; Musician
2 Cannon
1 Mortar
Deployment
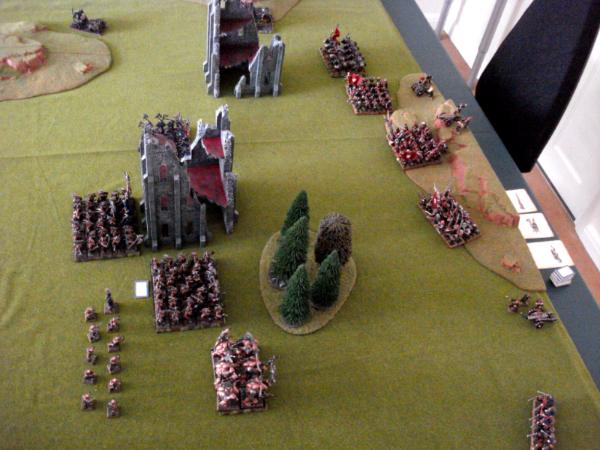
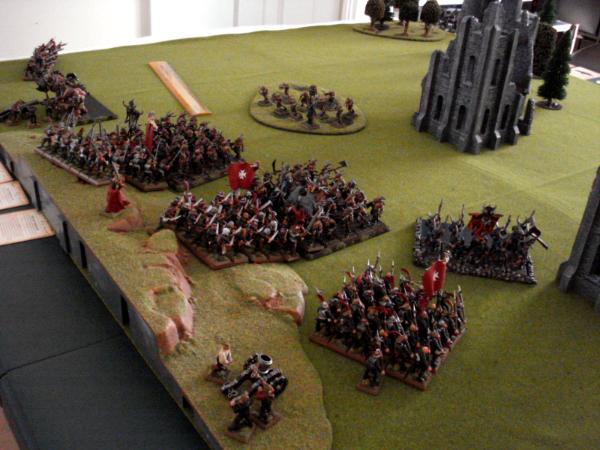
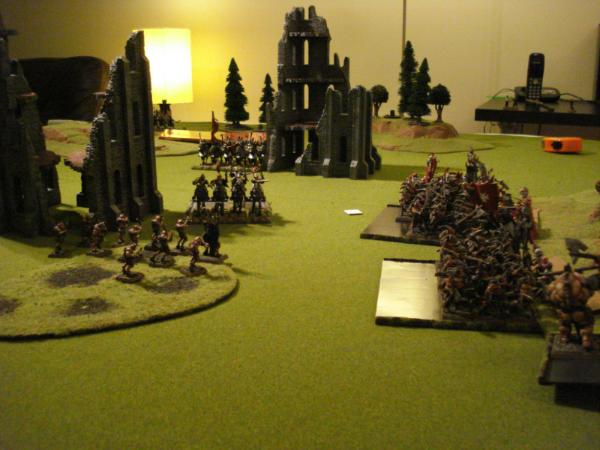
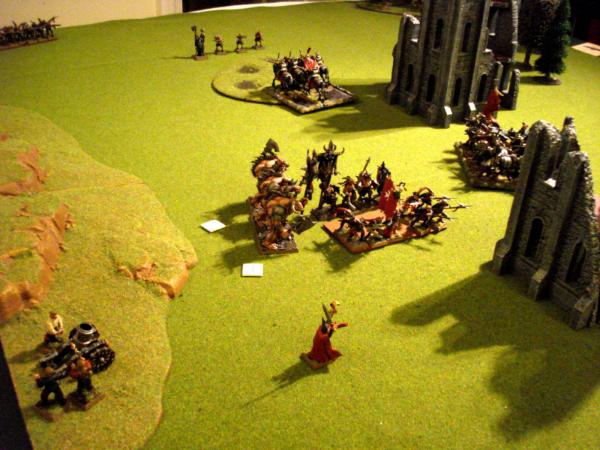
The board was dominated by three central pieces of terrain; two buildings and a wood. This suited me fine as they would provide cover from the empire artillery. Initial deployment looked like this:
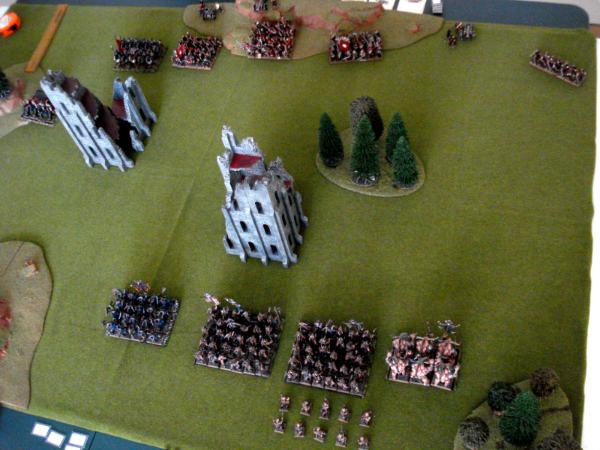
My opponent placed his pistoliers on the left and vanguarded them forward with the aim of getting them behind my force to pick off lone characters and generally annoy me. The cavalry was next on the left, positioned to take a flank or get behind my force. An infantry line (halberds, swords, greatswords) screened the central hill on which was positioned the wizard, mortar and a cannon. A single cannon was out on the right to get shots at my minotaurs. On the far right were the handgunners, which my opponent hoped to use to pull one of my units out of the line of attack and off the board.
My force was deployed in a line on the right side (bestigors, gors, gors, minotaurs) so as to keep everything in my general /
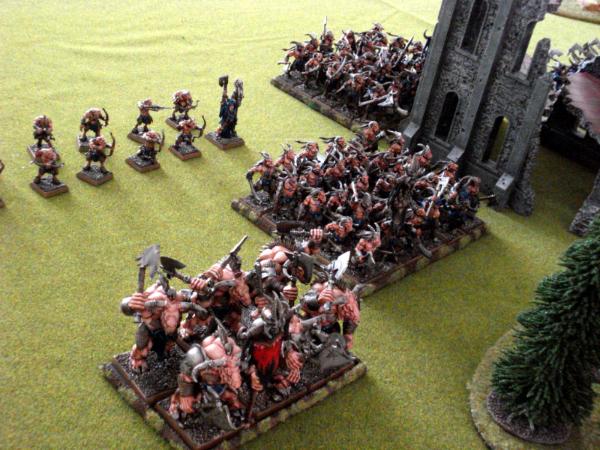
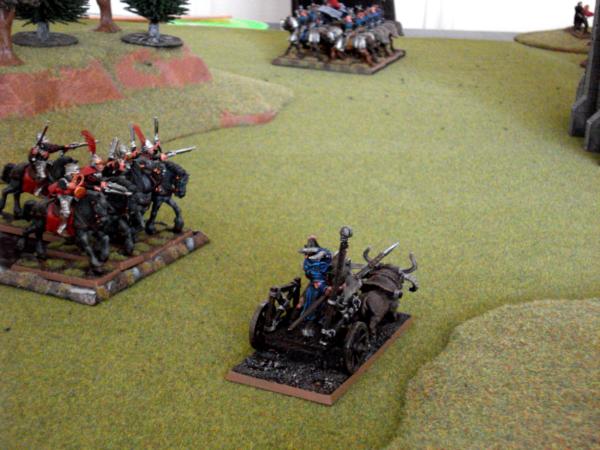
BSB bubble. The shaman sat in an ungor raider bunker at the back (I like using skirmishers as wizard bunkers as fewer die in miscasts due to the spacing between models). The chariot was on the extreme left, put down first in an unsuccessful effort to misdirect my opponent.
Beastmen Turn One
I won the roll off to go first and surged forward. The Gor unit with the general/
BSB entered the nearest tower. The only thing I held back was the chariot which I wanted to keep as a threat to his cavalry on the left. Magic blew seven dice, but everything useful was dispelled.
 Empire Turn One
The pistoliers got on the flanks of chariot and proceeded to put two wounds on it in shooting. My opponent pulled his Knights further to the left to be positioned for a flank charge on anything that charged the halberds. Winds of magic blow eight power dice but pretty much all of his spells were out of range.
Shooting is more eventful with the right hand cannon taking out two mino’s and the cannon on the hill blowing up. The mortar hits the Bestigors but only kills two. The handgunners manage a single wound on a mino.
 Beastment Turn Two
Everything moves forward to get into charge range. I ignore the handgunners on the right and throw everything at the centre. The magic phase yields five dice and for the second turn in a row my opponent has the same number of dice as me due to his priest. As a result all of my spells are dispelled.
 Empire Turn Two
The Knights reform to point the right way and the pistoliers continue to dog the movements of the chariot. Magic is uneventful but shooting is not. Seven bestigors die to a mortar round and are only stopped from panicking by the
BSB re-roll. A third mino dies to combined cannon and handgunner fire which I consider to be getting off lightly. The pistoliers fail to do any further damage to the chariot.
Beastmen Turn Three
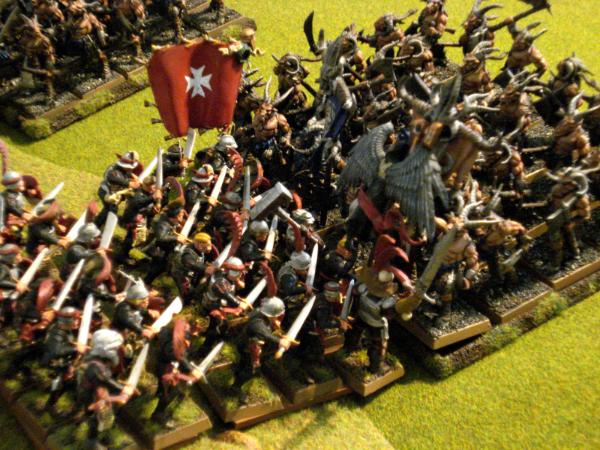
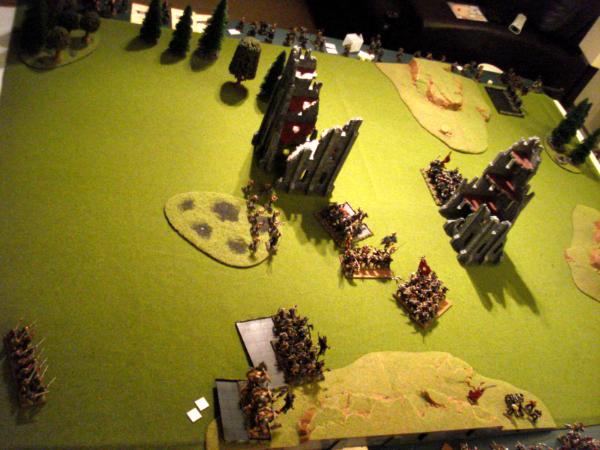
At last I’m in charge range. The chariot fails a rather speculative charge on the Knights. The minotaurs charge the cannon on the right. The gor units go in against the greatswords and the swordsmen. Both generals and both
BSBs are in the swordsmen / gor fight so it promises to be brutal. The bestigors are in a position to charge the halberdiers but will take a flank charge from the Knights next turn if they do so. I don’t fancy my chances of breaking thirty halberdiers in one turn, so instead just pivot the bestigors to screen the flank of my gors.
The winds of magic blow a perfectly average seven dice. Wildform on my gors is dispel scrolled but beast of Horros goes through on my general, giving him three additional attacks and plus three strength. In combat the minos easily kill off the cannon and don’t overrun off the board. The greatswords lose seven of their number to the gors for only four in reply, but they hold due to stubborn. In the swordsmen combat, the empire general challenges which I answer with the unit champion; I don’t want my general’s killiness to be absorbed by the empire general’s crazy armour and ward saves. My champion is predictably hammered into the ground but the overall combat goes in my favour with eight casualties (mostly caused by my general) to five. Unfortunately the swordsmen hold.
 Empire Turn Three
The halberdiers charge the bestigors and the knights charge the chariot. I’m not hopeful about the chariot’s chances, but it’s done its job by pulling both the pistoliers and knights out of the main combat. Winds of magic give my opponent nine dice to throw at me. Occam’s is dispel scrolled and enfeebling dispelled. Phew! Shooting kills another mino but is again largely ineffective.
In combat the knights destroy the chariot for only one dead. Given hatred by the priest, the halberdiers go Krakatoa on my bestigors and kill seven for only four dead. My bestigors need snake eyes and amazingly get it on the
bsb re-roll. My opponent takes this in his stride and declares a second challenge from his general. Rather than feed him my
BSB, I accept. The empire general uses the speculum to swap stats and I’m effectively fighting a beastlord with a 1+ armour, great weapon and 4+ ward. I consider myself lucky to escape with only one wound. The gors win the wider combar again but the swordsmen continue to hold.
The greatswords take another pounding, losing ten of their number for only five gors dead. Stubborn keeps them in play however.
 Beastmen Turn Four
The minos reform and move up to the flank of the greatswords. The ungor raiders pivot to get shots on the pistoliers which are moving through the rear, probably in an effort to get shots on the shaman.
Magic is a re-run of the previous turn with wildform dispelled and savage beast going off on the general. The general vs general duel ends with no wounds taken despite the seven strength seven attacks I’m unleashing from my beastlord. Again the gors win the wider combat and the swordsmen hold on
bsb re-roll. The greatswords take another eight casualties reducing them to just the command group. They hold on stubborn.
There is trouble on my left flank however as the halberds wipe out the bestigors and reform to be ready for a flank charge on my general’s unit. So that’s why all the empire armies are refitting with halberdiers…
 Empire Turn Four
Ouch! The halberds slam into the flank of my general’s unit. The Knights begin a long trek around the tower to try to get behind my force and the pistoliers move within short range of my shaman bunker. My position, which had looked strong at the start of my last turn, is eroding fast.
My opponent has eight power dice at his disposal and he puts occam’s on the halberds and enfeebling on my general’s unit. Things suddenly look a lot worse. Shooting leaves one ungor dead and puts two wounds on the minos.
Finally the greatswords are wiped out and the gors reform to face the swordsmen. Combat in my general’s unit goes predictably badly with the strength seven, hit re-rolling halberdiers causing carnage. Clearly annoyed by the turn of events, my beastlord took out his frustration on the empire general and killed him. My opponent was very unlucky (getting three ones on his armour save and no ward saves) but he consoled himself by breaking the gors and over-running them. At this point we made an error, the gors should have run from the most numerous enemy which were the halberdiers. Instead they ran from the swordsmen. This would have spared the swordsmen from a flank charge later.
 Beastmen Turn Five
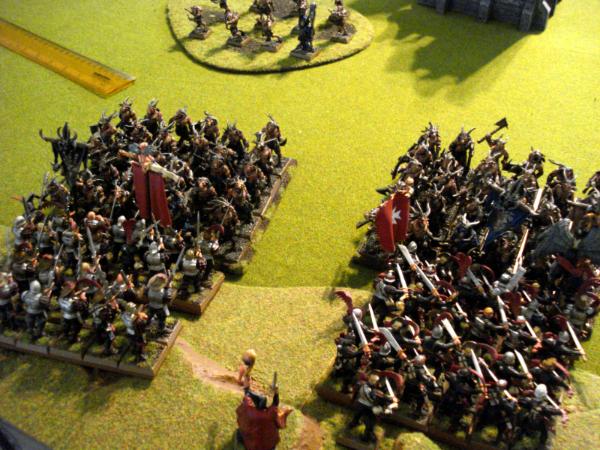
My Gors charge the swordsmen in the flank and the minos move to the top of the hill with a view to getting hold of the wizard. Winds of magic give me six dice to play with. Savage beast is dispelled but wildform goes off irresistibly on the gors. The miscast takes a wound off the shaman, kills three ungor and causes the bunker unit to flee – straight into the sights of the handgunners. The gors do horrible things to the
BSB unit and over-run it, stopping just short of the halberds.
 Empire Turn Five
The halberds charge the gors with knights lining up for a flank charge. Meanwhile the wizard puts as much distance between the minos and him as he can and the pistoliers go after the fleeing shaman. Magic goes badly for me with enfeebling going on the gors and Occam’s going on the halberds. Shooting is better with only three ungor dying. In combat, my opponent has some of the worst die rolls I’ve seen. His strength 7, re-rolling to hit halberdiers should have cut through my enfeebled gors with ease. Instead they barely win the combat and my gors make their leadership test. This is very bad for the empire as my minos will arrive next turn.
Beastmen Turn Six
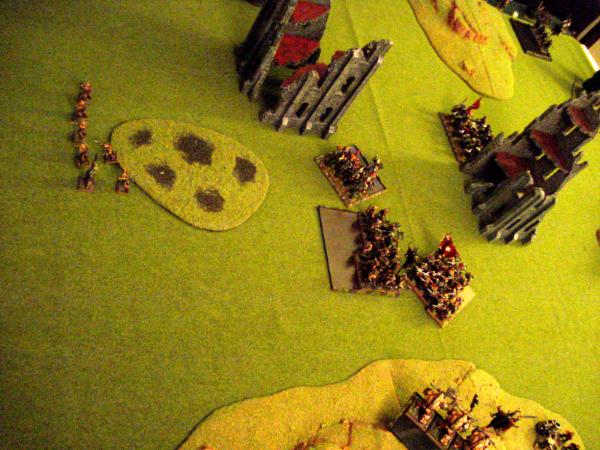
The shaman rallies. I question his judgement in doing so as he’s sandwiched between a firing squad of pistoliers and handgunners. I forgo a risky charge against the wizard with my minos for an easy charge at the flank of the halberds. Magic let’s me renew wildform on the gors but nothing else. In combat the minos unleash a whirlwind of strength five attacks and fourteen halberdiers are killed. The halberdiers flee but I am unable to catch them. Damn you bloodgreed!
 Empire Turn Six
The halberdiers rally and the knights charge what is left of my gors. The pistoliers close in on my shaman. Magic sees the gors enfeebled again. Three ungor then die to shooting and the shaman once again decides that discretion is the better form of valour and boots it. Combat sees two knights die at the hands of the wargor in the gor unit, giving a drawn combat.
Result
According to the victory conditions this one was a draw. However, I think I have to give it to my opponent. My error on the fleeing gors penalised him quite badly and he was using an unfamiliar army (the empire army is also mine) so the moral victory at least goes to him.
Beastman of the match for me was the beastlord. He was a killing machine and when savage beast was on him he was nigh on unstoppable. Big shirted man of the match was undoubtedly the empire wizard; his buffs and hexes meant that the weak and puny humans were usually anything but.
Learnings
Empire should never be without an engineer.
I really should have spent 35 pts on a level four
Pistoliers are horribly annoying. Unless you have a horde army that forms a wall from one end of the table to another, they will get behind you any kill things.
Cavalry are a lot harder to use in eighth. They have to hit at the same time as the infantry and that requires careful co-ordination. As my opponent proved, that is not straight forward.
If you get into combat with a priest, then direct attacks against him and kill him. That extra dispel die and the hatred are really annoying and he’s not that hard to kill.