Forum adverts like this one are shown to any user who is not logged in. Join us by filling out a tiny 3 field form and you will get your own, free, dakka user account which gives a good range of benefits to you:
No adverts like this in the forums anymore.
Times and dates in your local timezone.
Full tracking of what you have read so you can skip to your first unread post, easily see what has changed since you last logged in, and easily see what is new at a glance.
Email notifications for threads you want to watch closely.
Being a part of the oldest wargaming community on the net.
If you are already a member then feel free to login now.
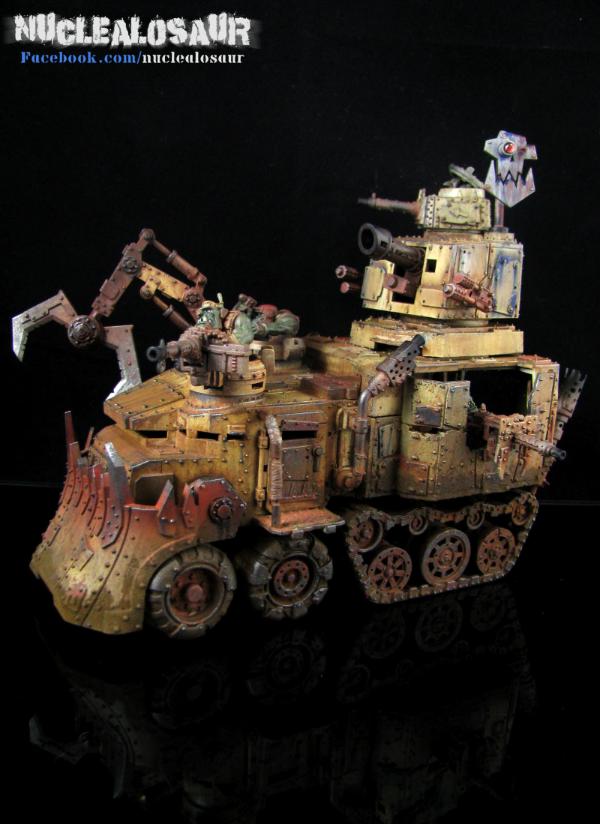
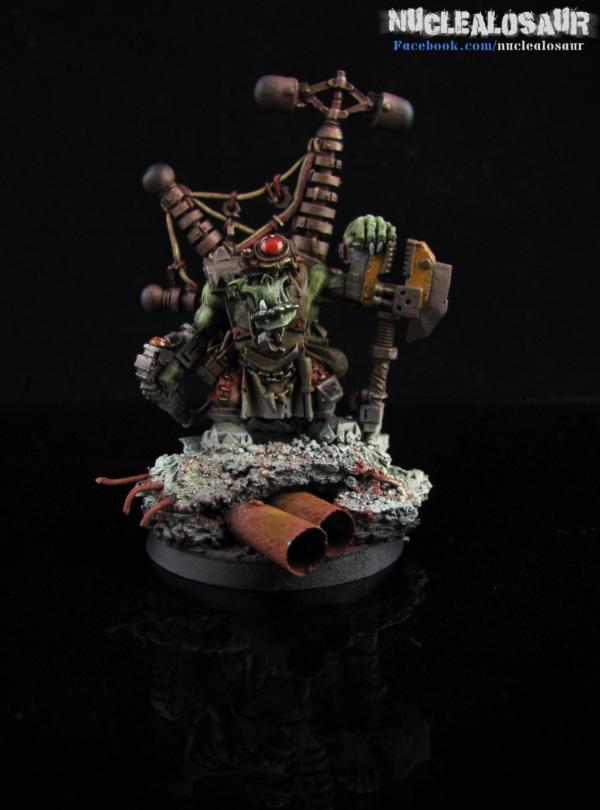
Those two dudes were really chunky - took me ages to prep the models.
I should be glad about the release of Finecast, but due to the embargo I think I'll pass on NZ Retail Price, thanks.
Comments are welcomed!
Fasai
This message was edited 1 time. Last update was at 2011/05/28 14:36:36
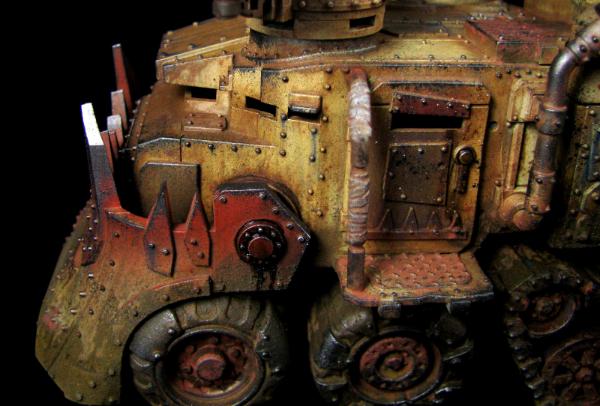
Fantastic weathering on the wagon - very realistic. I see sponge work, obviously, and pigments, by the look of it, but it's the subtle streaking that really takes it to the next level. Did you use oil filters or is there some other super-secret technique you'd be willing to declassify for the rest of us?
The Dreadnote wrote:But the Emperor already has a shrine, in the form of your local Games Workshop. You honour him by sacrificing your money to the plastic effigies of his warriors. In time, your devotion will be rewarded with the gift of having even more effigies to worship.
I used the same grime streak technique as I put up on my video tutorial - never tried oil filter (official one) yet, but I always use oil paint + turpentine for the same application.
This time was playing around with different colors as well like blue. Pigments were added heavily and then I used a semi-wet large brush to drag them around the crevices.
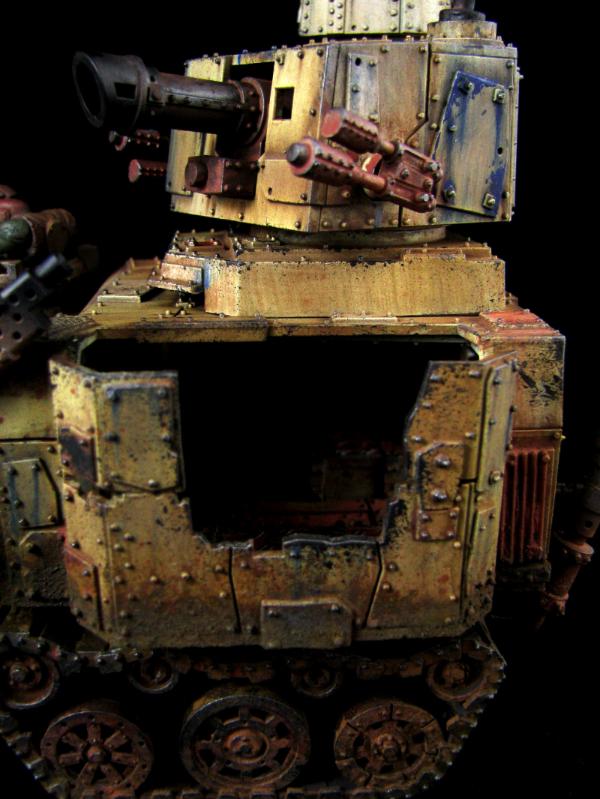
Half way done with the wagon, the Imperial Armor Masterclass book arrived from the UK, so I tried some new techniques like sponging (never tried before - love the effect) and ink+gloss varnish for grimy leaks. Gotta admit I've learned heaps from that book - will switch from salt chipping to sponging from now on (so much easier - and hairspray have come cons: - obscure details - attracts humidity: I've experienced a case where a finished mini (using hairspray+salt) sitting on my shelf on a rainy day and it started to sweat!
IA Masterclass is a really great book - I already have like 12 rhinos/rzbk unpainted for my own SW and our gaming club at the uni - will be painting them all using techniques learn from that book. Also ordered chimeras and russes just to try my hand on the new techniques as well - so much for being impulsive haha.
Cheers Fasai
This message was edited 1 time. Last update was at 2011/05/29 14:43:30
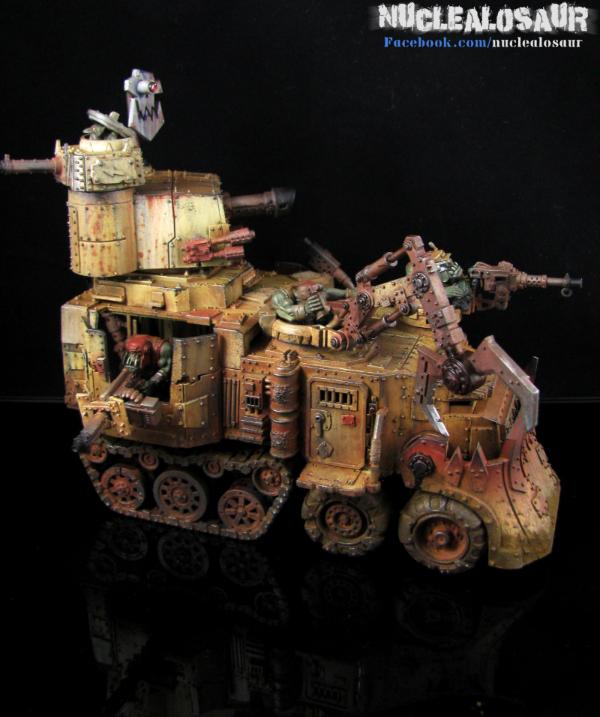
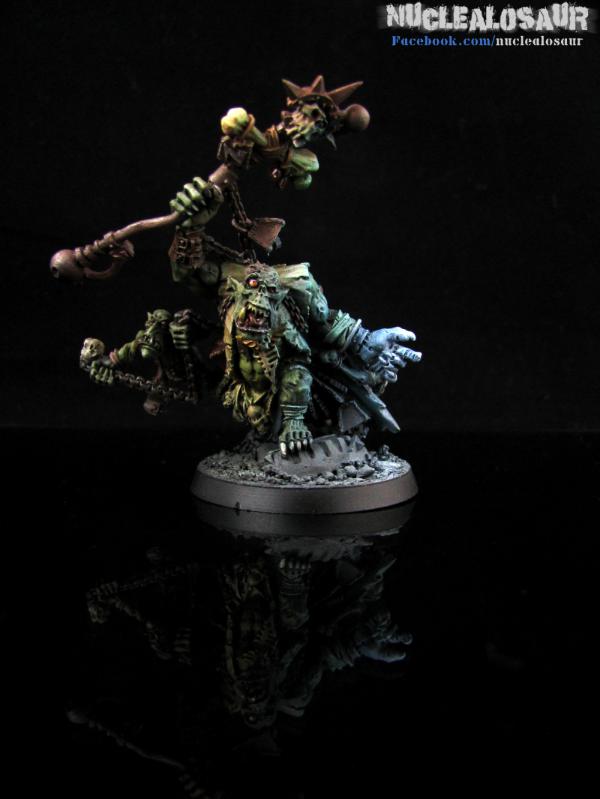
Holy cow! That looks fantastic. Infact the BW looks so great it actually pulls away from the Orks in there, and those are painted pretty nice too. That doesnt happen very often
Pardon my lack of Orkism knowledge - the BW was meant to be Blood Axe (and I did some research about Blood Axe color scheme!)
The pipes were made out of BK milkshake straw. It was cleaned first obviously lol, then primed. After the rest of the model was finished, I mixed rust/dirt pigments with satin varnish and just slapped the mixture on the surface. Once dried, seal with matte/satin varnish.
I find adding pigments this way gives more volume and texture (and they stay better)
Otherwise, for a more subtle outcome you can mix pigments with turp or alcohol and dab around the surface. I find that this way require thicker vanish to seal afterward though
nuclealosaur wrote:IA Masterclass is a really great book -
Yes - that's the book.
Although you can pretty much find most if not all techniques in that book on google/youtube, I still think it's worth every penny, consider that in NZ we pay about that much at a retailer for just a codex.
a small waagh wrote:Nice, all of it is lush! How did you make the base for the big mek?
The bigmek's base was done with a BK milkshake straw (Mc or other straws won't work) and some cork tiles. I bought a whole lot of paper clips and pushed them in the cork tiles and slab some PVA glue and sprinkle some sand/gravel.
Ratius wrote:The Wagon is excellent, a nice mix between realism and stylism, great balance.
Thanks!
For me style matters a lot, as I don't want to be just another person who copies the style from GW outright.
I try my best to create my own style using different techniques I've learned from various great artists.
And at the end of the day I want to have fun and enjoy painting stuff!
The ork battle wagon is amazing. I love the details and the palettes you've used made it so realistic. Big Mek and Weird boy are also nicely done. Finishing this set looks too laborious for me. But, man, your hard work paid off because all of these are impressive!
Have to admit the hardest part for me was always the assembly and removing mould lines for vehicles and model prepping for metal minis
I remember that ork wagon took me a few movie/tv shows to finish assembling it - Diary of a wimpy kid and a few episodes of South Park if I recall correctly. I normally work during weekends and that's also the time my gf requires attention so it doesn't hurt bringing some work to do while watching something.
(sorry if the movie choice wasn't that orkishly inspiring)
It was much fun to paint and I think the owner is planning to send more stuff down so that's a good thing!


 Waaagh! Skarshak - Back after being lost in the Warp, an' ready to Krump sum 'eads!
 224th Astra Legion (main army)
 628th Praetorian Guard Cohort (wife's army)
 827th Auxilia Cohort (ad mech fun)
 825th Foderati Cohort (in the beginning army)
 1212th Foederati Cohort - Jokaero (cause I like apes with guns)
 Black Legion 8th Grand Company
 Cadian XV Airborne "Flying Fifteens"
 Order of the Ebon Chalice
 Relictors 3rd Company


