Some folks may remember my post here:
http://www.dakkadakka.com/dakkaforum/posts/list/365167.page I had promised to do some
WIP and i finally found some time to do so. I will try to make this as educational as possible for those looking to learn from my mistakes.
My own disclaimer

I've only built one board before this and while i don't have pictures (board now belongs to a friend) it was not my best work. I took time and studied the techniques from the Forge World Model Masterclass book when building these. again, I'm no expert, anyone who wants to pipe up and give me tips please do so, i plan to try to make a few more boards for the local
FLGS if they will accept them..
Lets start off with board #1 I'll post board 2 & 3 in later posts.
Step 1: Planning & Design
Before you go out and start buying materials you should have some sense of what kind if table you'd like to build? Forest? daemon world? city fight? How modular do i want it to be? How much terrain do i want to inset into the board so later i can move or place things so it doesn't get boring? Do i need a frame?
Throw all of the above idea's and self answered questions onto a piece of graph paper. Make sure the layout is fair.. "But Warboss Gubbinz, what do you mean?" Spread out the area terrain and inset terrain across the board so each player has a fair chance of receiving cover, don't stick everything in one corner of the board.
Once you have your design its time to start purchasing what you will need, making the frame and laying things out. In my case i made a frame from 2x? and plywood so i would have a sturdy base. this was a simple construction and i will not go into that here. 1 and 1/2 inch foam was liquid nailed to the frame before anything was laid out.

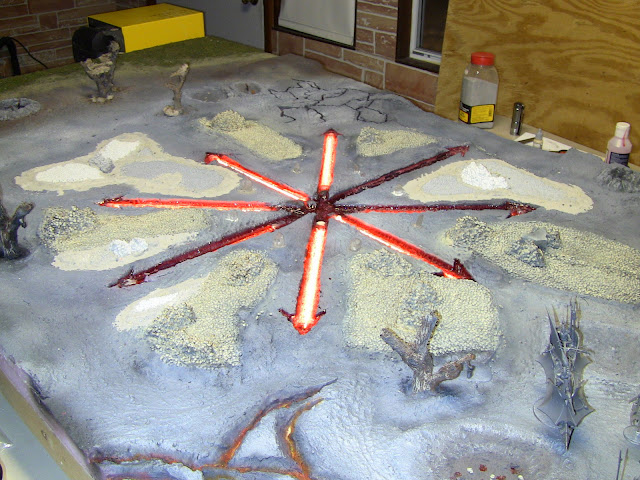
My plan was to make this board into a daemon world, what better way to do that than set in some CCFL lights and cover it in water effects later.

Here you can see alot of things are layed out in marker on the board, where we'll be carving or insetting things onto/into the board itself, this helps greatly.
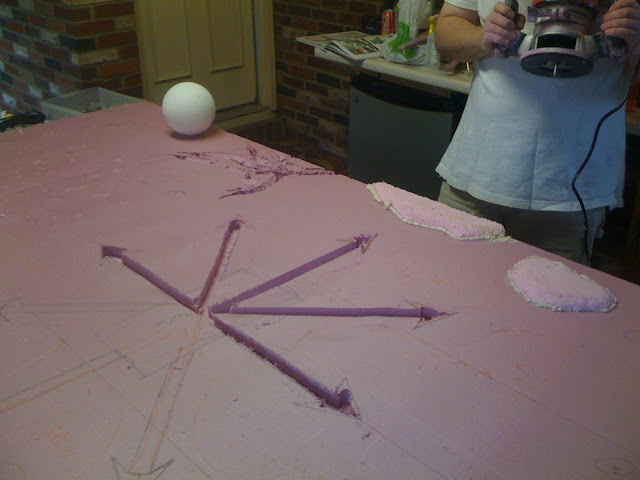 Step 2: Carving
So now i had my plan and i was working on the execution. Next steps were to actually carve out the board itself and make it look natural (or unnatural as the case may be) I did this using a variety of methods. The Lava cracks in the corner were carved out with a utility knife then given extra detail out using a soldering iron.


warning
any time you are using heat to melt or shape polystyrene foam you should make sure you have adequate ventilation. Inhaling the fumes is bad m'kay
The chaos star was carved out using a router, this was done due to the precision needed to make sure the CCFL tubes would fit properly.

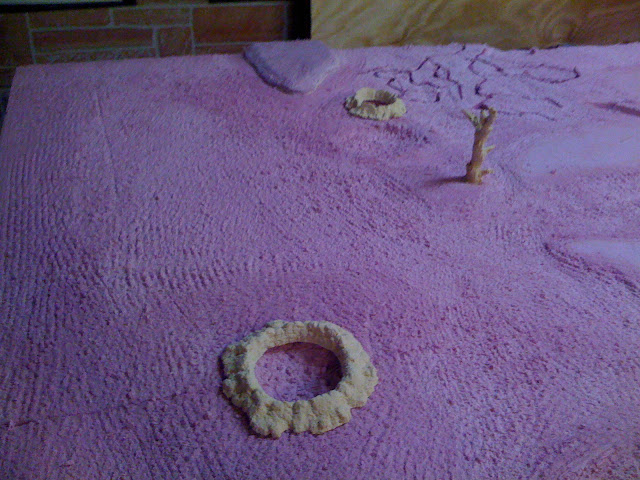
You'll notice how the board looks like its fuzzy in the above screenshots. This is because to give the board a non flat texture we used a wire brush normally used for scraping paint. The craters were dug out using the sharp end of the scraper, I essentially dug a 1/2 inch hole then during shaping created the crater ring, or used an armor-cast crater ring and placed it on top.
PS. this makes a huge mess of the area your working around, make sure you have a shop vac handy to suck up the foam shavings.


Also please make sure to dry fit anything your insetting before you move past this

So whats next?
Step 3: Sealing and filling in the cracks
If your familiar with Polystyrene foam you'll know that you can't just spray-paint it. Doing so causes the styrene to melt. So how do we prevent this from happening?
Answer: Melt the board with a heat gun!. This does two things, seal the board so you can spray paint it, it also creates a more durable surface you can texture with paints. Its also less likely to leave an indent when large objects are left on it.
warning
again, adequate ventilation is needed, do it outside. I also suggest a face mask or respirator, even if your outside.
I used a heat gun and set it to 950 degrees and slowly went over the entire board


After the board was melted i filled in any cracks with mastic, this is pretty cheap and comes from your local depot or lowes. Sometimes this requires 2 coats depending on the craks you are filling, if you use a putty knife you shouldn't need to sand it down, the paint we put down in the next step will cover up any tiny seams. or lines.
Step 4: Adding more texture
Ok, we've gotten this far, the board now has the shape you wanted, its time to put some paint on top of that board. I used Valspar ceiling texture mixed with silicone and a grey Valspar paint. As i put the paint down it was pretty thick, this was ok. While the paint was still wet i sprinkled sand lightly over the top. Once each section of the board was painted (i did mine in 3rds) i then sprayed elmers mixed with water onto the board, when it dries it gives the board a tough coat and helps the sprinkled sand adhere to the textured paint.
Forgeworld suggests paint with small gravel and sand mixed in, looking at their book and my boards i don't see too much of a difference in texture. Use whatever works i say!

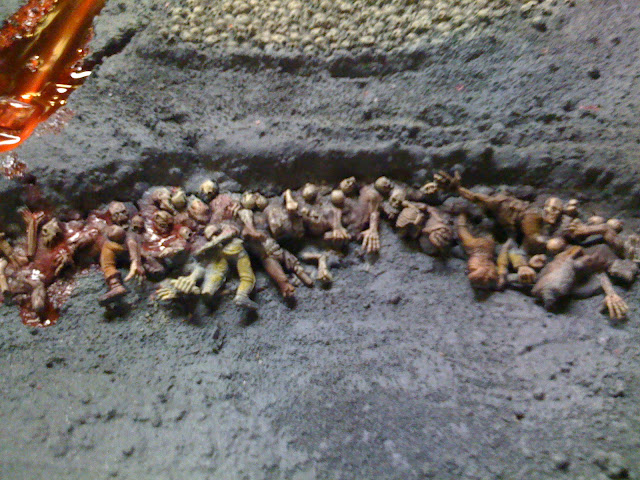
Below you can see i in-set the skull road pieces from armorcast as part of putting mastic in to seal the edges.


While the paint was drying i sprinkled sand on the top and while the paint was soft we pushed the girders into the foam below

Then added the Elmers and water mix
 Optional Step 5: Add Gubbinz.
If your going to add extra stuff to the board you should probably do it before you decide to primer you board. I decided to add LED's to my board for the Crystal wars holding Angron's Monolith to Khorne in place.
This was done via a gang switch to a 9v Battery then to the LED's (resistors built in)
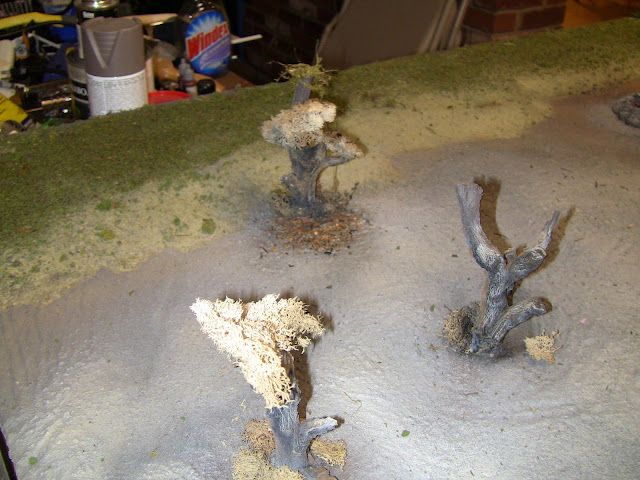
 Step 6: Paint & Flock
This one is pretty self explanatory, paint the boards. First i did a black coat over the entire board (wooo grimdark) then using other flat sprays from the local lows and army painter sprays gave the board the colors you see below:


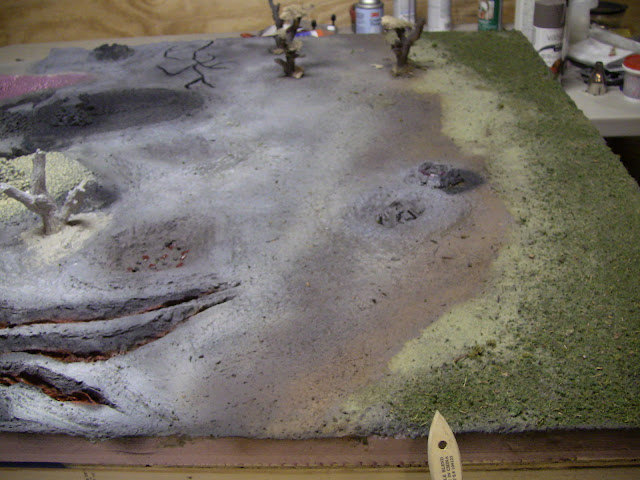
 Step 7: Painting and adding in the details.
This is another self explanatory one, go about adding in the extras and painting the smaller details. Folks will notice that i didn't have enough of the skull road pieces to finish setting them into the board, i simply did this later after i received my backorder.

Finished Product:

Its never too late to add more detail, i went back over the course of the month+ it took me to complete this and i always find ways to make it look better or add extra detail If anyone has questions please fire away. I'll try to answer everything in a timely fashion.
edit: spelling, grammar etc...