Dinosaur Cowboys is a skirmish ruleset I'm designing where you run a Posse of up to 6 members (including up to 1 dinosaur) against similar gangs. The game
started as a light RPG, but I've since narrowed the focus to be skirmish scale. I just recently did a playtest for some prospective rule changes (mainly around activation), and thought I'd share the blow-by-blow account. You can read more about the game on
my blog or just hop directly to
download the rules if interested. I tried to write the report in a White Dwarf style where you get to know the thoughts and reasoning of each player.
Anyways I'm still doing some more revisions, playtesting, and formatting, so I'm totally open to suggestions and comments. It's hard to have much of a sounding board with my friends, so pointing out weak mechanics or possible improvements is greatly appreciated!
Note that his battle report is a follow up to my recently posted
Encounter at Bosler, Wyoming sesion.
Encounter Overview
After the Drylands United Cattle Company thrashed Kirk Peterson's Hunting Expedition in a
recent playtest game, I thought I'd continue the storyline.
Kirk retreated north closer to the big Neotechnoist towns, and eventually put a bounty on the Drylands gang. Desperate to escape The Wall in the shortest amount of time, the Drylands crew headed directly south. After escaping over The Wall they figured safety was theirs. Their surprise was complete when a ragged platoon of bounty hunters fell upon them near Caldwell Lake, Wyoming. Resting near a ruined lakehouse, the two posses collided violently.
I levelled up the Drylands Posse, which gave them an extra 30 IP. I figured the hired hunters of The Lost Platoon would have a bit more money, so I settled on $1,500 total. This meant Drylands had $500 additional, which is $200 extra than a standard level up.
Keep in mind this game was played using v0.7 of the rules, with a few tests for v0.8 (mainly around the Initiative system). So ideas like Levels, some of the weapons, etc. will be dated compared to the current version.
Note on images, all of them are clickable and will open the image in a new window/tab as a 1280x960 image.
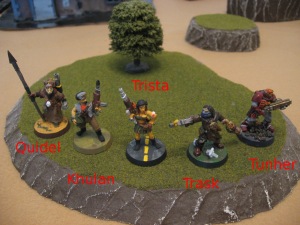
Posse: Drylands United Cattle Company - 130 IP, $1,500
This was the first Posse
I created, and so far they had a 1-0 record. Level 2 gave me some more IP and a bunch of Neodollars to spend on goodies.
My goal was to use the new income to expand my Posse a little bit, as well as ensure my equipment stayed up to date. To this end I recruited a new character named Tunher, who was really a Space Marine Scout figure with a shotgun that I had. I bought him a Pump Shotgun and Padded Armor to suit the model. Otherwise I sold Trista's old 400kW Lever-Action Rifle and bought the ridiculously sweet 600kW version instead.
As for IP most of it went to Tunher. First of all I created him as a Duster, so he started with -1 MV and +2
HP, which would work okay with his shorter ranged weapon. I hoped to supplement his Padded Armor with a further boost, so I spent another 10 IP to give him +1 AR. Finally he got -1 RMC so he could actually hit something.
My remaining IP was spent giving Trista and Tunher +1
HP each (boosting Trista to 8 and Tunher to 11).
For my new Trait I opted for "Clear Sight" for Khulan, which boosted his Assault Rifle's long range to 20" and meant he could snipe alongside Trista if needed. Her style was different since her 3A-6D weapon rolled less to hit, but could technically do more damage. Khulan's trusty Assault Rifle was 6A-1D, but his higher RMC meant such a weapon was well suited to help his aim.
My plan was to use Trista to hold a flank on her own, and maybe swing to the center if she needed to cover somewhere else. Khulan would cover the other flank, with Trask and Tunher advancing as a team and Quidel in as support. Trask's higher movement meant he'd likely reach combat first, but perhaps he could take some pressure off Quidel and Tunher as they trudged in.
All said and done the Posse looked like:
Quidel - Duster Leader
MV 3, AR 0, RMC 8, MMC 7, BRV 7,
HP 13, Berserker
Spear, 80kW Six-Shooter, Whiskey Drop
Khulan - Duster Member
MV 3, AR 1, RMC 7, MMC 8, BRV 6,
HP 9, Clear Sight
Assault Rifle, Whiskey Drop
Trista - Neotechnoist Member
MV 4, AR 0, RMC 6, MMC 8, BRV 6,
HP 8, Try Again
600kW Lever-Action Rifle
Trask - Bandit Member
MV 5, AR 0, RMC 8, MMV 6, BRV 6,
HP 9, Sprint
Club, 80kW Six-Shooter
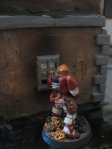
Tunher - Duster Member
MV 3, AR 2, RMC 7, MMV 8, BRV 6,
HP 11
Pump Shotgun, Machete, Padded Armor
Posse: The Lost Platoon - 130 IP, $1,500

I
outlined the detail and thought process around this Posse a while back. They are a knockaround ex-military outfit whose members are slowly going insane. Good times. I was interested to see how the Thickskull dinosaur would perform, since he doesn't have a ton of hitpoints, but his 8" Movement is almost the fastest of the dinosaurs. 5A-1D in melee doesn't hurt either.
My plan was to mount Captain Gunfire and Colonel Higgins on The Ram and push them forward, hoping to get to grips with their melee weapons. I was excited to see the Shudder Lance in action, since the Knockback could be rather handy. Otherwise Private Jacobs would act as a second hand and backup man to The Phoenix. The Phoenix had some serious killing power, and if I could get his Light Repeater into range with enemies that were tied up with my melee troops I hoped to do some real damage. And of course once The Ram unloaded his two passengers I planned to throw him forward and lock up any backline shooters, or just cause havoc in general.
As I outlined before, the Posse looks like:
Captain Gunfire - Bandit Leader
MV 4, AR 1, RMC 8, MMC 6, BRV 7,
HP 11, Quick Hands
80kW Six-Shooter, Shudder Lance, S-IRP
Colonel Higgins - Bandit Member
MV 4, AR 1, RMC 8, MMC 6, BRV 6,
HP 9, Strain Weapon
80kW Six-Shooter, Long Sword, S-IRP
Private Jacobs - Bandit Member
MV 4, AR 1, RMC 7, MMC 8, BRV 6,
HP 8
Light Pistol
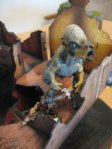
The Phoenix - Neotechnoist Member
MV 3, AR 1, RMC 5, MMC 8, BRV 6,
HP 7, Go For the Eyes, Bonus RMC I
Light Repeater
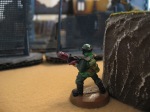
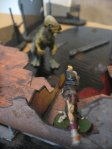
The Ram - Thickskull Dinosaur
MV 8, AR 1, RMC -, MMC 7, BRV 7,
HP 18, Bonus MV I
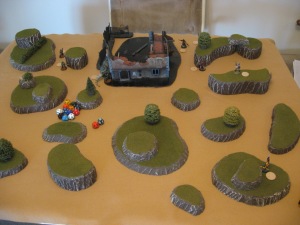
Table Setup
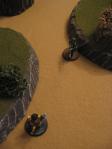
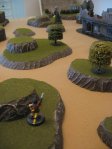
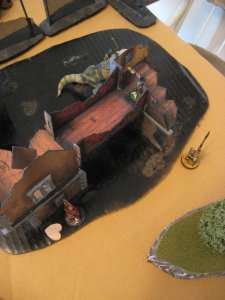
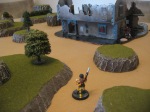
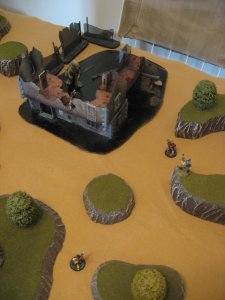
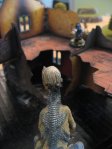
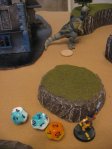
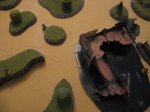
I used my usual kitchen table for the battle, which is 4 feet long and 3 feet wide with an 8" deployment zone on either short end. I covered the map with a bunch of hills, mostly just one inch high. The central terrain feature was an old Mordheim building that represented the ruined Lakehouse. It provided solid cover and the second floor would hopefully give some bonus Elevation damage.
 Deployment
During my random deployment side roll the Drylands posse got south (doorwards) and the Platoon got north (kitchenwards). The Drylands team had to set up first, followed by the Platoon, then the real fun could begin.
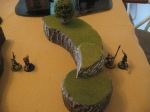 Drylands:
 I couldn't resist the central building, and hoped by aiming most of my forces there I could make The Lost Platoon meet me in a big ball of war on that side. To that end Trask and Quidel setup very far to the right with a bunch of blocking terrain in front of them. Khulan and Tunher setup across the nearest hill to the west. I hoped to get Khulan into a commanding firing position and cut the Platoon to pieces as they advanced. Tunher would scamper up and take the left side of the Lakehouse, and his matching movement speed with Quidel would mean they could do a divide and conquer attack. Trista went for the far left (west) flank all on her own. Her big powerful rifle could bring the pain from 21" away, so with luck I could shoot by the second or third turn.
 Platoon:
 As I figured the Drylands crew pointed towards the big building. I thought I'd match them, except I'd ignore their sniper with a denied flank tactic. Denied flank basically means you try to avoid playing into the opponent's hand by totally ignoring a section of his forces. In this case if I kept the building between my troops and the sniper Trista I'd basically stop her from having any impact on the game. As I mentioned the Captain and Colonel hopped aboard The Ram, whereas Jacobs and The Phoenix were up on a hill right by them.
Turn 1 - Closing to Range
Note that since I was testing the new Initiative rules I'd roll at the start of each Activation, so instead of seeing a global "X won Initiative" by each turn you'll just see who Activated and in what order.
 Drylands:
 Trask started my advance up the field by breaking into a dead Run forward.
Platoon: Neither of us were even remotely in range, so I knew this turn would mostly be moving in. To this end I Ran Phoenix down the hill he was on.
Drylands: Next up was Tunher, who also Ran. He aimed for the window in the closest wall of the building, but wasn't nearly close enough and settled for being in the open.
Platoon: I figured Private Jacobs would try to maintain his role as Phoenix's buddy, so he Ran down the hill and hung behind the next closest cliff.
Drylands: Quidel edged forward after Trask, but his 3" Movement was laughable compared to Trask's 5". Better to get into cover before the Platoon closes in too far though. I knew eventually they'd arrive, and to that end I decided to reposition my main shooters instead of running them forward and wasting their distance advantage. Trista stayed on her flank, and Khulan climbed the hill by him to get a better vantage point and some bonus Elevation damage (+1).
Turn 2 - Tension Builds
What I like about Dinosaur Cowboys is you aren't normally in shooting range on the first turn. What that means is everyone gets a turn to shuffle into position and react to the enemy's advance. This also helps build tension because sometimes you can FEEL the storm of combat brewing.
 Platoon:
 Figuring Khulan had the right idea, Private Jacobs mirrored his approach and climbed the hill he was taking cover behind. The Light Pistol is a handy weapon because it outranges the Six-Shooter, and I figured he was safe enough from Drylands big guns.
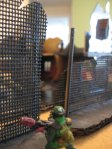
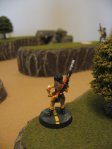
Drylands: Tunher continued his forward movement, ending up right at the window of the building. This looked awesome, but also meant he was a bit exposed. The cost of style I guess. Khulan also moved a bit, just to the very edge of the hill to maximize his range and hopefully get someone inside his 20" killing zone.
 Platoon:
 Time to start the shooting! I positioned Phoenix behind the fence in front of him, and this handily put Tunher into long range. I figured "no time like the present" and activated his "Go For the Eyes" Active Trait (Critical on 10+ instead of 12). With his RMC of 5 I only needed a 9+ to hit, and I smoked Tunher with 4/6 hits. Two of them were Criticals (thanks Trait!). All said and done his Cover reduced the damage by 1, but in total I hit for 6. Tunher promptly failed his Bravery test and was Fleeing. Looks like Drylands newest recruit isn't working so well, heh.
 Drylands:
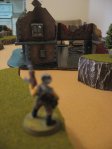
 Having a Fleeing character is always annoying, especially in Tunher's case where he needs every inch of the Pump Shotgun's 9" reach. Anyways I thought I'd move the more important stuff first, so Trask Ran forward into the building, and jumped up onto the second floor by the walkway. This gave him a great angle on the advancing Dinosaur.
Platoon: The Ram moved forward, his 8" Movement being a great help. Then I dismounted Higgins and Gunfire into cover, but foolishly forgot to Face them very well, so their backs were exposed.
Drylands: Well the Dinosaur was dismounted, which meant next turn would be a crazy one. Lots of people were in range, and I suspected I might even sneak some melee in. Anyways Quidel moved forward and shot at Higgins through the window. This happened to be into his back, and a Surprise Hit always helps (Critical on 10+ instead of 12). I hit with 1 Critical, but Cover reduced the cheap and flimsy 80kW Six-Shooter damage to 1. Every bit helps I guess. With the Dinosaur further to the right than I liked it meant Trista was basically useless and out of range, so I Ran her forward.
Turn 3 - Crazy Shootout at the Lakehouse
Now that everyone had closed the gap, this turn would certainly be a blood bath.

 Drylands:
 I won the first Activation, so I figured I'd best make a surprise attack of some sort. Trask used his "Sprint" Active Trait and flew across the walkway and into an elevated, back shot angle of Captain Gunfire and his associates. I hit 3/4 attacks with a total of 6 damage against Captain Gunfire. Regrettably he passed his Bravery test, which is too bad because I love when Leaders flee.
 Platoon:
 Although daring, Trask's rush forward had exposed him to Phoenix. I moved him up to the fence to ensure he was in cover. Then it was time to put that wonderful 5 RMC to use again. I hit 3/6 of times, but this only did 3 total damage (Trask had Cover).
 Drylands:
 Although Phoenix was a better shot, Trista had a superior gun capable of doing 9 damage compared to his 7. I moved up her full 3" which just brought Private Jacobs into range. He was exposed on the hill, so I had an easy roll of 7+ to hit. Still, I wanted to be sure, so I activated her trait "Try Again" (optionally re-roll one set of attacks). My first attack only hit once, so I re-rolled with a VAST improvement of 2 Criticals instead! 4 Hits plus 6 base damage meant 10 total damage, so Trista one-shot-killed Private Jacob!
Platoon: Um wow, ouch. I swung Captain Gunfire around the building to get a short range shot at Quidel. I hit and did 3 damage, which wasn't too bad. I used his trait "Quick Hands" to instantly apply the Small IRP from his pack, but it only restored 2
HP (on a
D6).
 Drylands:
 Time for my other big hitter to warm up. Khulan continued creeping along the hill to get a solid shot, in this case putting Captain Gunfire into medium range. I rolled REALLY well, hitting 4/6 times (2 of which were Criticals) for 7 damage, which outright killed Captain Gunfire! Ah, the sweet taste of dead Leader. The rest of The Lost Platoon (except The Ram) passed their Bravery tests...I guess they knew their crazy captain would bite it eventually.
Platoon: Two characters down in one turn, not good. I guess that's why people don't move into range of Lever-Action Rifles and Assault Rifles, heh. Anyways I did the mandatory Fleeing move with The Ram, then Ran him forward to try to recapture some lost distance.
Drylands: Quidel continued into the Lakehouse, but couldn't reach the second floor. He shot Higgins in the back through the window, getting 1 Surprise Hit Critical (he rolled an 11) for 2 damage.
 Platoon:
 With all the deadly firepower going around I thought I should use as many Active Traits as I could, before the characters with them died. So Colonel Higgins activated "Strain Weapon" (more damage on attack), hopped around the corner and moved into melee with Quidel. I only hit 1/2 attacks, but this was still 1+4+2 damage. Quidel failed his Bravery test from the rockin' damage, the cowardly dog.
Drylands: My last Activation was to Flee Tunher back, which actually helped because I could draw a line on Higgins. I fired at super duper long range (honestly it was ALMOST out of range) and hit with 1 Critical. The Pump Shotgun is nice because it has a high base damage, so all said and done I did 7 damage which killed Higgins!
Turn 4 - Shattered Recovery
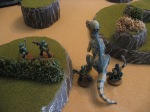
After so many decisive kills it was up to The Lost Platoon to try to recover ground. The Ram hadn't been the focus very much, so he might still get into combat. Plus The Phoenix was still prowling at the back, and even though he was outranged by 5 or 6" he could hit pretty much anything.
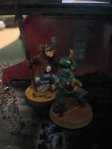
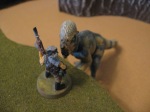
Platoon: I thought I should try to even the odds, and the nearest and juiciest meal to do that with was Trask. The Ram agreed, and Charged up to the second floor and into melee with Trask. I rolled well and hit him 5/6 times which killed Trask.
 Drylands:
 Well I was due to have someone die, and I'd prefer Trask over any of the real ranged hitters. One of these days he'll get to Club someone to death though. Anyways it was time to focus on The Ram and try to bring it down before it reached the rest of my Posse. To this end Trista moved into short range and fired, hitting 2/3 times for 7 damage (good old Cover) against The Ram. Khulan followed suit, but at medium range, and only hit 3/6 for 3 damage. The Ram was now at 8
HP. Almost there!
Platoon: The Phoenix had to be careful in his movement, since I didn't want to expose him to another one-hit-kill like poor Private Jacobs. So I played it a bit safer and stood and fired at Quidel through the window of the house. I hit 4/6 times for 4 damage which killed the Drylands Leader, woot. Khulan failed his Bravery test, but the rest passed.
Drylands: Well I guess Quidel couldn't survive forever. At least my whole Posse didn't run away as a result of his death. Anyways Tunher fired on The Ram, but needed 10+ to hit (7 base, +1 range, +1 AR, +1 target moved...yeah :( ). Anyways he still hit 1/3 times for 5 damage, so The Ram was down to 3
HP.
Turn 5 - Rampaging Beasts
 Platoon:
 The Ram tried to continue his rampage, but with 3
HP I didn't expect him to last the turn. Anyways I Ran him into close combat with Tunher. Even though the guy had a Machete, I figured Trista and Khulan hitting at -1 (the In Melee penalty) would be worth it. Plus if Tunher tried to move away I could get a Snap Attack in there.
 Drylands:
 Time to do some big game hunting! Except my dice didn't agree. Tunher missed entirely with his Machete against The Ram. Khulan Fled backwards, but was still in short range. He fired at The Ram but missed with EVERY FREAKING SHOT. Not only that but he rolled THREE 1s, so his gun was out of ammo and needed to be reloaded.[/i]
Platoon: Heh, looks like Khulan's barbaric powder based rifle finally failed. To show him up I thought The Phoenix would give a demonstration of his laser based Light Repeater. He squeezed the trigger and sent a hail of laser blasts at Tunher, hitting 3 times (including 1 Critical) for 5 total damage, which killed Tunher. That'll teach him to botch his Machete work. It did however leave The Ram exposed.
Drylands: Trista aimed down the barrel of her powerful rifle, but she must have been unaccustomed to the 600kW version as I MISSED with ALL 3 shots. I only needed 6+! Ugh, anyways I moved her back 4" to keep out of Run/Charge range of The Ram. Guess I should have saved "Try Again", but then I wouldn't have one-shot Jacobs.
Turn 6 - Better Luck?
 Platoon:
 Denied his tasty Tunher meal, The Ram Charged Khulan and hit 2/5 with a bad roll (not as bad as Drylands last turn, heh) for 3 damage. Khulan was down to 6
HP at this point.
 Drylands:
 Khulan had his fill of being bitten by a Dinosaur so I decided he'd risk leaving combat. This meant The Ram got a free Snap Attack against Khulan, but it also cleared the shot for Trista. Too bad The Ram rolled well on his attack and hit Khulan with 2 Criticals and 1 normal hit for 4 total damage. Khulan at least passed his Bravery test. Anyways I moved him to the other side of the cliff and Reloaded his weapon.
Platoon: The 16" max range of the Light Repeater was painful at this point as I had to Run the Phoenix across the fence and into the Lakehouse courtyard to try to get into range.
Drylands: Surely my dice can't fail too miserably too often. I moved Trista into short range to be sure and she fired at The Ram, hitting twice for a total of 8 damage which killed the Dinosaur.
Turn 7 - Tightening the Noose
With an unfavorable 2vs1, the situation is looking grim for The Lost Platoon.
 Drylands:
 I won Activation, and since it was a 2:1 ratio I had to handle both my characters. Trista moved closer to The Phoenix, but still was prudent enough to get behind the cover of a small hill. Khulan moved forward into line of sight with The Phoenix and fired at long range (actually at his max 20" range - thanks to Clear Sight). He hit with 1 Critical (needed a 9+ to hit) for 2 total damage.
Platoon: The Drylands team weren't looking too great, but neither was I. If I could just get one solid shot in I might take Khulan out. For now I tried to get out of line of sight and I used the Small IRP to heal The Phoenix back to 7
HP. Hopefully it wasn't just delaying the inevitable.
Turn 8 - Another Notch
 Drylands:
 I won Activation again, which helped since I could hopefully kill The Phoenix before he even got to act. Khulan backed away from the hill, mainly to protect himself. Then Trista maneuvered until she had a clear shot at The Phoenix through a window. Firing at long range she hit 2/3 times for 7 total damage which was just enough to kill The Phoenix and win the game.
Platoon: Nothing because they're all deaaaaaaad.
After Action Report
The Drylands United Cattle Company was triumphant (again), this time against the bounty hunter mercenaries of The Lost Platoon. I imagine the motley Drylands crew is far enough away from Neotechnoist territory that they can safely blend back into the Duster towns. Anyways the game ran 8 turns and 1 1/2 hours (mostly due to taking the ~50 photos and writing a turn-by-turn report). Some thoughts from the players below:
Drylands: Another win for me. Or should I say for Trista and Khulan, because they pretty much carried the team. Trask acted as solid bait, drawing a lot of fire and distracting the main force of the Platoon. Quidel dying so early was unfortunate, but I guess The Phoenix in the backline was a taste of my own medicine. Tunher worked okay, but I think a smaller, cramped map would be more to his liking (especially with a 9" range Pump Shotgun). I had some pretty solid dice rolls, but regardless Turn 5 was probably the worst I've rolled in a while (in any game, haha). To not be able to bring down The Ram when he only had 3
HP! Sad. Anyways good times, although we basically fought just around the Lakehouse and didn't really exploit the rest of the map.
Platoon: Well I ALMOST had my hopes up near the end that I could pull a win out. Then Trista killed The Phoenix, and it was kind of like "Oh...well then". The early one-shot-kill of Private Jacobs certainly didn't help. I didn't even get to use Captain Gunfire's Shudder Lance because he dawdled around and got himself shot a turn before melee. At least I got Quidel back eventually. That 600kW Lever-Action Rifle Trista had sure was a beast and made The Phoenix's Light Repeater look like a toy. Then again it costs about three times as much, heh.
Instant Replay
I felt that the game was so close and could have swung either way that I wanted a rematch. I ran through it again, and The Lost Platoon rolled over Drylands with a vengeance, so I guess that Posse is just good when in the spotlight. Although I imagine improving target priority helped a bunch, as did knowing how deadly each member could (or couldn't!) be.
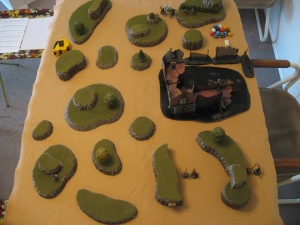
The map was the same, but the setups were reversed. The Lost Platoon had some solid early turns, basically wiping out everyone but Trista and Khulan. In a sweet twist of fate Private Jacobs actually got into a running shooting match with Trista, and WON! The minimum range on her rifle hurt since she had to keep moving to get into a firing position, and eventually Jacob's Light Pistol overcame her and won the game for The Lost Platoon. There were a few close calls for sure though! I found it interesting how a second match can change the flow of the game. Plus I could run the game without worrying about too many pictures or writing, so it finished in 30 minutes instead of 1 1/2 hours like the battle report version.
Like I said I didn't do a turn by turn report for it, but I did take a few pictures: