Switch Theme:

Friday Quick Tip: Glass Bead Rivets  [RSS] Share on facebook Share on Twitter Submit to Reddit
»
Author Message
Advert


Forum adverts like this one are shown to any user who is not logged in. Join us by filling out a tiny 3 field form and you will get your own, free, dakka user account which gives a good range of benefits to you:
  • No adverts like this in the forums anymore.
  • Times and dates in your local timezone.
  • Full tracking of what you have read so you can skip to your first unread post, easily see what has changed since you last logged in, and easily see what is new at a glance.
  • Email notifications for threads you want to watch closely.
  • Being a part of the oldest wargaming community on the net.
If you are already a member then feel free to login now.


Made in us
[DCM]
Illustrator


North Carolina


+++++++++++++++++++++++++++++++
Friday Quick Tip: Glass Bead Rivets
By: grey_death


I've never gotten too deep into scratch building or kit bashing in all of my years of wargaming.  But the need has arisen as of late to get serious about both and with that comes new ideas, tips and techniques.  Today I am sharing a method I've known about for some time, but never gave a try, Glass Bead Rivets.

After searching my local hobby store multiple times to no avail, I finally stumbled upon the proper bead size made by a company I never thought I'd find myself supporting, the one and only Martha Stewart empire!  To save you some time I've dug up an online supplier of the beads (Martha Stewart Luster Glass Microbead Onyx), Fabric.com.  I haven't scoured their site for anything else just yet, but you never know what you'll find in any random hobby/crafts shop that might aid your modeling!

You'll also need some Super Glue, a pin vice and drill bit (1mm) for this. GW's drill and bits work just fine for this, so if you've got one, you're good to go!  I suggest doing this by hand, as opposed to using a power drill, as you'll need more control than a power drill can afford you. 


I start each rivet very shallow and usually am able to work 4-5 rivets at once.  Each is only a few light turns of the drill to mark the placement.  Be very light on the drill and I highly suggest using a test piece of plastic to work out just how much pressure you need to apply to get the proper depth.  Don't get ahead of yourself and try to drill to the proper depth in one go.


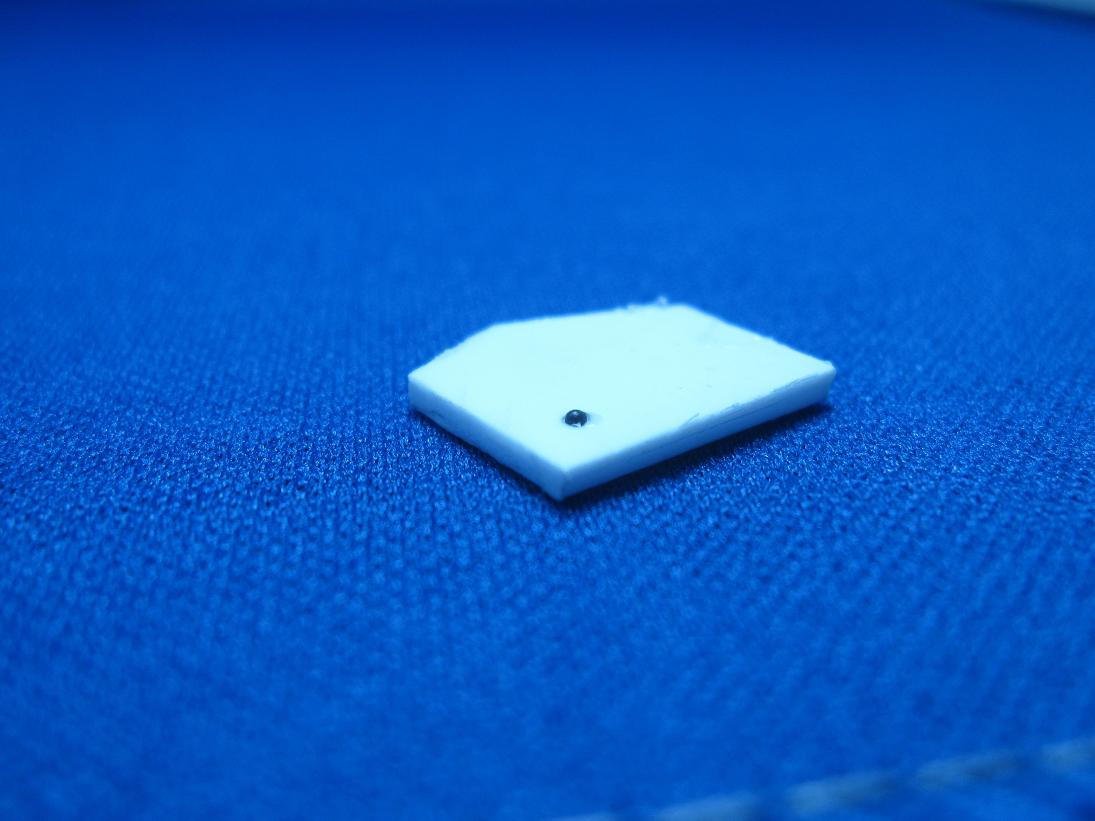
I dry fit each rivet after getting them started to see just how much needs to come out of the pit.  You want the rivet to be half obscured by the hole with the other half sticking out to create the proper look.  As you can see in the above photo, this one is just slightly above the line it needs to be, and the pit will be drilled out just a few more light turns with nearly no pressure, just letting the weight of the pin vice do the work.


The light adjustments to the depth complete, the second dry fit confirms the pit is at a good depth and the rivet is ready to be glued into place.  I find I test each pit 2-3 times before I move on to the super glue.  Don't worry if you go too deep, you can always create a little battle damage and just drill the hole all the way through creating a rivet that was blasted off/out by a large caliber weapon! 


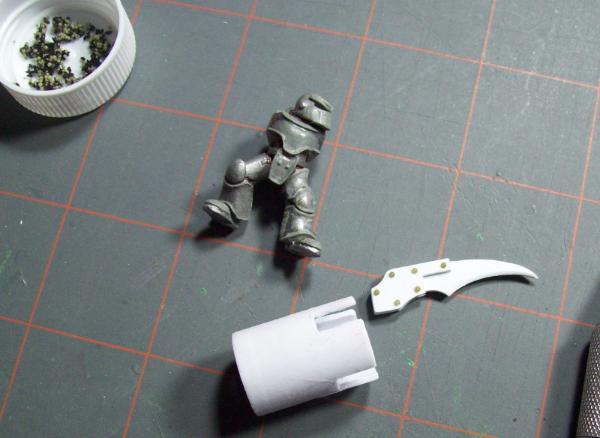
To apply glue I used a small piece of spare styrene cut to a point and dipped into the super glue.  Had a toothpick been available I would have made quick use of it as it would have likely worked far better! 


Apply a small dab of glue to the inside of the rivet pit.  I didn't even attempt to add the glue to the glass bead itself, I just imagined myself pulling little beads off my hands and arms with small bits of skin attached if I tried!

A small handling tip for the beads themselves, I found that wetting the tip of a finger or thumb made it far easier to move and place the beads as it made them stick long enough to get them into the pits.


Once the bead is in place, I always push them down into the pit using something flat, most of the time it ended up being the butt end of my hobby knife.  This helps ensure the bead is set all the way into the pit instead of floating in the super glue. 


Above you can see the beads on some additional armor plating I've applied to a Leman Russ hull.  The scale is just right for most needs and adds an important bit of detail to otherwise boring sections of flat space.  If you're scratch building/kit bashing a piece of armor this is a must have technique!


I know this isn't the only way to go about rivets!  But as a starting point, it's hard to beat.  If you've got some rivet links, throw them up in the comments!  Used this method?  Show us all your results!  Stay tuned for more tips from the scratch build as I get further along!

-Aaron
Call For Fire

DA:80+S+GM(DPC)B++++I+Pw40k99+D++A++/mWD247R++T(M)DM+++++ 
   
Made in fi
Battlewagon Driver with Charged Engine


somewhere in the northern side of the beachball

How big is that rivet?

Every time I hear "in my opinion" or "just my opinion" makes me want to strangle a puppy. People use their opinions as a shield that other poeple can't critisize and that is bs.

If you can't defend or won't defend your opinion then that "opinion" is bs. Stop trying to tip-toe and defend what you believe in. 
   
Made in us
[DCM]
Illustrator


North Carolina

illuknisaa wrote:How big is that rivet?


Just around 1mm, maybe smaller. It's the 1mm drill bit being used to create the crater shape it fits into.

-Aaron
Call For Fire

DA:80+S+GM(DPC)B++++I+Pw40k99+D++A++/mWD247R++T(M)DM+++++ 
   
Made in us
Loyal Necron Lychguard


Palm Beach, FL

Are all the Martha Stewart beads roughly the same size/shape? I bought a set of generic brand ones a while back for the same reason, but it's kind of annoying as they vary wildly in size, and many are miscast and not the right shape. It works for Ork rivets, at least.
   
Made in us
[DCM]
Illustrator


North Carolina

MasterSlowPoke wrote:Are all the Martha Stewart beads roughly the same size/shape? I bought a set of generic brand ones a while back for the same reason, but it's kind of annoying as they vary wildly in size, and many are miscast and not the right shape. It works for Ork rivets, at least.


They are indeed. All of the rivets I've done have all been exactly the same. I'm guessing the quality control is much more stringent.

-Aaron
Call For Fire

DA:80+S+GM(DPC)B++++I+Pw40k99+D++A++/mWD247R++T(M)DM+++++ 
   
Made in us
Homicidal Veteran Blood Angel Assault Marine


Dayton OH

Awesome, I just ordered a bottle because I've been all over my hobby stores trying to find something small enough.. but it got me thinking glass beads? Like you SAND BLAST with? You can get them in much larger quantities from industrial suppliers. Not like any of us need a fifty pound bag, but you can get five pounds for $40 and it might be an idea for a gaming club or store to buy one and split it into smaller quantities

For the Emperor! Kill Maim Burn!... I mean purge the unclean!  
   
Made in us
Liche Priest Hierophant


Only thing is, Industrial beads would probably have even lower QC than the cheapo bargain store decorative ones. Misshapen, lumpy, different sizes...

GENERATION 8: The first time you see this, copy and paste it into your sig and add 1 to the number after generation. Consider it a social experiment.

If yer an Ork, why dont ya WAAAGH!!

M.A.V.- if you liked ChromeHounds, drop by the site and give it a go. Or check out my M.A.V. Oneshots videos on YouTube! 
   
Made in us
[DCM]
Illustrator


North Carolina

Anvildude wrote:Only thing is, Industrial beads would probably have even lower QC than the cheapo bargain store decorative ones. Misshapen, lumpy, different sizes...


I would expect that to be true too. Plus, with how many beads you get in these small containers, it's hard to think you'd need anything more!

-Aaron
Call For Fire

DA:80+S+GM(DPC)B++++I+Pw40k99+D++A++/mWD247R++T(M)DM+++++ 
   
Made in us
Homicidal Veteran Blood Angel Assault Marine


Dayton OH

grey_death wrote:
Anvildude wrote:Only thing is, Industrial beads would probably have even lower QC than the cheapo bargain store decorative ones. Misshapen, lumpy, different sizes...


I would expect that to be true too. Plus, with how many beads you get in these small containers, it's hard to think you'd need anything more!


Apocalypse army, all wearing Crusade armor!

For the Emperor! Kill Maim Burn!... I mean purge the unclean!  
   
Made in nl
Esteemed Veteran Space Marine


the Netherlands

some model train companies have plastic, resin and sometimes even metal rivets in all sizes. you will get a sprue with like 25 rivets which you can cut off

   
Made in us
Frenzied Berserker Terminator


Everett, WA

I have used the bead method of rivets! However, I went uber cheap! I broke open the used water filter from our Britta water filter at work.

After sifting through the resulting beads and charcoal bits, only to find that rarely can you find more then 3 beads the same size, I strongly recommend the Martha Stewart Beads. I will be getting some of those soon.

However, for an experiment to see if I liked the method, it was great! I am building a large War Walker, and I wanted some mean looking claws for the Close Combat Weapon.


Also, a note on the filter beads....when they dry out, they seem to shrink. So be careful.

Thanks for the Tutorial!


Forum Index » Painting & Modeling Tutorials
Go to: