To make the best of the glorious autumn sunshine, my other half and I spent the weekend outside making the base for our battle board. Fueled by our desire to have a surface to play on (my
DE stick to our carpet...) and something we can call totally our own (the other choice was a Zuzzy) we had spent some time the previous weekend getting the needed equipment.
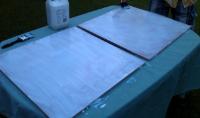
Before I go any further I would like to say that this is a very BASIC board, with no frame or clips. Later we might add some wooden pins, but not being very handy and not having the space to do more serious DIY work we are quite happy for some simple tiles. We can always put some of that sticky grip net on the bottom for when (if) we put the tiles on a table.
This is what we used:
Eight 2' x 2' squares of 12mm thickness
MDF (the sheet we bought gave us 8 tiles and we decided to make two 4 'x 4' boards as we only play small games so far)
A bag of general purpose ballast
A tub of dark grey paint for a base
2 cans of texture spray, one brown for an earthy/rocky texture and one green for a planty texture
A bottle of PVA glue for sticking and sealing
An assortment of brushes and things like buckets and trowels
Step 1:
http://images.dakkadakka.com/gallery/2011/10/3/277701_tb-Gluing%20the%20tiles.jpg
We brushed pure PVA glue onto the boards ready for pouring the ballast on. Some people might used watered down glue for this part, but our ballast was rather coarse with some larger stones in, so the stickier the better. The day was rather hot so drying wasn't an issue. It doesn't look like it, but I swear the sun shined all day!
Step 2:
http://images.dakkadakka.com/gallery/2011/10/3/277702_tb-Spreading%20the%20sand.jpg
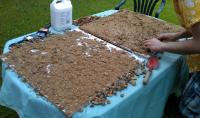
The messy part - pouring on the ballast and patting it down into the glue, removing the really large stones. We wanted to get as much sand stuck as possible so really stuck it well into the glue and pushed it around a bit so some of the glue came up into the sand layer. This took a good while to dry, and as we were losing light we left it overnight.
Step 3:
Once the sand had dried a layer of watered down PVA glue (50% strength) was painted on top to seal the ballast. There were plenty of rough areas that would catch and crumble off, so a good, generous coat was essential. This took about an hour to dry in the sun.
Step 4:
http://images.dakkadakka.com/gallery/2011/10/3/277703_tb-Painting%20the%20undercoat.jpg
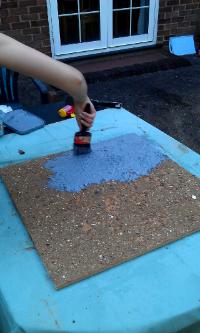
Time to put on the undercoat of grey paint. This transformed our boards into "ballast stuck on board" to "lunar landscape" in just a few strokes of a brush. It's beginning to look like proper terrain now!
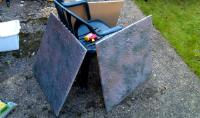
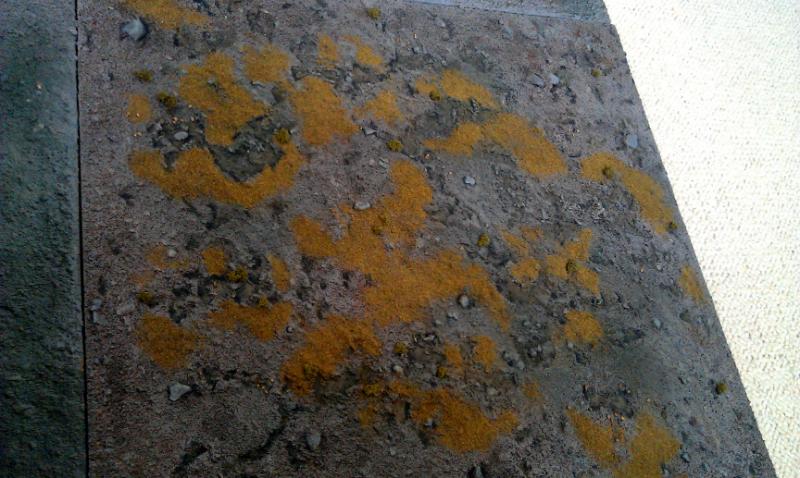
Step 5:
As we are going for a sort of rocky, swampy, muddy landscape (bit of everything really), we used the spray cans to add some texture. The brown one put a layer of flecks which looked like clods of earth churned by marching feet and the green gave a mossy feel. The picture is a bit 'bleached' but you can get the general idea. I'll post more as the rest gets done.
http://images.dakkadakka.com/gallery/2011/10/3/277704_tb-After%20spraying.jpg
This is how it is at the moment. Over the next couple of weeks we intend to paint, flock and otherwise decorate our board so we can use it in our next weekend game.
That's it for now!
PS bigger pictures in my gallery, I thought when you did images in a forum post they linked to the bigger picture it was taken from :(


 Gorgutz Waaagh 2000pts 20-9-9, 1750pts 23-7-13


 Eldar
Eldar  -5000 points