Switch Theme:

Amateur Terrain Building Blog!  [RSS] Share on facebook Share on Twitter Submit to Reddit
»
Author Message
Advert


Forum adverts like this one are shown to any user who is not logged in. Join us by filling out a tiny 3 field form and you will get your own, free, dakka user account which gives a good range of benefits to you:
  • No adverts like this in the forums anymore.
  • Times and dates in your local timezone.
  • Full tracking of what you have read so you can skip to your first unread post, easily see what has changed since you last logged in, and easily see what is new at a glance.
  • Email notifications for threads you want to watch closely.
  • Being a part of the oldest wargaming community on the net.
If you are already a member then feel free to login now.


Made in us
Prospector with Steamdrill


Hey guys. So I started my miniature armies about a year and a half ago, and since then I haven't invest too much time into painting and building my armies. Over the summer however, I had obviously had an influx in available time because I didn't have to do any summer schooling because I was in the middle of transferring schools. So! I through a ton of more work into my 40k Ork army and I've started a dwarf army for fantasy. I'm still not as practiced at painting the models as I would like, but I think I'm getting better, especially since I've started posting on this forum.

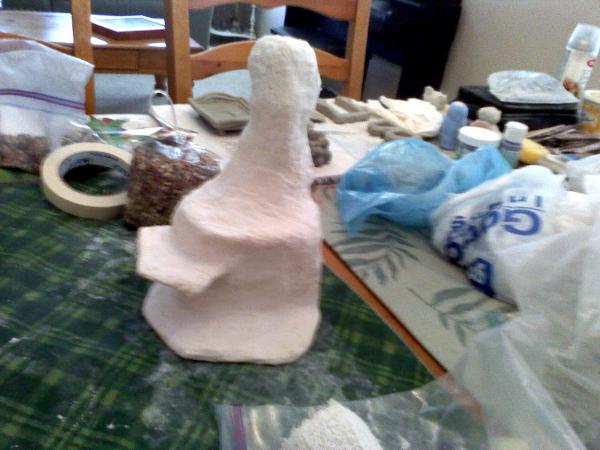
The point of this blog is to display and get some feedback on the terrain pieces I've been working on. Since my girlfriend showed me how easy it is to work with plaster gauze and the like I've been really excited to make these pieces. I've started out with a theme based on an abandoned dwarf mine of which I only have a few pictures.


This is my first piece of terrain. Obviously its unfinished, but even in this state I think it looks a little plain. Once I start flaking it I hope to add some other cool features, like boulders or luminescent mushrooms.


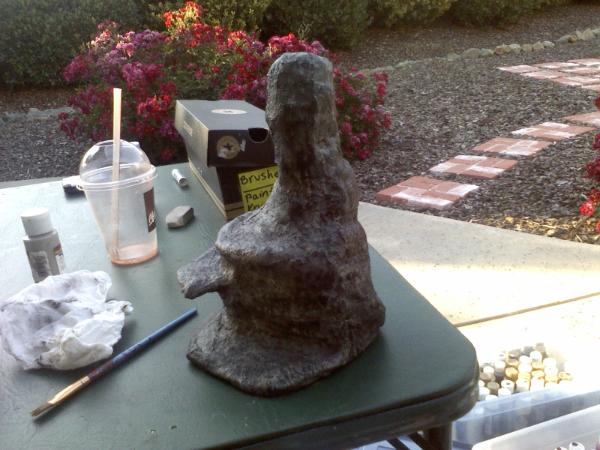
Here's the same spire painted.


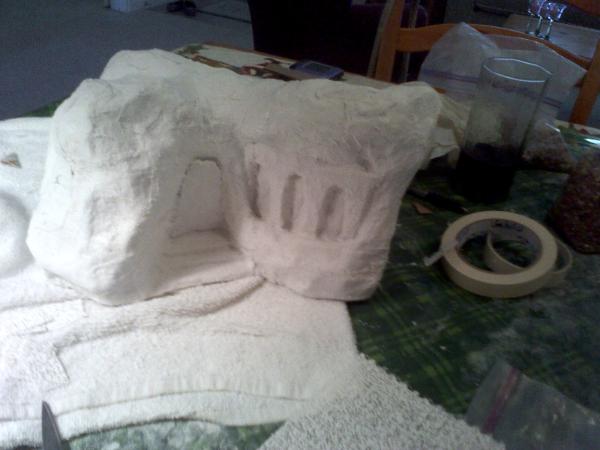
Here is the entrance to an underground Dwarf mining Hall. The building is supposed to be crafted into the stone and was made to be placed right up against the table edge. Like the other one I'm happy with how it came out, but I want to add some more flavor to it. It hasn't seen any flak yet either, so maybe that'll spice things up.

Unfortunately I left both of these pieces with my friends when I transferred to the new school, so I'll have to wait to update those until I'm back home. But! There was a sale on plaster gauze at the Michael's up here and I was able to pick some up for half off. So this next piece will see at least semi-regular updates.


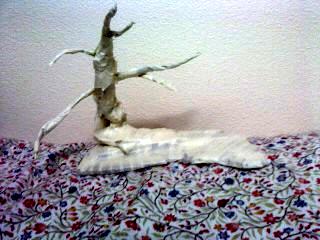
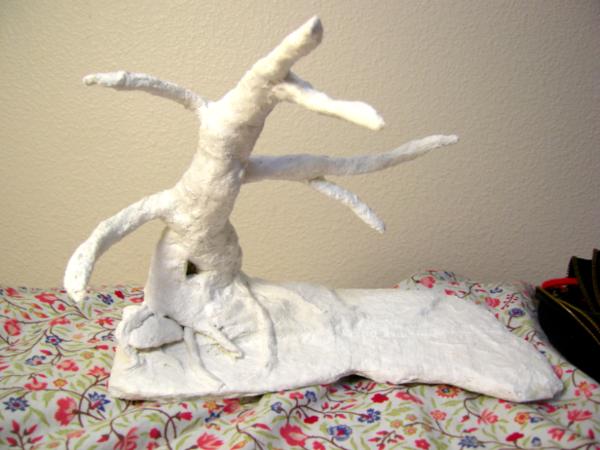
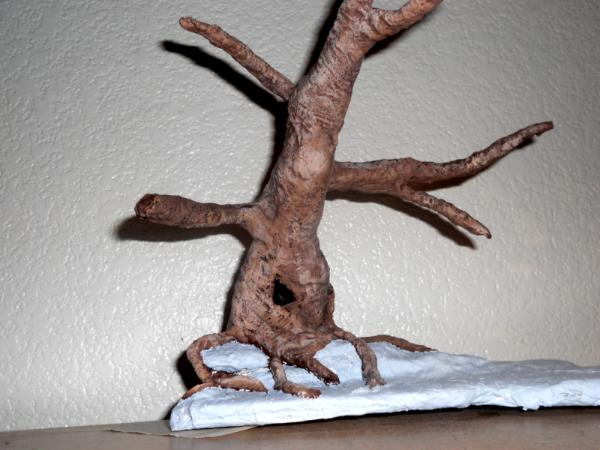
So I call this "Creepy Tree on a Hill". I think the image does it more justice then it currently deserves, but I'll add some more posts tomorrow night when I throw the plaster one it.
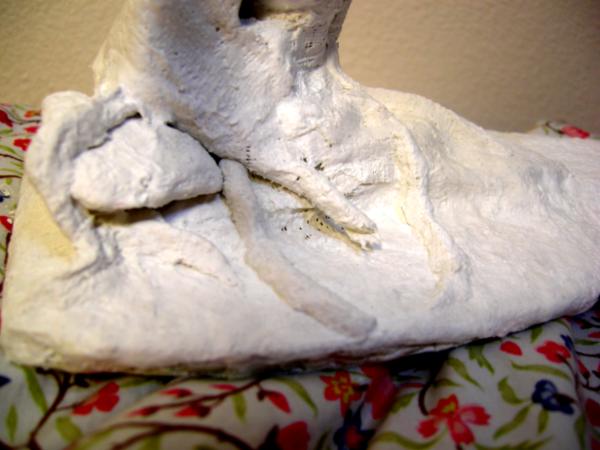
For this guy I used cardboard to create the base and the hill. I just outlined the base with a pen and cut out a couple copies of it. Somehow we only have a small amount of cardboard, so I might have to go scrounge some up and make a larger, better sloping base for it. The tree its self is just crinkled up newsprint with masking tape all over it.

What do you guys thing? Tomorrow night I plan on adding some long, tendril-like roots and maybe a few boulders to give it full affect, and once its painted I'd like to try my hand with some green stuff and plant a few skulls within the hollow.

This message was edited 2 times. Last update was at 2011/10/12 04:10:48


Made in us
Prospector with Steamdrill


So in this picture I've added all the plaster gauze to the creepy tree. For the base I used larger strips of gauze, but once I got to the trunk of the tree I started using long, skinny strips in hopes of emulating the look of bark. There are some spots with large, bulbous knots where I used the wide strips again to get a uniformed, gnarly structure, otherwise I kept pretty steady with the long strips. I feel like some of the branches might have gotten a little scrawny looking, so I'm gunna see if I can file those down, or cover them with flak later. The hollow in the middle has been tightened up a bit. It still has a pretty deep recess that might hold a good plenty skulls, but now the trunk looks a bit more full and sturdy. I'm excited about that. I also added a rock for the tree to rest on and what are supposed to be several long, spindly roots stretching out across the ground. The rock is made of more newsprint covered in masking tape then gauze, and the roots are just straight out of gauze.

Sorry if this last picture hasn't come out very well, I was working on the ground and once I finished the piece was still wet and I didn't want to move it. Once the plaster sets I'll get a better picture.

Hopefully by next weekend I'll have it painted (at least partially). Do you guys have any suggestions for color schemes? My original thought was doing the base as a gray, rocky hill with bits of dreary looking dead grass. My friend has since turned me on to making it all covered in snow. I like this because plaster gauze has a tendency to leave behind a bunch of tiny, textured holes, and a decent amount of snow flak would give me an excuse to cover most of those up.
In any case, I'm totally open to suggestions. Tell me what you think.
   
Made in us
Prospector with Steamdrill


I got back to my model today to find that it was setting improperly. I guess I used too much water because a lot of different portions were cracking in stress areas while other parts were still pretty damp. My girlfriend helped me to repair the crack however and we were able to right the situation. Now its setting properly again and even drying faster. That was a close one!
Since I was able to move it and actually use a decent camera, here's another picture of it.


Then here is a close up on the new roots.
   
Made in us
Prospector with Steamdrill


Here is this weekend's update!

Got the tree painted pretty closely to how I think I want it. Painting the plaster is pretty easy, although its fabric-like material still kind of shows through the paint and the plaster. Hopefully the flak I'll use will cover up any of the places that look quilted over or that still show the little holes. The base is just base painted in grey for now. I plan on making it a snow covered scene so I only want the paint on the base to complement that flak that gets laid down, but I might go over it a little more. I plan to do the rock on the left a lot more.

I'm thinking of sticking some bones either in the hollow, or just in and around the whole model. Might place a hung skeleton in the tree or a crow on one of the branches. What do you guys think?
Next week I'll be heading home to collect the other pieces I was working on. I'll upload my images of those models painted and I'll look into buying some flak to finish everything up.
   
 
Forum Index » Dakka P&M Blogs
Go to: