| Author |
Message |
 |
|
|
|
|
Advert
|
Forum adverts like this one are shown to any user who is not logged in. Join us by filling out a tiny 3 field form and you will get your own, free, dakka user account which gives a good range of benefits to you:
- No adverts like this in the forums anymore.
- Times and dates in your local timezone.
- Full tracking of what you have read so you can skip to your first unread post, easily see what has changed since you last logged in, and easily see what is new at a glance.
- Email notifications for threads you want to watch closely.
- Being a part of the oldest wargaming community on the net.
If you are already a member then feel free to login now. |
|
 |
2012/03/19 03:08:32
Subject: Blood Angel Master & In Need painting help [PICTURES] PURITY SEALS WTF?
|
|

Infiltrating Naga
|
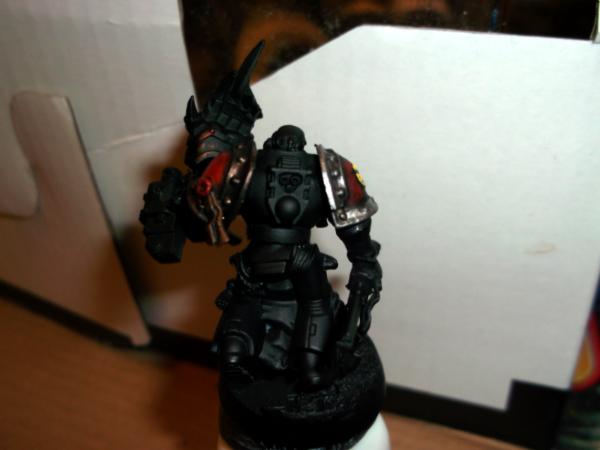
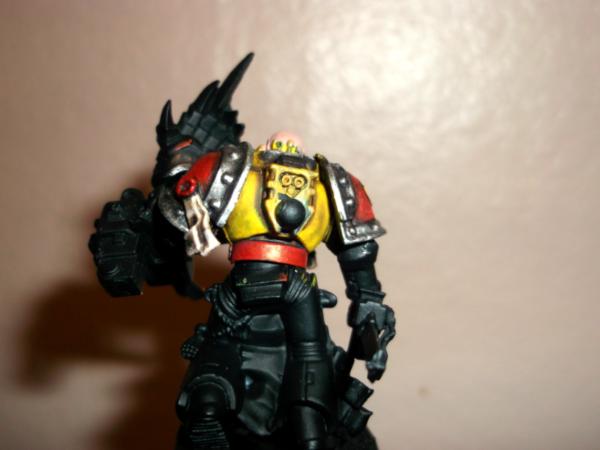
Little dissapointed with the shoulder so far.. I don't know how to get the metal to look cleanly done, it looks.. like the paint is thick through lack of definition but its more-so the way that the metal covers, forming the divide with silver is difficult. I had it looking better before the shoulder, but the actual decal had to be done a couple of times before it actually came out right.. which caused the shoulder pad to come out a little.. dirty? I most likely will come back to this to add battle damage to it just because I'm really not a fan of how un-smoothe the paint on this shoulder is. It was just difficult to get the fading AND the smiley to work... let alone the silver, really need a better way to get smoother fading as well as a better metal trim effect.
I really need some advice on how to 1: get those clean crisp looks to my painting, being both 2: smoothe at the same time. I just can't seem to get the right shading without the paint building up and becoming ugly in its layering. Really could do with some advice here because I'm desperately trying to improve on my painting just getting a smoothness and crips'ness to it would ultimately advance me alot I just don't know how...
|
|
This message was edited 2 times. Last update was at 2012/04/17 16:15:05
|
|
|
 |
|
2012/03/19 03:11:45
Subject: Need painting help [PICTURES]
|
|

Avatar of the Bloody-Handed God
|
I actually love the shoulder pad... so much Im stealing the color scheme :'P
It reminds me of deathwatch
|
Paused
◙▬▬▬▬▬▬▬▬▬▬▬▬▬
◂◂ ► ▐ ▌ ◼ ▸▸
ʳʷ ᵖˡᵃʸ ᵖᵃᵘˢᵉ ˢᵗᵒᵖ ᶠᶠ |
|
|
|
|
2012/03/19 03:15:19
Subject: Re:Need painting help [PICTURES]
|
|

Lady of the Lake
|
I like the look of it too.
I think the secret to making it look crisp though is thin coats and blending.
|
|
|
|
|
|
2012/03/19 03:16:05
Subject: Need painting help [PICTURES]
|
|
Infiltrating Naga
|
xD >.< its my angry marine captain lol xd
Automatically Appended Next Post:
Will be trying the thin coats on the yellow.. I couldn't cope if the whole model ended up looking like it had thick paint on like that would drive me mad @.@. I'm wondering if I should venture into airbrushing.. or if multiple thin coats really is how to do it.
I don't know, do people use airbrushes for detail or small peices like that?
|
|
This message was edited 1 time. Last update was at 2012/03/19 03:17:28
|
|
|
|
|
2012/03/19 12:53:44
Subject: Need painting help [PICTURES]
|
|

Druid Warder
|
I would think down the paint a little bit more and do multiple layers, the pad looks good but you can tell the paint is a little thick there due to the rivets, but its not as bad as i have seen from other people starting out. Before you venture into air brush territory try to get down using the brush first. Air brushing brings its on set of problems that can frustrate new painters. In some ways the air brush is better, but in others i prefer the brush. its simply another tool in your tool kit.
|
|
|
|
|
|
2012/03/19 17:50:22
Subject: Need painting help [PICTURES]
|
|
Infiltrating Naga
|
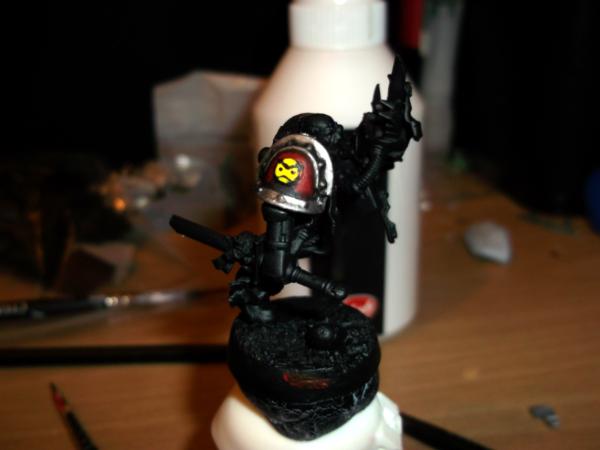
I did have to redo that shoulder pad twice on the actual flat, but never the rivets.. I think it might be a result of my sprayed undercoat which has caused the rivets to become more like blobs, that or the cast because the rivets were only undercoated in tin bitz, dry brushed with bolt gun and washed with devlan mud before another drybrushing bolt gun and highlight with mithril . of course most the process seems to be lost
Automatically Appended Next Post: I have a problem with more watered down paint, I'm not sure I'm using it right, its really runny and ends up welling in crevasses @.@ Automatically Appended Next Post: really not liking how this angry mahreen is coming out lol. I think I'm going to end up paint stripping it and starting over from scratch and just paint a completely different way with paint thats probably more water then paint... For some reason things just aren't coming out how there supposed to and it just looks like theres a massive build up of paint on the model...Im not sure whats causing the problem, if I'm just rushing or if the heat from my lamp is causing the paint to dry too quickly so it stacks up quicker or if my paint isn't watered down enough, but then again how much is enough? I wan't the model to retain a smooth crisp result and its annoying because I know I can do it, its just about how I'm doing it and something somewhere is causing me major problems...
As well as that i think I need to re-visit some battle damage tutorials and use ink a little less. think I used it a little relyantly in the past and its starting also to cause me problems.
|
|
This message was edited 2 times. Last update was at 2012/03/20 02:00:32
|
|
|
|
|
2012/03/29 17:18:02
Subject: Need painting help [PICTURES]
|
|
Infiltrating Naga
|
Second time round... Vallejo + GW Paints, and with horrid paintbrushes...
I need to put some battle damage on this but I don't know where to start :S
Could also do with some pointers on improvements.
And the back
  Automatically Appended Next Post: Automatically Appended Next Post: 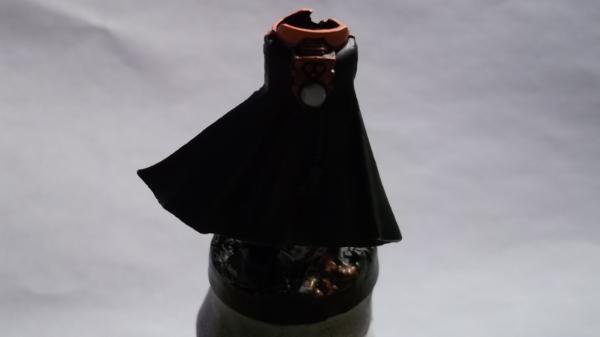
|
|
This message was edited 1 time. Last update was at 2012/03/29 17:24:13
|
|
|
|
|
2012/03/29 18:00:18
Subject: Need painting help [PICTURES]
|
|
Mutilatin' Mad Dok
|
you don't have to do battle dramage unless you want to. I also like the shoulder pad work the way it is. Keep it going!
|
Tournment Record
2013: Khador (40-9-0) 
============
DQ:70+S++++G+M+B+I+Pw40k95-D++A+++/aWD100R+++T(M)DM+
|
|
|
|
|
2012/03/29 18:04:06
Subject: Need painting help [PICTURES]
|
|
Longtime Dakkanaut
|
ON the sanguinary guard, it's all about line highlighting to bring the shape out. Bring that up a few notches first. Worry about battle damage later, as that's best done pretty much last.
|
|
|
|
|
|
2012/03/29 18:35:12
Subject: Need painting help [PICTURES]
|
|
Infiltrating Naga
|
I'm not too confident when it comes to brighter/sharp highlights I feel safer with subtle ones but ill try pushing the highlights up a bit more so they stand forward better.
I'm curious about battle damage though because I've seen tank tutorials for it but no really good infantry ones >.<
|
|
|
|
|
|
2012/03/29 19:50:46
Subject: Need painting help [PICTURES]
|
|
Willing Inquisitorial Excruciator
|
A note on painting yellow. For more depth of color and less paint build up, try to avoid painting yellow on black. Yellow is typically a really weak pigment (actually, it's just really expensive so most paint companies don't put much in), it will take way to many layers to get a good coat, and your shading will be off.
Try painting the area brown or orange first then highlighting up to yellow. Your mini will look much crisper.
Different colors require very different painting techniques. Brown or grey can look great when painted over black, white and yellow is a pain, and red can go either way. Yellow can be easily highlighted with a lighter yellow, but with red either need to stop at pure red, or start using orange or pink to highlight. White can't be highlighted at all, obviously, and you instead have to darken the rest of the model.
Tl;dr: Try to not paint yellow over black. Brown, orange, or grey are better bases.
|
|
|
|
|
|
2012/03/29 20:06:32
Subject: Need painting help [PICTURES]
|
|
Infiltrating Naga
|
That was the bigger problem on the first one, the 2nd images are undercoated white and the coloring came across much nicer, I haven't tried painting yellow again yet but I'll definitely be putting it directly over white in future.
|
|
|
|
|
|
2012/03/31 00:34:59
Subject: Need painting help [PICTURES]
|
|
Infiltrating Naga
|
Have some more shots I upped the highlight just a touch, though the helmets is kinda dark...
... Why not to paint past your bed time I think I've just discovered...
Don't know if you can see very well but I epicly destroyed this... 2 more ordered for next week...
Weird though this one came out okay

No more painting past midnight for me :F
I think I painted the bolter arm in the wrong order to be honest, and I dunno paint was too thick also and I was trying to be smart using the palette from the other arm on the bolter arm to save paint and end up costing me more then 3 tubes of the stuff in replacement order. Never painted a boltgun before and its giving me problems. Unlike the human body/figure / miniature itself its really edgy in that it has so many different flat surfaces I don't know where to blend and highligh from / too. I could simply go with 'edging' which I see lots of people do but it doesn't look right to me :/
Automatically Appended Next Post: Yes that is a very mild very poor attempt at glow :O
But then again.. until I get paid this is what I'm having to paint with >_>
Not sure what the white is, there clean looking to me but yea... aweful huh xd
|
|
This message was edited 1 time. Last update was at 2012/03/31 00:40:09
|
|
|
|
|
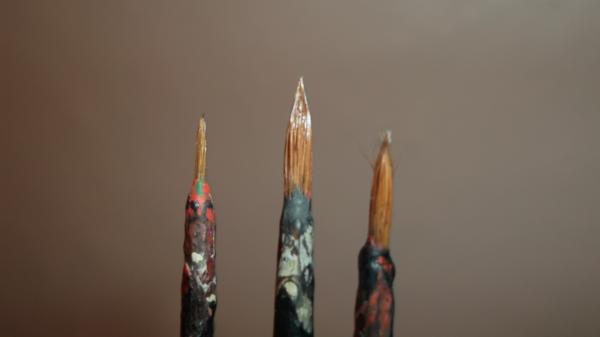
2012/03/31 07:55:47
Subject: Need painting help [PICTURES]
|
|
Longtime Dakkanaut
|
Bin those, they're deader than a Norweigan Blue.
Actually uou could probably cut them down for drybrushes, but you need to get some heavy duty solvent on them to clean 'em. Paint on the ferrule like that is not good. When painting KEEP YOUR BRUSHES CLEAN. Don't let paint build up like that, and your brushes will keep a point and behave properly.
|
|
|
|
|
|
2012/03/31 09:21:16
Subject: Need painting help [PICTURES]
|
|
Infiltrating Naga
|
They are pretty dead, there pretty old too only since ive been getting back into painting lately have I learned properly about brush care and etc. Unfortunately too late for those poor souls xd
|
|
|
|
|
|
2012/03/31 11:58:01
Subject: Need painting help [PICTURES]
|
|
Longtime Dakkanaut
|
Cellulose thinner will remove the paint, no problem, but you will certainly have difficulty getting those to keep a point.
|
|
|
|
|
|
2012/03/31 12:12:13
Subject: Need painting help [PICTURES]
|
|
Infiltrating Naga
|
I'll likely be getting some winsor or w/e it is series 7 sable brushes over the weekend so xD the old ones will be retired to dry brushes soon!
|
|
|
|
|
|
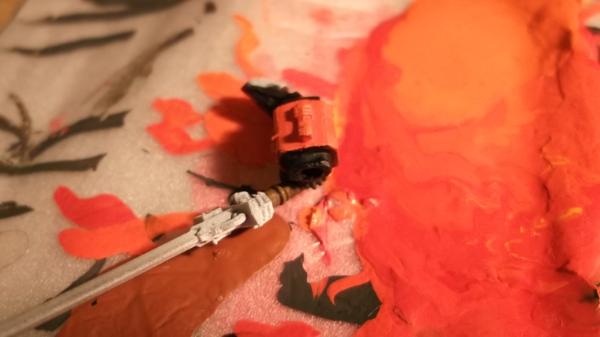
2012/04/04 22:18:11
Subject: Need painting help [PICTURES]
|
|
Infiltrating Naga
|
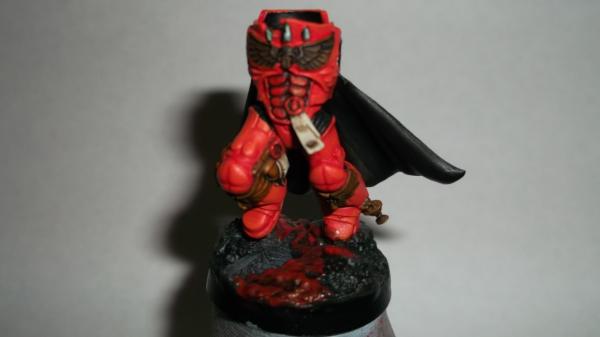
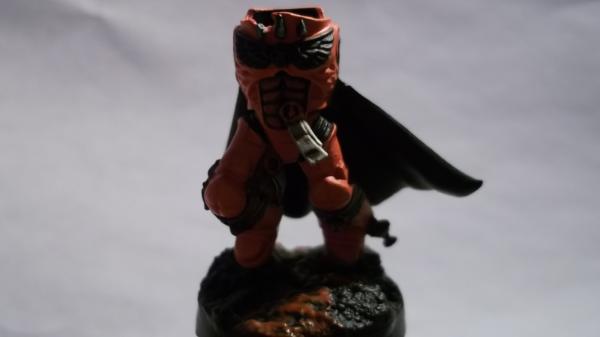
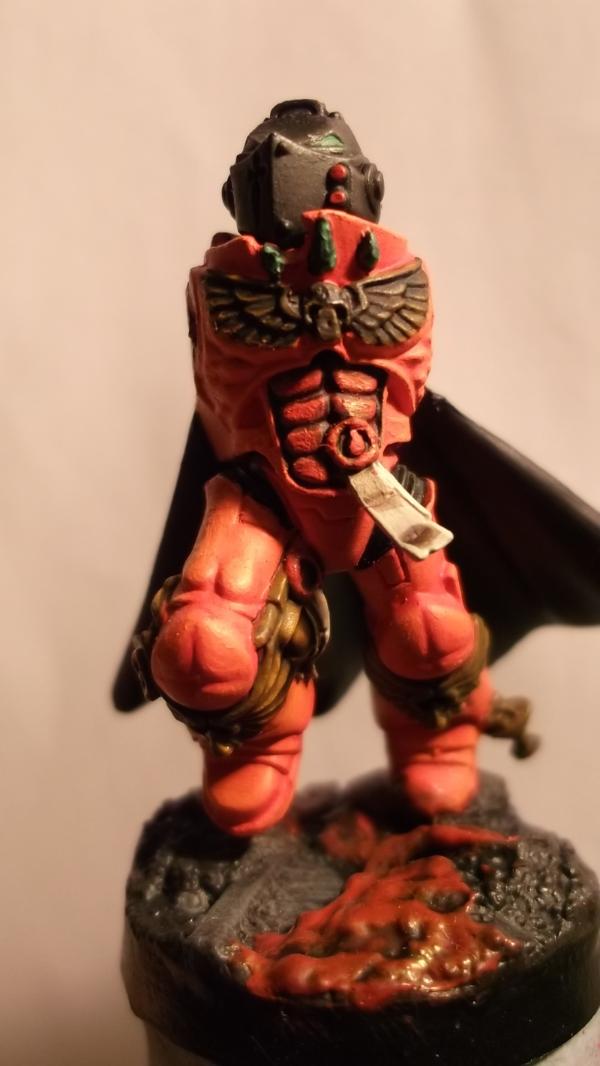
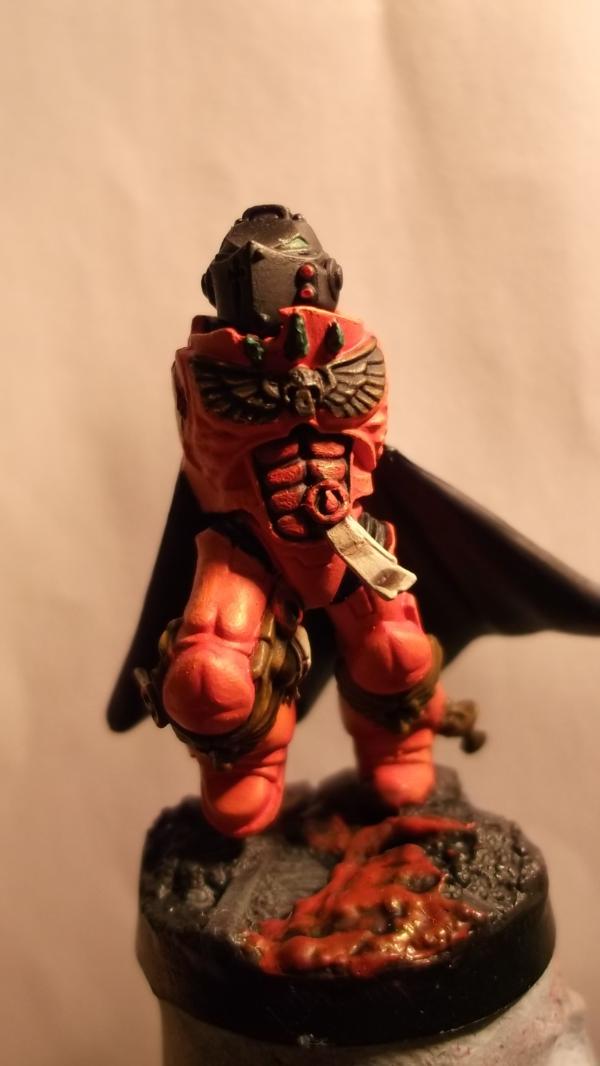
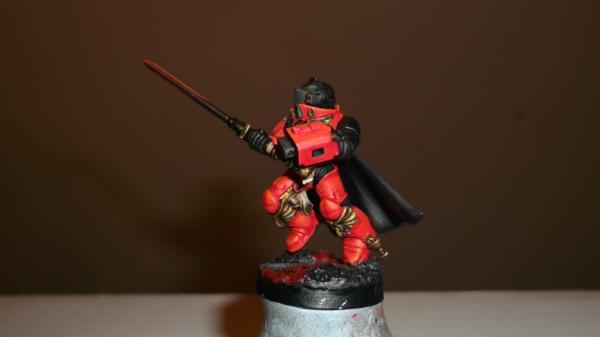
3rd time lucky! It took me 3 attempts to get the arms how I wanted them..
I haven't used my new brushes as much as I'd of liked to yet, they will see use with the gold effects because of the small size of the features but at the moment I haven't felt any real need!
Oh I did do up some of the highlights to have a little practice with one though!
The new highlighted version 
Little worried its picking up some dust before I've gotten to seal the paint D: I get my purity seal stuff tomorrow though @.@
Anyone have any good tips as to how I should go about re-working that front purity seal it looks really bad.
|
|
|
|
|
|
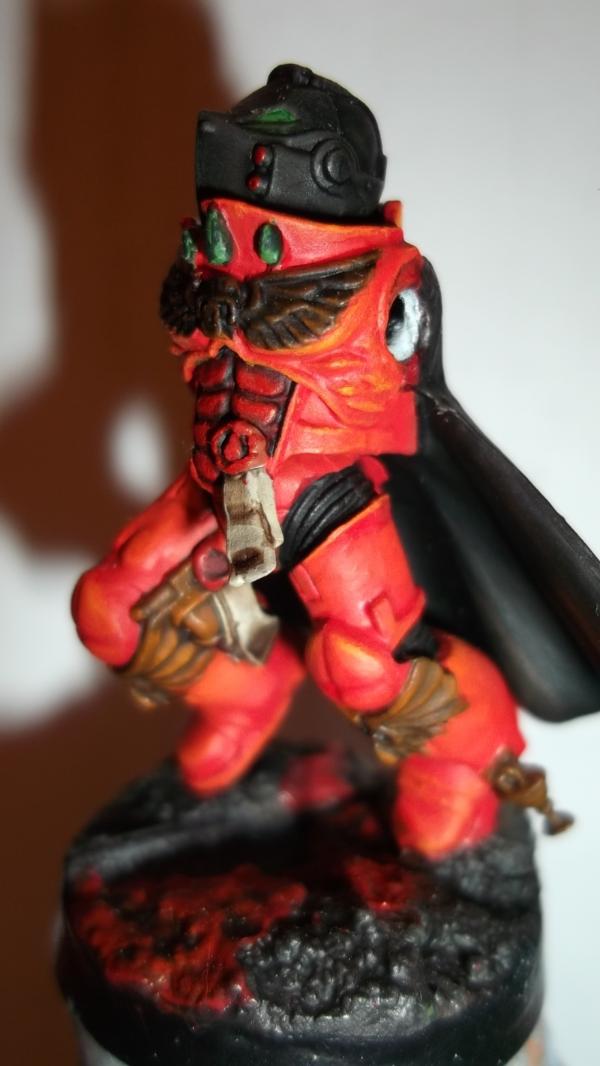
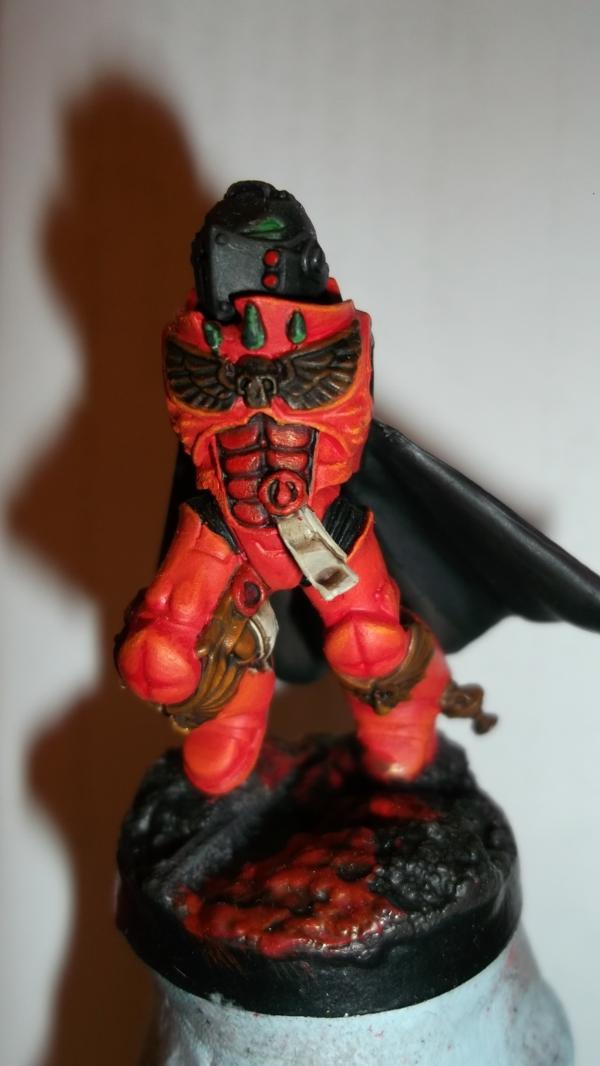
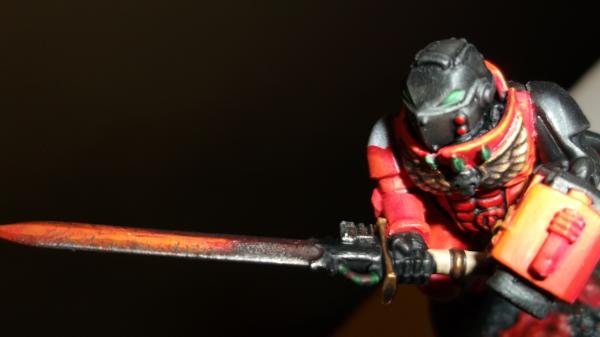
2012/04/07 04:36:38
Subject: Blood Angel Master & In Need painting help [PICTURES]
|
|
Infiltrating Naga
|
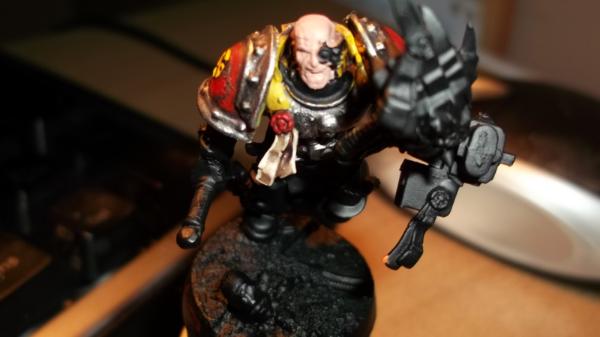
Some fluff ;D!
---
I did the sword using a combination of em, er I forget the name! and flaking.
Basically with a wet brush went up and down the sword to merge the colors until the paint itself began to flake off (as it was vallejo its prone to doing this) but with the base coat of GW paint it drew it all the way back to its base coat color, making a fractured look to the sword before adding a lava like effect and metallics.
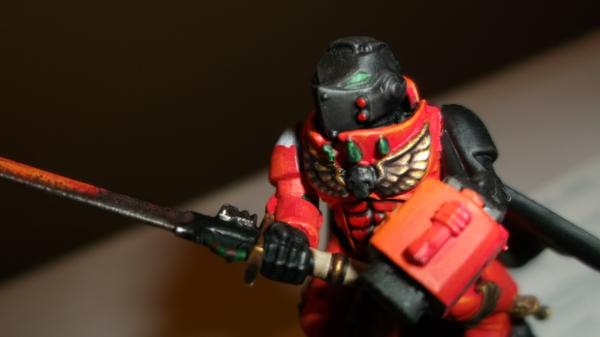
Shoulder pads will be the last addition for this guy, the jumppack will be being painted before them!
The jump pack itself is the one used for the sanguin priests. I have seen somewhere but I'm not sure, some energy like cast or sculpt or something for the booster parts of the jump pack. I'm kind of in need of finding out a way to give the pack a little flair as because of how it is regularly it just looks as though its turned off.. Automatically Appended Next Post: Aaaanyone xD really looking to get an effect that'l look similar to this http://media.defenseindustrydaily.com/images/ENG_F119_Thrust_Vectoring_Test_lg.jpg
|
|
This message was edited 1 time. Last update was at 2012/04/07 16:32:51
|
|
|
|
|
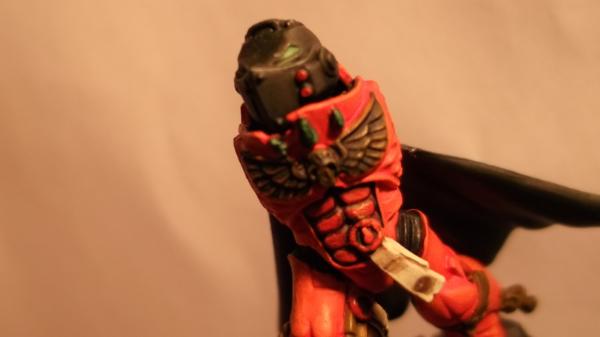
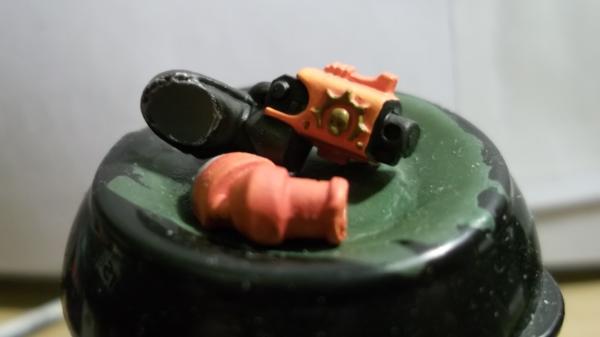
2012/04/17 16:19:12
Subject: Blood Angel Master & In Need painting help [PICTURES] PURITY SEALS WTF?
|
|
Infiltrating Naga
|
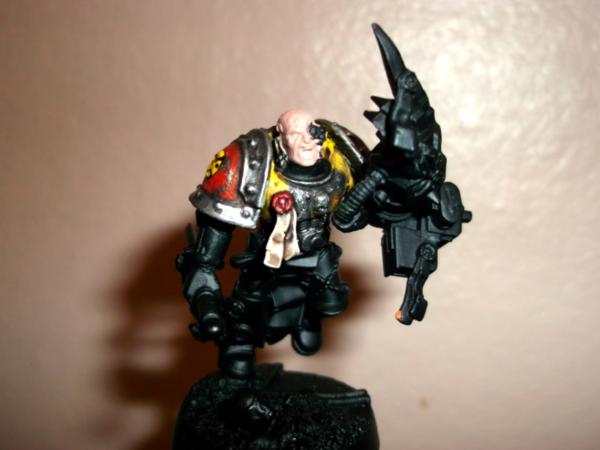
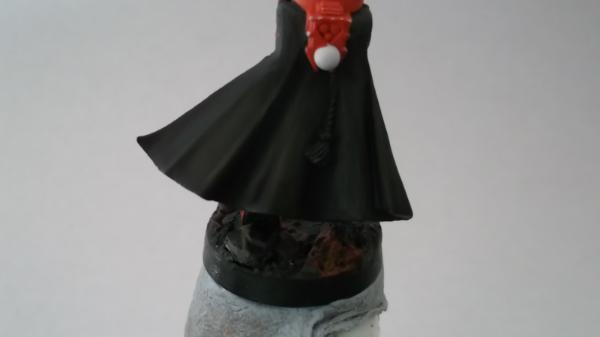
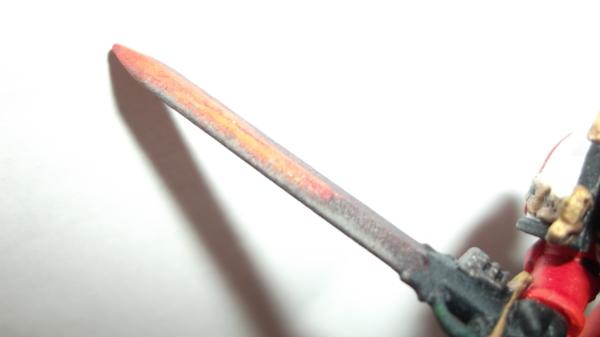
-.- I've applied about 2 or 3 coats of purity seals in the duration of my painting because I noticed that Vallejo was very prone to paint damage.
Now it appears that while I have to really look in close to see inperfections on the model it shows up horribly in the light... I really don't want a repeat of this in future paint jobs. Is there any way to remove that effect, I've heard gloss works?
Also is there any alternative 'thinner' or better paint sealant to use when working with vallejo paints?
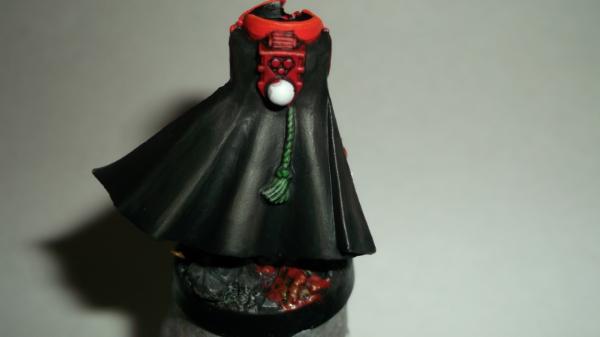
A Good example of a bad picture would be -
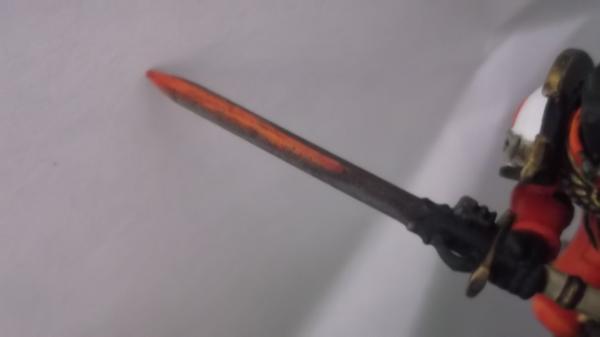
and in light
|
|
|
|
|
|
|
|


 1500
1500  1500
1500 