| Author |
Message |
 |
|
|
|
|
Advert
|
Forum adverts like this one are shown to any user who is not logged in. Join us by filling out a tiny 3 field form and you will get your own, free, dakka user account which gives a good range of benefits to you:
- No adverts like this in the forums anymore.
- Times and dates in your local timezone.
- Full tracking of what you have read so you can skip to your first unread post, easily see what has changed since you last logged in, and easily see what is new at a glance.
- Email notifications for threads you want to watch closely.
- Being a part of the oldest wargaming community on the net.
If you are already a member then feel free to login now. |
|
 |
2012/04/11 02:00:03
Subject: Battle Damage Tutorial (Scratched/Chipped Paint, Bullet Holes, Picture Heavy)
|
|

Ultramarine Land Raider Pilot on Cruise Control
|
So I’ve been working lately on space marine vehicles and I did not want my machines’o’death to look like they were entirely fresh of the press, so I figured ‘hey lets try some battle damage/scratched-chipped paint.
I am not sure if anyone has a better technique but here is what I do:
Chipped Paint/Scratches:
To simulate chipped paint and scratches I use the following paints:
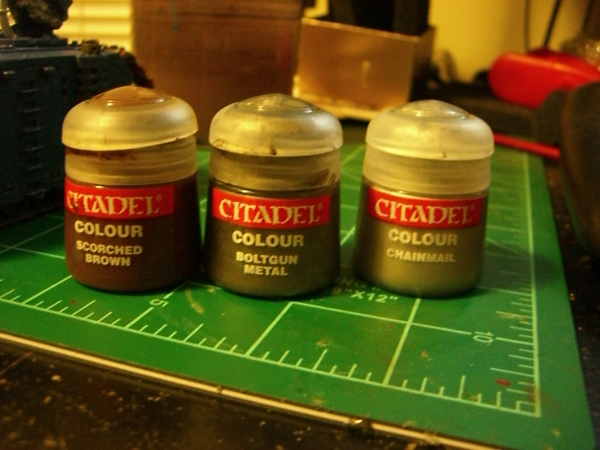 Why these Paints?
 Boltgun Metal is really an awesome paint, it works great for most basic Warhammer metals and it take a wash really well, couple that with Chainmail to highlight it and you have a great looking end result with minimal effort. Scored Brown? Easy, rust has a brown/redish color to it. The Scorched Brown does a good job of making the damaged area look like a) it is rusting a bit in areas that have not been scratched recently and b) it adds a dark border to add emphasis to the damaged portion. This makes an armor colored highlight stand out more and works well if you want to use washes at the end of your project (or weathering powders) to further add rust/grunge effects to your model.
I start by applying Scored Brown to the area that I want to have the damage. I usually just try to make a bunch of lines going outwards making sure that each successive line is touching the last, basically you are not looking for perfection because lets face it, paint usually does not chip/scratch perfectly.
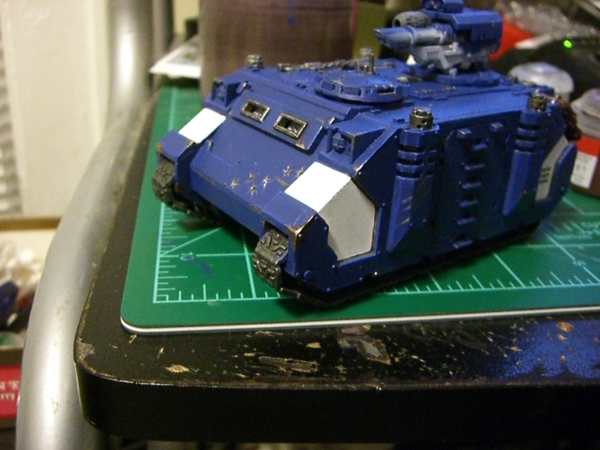
I then go back over this area with Boltgun Metal in the same fashion however I do not cover all of the brown. I make sure to do the same line type of method that I use with the brown but making sure to leave brown slightly on the outside of the Boltgun.
Once this dries I apply Chainmail in the same fashion, but very lightly and I do not cover the whole area, this helps make the lighter portions look like fresher scratched areas.
Finally you can end with a highlight around the damaged area with the color of your models armor to help give the illusion of chipped/scrapped paint. I’ve experimented with applying a black wash and then applying the Chainmail as well, it works pretty nicely because it darkens the Boltgun prior to the lighter paint being applied.
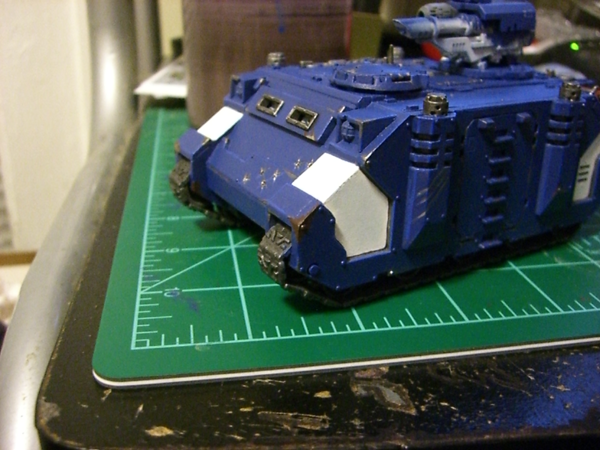
Bullet Holes:
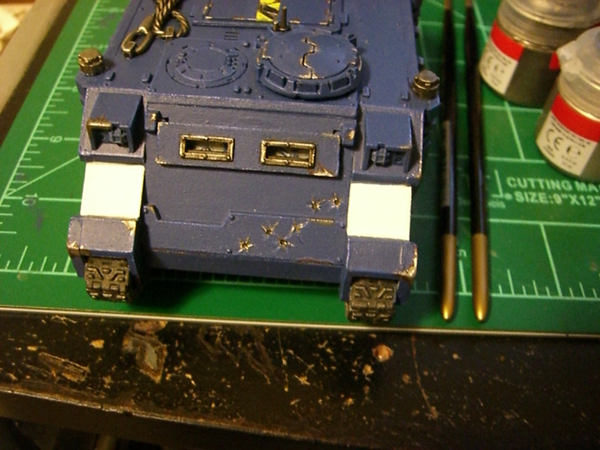
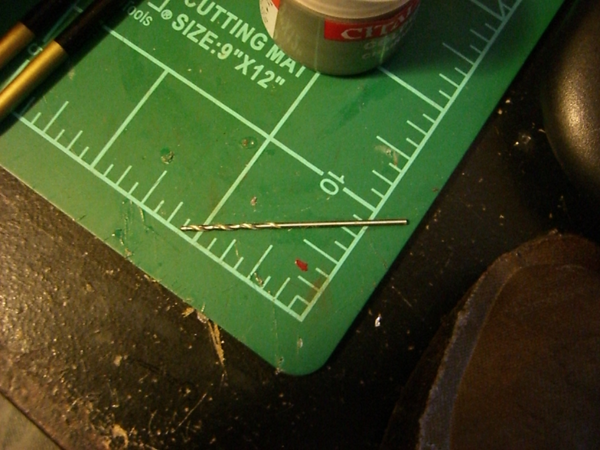
To simulate bullet holes I use an xacto blade and a very small drill bit.
I start by planning out where I would like the bullet holes to be, the direction they will go, and about how many I want.
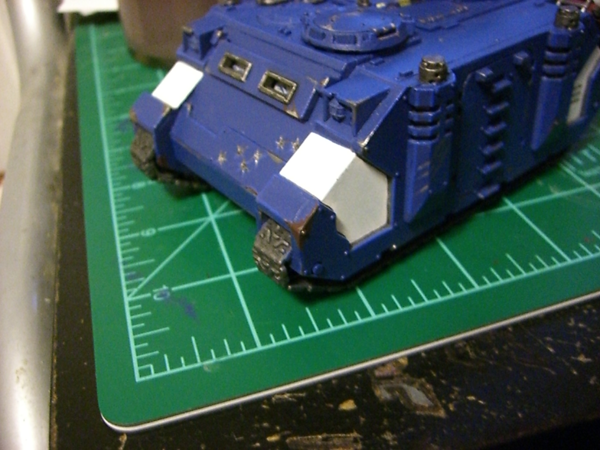
I then use the drill bit, mine came with my (pin or pen, not sure >.<  vice, to make a very small hole (don’t go too deep, unless you want it to penetrate the armor).
I then score the outside edges a bit with the xacto blade and make a couple of longer scoring marks to help give the effect of a dent/crack in the armor.
To paint the holes I start with Boltgun Metal (paint names have changed=[) and fill in the hole/follow the score marks outward. Don’t be afraid to try to get fancy here, you’ll tidy it up later.
After this is dry I get the color of my armor itself (in my case Mordian Blue) and touch up around the score marks in places that look off.
I then get a small drop of Badab Black wash and put it into each hole, smear it outwards with the score marks and let it dry.
Finally my finishing touches are going back over the score marks with Chainmail, very lightly and not perfectly, to bring emphasis to portions of the bullet strike. To top that off I highlight with my armor’s highlight color, in my case Ultramarines Blue, to help give the illusion that the paint was actually chipped.
Expanding This Technique: (Examples)
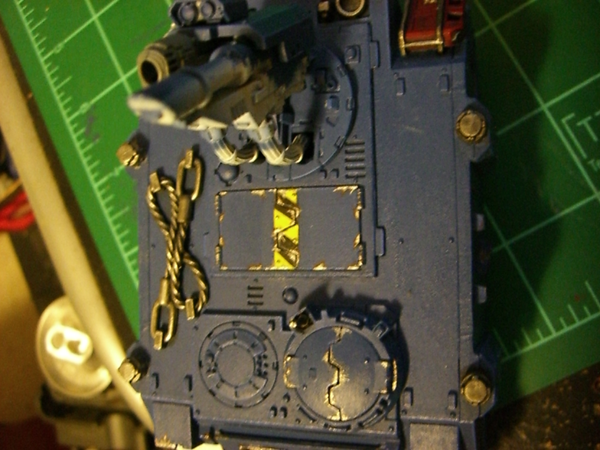
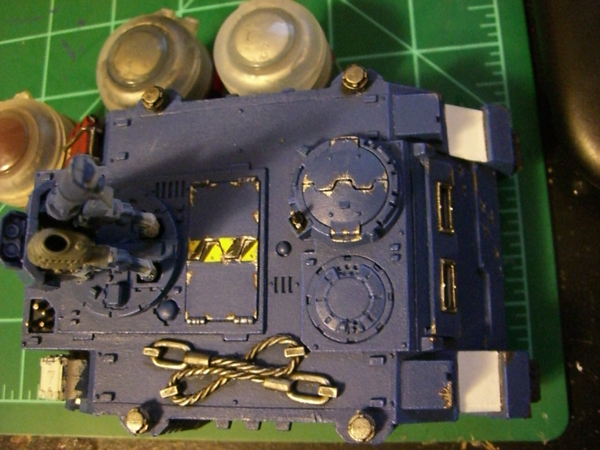
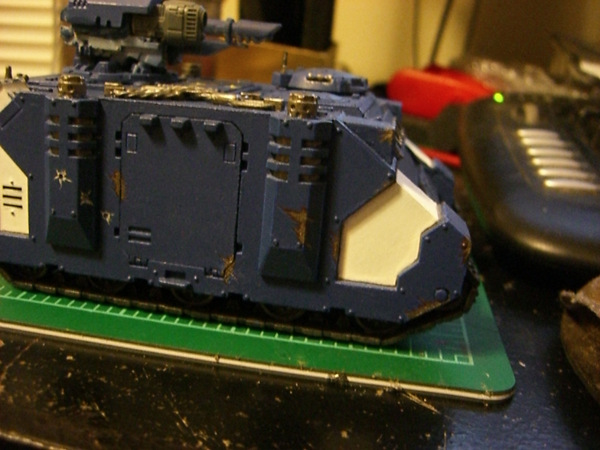
As you can see here I have used the same type of technique to do hinges and worn down areas around hatches and doors that would get extensive use. You can also see some of the Boltgun Metal + Badab Black Wash + Chainmail highlight technique on the cabling that is on top as well, easy effect, awesome results.
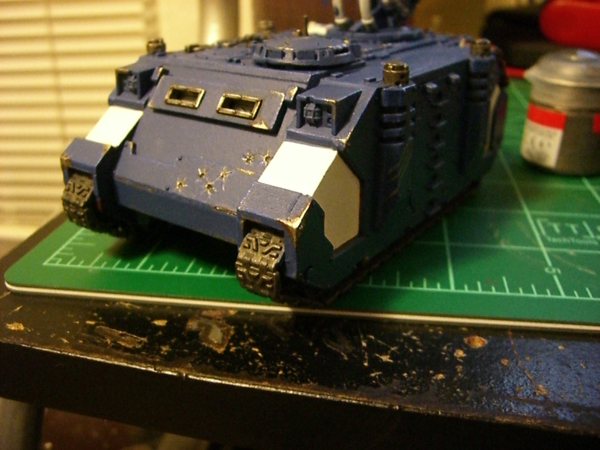
I have reposted this photo because I wanted to draw attention to the light blue highlights scattered around some of the damage to help emphasize the damage. You cannot see this very well if at all on the small areas on the Razorback but you can see some of them on this side.
I hope this was somewhat helpful for everyone, and hopefully my directions were simply enough. I apologize for the not-super photos as well, my digital camera is archaic.
|
|
This message was edited 3 times. Last update was at 2012/04/11 02:02:34
|
|
|
 |
|
2012/04/11 04:59:45
Subject: Re:Battle Damage Tutorial (Scratched/Chipped Paint, Bullet Holes, Picture Heavy)
|
|

Steadfast Grey Hunter
Can't tell you. It's a secret...
|
I found it very informative and well explained. Though I would love some stage by stage photos for the bullet hole damage, the instructions seem simple enough! Will give it a go on my Rhino's 
Thank you for taking the time to write it down!
|
Don't grow up!!!
It's a TRAP!!! |
|
|
|
|
2012/04/11 05:06:06
Subject: Re:Battle Damage Tutorial (Scratched/Chipped Paint, Bullet Holes, Picture Heavy)
|
|
Death-Dealing Dark Angels Devastator
|
Bobakos wrote:I found it very informative and well explained. Though I would love some stage by stage photos for the bullet hole damage, the instructions seem simple enough! Will give it a go on my Rhino's
Thank you for taking the time to write it down!
I agree, simple and informative. I have actually don't the same technique prior to this on some battle damaged pain tokens I created for my Dark Eldar minus the scorched brown. The simplicity makes it even nicer simply because any one can do it, instead of being a "Master" painter to perform these techniques
|
http://www.dakkadakka.com/dakkaforum/posts/list/634742.page
 3000 3000 |
|
|
|
|
2012/04/11 05:42:36
Subject: Re:Battle Damage Tutorial (Scratched/Chipped Paint, Bullet Holes, Picture Heavy)
|
|
Ultramarine Land Raider Pilot on Cruise Control
|
Bobakos wrote:I found it very informative and well explained. Though I would love some stage by stage photos for the bullet hole damage, the instructions seem simple enough! Will give it a go on my Rhino's
Thank you for taking the time to write it down!
Got 3 vindicators in my production run, I'll try to remember to snap some stage by stage photos of them
Lucazi wrote:Bobakos wrote:I found it very informative and well explained. Though I would love some stage by stage photos for the bullet hole damage, the instructions seem simple enough! Will give it a go on my Rhino's
Thank you for taking the time to write it down!
I agree, simple and informative. I have actually don't the same technique prior to this on some battle damaged pain tokens I created for my Dark Eldar minus the scorched brown. The simplicity makes it even nicer simply because any one can do it, instead of being a "Master" painter to perform these techniques
Agreed, I feel many people are intimidated when it comes to painting and a really good quality can be achieved by anyone.
|
|
This message was edited 1 time. Last update was at 2012/04/11 05:43:30
|
|
|
|
|
2012/04/11 15:07:16
Subject: Battle Damage Tutorial (Scratched/Chipped Paint, Bullet Holes, Picture Heavy)
|
|

Esteemed Veteran Space Marine
|
great tutorial, i heared about the paint chipping technique, but with black as a base, i like the scorched brow much better!
|
|
|
|
|
|
2012/04/11 15:27:20
Subject: Battle Damage Tutorial (Scratched/Chipped Paint, Bullet Holes, Picture Heavy)
|
|

Spawn of Chaos
|
Have you tried this on your marines?
I'd love to try it on my own SM's
|
Word Bearers  Wins: 16 Losses: 3 Draws: 0 Wins: 16 Losses: 3 Draws: 0
Sons of Sovereign javascript:emoticon(' '); javascript:emoticon(' '); javascript:emoticon(' '); Wins: 2 Losses: 2 Draws: 0 '); Wins: 2 Losses: 2 Draws: 0 |
|
|
|
|
2012/04/11 17:55:46
Subject: Battle Damage Tutorial (Scratched/Chipped Paint, Bullet Holes, Picture Heavy)
|
|
Ultramarine Land Raider Pilot on Cruise Control
|
I haven't tried any battle damage on my marines yet, should work the same.
|
|
|
|
|
|
2012/04/17 16:23:50
Subject: Battle Damage Tutorial (Scratched/Chipped Paint, Bullet Holes, Picture Heavy)
|
|
Mekboy Hammerin' Somethin'
|
Very Nicely done. I have tried Black as the base for the chips and holes but I do agree, the brown is much more effective.
|
|
|
|
|
2012/04/17 17:46:43
Subject: Battle Damage Tutorial (Scratched/Chipped Paint, Bullet Holes, Picture Heavy)
|
|
Ultramarine Land Raider Pilot on Cruise Control
|
Lysenis wrote:Very Nicely done. I have tried Black as the base for the chips and holes but I do agree, the brown is much more effective.
Thanks, I agree, especially if anyone likes to use a brown wash around nuts and bolts, matches well and makes for a rusty type of effect.
|
|
|
|
|
|
2012/04/29 02:34:06
Subject: Battle Damage Tutorial (Scratched/Chipped Paint, Bullet Holes, Picture Heavy)
|
|
Jealous that Horus is Warmaster
|
Thanks
|
|
|
|
|
|
2012/04/29 06:21:22
Subject: Battle Damage Tutorial (Scratched/Chipped Paint, Bullet Holes, Picture Heavy)
|
|
Ultramarine Land Raider Pilot on Cruise Control
|
Langston128 wrote:Thanks
Not a problem, if it worked well for you any chance we could get a photo? I'd like to see how it turned out.
|
|
|
|
|
|
2013/01/09 18:09:25
Subject: Re:Battle Damage Tutorial (Scratched/Chipped Paint, Bullet Holes, Picture Heavy)
|
|
Veteran Wolf Guard Squad Leader
|
Nicely explained. You said colour names have changed, what is boltgun metal now?
|
|
|
|
|
|
2013/01/10 08:50:38
Subject: Re:Battle Damage Tutorial (Scratched/Chipped Paint, Bullet Holes, Picture Heavy)
|
|
Ultramarine Land Raider Pilot on Cruise Control
|
Exalbaru wrote:Nicely explained. You said colour names have changed, what is boltgun metal now?
I am pleased that another person found this informative As for the paint changes, here is a link: http://www.games-workshop.com/MEDIA_CustomProductCatalog/m2320032a_Citadel_Conversion_Chart
I'd advice either a) downloading that or b) printing it out (or both). I reference it all the time due to my paint collection having a large amount of old paints. I hope this was helpful.
|
|
|
|
|
|
2013/01/10 11:59:15
Subject: Re:Battle Damage Tutorial (Scratched/Chipped Paint, Bullet Holes, Picture Heavy)
|
|
Veteran Wolf Guard Squad Leader
|
Definatly doing both, thank you very much! Also I'll read a lot of tutorials that refference older paints. I've considering buying that citadel ultimate paint set but don't know if it's worth it
|
|
|
|
|
|
2013/01/11 01:12:58
Subject: Re:Battle Damage Tutorial (Scratched/Chipped Paint, Bullet Holes, Picture Heavy)
|
|
Ultramarine Land Raider Pilot on Cruise Control
|
Exalbaru wrote:Definatly doing both, thank you very much! Also I'll read a lot of tutorials that refference older paints. I've considering buying that citadel ultimate paint set but don't know if it's worth it
I would advise against that, as much as I am in favor of supporting local stores I'd have to suggest (with an investment of that magnitude) just ordering one of every paint from Miniature Market. This would be considerably (25% to be exact) cheaper than the ultimate paint set (or somewhere in that ball park, GW really didn't discount that paint set much, if at all).
|
|
This message was edited 1 time. Last update was at 2013/01/11 01:13:07
|
|
|
|
|
2013/01/14 03:21:49
Subject: Battle Damage Tutorial (Scratched/Chipped Paint, Bullet Holes, Picture Heavy)
|
|
Hooded Inquisitorial Interrogator
|
Good tutorial! I've been weathering up some of my old tanks and will take these points into consideration.
|
|
This message was edited 1 time. Last update was at 2013/01/14 03:22:18
|
|
|
|
|
2013/01/14 05:57:49
Subject: Battle Damage Tutorial (Scratched/Chipped Paint, Bullet Holes, Picture Heavy)
|
|
Ultramarine Land Raider Pilot on Cruise Control
|
 Stormfather wrote: Stormfather wrote:Good tutorial! I've been weathering up some of my old tanks and will take these points into consideration.
I hope they are useful =)
|
|
|
|
|
|
|
|


