| Author |
Message |
 |
|
|
|
|
Advert
|
Forum adverts like this one are shown to any user who is not logged in. Join us by filling out a tiny 3 field form and you will get your own, free, dakka user account which gives a good range of benefits to you:
- No adverts like this in the forums anymore.
- Times and dates in your local timezone.
- Full tracking of what you have read so you can skip to your first unread post, easily see what has changed since you last logged in, and easily see what is new at a glance.
- Email notifications for threads you want to watch closely.
- Being a part of the oldest wargaming community on the net.
If you are already a member then feel free to login now. |
|
 |
2012/06/20 23:25:51
Subject: Flood's Miniature Experiences
|
|

Boosting Space Marine Biker
|
So after a brief consultation on a list it's time to dive right in. I haven't touched the hobby for maybe 16 years, so this should be a good challenge/experience.
I've a lot to paint, will try and get around to listing it all here. Sometime.
Some 2500 points of W40k space marines ( DIY chapter), working up from standard tacticals to fancy characters. Hopefully this will mean I'm half-decent by the time I get to working on the IC's.
There's four tactical squads to get done and I'm setting myself the goal of one squad per week to start with.
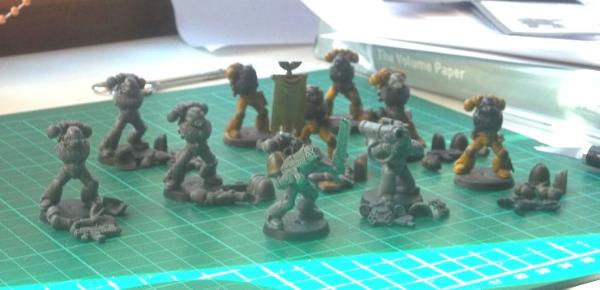
We begin with Tactical Squad Thanatos, who on Day 2 (Tuesday) looked like this;
OK so the ML marine is kneeled using the legs from the command squad box (I think) and there's a pair of 2nd Ed. guys in there. The 2nd Ed. models I'm using the 'modern' model arms on since their own looked a bit over-sized. I'm doing a bit of mix n' match between these four squads LOL. The sergeant is sporting a kit-bashed combi-flamer (bolter with an upside-down flamer end, looks not too different from the forgeworld model). Oh and I've gave one of the 2nd Ed. guys, a former BA I believe, that fancy scope on his boltpistol and a 'pointing arm' from the command squad box. If these guys ever combat squad he can be the team leader.
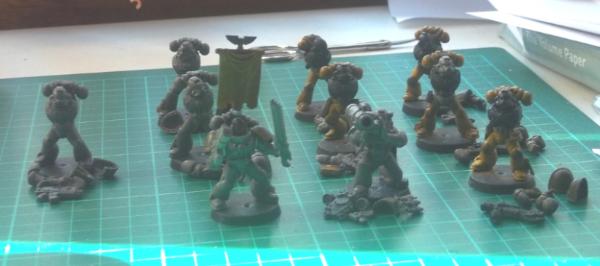
Onto today (Wednesday) and the boys get primed in a sexy Chaos Black. Three (or was it four?) thin layers of Leather Brown basecoat later:
Little blurry on that pic. If you've noticed some existing coats on a couple of the models, I did attempt to start these like two years ago  Hopefully this time the blog will keep me motivated.
In tomorrow's episode: the basecoat gets finished, the arms and accessories get base-coated and we move onto painting yellow!
|
|
This message was edited 15 times. Last update was at 2013/09/19 16:57:19
|
|
|
 |
|
2012/06/21 18:34:35
Subject: Flood's 2500pt adventure
|
|
Boosting Space Marine Biker
|
Well, not much to add. Had time for a couple more coats of brown, not happy with it yet though. Will have more time tomorrow to finish that stage off, then move onto tidying them up and getting the yellow started.
Wondered today if I should do a 50/50 mix of leatherbite brown and golden yellow rather than pure yellow. Or I might do the yellow and wash it with gryphonne sephia or ogryn flesh (give it a murkier look).
|
|
|
|
|
|
2012/06/22 20:16:14
Subject: Flood's 2500pt adventure
|
|
Boosting Space Marine Biker
|
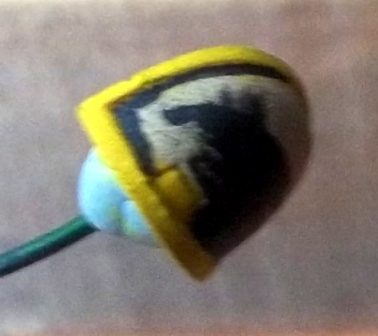
OK end of day 5. Well I think I'm finally done with that bleedin' snakebite leather (8 coats, damn). All the arms, pads and fidgety bits done. Not perfect but it'll have to do if I'm going to stick to this schedule.
So now the plan is;
Saturday: turn that rather neat brown into a yellow, outline in black and maybe throw on a wash. Get the sergeant's head done.
Sunday: detail, detail, detail. Eyes, guns, all that stuff. Touch up anything noticeably messy.
Not going to complicate things by doing a 50/50 brown and yellow, straightforward coat for the primary colour. May alter the planned black shoulders for a dark olive-green.
Not much of the of visual progress, but in the interest of science;
|
|
|
|
|
|
2012/06/24 21:31:28
Subject: Re:Flood's 2500pt adventure
|
|
Boosting Space Marine Biker
|
Well, damn. Weekend's are terrible for getting things done.
Did an NINTH layer of brown on Saturday before being distracted all evening. Today I got four coats of yellow on the main bodies, and the results so far are quite disheartening.  Unfortunately my gf's camera decided to pack in today so I can't show them, but yellow has kept its reputation of being a  intact.
Can't imagine how or why but even after all those damn basecoat layers the yellow has some patchiness that looks black. Very annoying. I'll have to consider using a different primer or something next time (more £££).
Hopefully tomorrow will it will improve. I estimate it'll be another 3/4 coats until it's something acceptable.
Oh and I need to replace two of the backpacks, the mould lines are showing terribly. They were the 2nd Ed ones, obviously I never gave them a look over when I did the others.
So it's going great so far.
|
|
This message was edited 1 time. Last update was at 2012/06/24 21:31:52
|
|
|
|
|
2012/06/24 21:33:09
Subject: Flood's 2500pt adventure
|
|
Painting Within the Lines
|
Brave move picking yellow. Hopefully you can get a camera again to update us. Lots of nice stuff you've got!
|
|
|
|
|
2012/06/25 17:03:26
Subject: Re:Flood's 2500pt adventure
|
|
Boosting Space Marine Biker
|
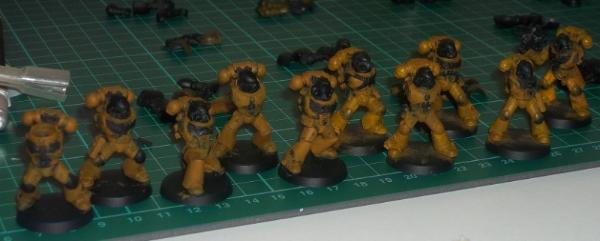
Right, I don't know how well you can see the difference to previously;
They are more on the yellow side of the spectrum, however it's still patchy and horrible. I shall persevere with them in the meantime, but I'm ordering a bone primer and a yellow foundation for the next lot (a dozen layers is too time consuming for a whole army!) Might sound drastic but I'm better changing at this stage before I'm halfway through an army and regret it.
If these guys don't improve before the new primer arrives I'll probably skin them alive and restart. Hopefully the change of tactics will be speedy enough for me not to fall too far behind my planned schedule.
New method will be:
bone primer
Averland Sunset as basecoat
Gryphonne Sephia wash
Golden Yellow
highlight with sunburst/white mix
maybe black wash to dirty it up a little Automatically Appended Next Post: Bit blurry but shows the colour better;
|
|
This message was edited 1 time. Last update was at 2012/06/25 20:55:13
|
|
|
|
|
2012/07/01 00:46:01
Subject: Flood's 2500pt adventure
|
|
Boosting Space Marine Biker
|
Updated OP with new lists I'm working too. Paints have been delayed for delivery.
Expect to have some finished pics for this squad on Monday, start the new lot on Tuesday.
|
|
|
|
|
|
2012/07/05 01:20:38
Subject: Re:Flood's 2500pt adventure
|
|
Boosting Space Marine Biker
|
Alright let's DO DEEZ!
Clean slate, I says. Sergeant, take your boys and have some chillax. Hell you can use my hot tub... Yeah, yeah, that smell is 'cos I just cleaned it honest...
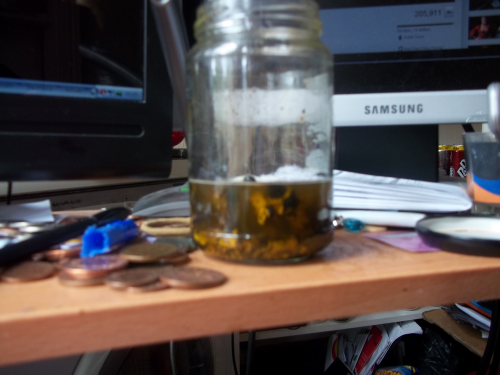
After 48hours in the 'hot tub', it was time to scrub the down. At this point they had never looked more yellow, just to mock me. I took great joy in tearing that off.
Ah the wonders of Dettol and a toothbrush*
*Note to self, replace girlfriend's toothbrush.
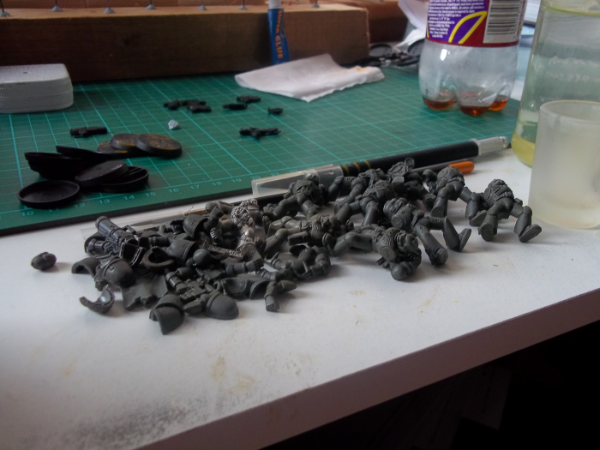
I took this opportunity to bathe a few more of the recruits in preparation;
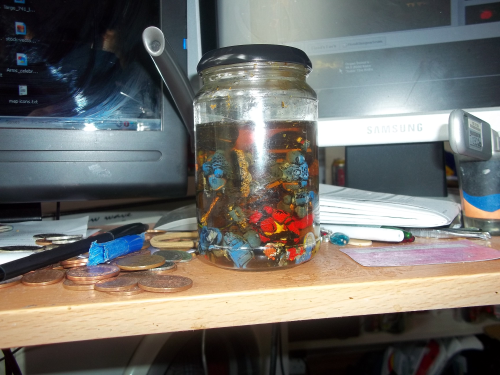
Mmmmm. Mediciney.
OK so now it's time to get this bad boy rolling again. First up, some boney primer:
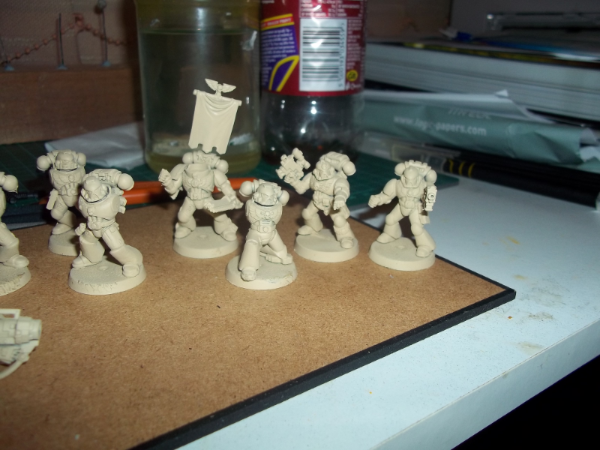
Ooh lookin' promising. Having surely gave myself cancer from the fumes, it's time to slather the lads in some Gryphonne wash;
Yes yes. This is more like it! Progress! Although now my back is killing me and it's 2am. Tomorrow is foundation-yellow time: yee hawr!
Some notes here: future priming should be done with the full model assembled or parts stuck down (several pads went flying).
Priming needs to be done outside, opening all the windows isn't good enough.
Throw a towel over your lap when messing about with Dettol. My crotch area smells particularly clean.
Sometimes cheap superglue is amazingly resilient to being submerged in household cleaners.
Green stuff is awesome but has a mind of its own.
|
|
|
|
|
|
2012/07/06 19:16:59
Subject: Re:Flood's 2500pt adventure *Clean slate
|
|
Boosting Space Marine Biker
|
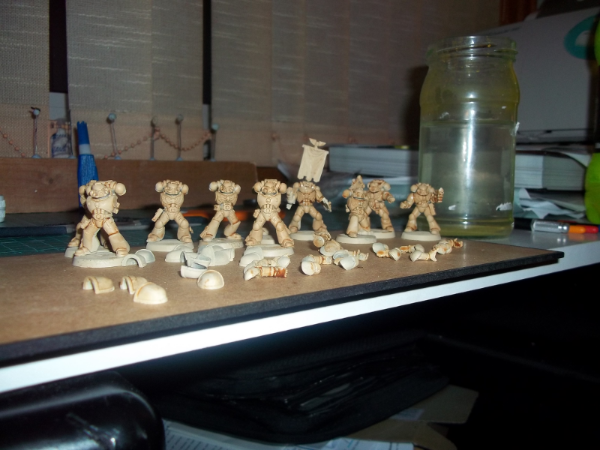
Quick update (how time flies);
505/50 mix of Averland Sunset (iyanden yellow) and Snakebite Leather. Although I was following a tut I think mine came out a bit more orange than it was supposed to. I also think I should've left the wash stage out until the solid yellow base was painted, since the helmets will be black anyway. So next time, no mixed coat and hold out on the wash.
Well learning is good anyway. Plan for this weekend is a solid yellow with Averland, coat or two of Golden Yellow, block in the black parts. If I have time: highlights, weapons and black wash. I'm certainly not as fast as I thought but hopefully that means they'll turn out a bit 'neater'.
|
|
|
|
|
|
2012/07/18 10:41:44
Subject: Flood's 2500pt adventure *Clean slate
|
|
Boosting Space Marine Biker
|
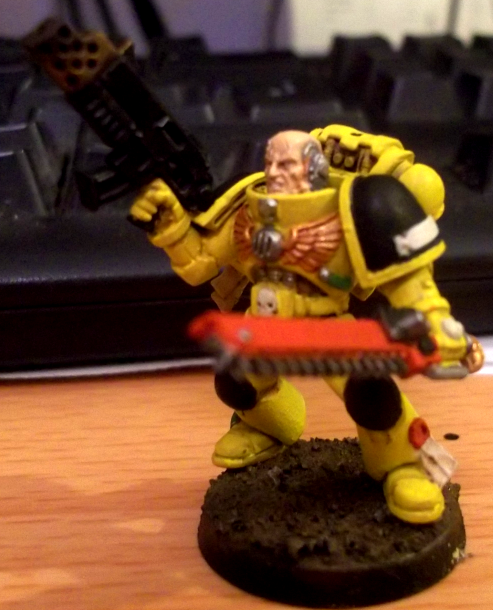
Unfortunately (or not, depending on your view to my newbie blog) my camera has decided to end it's meagre existence. Particularly disappointing as my first squad is looking rather splendid in an eye-popping yellow. :(
Be another 5 weeks before I can afford a new one, will try to borrow something before then though.
At any rate the formula for the lovely yellow is;
primed in Army Painter Skeleton Bone
Gryphonne Sephia wash
50/50 Averland Sunset/Snakebite Leather (not sure I really needed to darken this)
2 thinned coats of Averland Sunset (very solid peachy colour at this stage)
1 or 2 coats of thinned Golden Yellow (Tangemarines at this stage, could take them in an orange direction from here easily)
4 thin coats of Sunburst Yellow
50/50 Sunburst/White for highlight
thinned Chaos Black wash for recesses/muddying up
It has been a slow process due to RL intervening (as always) but it has given me time to review my list a few times over and play with ideas.
|
|
|
|
|
|
2012/08/06 03:01:17
Subject: Re:Flood's 2500pt adventure *Clean slate
|
|
Boosting Space Marine Biker
|
Thought I'd throw in a couple of things I did during one of my, admittedly rare, splurges of productivity.
Today while avoiding the painting I should be doing, I went ahead and did some bases;
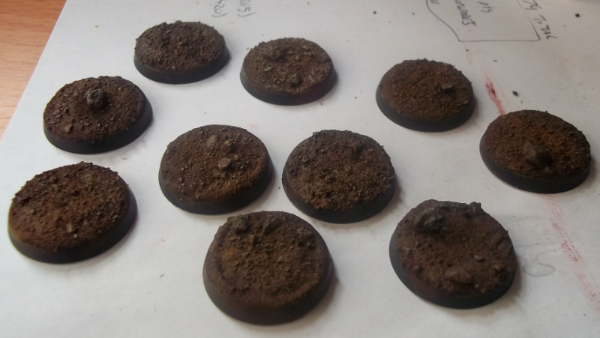
Nice dirty Martian-esque terrain. Drybrushed a bit more bleached bone after that pic to really bring out the rocks, really pleased how they turned out.
Next I used some of the terrain kit I found on ebay:
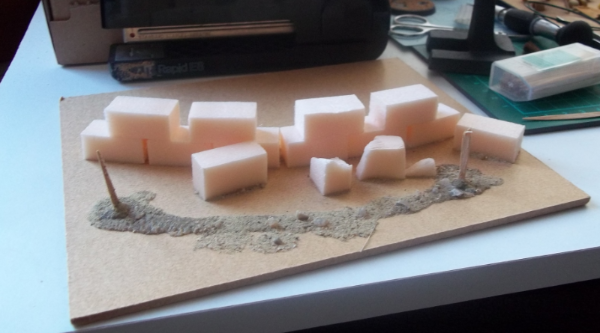
Sprayed black, some base colours:
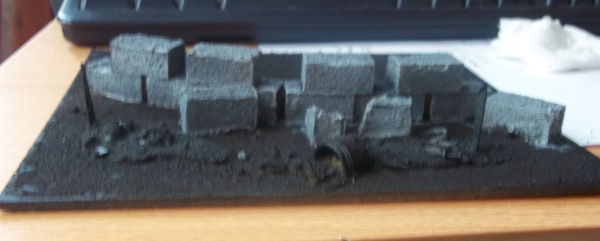
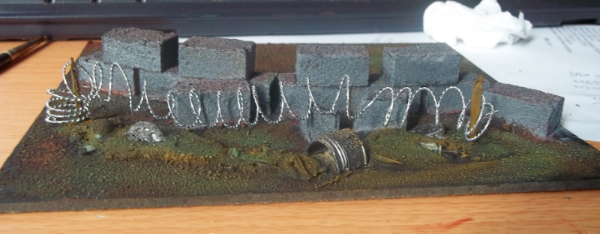
Hadn't coated the foam blocks in pva, so the paint needed a couple of coats to stick. I then added some colour. Not entirely happy with the ground, might go back and do some scorch marks on the wall later. Will definitely stick some grass/flock around the place when I get some.
Desperate to start another model, I then slapped together a heavy flamer conversion for my sternguard.
I call him Norman.
LotD body (flamer guy), filed down his flamed-buckle, flipped a normal marine hand on the left arm, split a grenade-holding arm for the right. This right arm is a bitch to line up right with the terminator heavy flamer, messed up an attempted pin to the body so will have to hope the GS will hold it later (just blu-tak in the pics). If it holds I think he'll look pretty good.
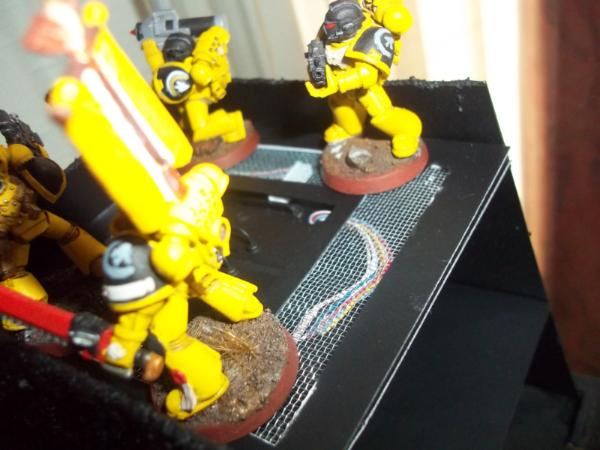
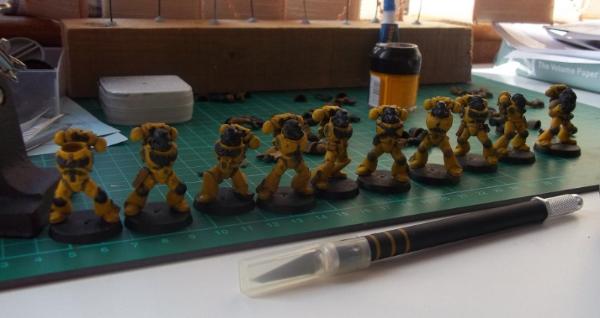
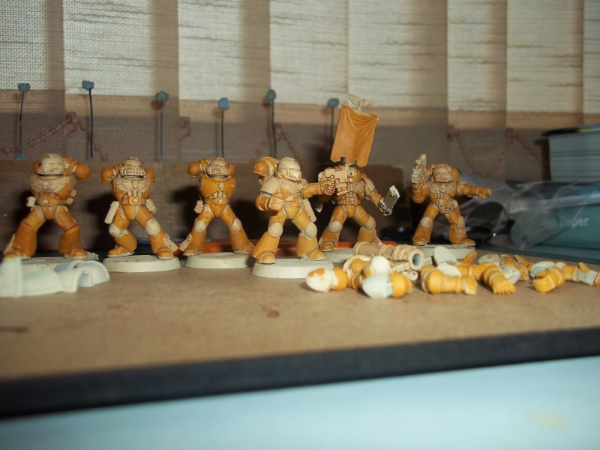
Lastly a comparison of the peachy-tangemarine-yellow phases of my tacts.
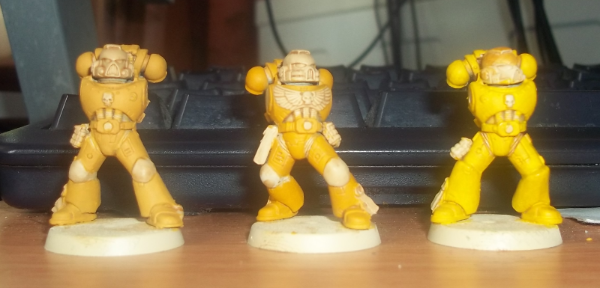
I will get this squad finished this week, goddamnit! Well, maybe 9 of them. One of the 2nd Ed's looks a bit odd to me. Might cut his legs off. I really do paint at a glacial pace...
Regardless of progress, I'll be buying a whack of models to add to the queue come the 24th, including 'nids. Can't wait. My eventual goal is a flexible 2500 points of every army. Ambitious but, well, I needed a new hobby lol.
|
|
|
|
|
|
2012/08/15 22:14:48
Subject: Re:Flood's 2500pt adventure - The story continues...
|
|
Boosting Space Marine Biker
|
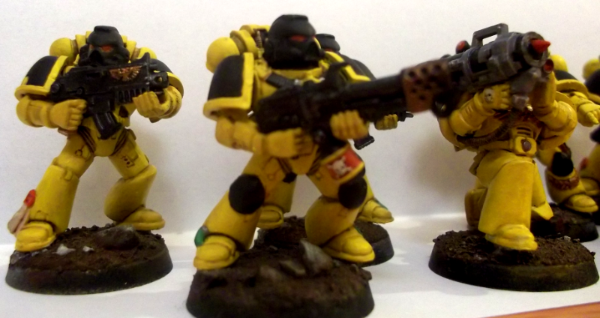
Update: some finished troops!
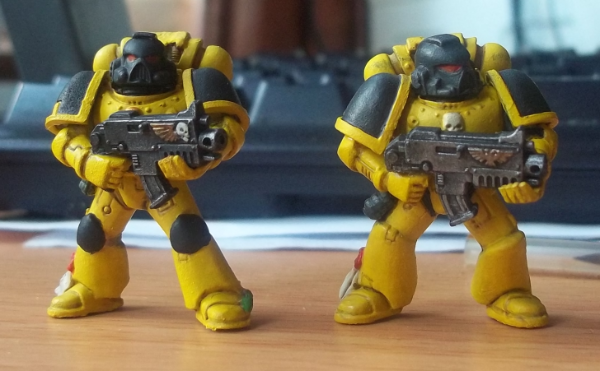
Well, nearly. Need some tidying up after my messy wash. Waiting on a smaller drybrush to do some stronger highlights too. Then they need attached to their bases, but woo!
Definitely getting better with each one now, hopefully I can tidy them all up a little better. Getting the pads done is a little tense;
The black is worse than the yellow imo. Will be priming the heads separately in black next time. They also feel like they need something to give the yellow a little contrast; something not so light-sucking as the black... Maybe some red squad markings I'm not sure.
|
|
|
|
|
|
2012/09/03 20:55:28
Subject: Re:Flood's 2500pt adventure - The story continues...
|
|
Boosting Space Marine Biker
|
And back once again, unsurprisingly without a lot of progress!
Funnily enough I'm getting more stuck in now I'm busier elsewhere, hey ho.
Botched the sergeant badly (oops says the fiance) so he's being redone, and I ditched one of the 2nd Ed guys in favour of a bitz frankenstein off leftover marines.
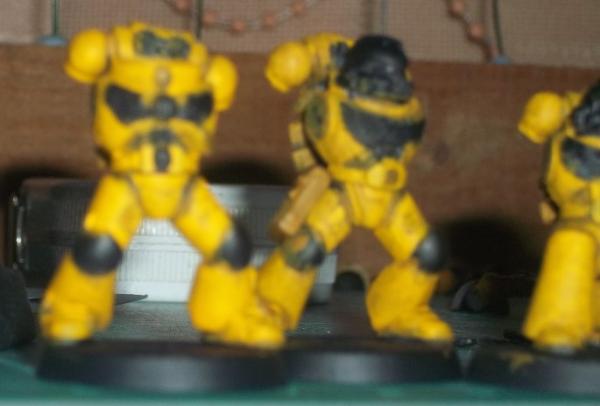
So, the finished 8, apologies for the blurry;
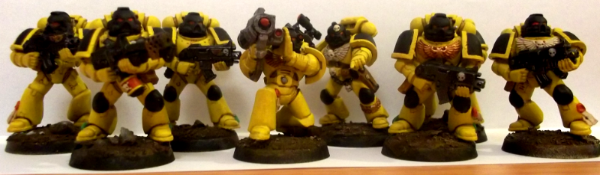
Edge highlights for the black helmets still needed to make them stand out a bit more.
Flamer and duo
Pointing Lt. and duo
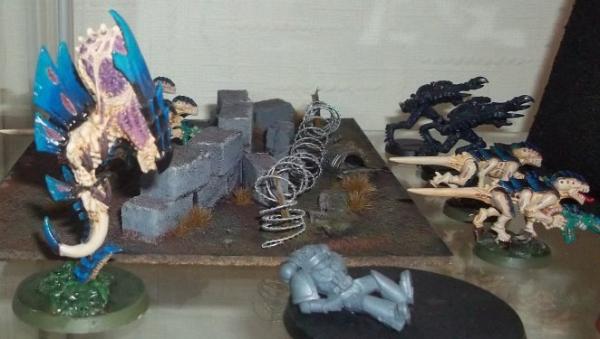
The precursor for my incoming Tyranid scheme;
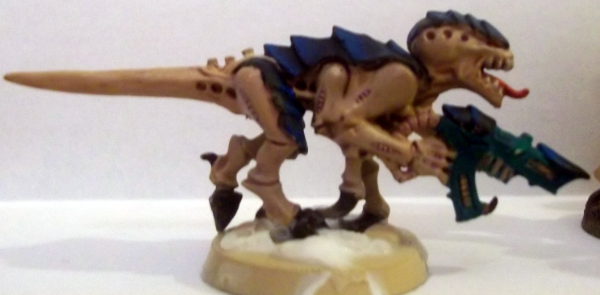
Please with how the 'feathered' blue edges came out (black>kantor blue>enchanted blue> sotek green)
So hammering the last two for that squad tomorrow, 4 'gants ready to prime, aim for these all done by Saturday. Huge order of minis coming in this week (hurry up rockethobbies) so plenty to work on for the next, ooh, couple of years perhaps...
I did get myself a nice little painting light now though, so I'm no longer restricted to daylight hours.
|
|
|
|
|
|
2012/10/20 19:46:25
Subject: Re:Flood's Deathbringers & Hive Fleet Mizuchi
|
|
Boosting Space Marine Biker
|
Ooft, another month flies by...
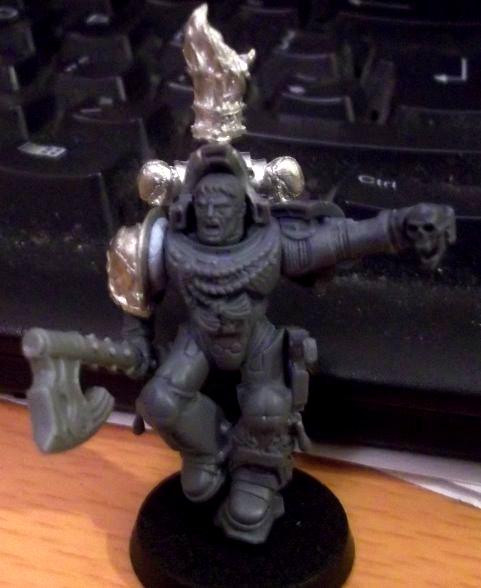
Well, finished 'sarge'. Still working on his banner atm.
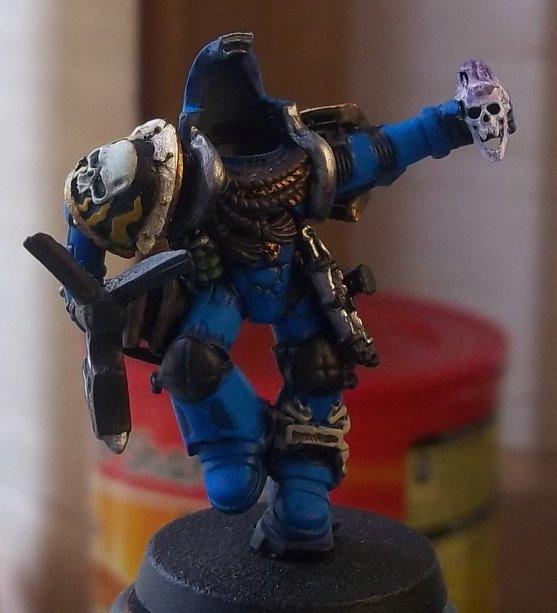
Piecing together a libby tonight, gone for an ascending pose; as if his powers are raising him off the ground in preparation to cast a warpball of some kind. The skull in his left hand is going to get some gs-love to make ti look like it's imbued with warp-flames. Have some bits n bobs to ornament him with too. Thinking the SM knife handles could work into some nice keys (librarians have a key fetish from the looks of the standard models). Might stick am imperial eagle wing on the back of the axehead as well some gs to give it a 'powered' look.
Anyway at the moment he looks like this;
Bit of a 'slam dunk' pose
Apologies for the blurriness, don't know how that happened.
Get this guy done and primed for tomorrow, along with a slightly bent zoanthrope, which will probably need re-mounted on something other than it's standard Tyranid-thingy.
|
|
This message was edited 3 times. Last update was at 2012/10/20 19:48:05
|
|
|
|
|
2013/04/01 03:10:04
Subject: Re:Flood's Deathbringers & Hive Fleet Mizuchi
|
|
Boosting Space Marine Biker
|
Hmm. Talk about unearthing a grave. I promise *this time* I'll be more regular. 
Schedule is a bit clearer, so allowing myself a couple of hours every other day for painting/building (instead of just buying, which I have been guilty of since my last post).
Disappointed this photo doesn't show the blend from black to blue to turquoise that well, as I was quite pleased with it.

The use of a wet palette has helped immensely.
Have him finished tomorrow evening I think; finish his fleshy bits; bit of highlighting then the base. When my varnish comes in I'll slop some shiny on the brain for that wet look, then satin the whole thing over.
Looking forward to starting that librarian who has been gathering dust. I've some very thin plasticard I'm hoping to use as stencils for the chapter heraldry on the shoulder pads. Need to improve my photo skills too by the looks of it!
|
|
|
|
|
|
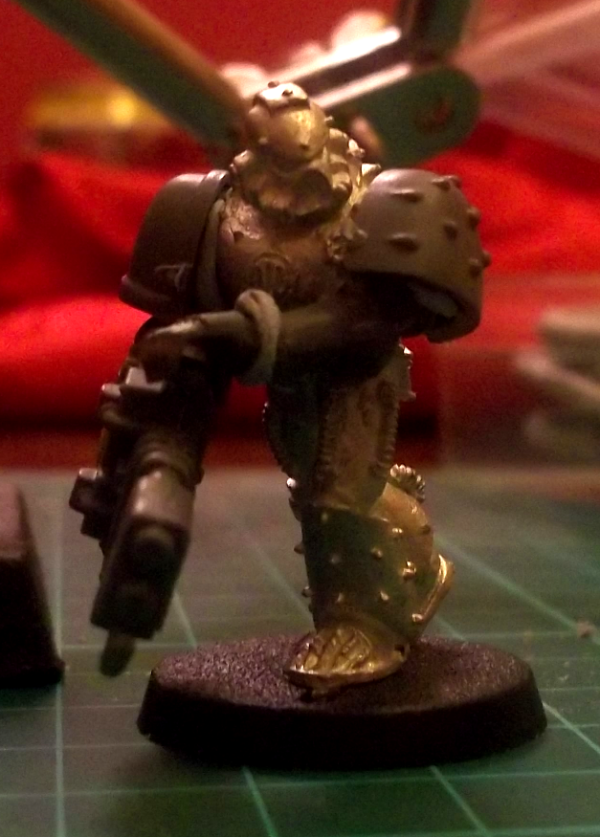
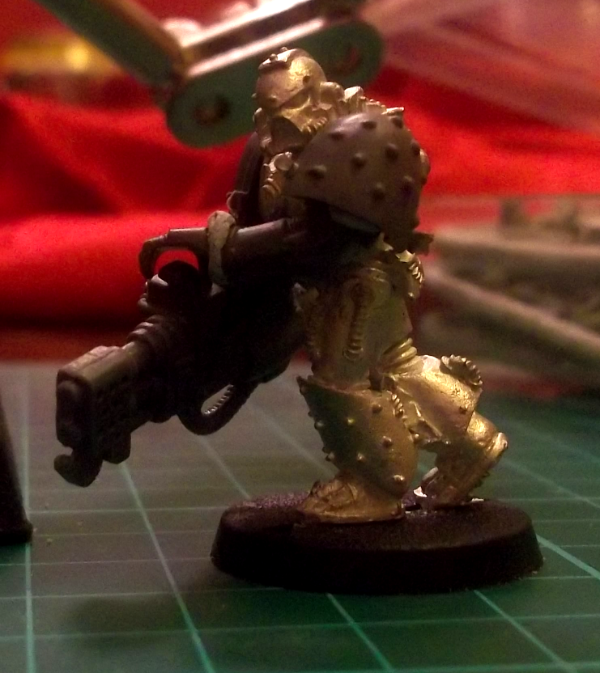
2013/04/01 03:42:10
Subject: Flood's Deathbringers & Hive Fleet Mizuchi
|
|

Fixture of Dakka
|
What is that metal studded marine?
And the yellow hurts me eyes!
Any plans of a brown wash to male the yellow less flashy.
Keep up the good work!
|
|
|
|
|
|
2013/04/01 18:21:05
Subject: Flood's Deathbringers & Hive Fleet Mizuchi
|
|
Boosting Space Marine Biker
|
The studded guy is going into a Sternguard squad, once I get around to them (trying to re-organise myself so I'm painting up armies sections I can play with).
The metal figure is from the LotD squad box. I'll fill in some of the bone details on his feet before priming.
Aye, the yellow isn't so blinding in real-life but I'm going to tone them a touch after I've tried out some different washes on a test model.
Thanks for commenting 
|
|
This message was edited 1 time. Last update was at 2013/04/01 18:23:33
|
|
|
|
|
2013/05/17 15:49:26
Subject: Re:Flood's W40k and Terrain: new gameboard!
|
|
Boosting Space Marine Biker
|
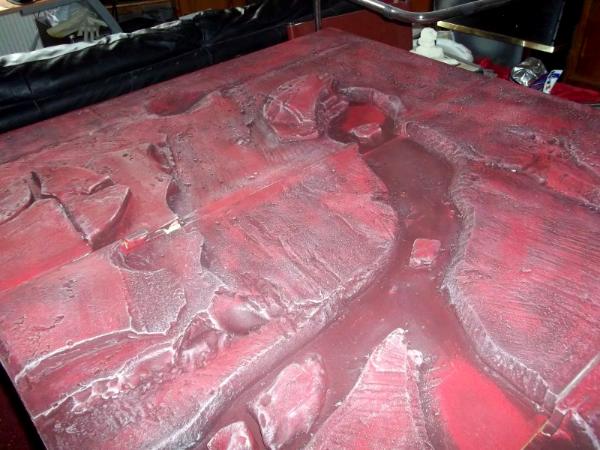
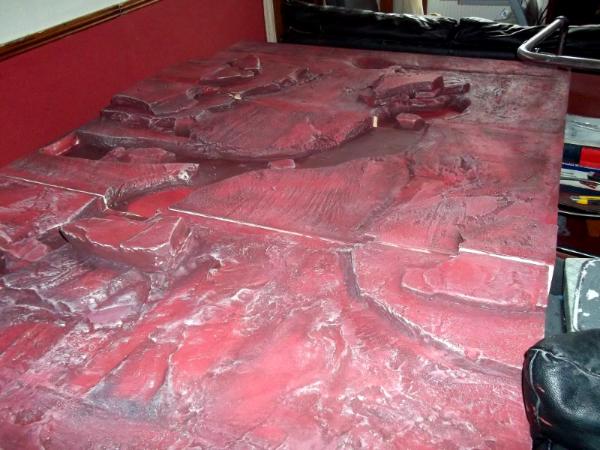
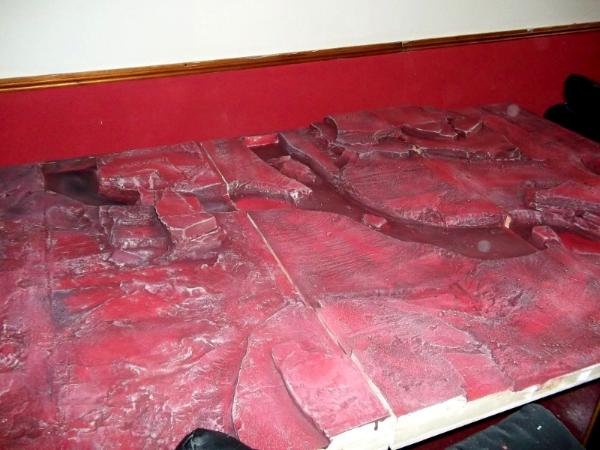
What? Slacking, me?! Never! Oh right, the updates. Well I have an excuse, honest! No really, look what I did.
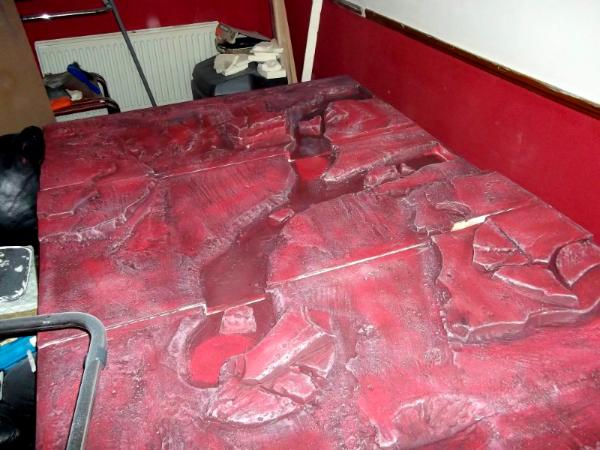
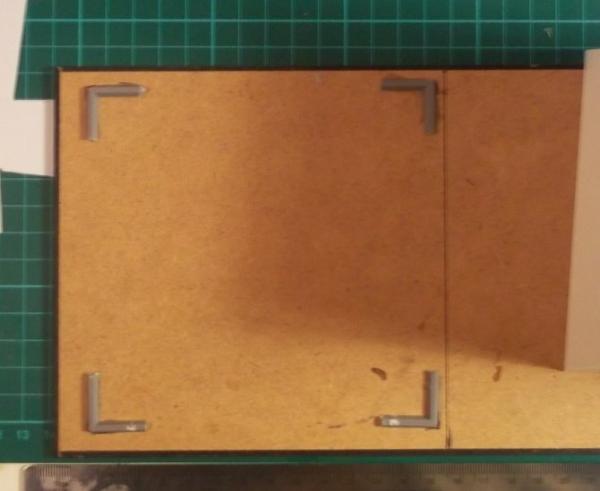
First I paid a little visit to B&Q for some MDF, wooden batten and insulation foamboard. Little woodglue and screws form the hardware shop around the corner and voila;
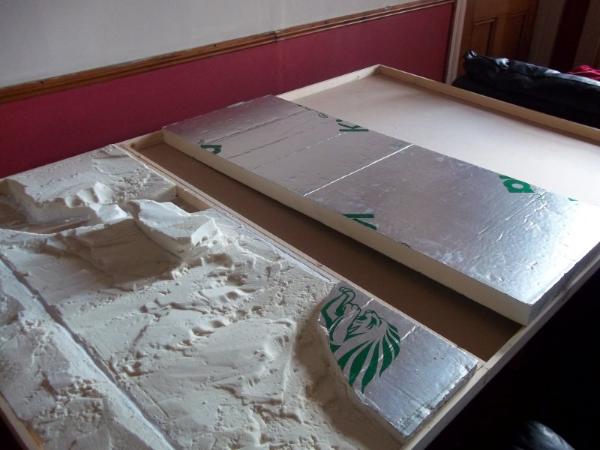
Next I set about the foam with a combination of saw, large kitchen knife and stanley razor (normal weekend equipment then);
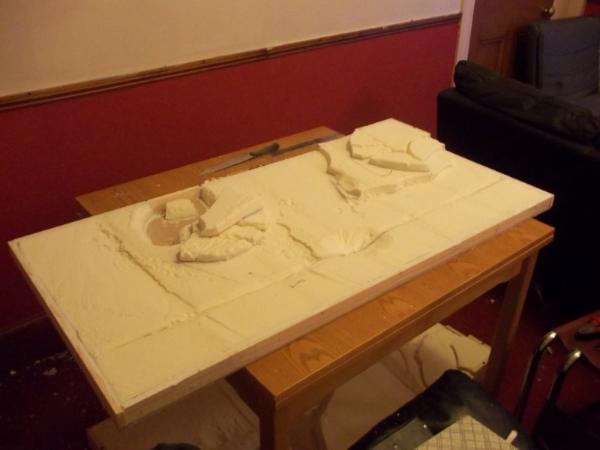
Sealed the foam with some red emulsion (that's latex paint to citizens of the former colonies) then made use of some filler my landlord had generously overlooked in the boiler cupboard to smooth out the worst of the irregularness;
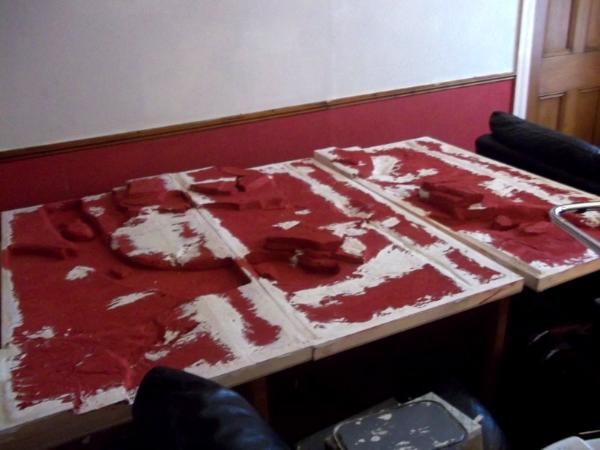
I then painted over that with a mix of red, PVA and sand for a nice martian-desert terrain effect. This was followed by a dark shading of watered-down red and black and finally with another touch up of red ;
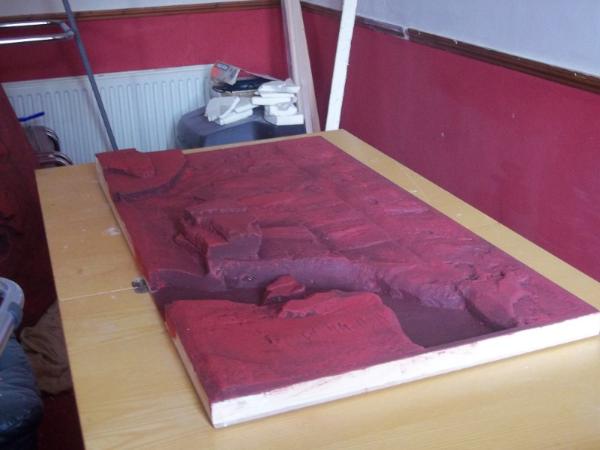
Quick highlight with more leftover paint (conveniently a nice shade similar to bleached bone). Some of this went on a little too thick for drybrushing so some streaks did appear, however it wasn't bad enough to warrant me trying to go over it, potentially ruining things further. The camera here also makes it look a lot whiter than it really is.
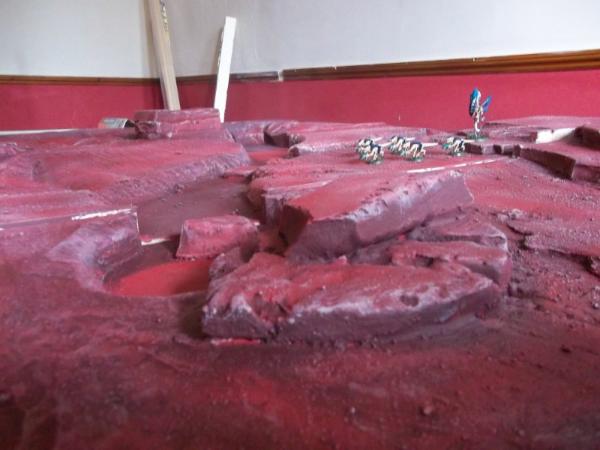
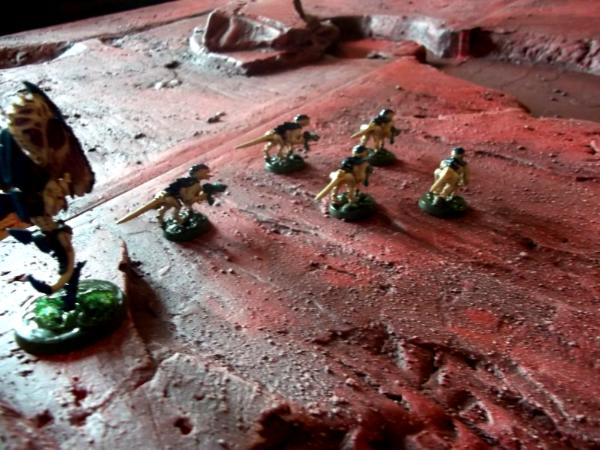
and some with models for a sense of scale;
Quite happy how it turned out, just needs some tidying up around the edges to smooth where it connects and maybe tack some carpet underlay on the bottom to stop it scratching surfaces. I still have some magnets and metal strips to fit in along the edges so the board pieces won't move around too much if they're bumped against. Next weekend I should also have my clear-resin and green dye to apply in the riverbed for a very cool alien waterway.
I designed the pieces so that they can fit into 5 different configurations (6'x4') but I do have another length of MDF left here which I may make into an island segment or large bay, once I get my resin delivered. This should be able to extend at least one of the configurations for a 8'x4' version.
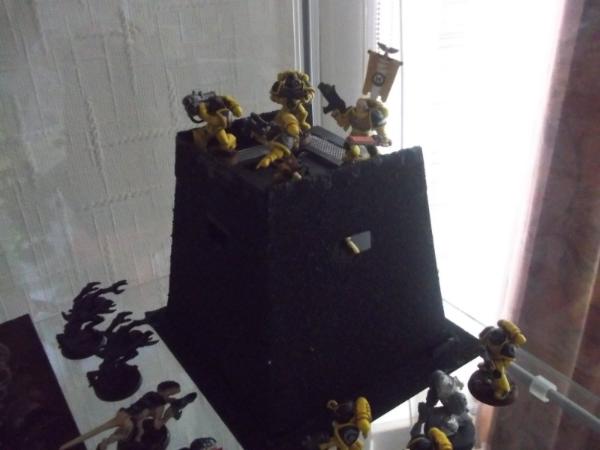
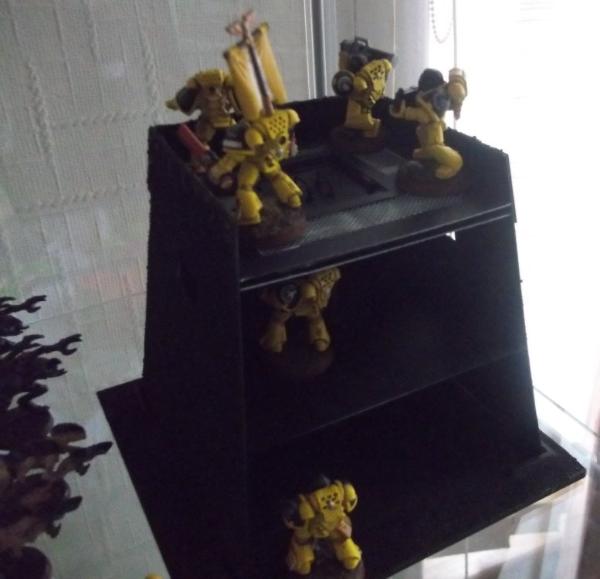
Next up I'll be using the leftover foam pieces for some extra hilltop terrain, to increase the height of the board hills, and for some ruins and rock formations. Just now though I decided to make a quick defence tower out of plasticard;
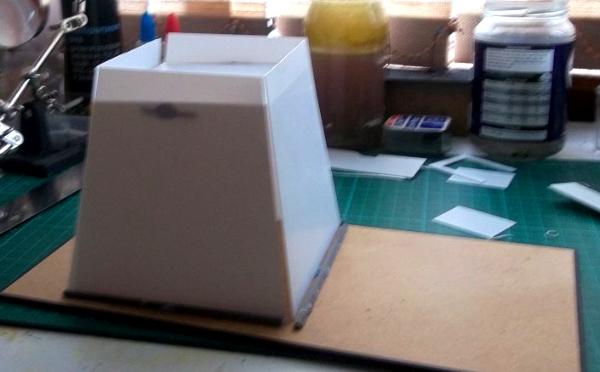
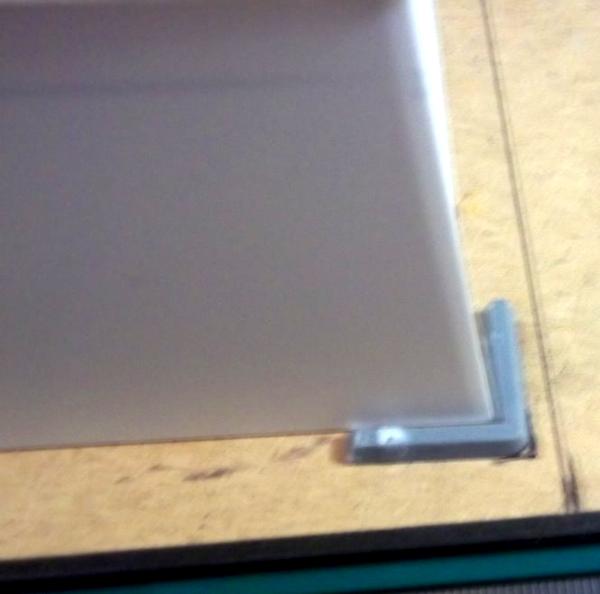
To help secure it to the base I used some sprue corners;
For the roof I wanted a kind of hatch with some mesh flooring, I nicked the idea of cables under the mesh from another blog (somewhere);
then I added a middle floor and cut out some firing slots, supported this further with a pole through the centre;
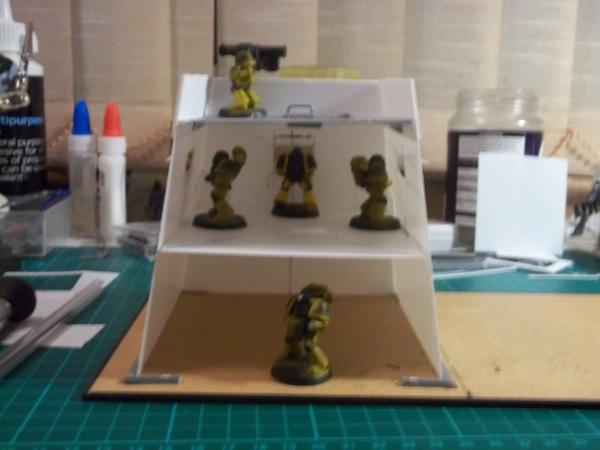
Then coated the outside in PVA and glue and primed the whole lot in black;
Still to finish painting that one, although I did find time ti finish my Zoanthrope and start on my librarian;
Attempted some stencisl for my SM chapter badge, might just chnage it to something easier to freehand though;
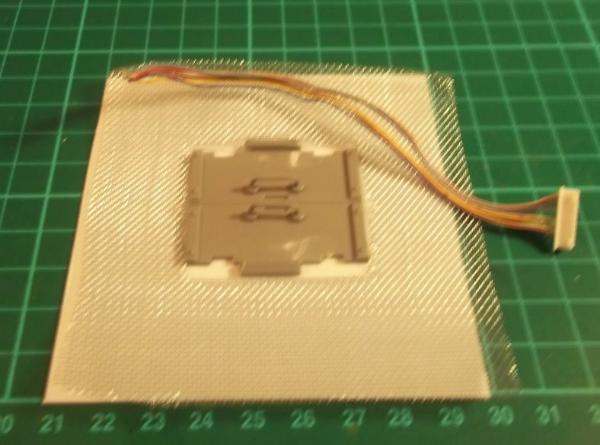
Phew, think that's enough for now. Next up is to finish the libby and tower, then a couple of rock formations and ruins from the leftover foam. After that it is back to termagants! Automatically Appended Next Post: Oh yeah, I wanted to add to this one of the images I've done to go alongside the fluff I'm writing (my last chapter history revision isn't the best). I write short stories for a hobby sometimes, so doing a few to go along with these seems like fun. Anyway here's my system image;
And a couple of stories I did a while back which I already have up for Dakka: HERE and HERE
I have another based in during a Tyranid invasion, I'll probably upload it later this weekend.
|
|
This message was edited 1 time. Last update was at 2013/05/17 15:58:39
|
|
|
|
|
2013/06/03 22:43:08
Subject: Re:Flood's W40k and Terrain: new gameboard, loads of pics!
|
|
Boosting Space Marine Biker
|
Libby very nearly done, just missing his chapter insignia and the base needs painted;
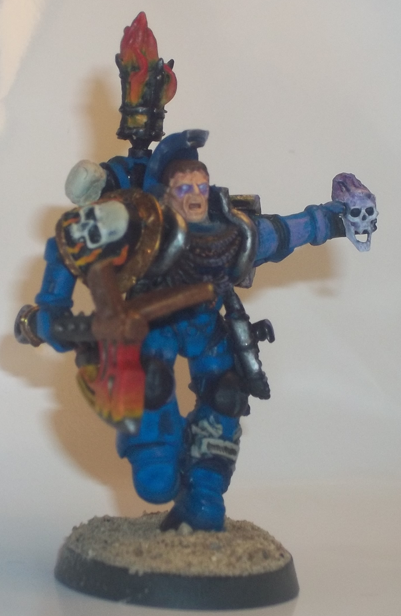
Quite pleased with his eyes, my blending for the axe got a little smudged though. The light effect off the 'flaming warp skull' looks a bit off closer up but fine for tabletop.
Blending on the pack-flames and lantern turned out quite well too, pretty pleased with him overall. Just need more practice practice practice!

And now back to painting 'gants. Yay.
|
|
|
|
|
|
2013/09/19 17:31:27
Subject: Re:Flood's Miniature Experiences
|
|

Boosting Space Marine Biker
|
Ah back once again. The excitement of the new SM codex, and the rumoured upcoming 'Nidvember, has once again spurred me on to paint. Since the last post I've added a (heavily modified) HeroQuest campaign to my gaming repertoire, meaning lots of assorted baddies and characters to paint up!
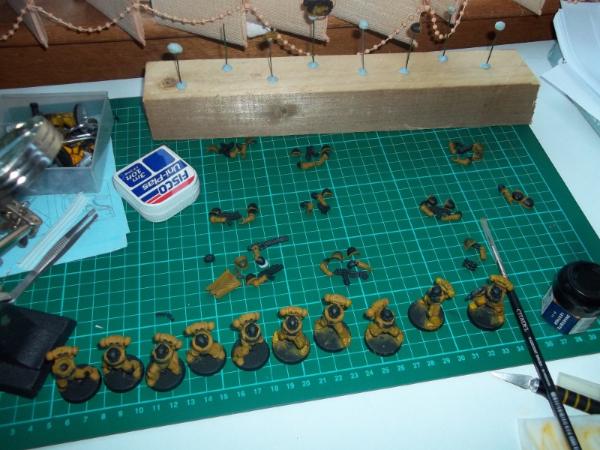
To kick off I did four DarkWorld ogres as substitutes for the Ogre Horde HeroQuest expansion (not fond of the standard models, too small imo).


Whole bunch of Bones mini's ordered to replace/add to that campaign.
On my desk right now are a bunch of models waiting to be primed/basecoated;
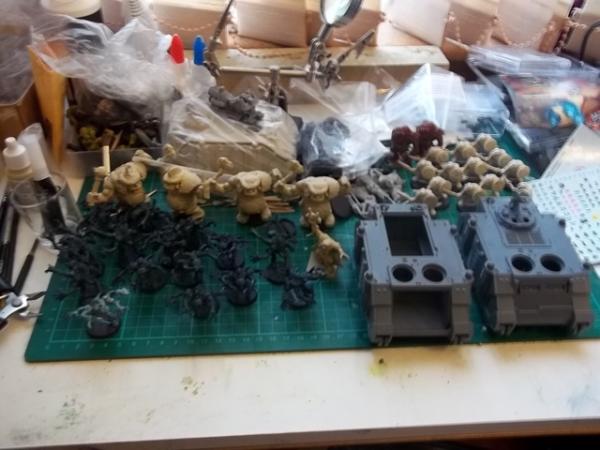
Ogres from Battle Masters, skaven from Advanced HeroQuest, an orc shaman from avatars of war, 15 genestealers and 3 rhino chassis. Now I just need the rain to stop...
While waiting on the rain to stop I started to convert an SM bike. The normal bikes are a bit too clunky for me, so I wanted hoverbikes. Fortunately, some bright people have already done these and these, so adapting the idea slightly was straightforward.
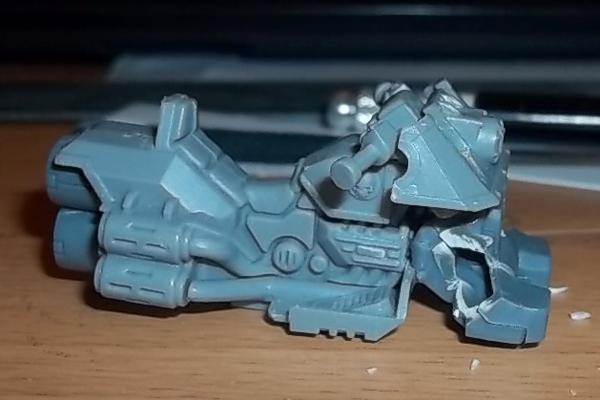
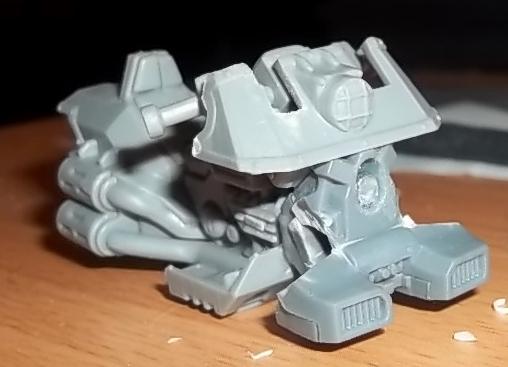
Magnet at the front there should make swapping out weapons a simple task without the need to swap marine arms around ( and paint less arms, yay).
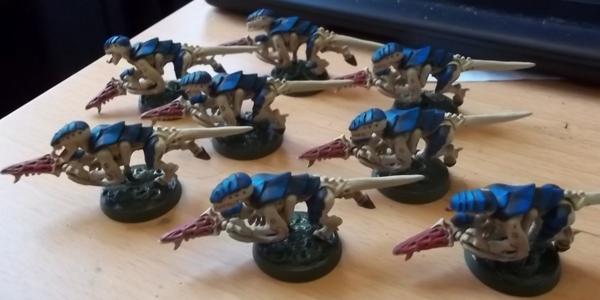
And as ever, more 'gants for the swarm.
|
|
|
|
|
|
2013/09/19 17:46:43
Subject: Flood's Miniature Experiences
|
|

Longtime Dakkanaut
|
Nice stuff. Like the red surface of you gaming table.
|
|
|
|
|
|
2013/09/30 13:27:06
Subject: Flood's Miniature Experiences
|
|
Civil War Re-enactor
|
The yellow on those Marines is excellent. Well done!
|
Shotgun wrote:I don't think I will ever understand the mentality of people that feel the need to record and post their butthurt on the interwebs.
|
|
|
|
|
|
|