Hello Dakka,
This is my first tutorial, and hopefully it will help out some of you that are looking to make conversions to their
SM Rhino's so they can use a few Rhino's and make any version of the Rhino tank series. These are not completed tanks, but just the location of the magnets to make the conversions. Comments and questions are always welcome.
The following pictures are for the side and rear hatch for the standard Rhino.
Side Hatch magnet locations. Used 1/16" x 1/32" disc magnets, six total per side.
Rear Hatch magnet location. Used 1/16" x 1/32" disc magnets, four total.
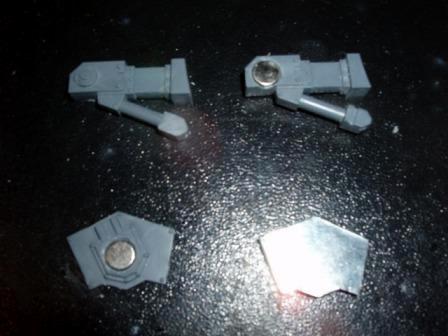
The next picture is for the Whirlwind.
Whirlwind attachment. I used 1/8" x 1/16" disc magnets on the backs of the missile attachments. Then used 3mm cube magnets on the inside of the missile housing. This are set back to allow the magnets on the missile attachment to fit. Used a 1/8" x 1/32" (3mm x 1mm) disc magnet under the hole for the Radar, and cut the peg off, and drilled a hole for a 1/16" x 1/32" disc magnet in the base of the Radar.
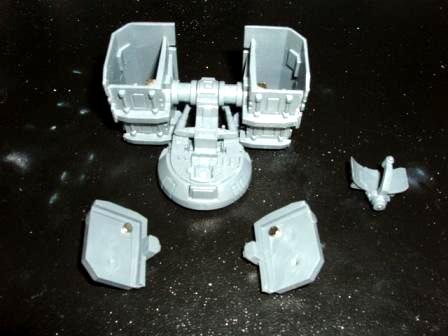
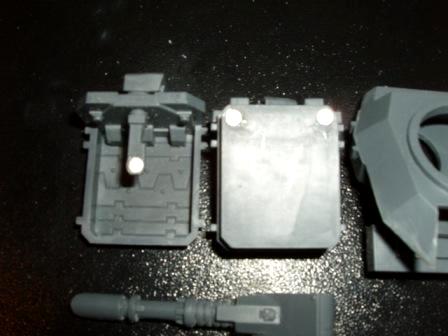
This picture is for magnet placement on the Razorback attachments.

Razorback attachments. Used 1/8" x 1/16" (3mm x 2mm) or 1/8" x 1/32 (3mm x 1mm) on all components. On the Assault Cannons, I had to drill in to have the magnet fit. On the base, two magnets are used, and drilled in after the peg is cut off. A magnet is placed in each hole where it would have been attached to the peg on the base. Some drilling is required to get them to fit.
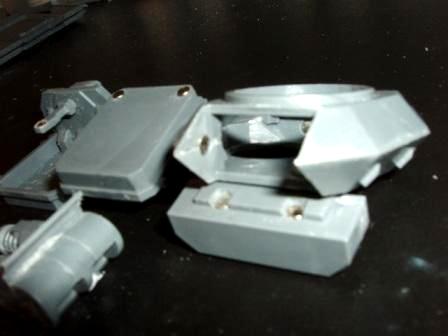
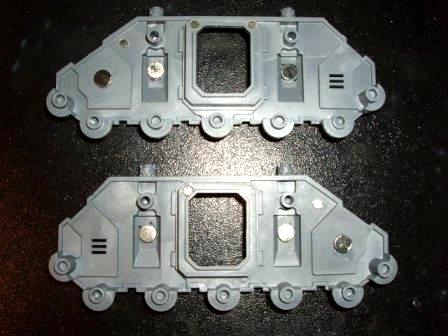
The next three pictures are for the Predator.
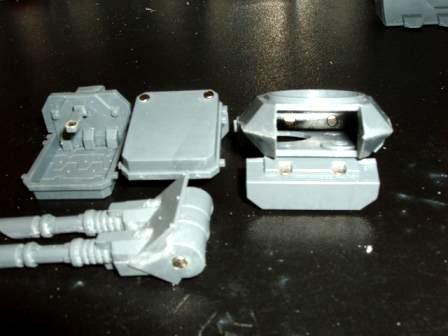
Predator attachments. All the magnets are 1/8" x 1/32" (3mm x 1mm) disc magnets. I drilled holes for the magnets, so they would be flush with the plastic. I did not drill completely through, I used a 1/8" bit and drilled using my fingers to hold it. You will see a small bubble form when the tip of the drill is getting close to piercing through the plastic. I would test fit to make sure the magnet was flush and drill more if needed. Takes practice but it can be done so that the magnets don't show.
This is a closer look at the sponsons front and back sides. Only used two magnets on the back side, and one magnet on the attachment arm to support the weapon. I placed a magnet inside the weapons where the peg would go on the weapon attachment arm. Need to do some drilling to get them to fit. The hole for the magnet on the attachment arm is just small enough to not remove all the plastic on the sides or go through the back of the arm. Proper alignment is a must for this one, I recommend starting with a small drill bit, to find the center and work your way up to 1/8" bit. I also had to file some plastic off the hole where the weapon attachment arm slides into the weapon on the heavy bolter.
On the turret, just put a magnet on each side where the weapon pegs would fit. On the weapons I cut off the pegs and drilled a hole for the 1/8" x 1/32" (3mm x 1mm)disc magnets. Also placed a small piece of sprue to keep the weapons from sagging down. Might not
sag if larger magnets are use. As for the ammo box on the back of the turret, I drilled holes where the attachment points are, not going through the plastic, and before gluing the turret together drilled two holes on the inside to hold the ammo boxes on. I drill the holes so that the magnets are closer to each other, and have a stronger attraction that way, then if they are separated by a wider distance.
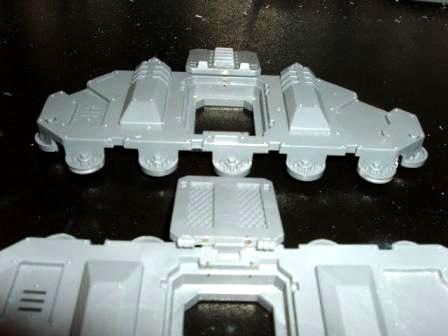
Finally the Vindicator, the one modification that takes some time and quite a few magnets, but I think is worth it.
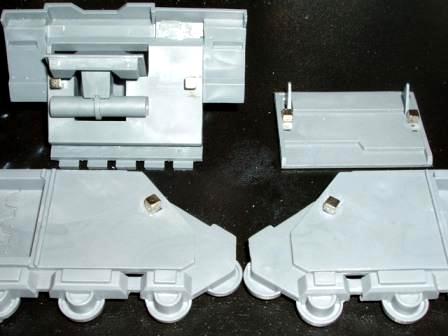
Used the 3mm cube magnets here. Just have to make sure they are all lined up when you glue them in place. I placed the magnets on the standard Rhino front right under the extra armor piece that sticks through. I would then mark on the side track parts where they would be located so I can place the magnets there. Then placed the Vindicator front piece and marked the magnet location on it.
On the side armor, I drilled two holes flush with the plastic using 1/8" x 1/32" (3mm x 1mm) disc magnets. I also drilled three holes for 1/16" x 1/32" disc magnets for extra support using the same magnets for the standard Rhino side hatches. Not really needed, but I had the extra magnets and figured it doesn't hurt anything.
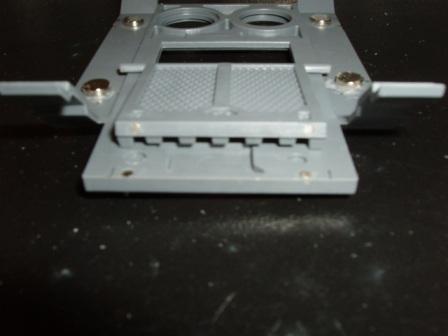
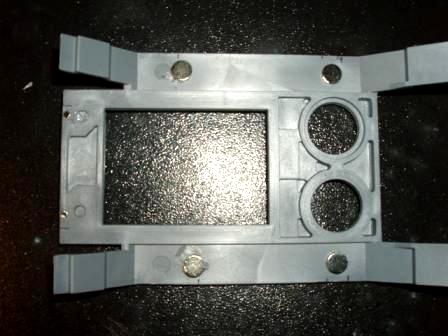
This is the inside of the outer track/side armor. The three larger disc magnets are 1/4" x 1/16" (6mm x 1mm). They are for the side Vindicator armor and the attachment point for the Shield on the front of the Vindicator. The three smaller disc magnets are 1/8" x 1/16" (3mm x 1mm). The two at the top of the hatch entrance are for the Predator side sponsons. The other magnet is for smoke launchers or any other small attachment you might want to add to the tank. I did this since if you have a turret from the Predator, the weapon barrels tend to hit the attachments if they are placed on top of the hull of the tank. Its not necessary, just something I found I didn't like. The three smaller magnets are all drilled flush, but don't show on the other side of the plastic. The larger magnets are all just glued on. One side note, the two larger magnets don't fit flush in the exhaust area, so if you have some smaller magnets that would be better. I used the ones I had on hand.
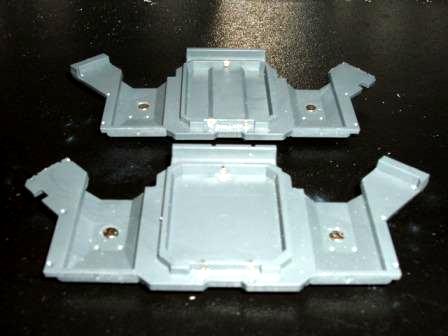
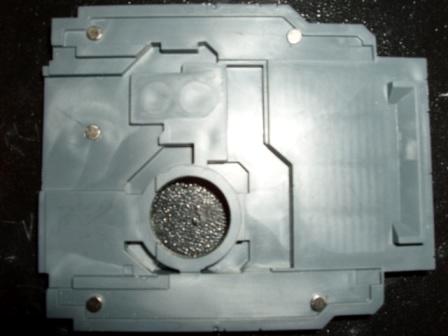
This is the underside of the top hull. Used the 1/4" x 1/16" (6mm x 1mm) disc magnets on the understand. These are for the Vindicator top armor piece. Can also use for attachments for the other Rhino versions. Can also see the location for the two magnets to close the rear hatch. One note for the large magnets, again, can use smaller magnets, but if you use larger ones, make sure they do not get in the way when you put the two halves together for the side tracks of the Rhino.
This is the Vindicator top armor. Used 1/8" x 1/16" (3mm x 1mm) disc magnets. No drilling needed. Put a magnet in the center hole for the targeting camera, cut the peg off the bottom of the targeting camera, and glue a 1/8" x 1/16" disc magnet to it. Once you have glued these magnets in place, its easier to find the location for the larger magnets on the underside of the Rhino top hull.
Here is the shield for the Vindicator. Used the 1/4" x 1/16" (6mm x 1mm) disc magnets in the arms. Another tight fit, but if you take your time, the sides of the drill hole will be still in place and you won't see the magnets. If you are off center, can always
GS it to cover the magnet. The arms I had to modify as well, so that the shield would fit properly when attached. They are glued on to the shield, but had to file the peg and the small block off, as well as file the side down, same side as the peg, so that the arms lined up with the attachment points on the hull. I also did some modifications to the shield for the two small hatches. They are just so the headlights can be used. I used 1/16" x 1/32" disc magnets as hinges as well as the latch for when they are in the closed position. If you want to know how I did it, just ask, I'm not going to explain it in detail, since most people won't bother doing it.
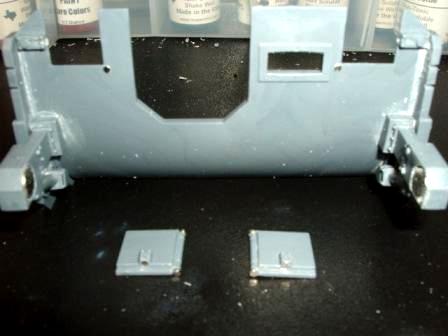
Last picture, and its of the attachment points and the shield arms. The arms use the 1/4" x 1/16" (6mm x 1mm) disc magnets as described above. You can see some of the filed areas I was talking about as well. The attachment points, I used the same large magnets, you have to drill the hole to get them to fit, so if you have something slight smaller, should fit perfect. I also used some tin on the back side so they attach to the hull of the Rhino. The magnets on the inside of the side tracks located a few pictures up is what hold these attachment points in place.
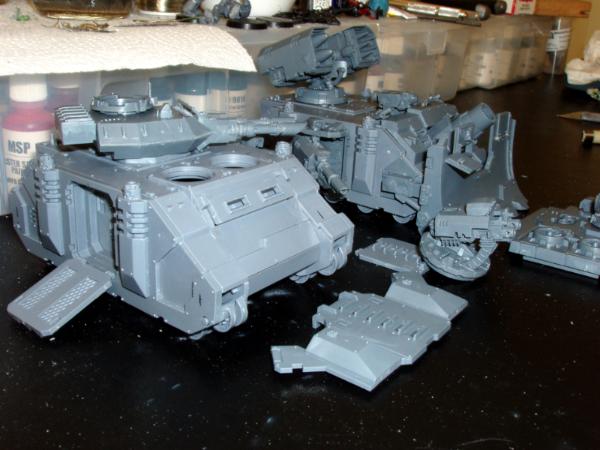
Here is an edit for all the comments I received about wanting to see them tanks put together. None my my tanks are built yet, I just snap fitted them together to show you how they look and how you can change them up in a few short minutes. I posted twenty pictures in my gallery, but I'll just pick a couple to show what they look like here.
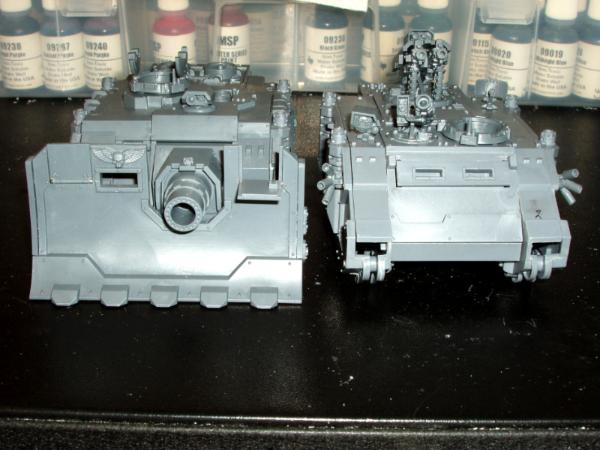
Here is a picture of two of my Rhinos. Rhino #1 on the left is as a Vindicator, and Rhino #2 is as a Razorback.
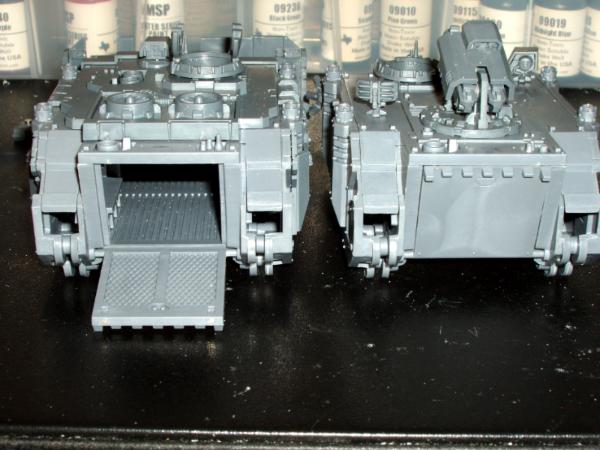
Here is a rear view of both tanks, with on rear hatch open and the other closed.
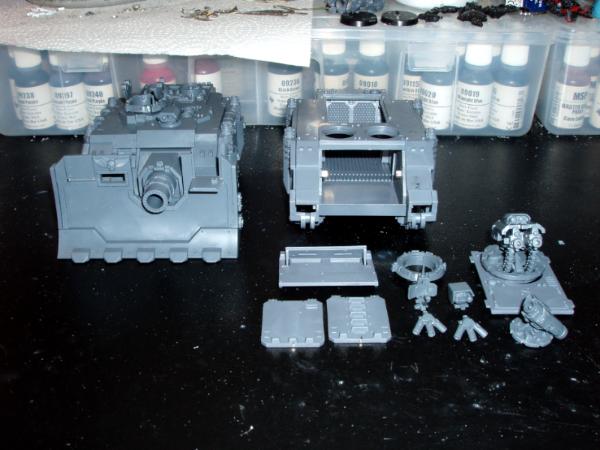
In this picture I removed all the Razorback components along with the extra add on components. You can see I also removed the front armor piece. I left the Vindicator as is.

I then removed the Vindicator armor and Demolisher Cannon from Rhino #1 and swapped it over to Rhino #2. Took about a minute total to do.

In this picture, I am just showing a bunch of different attachments on both Rhinos. You can pretty much make up new tanks if you wanted to. Rhino #1 has a Whirlwind Launcher, extra components, and a Predator side sponson Heavy Bolter. On Rhino #2 I left the front of the Vindicator with the shield on, removed the left and top armor and threw on a Predator turret with twin Lascannon, and a side sponson Lascannon.
Here is another mix up of different parts on the two Rhinos. Rhino #1 just have a Predator turret, and the left side hatch open. The placement of the magnets on the hatch allow you to have it open to disembark troops out if you use it as a Rhino or Razorback. Its not the same as a hinge, but looks good, and allows you to remove the door and throw in a sponson or add the Vindicator armor. On Rhino #2 I left the Vindicator front and shield, also the Predator side sponson with Lascannon, and throw the Whirlwind Launcher on top.
I have a couple other pictures in my gallery but this shows what possibilities you have with a couple Rhino hulls and some magnets.
Well that is how I made my standard Rhino able to handle all the different versions of the Rhino chassis. Hopefully this will be helpful to anyone that is wanting to have only a few tanks, but all the different versions available.
If you have any questions or comments, you can post them on the forum or
PM me, always willing to help out a fellow Dakka member.
Dark Knight


 The Black Hand
 (6th) 2-1-0

