Switch Theme:

How to build cheap and solid magnetic movement trays.  [RSS] Share on facebook Share on Twitter Submit to Reddit
»
Author Message
Advert


Forum adverts like this one are shown to any user who is not logged in. Join us by filling out a tiny 3 field form and you will get your own, free, dakka user account which gives a good range of benefits to you:
  • No adverts like this in the forums anymore.
  • Times and dates in your local timezone.
  • Full tracking of what you have read so you can skip to your first unread post, easily see what has changed since you last logged in, and easily see what is new at a glance.
  • Email notifications for threads you want to watch closely.
  • Being a part of the oldest wargaming community on the net.
If you are already a member then feel free to login now.


Made in gb
Thunderhawk Pilot Dropping From Orbit


Scotland

Hey dakkanauts, I just finished building my prototype movement tray, and I'm pretty pleased with it, so I thought I'd share.

Assuming you have the basic modelling supplies, they work out about a pound a pop if your doing an army or two. There is also a guide on snapguide if you prefer: http://snp.gd/tbad4w

Supplies:

Sand
Superglue
White glue
Plate metal (I bought 0.9mm steel plate from a uk eBay seller for £8 - enough to do 3000pts of high elves, and about 1500 of orcs and goblins)
Magnets (I bought 100 n40 6mmx2mm from eBay for about £6)
Old sprues
Putty (millionth was what I used)
Paint
Flock
a hacksaw or power tool for cutting the metal (the seller I spoke to can cut to size if required) pm me if you want details of the seller.
A needle file.

Method:

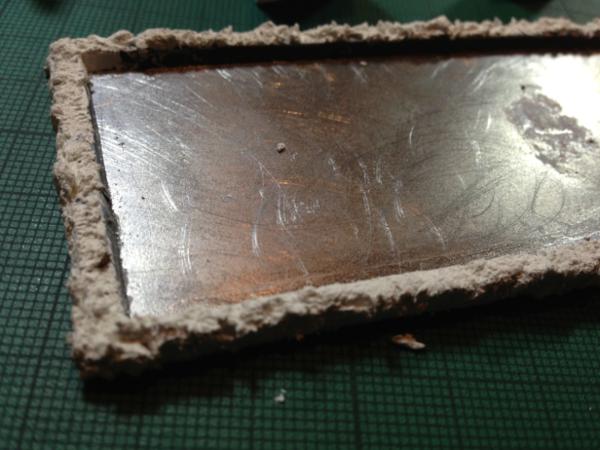
start by cutting some lengths of sprue to use as a border for the tray. File off any lumps and bumps. They don't have to be perfect.
Mark the footprint of the unit plus sprues on the steel:


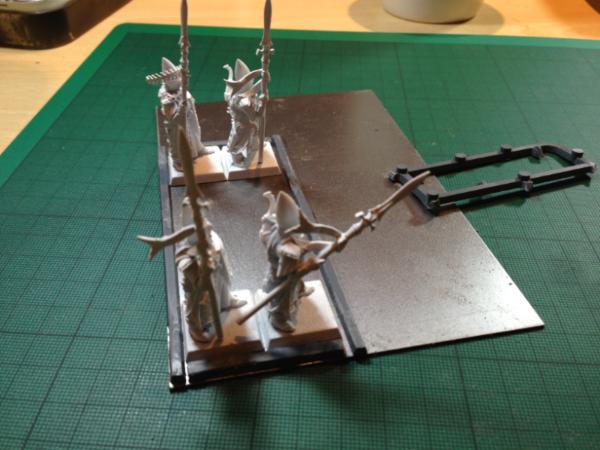
Cut out the steel, watching you don't lose a finger. File off any sharp edges or burrs.


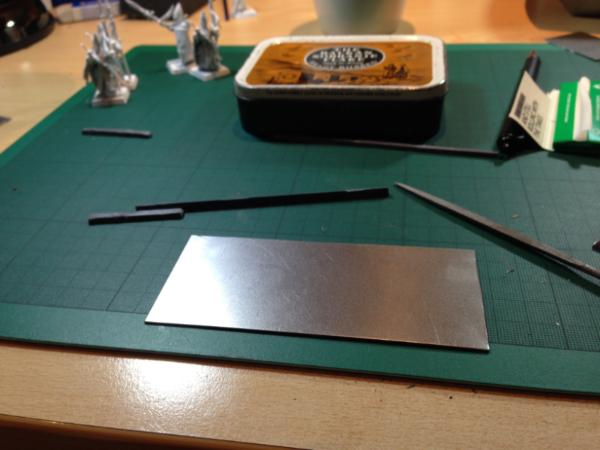
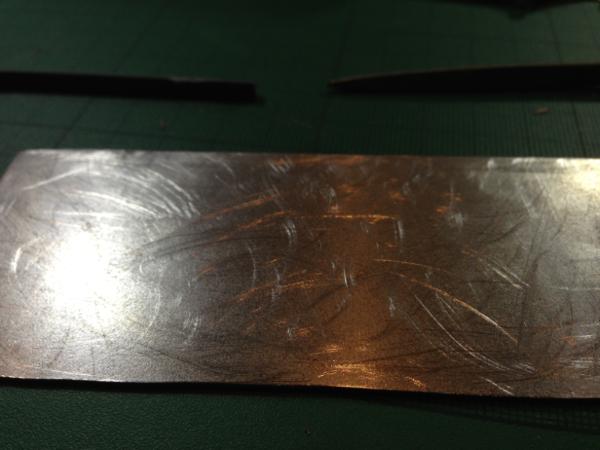
Scratch up the top surface of your steel - this will let the superglue and white glue get a decent grip. I just used a file in a circular motion.


Glue on your sprue borders. Take the opportunity to make sure everything fits at this stage, or you are going to be swearing later. File any excess sprue off at the corners.


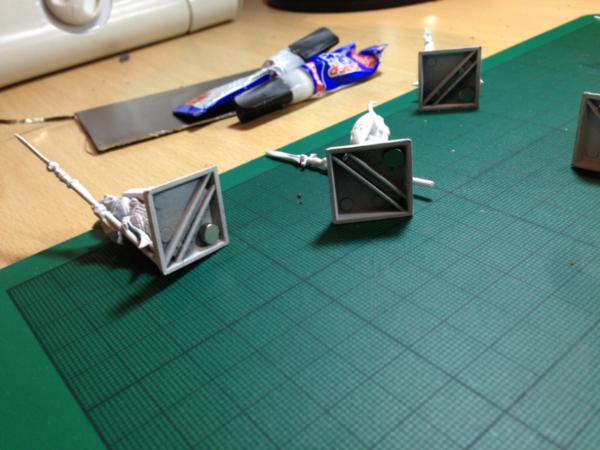
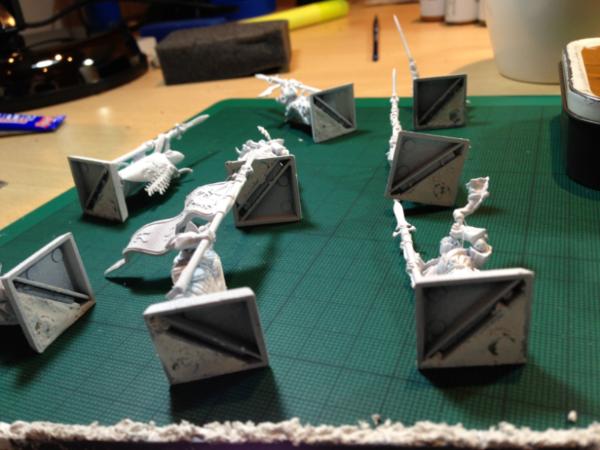
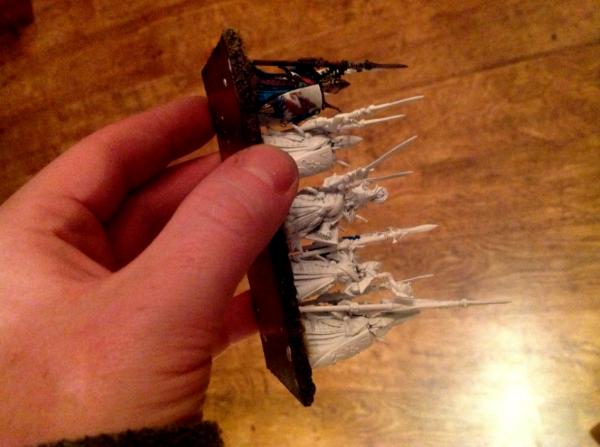
Glue magnets into the bases of your unit. I used N40 strength 6mmx2mm. These are pretty strong, but there is a layer of sand to go between the steel and magnet, so this will reduce the strength.


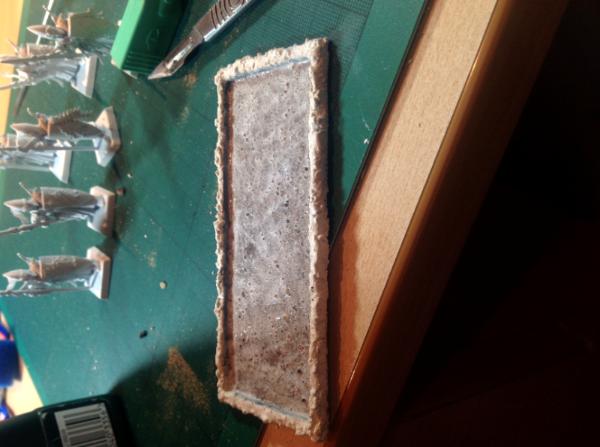
Use modeling putty to 'dress' the sprues. Make sure you don't get any on the inside or bottom edges, or your models won't fit. You can go for a smooth look, but I've gone for 'muddy terrain'.


Pack modeling putty around the magnets in your models. This will help stop the magnet detaching from your model when removing it from the tray.


Paint the interior of the tray with white glue, and sprinkle fine sand onto it, taking care not to get on the sprue edge. Shake off excess. Once dry, give the whole piece a coat of glue to seal it.

Sorry a couple of the following images are sideways - I can't find an option to rotate. :/


Once everything has dried, base coat in a colour to match your model bases or whatever.
Wash, drybrush and flock to taste.


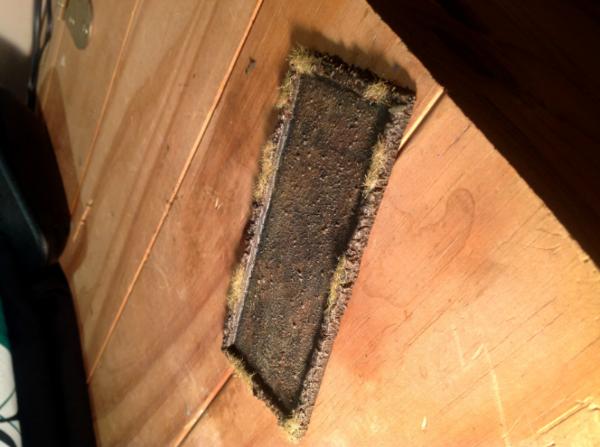
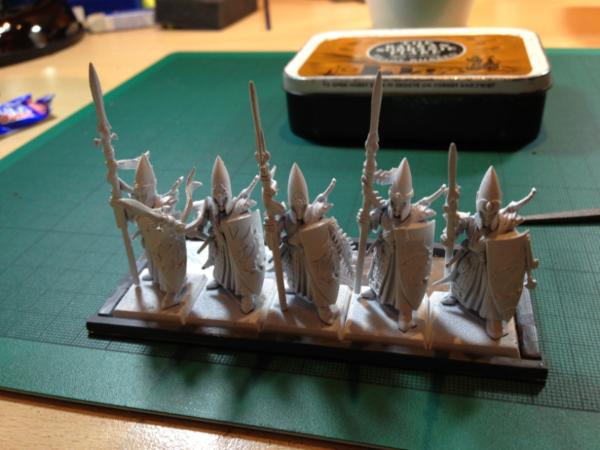
Test fit your unit, if you have done it right, all should fit snugly.


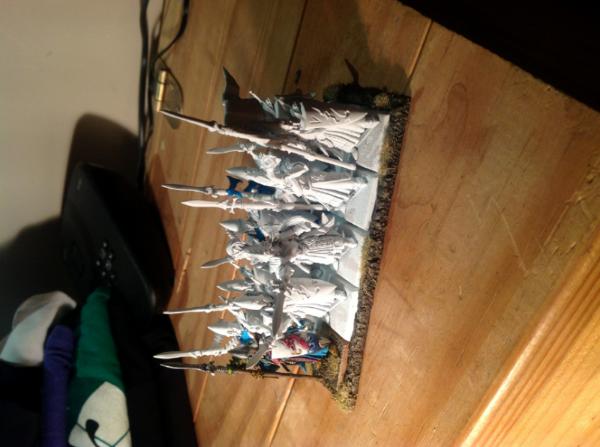
Hey presto. You can hold them upside down no problem, yet they are easy to remove once your soldiers get killed! Remember to give it a coat of varnish.


Hope someone finds it useful.

Eggs

   
Made in us
Tough Tyrant Guard


North Carolina

1. Did your sheets come flat?

2. Did you have to cut them?

3. What did you use to cut them with out causing them to bend?


Biomass


Made in gb
Thunderhawk Pilot Dropping From Orbit


Scotland

1. Yes, they came flat. I bought 100mm x 150mm sheets, which is enough for a unit up to 7x5. The seller can cut to size though.

2. Yes, I cut them, purely because I didn't have a tape measure to hand when I was ordering them, but if you don't want to cut them, see 1!

3. I used a compound angle mitre saw with a metal cutting blade, but if you are handy with a jigsaw, it would be easy enough. To stop it bending, put a scrap piece of wood underneath it, and make sure you use a metal cutting blade (metal blades cut on the downstroke, wood on the upstroke, which would bend the metal upward).

Hope that helps.

   
Made in us
Steadfast Grey Hunter


Topeka, KS in the Dustbowl Sector

nice write up

"Raise your shield!" 
   
Made in gb
Thunderhawk Pilot Dropping From Orbit


Scotland

Thanks!

   
Made in gb
Boosting Space Marine Biker


England, West sussex.

In have been working on a very much the same project apart from I managed to get some metal from a handyman who is a friend, took me ages to get lol, I however am using flexible magnetic sheet and cutting to size to go onto the underside of the base and then putting the metal sheet onto a normal movement tray, will see how it turns out, this will be very useful if i need to do any more movement trays though

Fritz40k forum: 40k only warhammer forum.

http://www.thewarmaster.com

Warmachine Menoth 60 points

SalamanderMarine

High Elves 2000 points

200 points
1000 points
1250 points
1500 points
300 points (in progress)
Tomb kings: 1000
High elves 2000 points


6th ed slate

2/0/3

http://www.games-workshop.com/gws/content/article.jsp?catId=cat440134a&categoryId=1000018%C2%A7ion=&pIndex=1&aId=3400019&start=2&multiPageMode=true

http://www.forgeworld.co.uk/News/Downloads.html 
   
Made in gb
Grovelin' Grot


Kent, UK

Cheers for this mate.

Great little guide that I will be following for my Empire as they take shape.

The main reason this is attractive to me is my heavy handed friends who love to hap-hazardly palm models off the table to an early demise. Having already lost my Tomb Stalker to such an incident, I am determined to ensure my Knights will have ample protection from the onslaught of heavy handed buffoons!

I'd be interested in getting the pre-cut to size once I work out the measurements.

Cheers

Jed

The Hand of Blood

Thanks for Visiting!
 
   
Made in au
Shunting Grey Knight Interceptor


Innawoods

That looks bloody amazing, and the best part is it is simple and easy to make.

If we win we win, if we die we die fighting so it don't count. If we runs for it we don't die neither, cos we can come back for annuver go, see!
 
   
Made in us
Nasty Nob


Cary, NC

I use this method myself (sans border, due to personal preference). One thing I also did was grab a sheet of adhesive backed felt (from a local crafts store) and cut it to size. I stuck that on the underside of the movement tray.

This prevents your metal tray from scuffing up someone's painted board, and also gives it a bit of grip, so that you can place the tray on hills and other uneven surfaces more easily.

The trays work wonderfully, speed up your deployment immensely, and make putting away your models after the game much easier. Also, as the models stay on the tray quite securely, the whole tray can just be put in a figure case, and the models don't bump around (or get spiky bits caught in the foam).

Well written tutorial.


Made in gb
Thunderhawk Pilot Dropping From Orbit


Scotland

That's a great idea! I was wondering how to tidy up the underside. Thanks!

   
Made in gr
Basecoated Black


Athens, Greece

Awesome idea. Very useful
Thanks

You can always visit my blog - http://greekminiatures.blogspot.com - Epic miniatures, terrain, tutorials
Also Youtube Channel : https://www.youtube.com/user/TheKostasiii 
   
 
Forum Index » Painting & Modeling Tutorials
Go to: