THE SCOURING
VANGUARD DEPLOYMENT
6 random value objectives (15
VP total)
1,250 pts each player x4
BA & CHAOS Lists coming asap
NECRONS
1 Destroyer Lord
+Sempiternal Weave
+Mindshacked Scarabs
+Res Orb
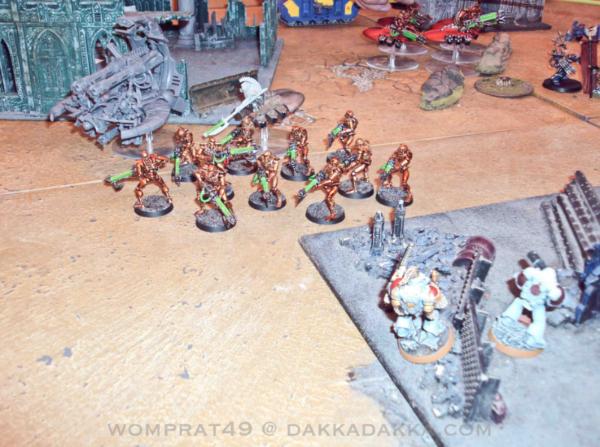
20 Necron Warriors
10 Necron Immortals
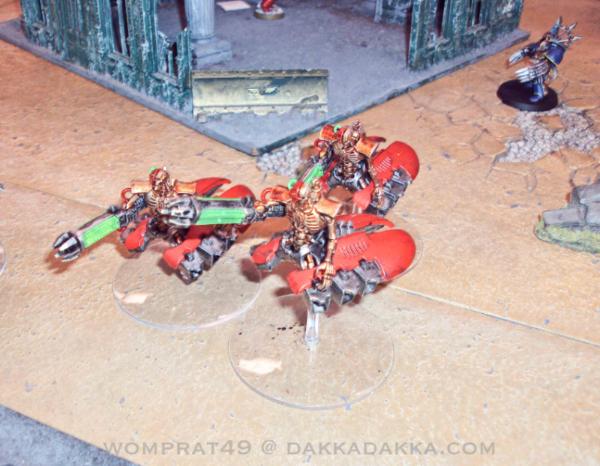
5 Necron Destroyers
4 Necron Destroyers
3 Annihilation Barges
SPACE WOLVES
Runes Priest WARLORD with the +1" add to charge roll within 12" trait (useless in this game).
Storm Caller
Jaws of the Wolf World
Rune Priest
Murderous Hurricane
Storm Caller
Chooser of the Slain
Wolf Priest
Plasma Pistol
Saga of the Hunter
Wolf Guard Battle Leader
Frost Blade
Saga of the Hunter
8 Grey Hunters
Wolf Standard
Meltagun
7 Grey Hunters
Wolf Standard
Meltagun
5 Grey Hunters
Wolf Standard
Meltagun
5 Grey Hunters
Wolf Standard
Meltagun
5 Grey Hunters
Wolf Standard
Meltagun
Lone Wolf
Terminator Armor
Powerfist & Combi-Plasma
4 Long Fangs
3
ML
4 Long Fangs
3
LC

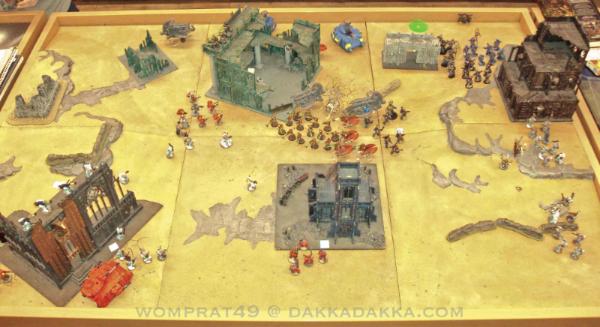
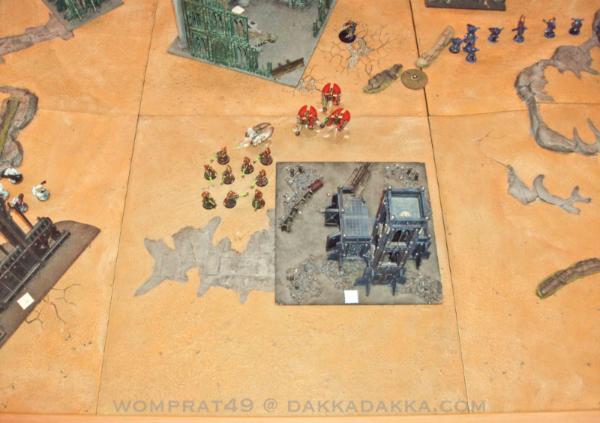
DEPLOYMENT, objectives
VP values revealed,
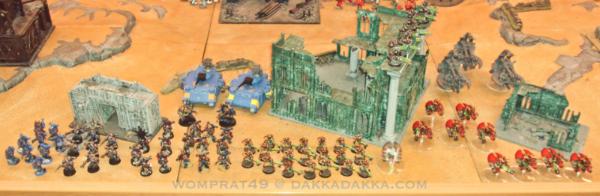
SM deploy first
*Both teams have 3 objectives within their DZ, The
SM have the majority of 9
VP objectives while The Necs & Chaos 6
VP on their side.
*The
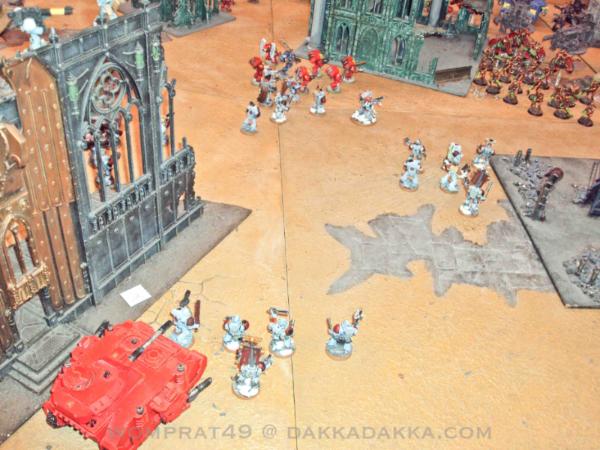
SM deploy along the front line. Long Fangs LasCannons place on top of ruins to the left with a great view of the battlefield.
*The Wolves Wolf Guard Battle Leader & Wolf Priest take 2 units of Grey Hunters move around to OUTFLANK. A Grey Hunter Squad is place in normal reserves.
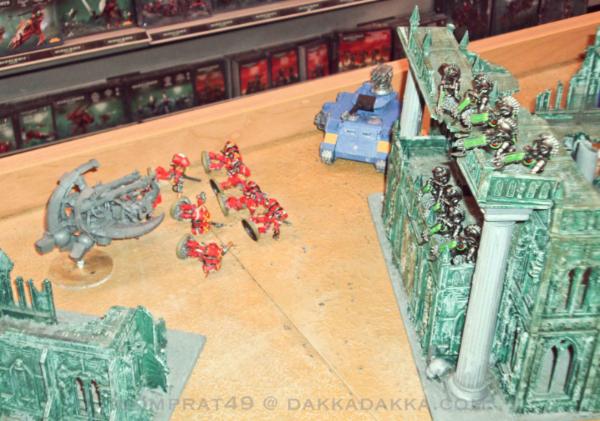
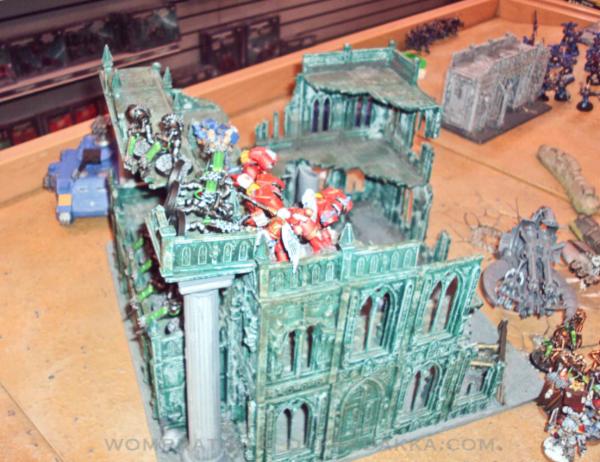
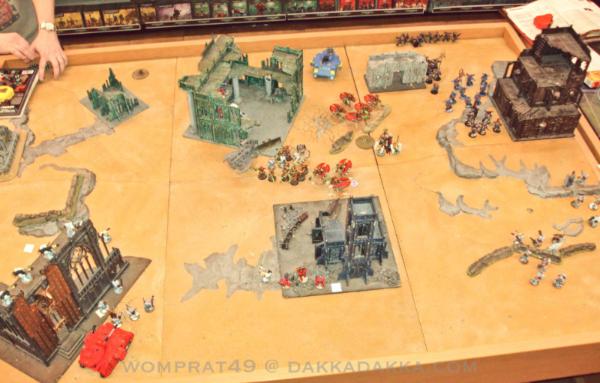
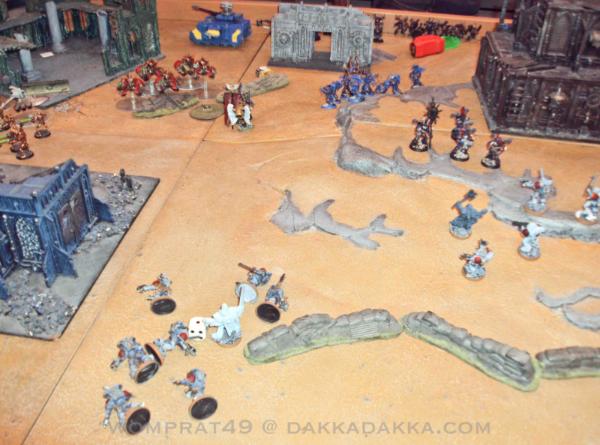
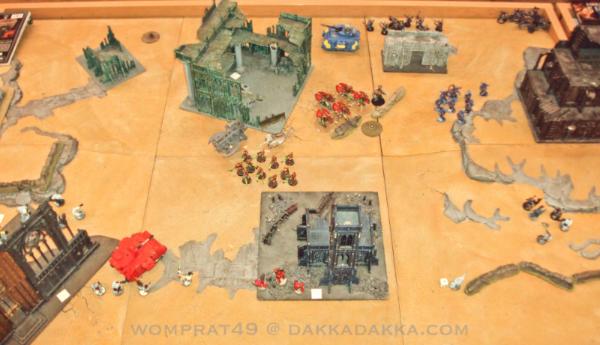
*Chaos blobs up to the top right under 2 objectives. Necs deploy in center top ruins with objective under them. 20 Warriors are deployed in the middle. Tanks and Barges go behind the center green ruins.
**The Chaos player makes a great COUNTER OUTFLANK deployment in the top right corner. They are placed across the entire edge to DENY the Wolves from OUTFLANKING in that area.
TURN 1
NIGHT FIGHTING in effect
TOP OF TURN 1
*The Rune Priests summon Storm Caller to provide a 5+ cover save, to boost the Night Fighting effects. All the other units footslog into the middle to engage the Necron Warriors.
*The Long Fangs &
BA Devs make a few hits but the Night Fighting rules cancel out everything.
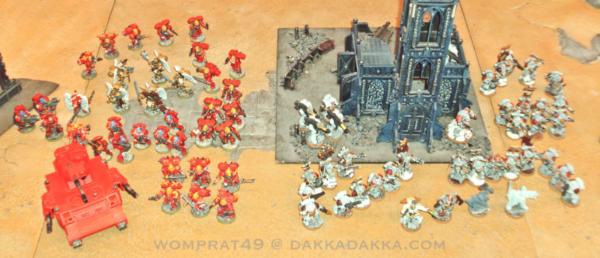
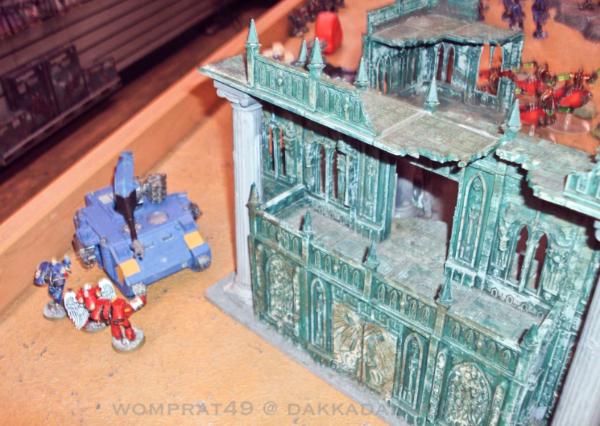
*The
BA left flank move up to the ruins ready to assault either the Necs in the ruins or the Barge / Tank in Turn 2.
BOTTOM OF TURN 1
*The Necron Immortals in the ruins rapid fire upon the nearby
BA on the left side making a few kills.
*Night Fighting rules combined with Wolves Storm Caller cancel out most of the heavy shooting.
*Necron Warriors and Chaos
SM beside them move into position in the middle to engage the Wolves.
*Heavy fire from the Chaos Pred on the left side causes the
BA plasma
Devs go to ground to avoid casualties.
TOP OF TURN 2
*The darkness of the night lifts, and the mists of the storm subside.
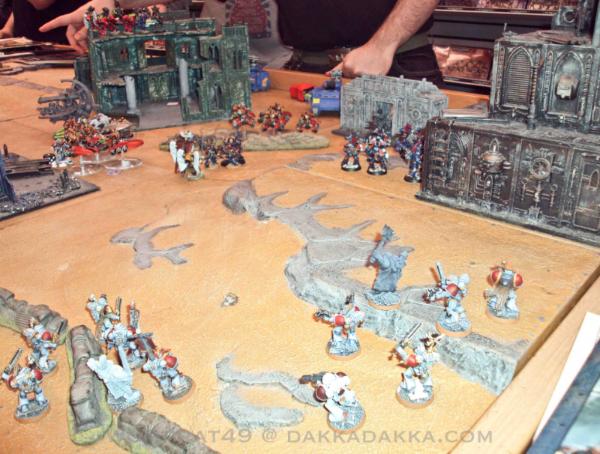
*All the Space Wolves OUTFLANKING units come join the battle on the right side. They shoot their bolters into the Chaos Squad in the center and make a few kills.
*Blood Angels Sanguinary Guard deep strike and join newly arrived Wolves on the right flank.
*The Grey Hunters also come into battle and capture the 2
VP value objective. They move forward in front of the
BA Pred to provide cover for it.
*The Long Fangs direct some cover fire into the left flank for the
BA, rending the Barge over thier only able to shoot snap shots.
*The Rune Priest and his
GH squad move up and fire bolter shots into the Chaos Marines making a kill. Murderous Hurricane surrounds the Chaos Marines, sending them into dangerous terrain until next turn.
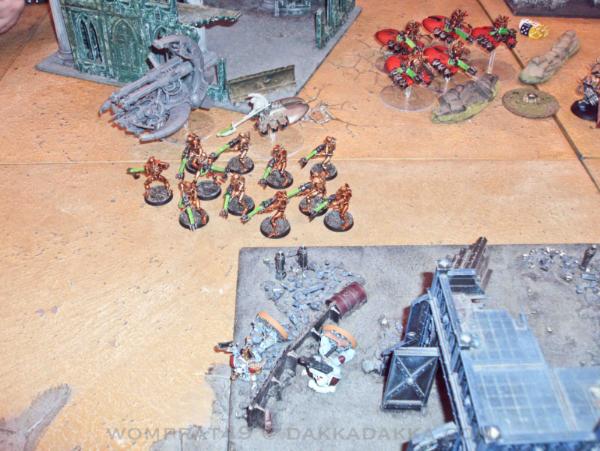
*The Necron Warriors gunline is blasted with bolter hits but only manage to make a few kills after they resurrect. The Rune Priest Warlord move up with his squad and he summons Jaws of the Wolf World making 7 enemy teeter about. Necrons and Chaos tumble into the fissure but the Necrons resurrect climbing out of the crack.
BOTTOM OF TURN 2
*The massive amount of firepower on the left flank annilates the charging
BA squad. (You can't see the 5 Necron Destroyers here) The Necrons & Chaos have FIRST BLOOD.
*Just as the
BA Dev squad get back into the fight to let rip Plasma Cannon fire, the Chaos tank sets it's sights on the
BA Dev squad that just got up from ground. The combat squad of 2 plasma cannons is wiped out.
*The Chaos horde on the far right side see the newly arrived Wolves and
BA and move out from behind the ruins. Thy unleash a killing spray on bolter rounds into them. The Sang guard takes three casualties and a few more go the Wolves.
*The Necron Destroyers move out and with their Warriors they kill all the Grey Hunters near the 4
VP objective. Leaving just the Rune Priest surround by his fallen brothers.
*The massed amount of shooting here in Turn 2 has killed 3 entire units of enemy troops!
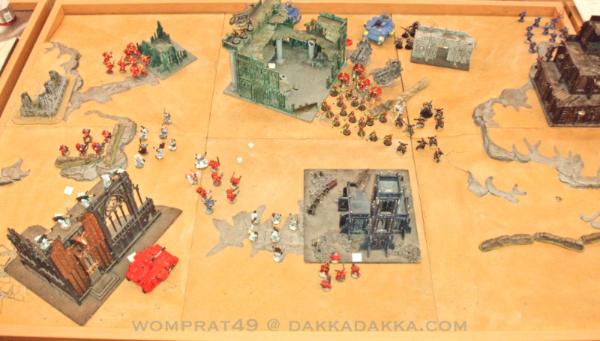
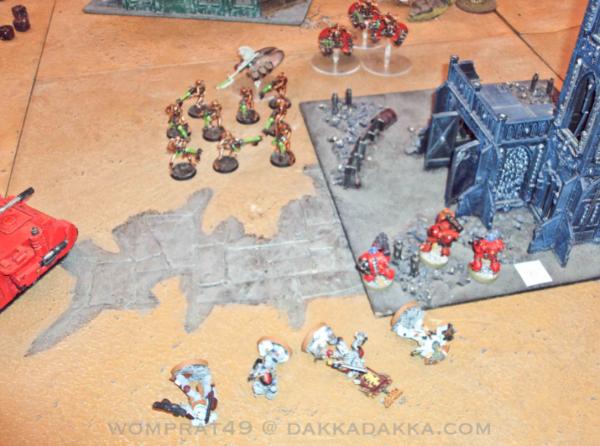
TOP OF TURN 3
*The Wolves by the
BA Pred fumble about in the difficult terriain, unable to make a rush for either the 4
VP objective in the center or the 3
VP objective to the left. They manage to stay put more or less under the 2
VP objective.
*Sensing an urgency to claim the 4
VP objective in the bottom center both of the
GH squads on the far right flank make a dash for it. They let loose a long range volley into the Chaos horde rampaging into their zone. The Chaos Marines on the far right flank take a kill or two.
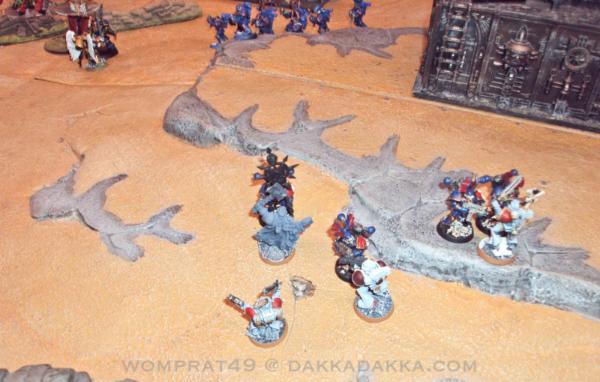
*The Space Wolves charge into the Necron center under their wolf standard. The Rune Priest Jaws of the Wolf is DENIED! One Wolf goes down in the volley of Gauss rounds. The Rune Priest does not challenge the Necron
HQ (he forgot to). The Necrons lose the combat by 3, but resurrect to almost full strength again.
*The Long Fangs manage to destroy the Barge on the left flank.
*The
BA Pred LasCannons explode one of the Barges in the Necron Center.
*Alongside the charging Grey Hunters, the Lone Wolf Terminator makes a great charge into the Necron Destroyers after a volley from his Combi-Plasma. The Necrons crumple beneath his powerfist. The Necrons lose all three Destroyers, one makes a lucky FEEL NO PAIN (from WARLORD trait who is still nearby) roll and stay alive later, all three resurrect! The Lone Wolf took one wound. The combat continues...
*The surviving Rune Priest makes a strategic withdrawl toward the 4
VP objective and bands with the combat squad of
ML devastors. He sends a Murderous Hurricane into the Chaos Marines in the center.
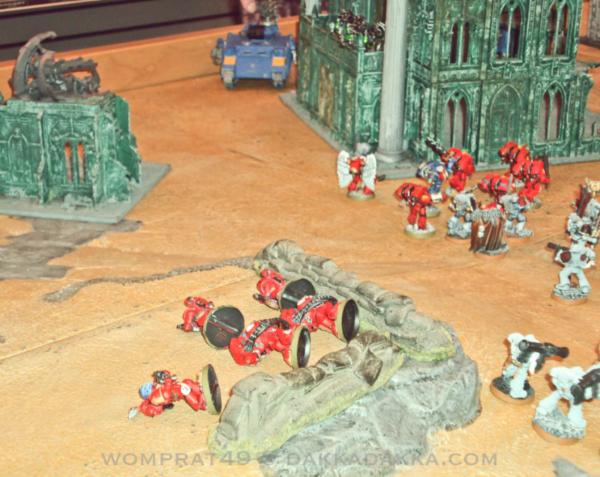
*The bloody Sang Guard jumps into the Chaos Marine center and makes few kills. The entire center of the battlefield is now engaged in close combat!
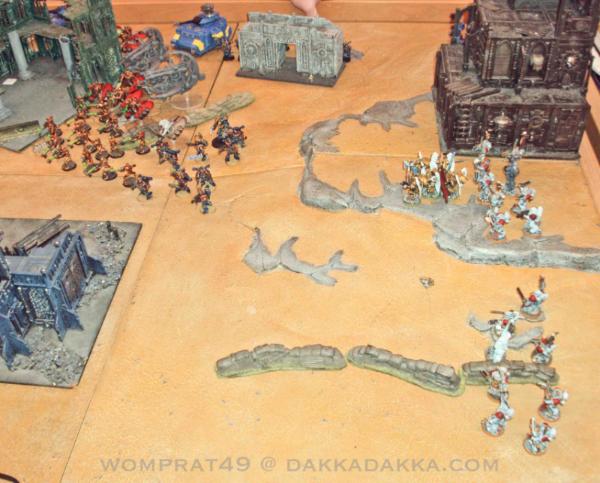
The
BA split off from the Wolves in the center and jump into the ruins with the 2
VP objective and charge into the Necron Immortals. Unfortunate the BAs take 1 or 2 wounds in the dangerous terrain. Later the turn, The Necrons are dispatched entirely and the
BA consolidate down on level deeper into the ruins closer to the objective within.
BOTTOM OF TURN 3
*The Necron Destroyers zoom ahead and sensing the Wolves urgency to capture the center bottom objective let rip a large volley of AP3 shots killing a few more Wolves.
*In the Necron center the Warriors continue close quarters toe to toe with the Wolves. The Wolves
RP challenges the Necron Lord and slays him with his Force Weapon! Of course the Necron Lord resurrects...
*The Lone Wolf falls in combat with the Destroyers.
*On the far right of the battle the Chaos Marines move forward and fire bolters into the Wolves that are moving back towards the bottom center objective.
TOP OF TURN 4
*On the right side the Wolves make a run for the 4
VP objective in the bottom center.
*The Wolves above them stand firm and move into rapid-fire range and with Preferred Enemy kill 2 Chaos Marines.
*The Long Fangs atop the runs shoot their LasCannons through dense ruins at the other Chaos Pred looming around making to Pen hits but the tank makes it's cover saves.
The
BA jump out of the ruins and assault the Chaos Pred. The tank explodes, killing one marine.
BOTTOM OF TURN 4
The Necron Destroyers unleash a devasting volley into the large
GH pack. Killing them all and wounding the Wolf Guard Battle Leader! These
GH where about to run for the 4
VP objective (to their left about 7") away next turn to score.

The Necron Destroyer Lord SLAYS THE WARLORD! They now have 2 Secondary Objectives!
The Marine center is broken! The Wolves lose their combat by 2 and FALL BACK halfway to the 4
VP objective right behind them and into ruins.
On the right flank the Chaos charge the Grey Hunters to tarpit them and erase any chance of them running towards the 4
VP objective. Chaos loses combat by 2 put FEARLESS on both sides keeps the
CC going.
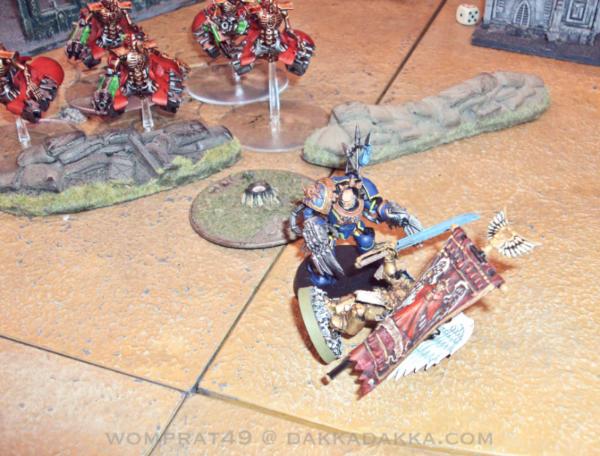
The Chaos WARLORD slays the last
BA Sang Guard!
TOP OF TURN 5
*The
GH near the 2
VP location make a dash for the 4
VP objective and try to link up with their
RP. They have to RUN to achieve this. Afterward they claim the 4
VP objective!
The remaining
BA jump back into the ruins taking a dangerous terrain casualty. The
BA claim a 2
VP objective! The Marines now have 6
VP!
*The Long Fangs combined squads of
LC and
ML fire and wipe out the Necron Destroyers.
The Necron Warriors eliminate the 2 remaing
GH they were in
CC before.
Necron Destroyers kill of the
GH pack &
RP claiming the 4
VP objective. The
BA Devs next to them suffer the same fate.
The Necron Warriors are about to claim LINEBREAKER! They (will) have all 3 Secondary Objectives!
The lone
BA struggling to get those 2
VPs is killed by the Chaos Pred leaving the MARINES with no
VPs.
At the END OF TURN 5 we called it a loss for the MARINES (0
VP) and a WIN for the NECRONS and CHAOS with all the
VPs from 2 (3) of the Secondary Objectives. In the end they did not claim any primary objectives.
And the MVP goes to the NECRON DESTROYERS. They help wipe the initial
BA assault on the left flank on TURN 2 and then wiped an entire squad of
GH about to claim an objective in TURN 4.
Automatically Appended Next Post:
My buddy Steve2112 and I both played the Space Wolves & Blood Angels. For me this was my first game commanding over 1K points and my first game against Necrons.
I am going to leave my impressions and thoughts of the game now in hindsight. I will attempt to write everything I
was thinking during the game. This will be for my benefit and any others here on dakkadakka. I will talk a little bit about my teammates play good and bad, only because I want to win tournaments with him.

PRE-GAME
I did not choose any Rune Priest powers after I learned whom the enemy was, which would be fair. Jaws of the Wolf was a wise choice against I2 Necrons squads. My second
RP should of took Jaws as well. Murderous Hurricane was only a minor effect in this game.
I took 5 units of Grey Hunters and 4
HQ's to bring my
SW collection up to 1,250 points. I had 5 scoring troops which was nice but 3 of them were very minimal in strength. This game brought all my models into the game.
I wish Steve's
BA had a third unit of troops instead of those Devastators.
DEPLOYMENT
I did not put much thought into deployment rather than really wanting to "get fancy" and try out Saga of the Hunter. I took half of the
GH, the two biggest squads and 2
HQ to outflank. I did not really think past this to
where they would outflank to. To boot, our opponent deployed brilliantly to counter any outflanking move on the right side of the table. I am not very good in Vanguard deployment.
TURN 1
I told my teammate the my Wolves would guard our 3 primary objectives. Instead I moved the 2
GH on the table away from them and into the center to get shot at. I should have stayed back and played defensibly, which I also said I was
going to do... I played too fancy once again!
TURN 2
I think my biggest blunder was placing my 2 outflanking wayyyyy over there on the right side away from the action. There as no objective at all on that side! I think the next turn I realized this and started running for the big juicy primary objective in our center. I pretty much wasted an entire wolf pack and wolf guard battle leader to crawl halfway to an objective. There was a nice objective sitting all alone on our left side...
For some reason I wanted to charge those Necron Warriors in the middle. I knew my Lone Wolf was in good position, and I was very excited to start blasting the Necron line with Jaws of the Wolf World.
I may be wrong but it looks like Steve's
BA on the left could of assaulted the Necron Immortals in the ruins instead of getting shot to pieces. Though I remember telling him "don't worry about the Necrons in the ruins...
I got em...." whoops sorry
I think the Sang Guard deepstriked within range of a lot of firepower... They lost 3 out of 5 the following turn, which sucked.
TURN 3
At this point I knew what Necron Destroyers do. I also learned about Necron resurrection...
TURN 4
I realized that all those Space Wolves on the far right are strategically out of the game... The Chaos up in the top right were as much out of the game as well though.
TURN 5
It's all over. It WAS all about the objectives.
CONCLUSION for me
Space Wolves
1. more Long Fangs!
2. less fancy
HQ
3. more big shooty
AP 3 or less
4. footsloggin ok, deploy better
5. less fancy "tactics"

