Panda's Amazing squigg tut, you too can have pretty scales in a hours worth of work!

Just a hour he says?! for such a huge model. I never said it was done, but that skin sure is pretty! 1 hour for the scales! do tell amazing panda! photos are coming!
Here is the finished product! just kidding keep scrolling!
Automatically Appended Next Post:
Alright Folks! Here is Panda's Mighty Squiggy Tut. So Mighty Everything Must Start With A Capital Just So It Hurts The Brain.
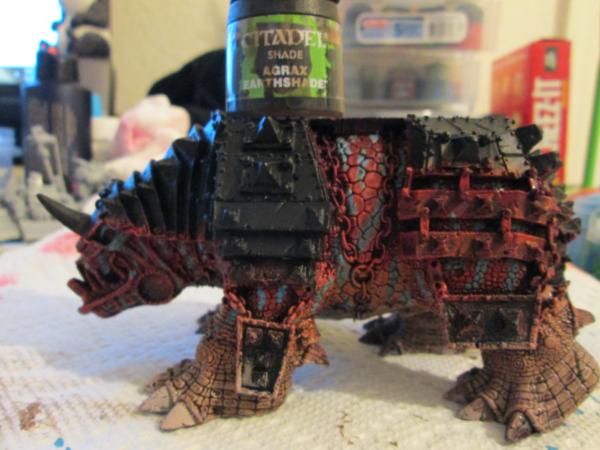
alright that is over.. anyway what do we have here on the good old fashion 'paint it like crap and call it gold block'?
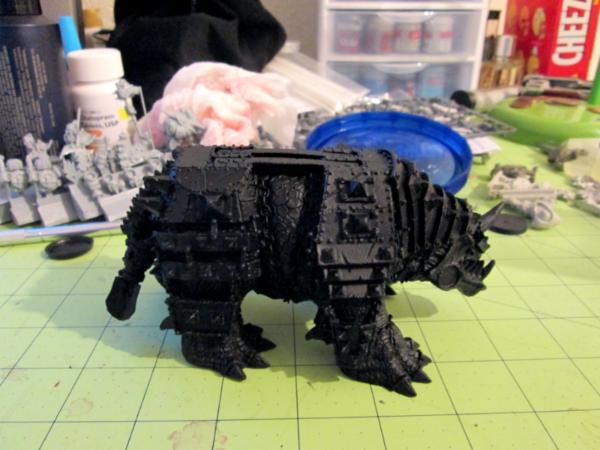
Why that appears to be a primed squiggoth. So it is! Lets start to ruin-make the model pretty!

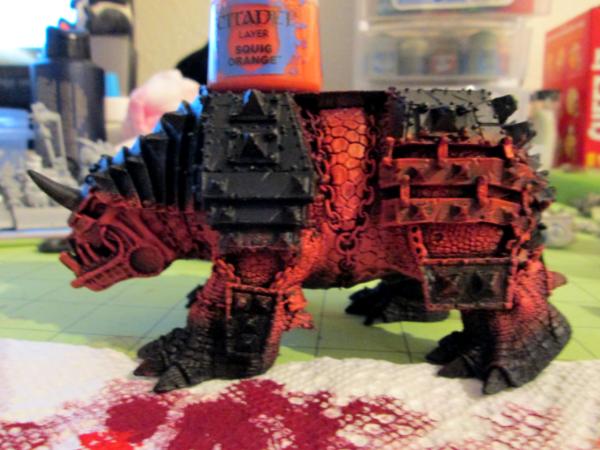
grab your large dry brush lads, and a whole skew of colors.
Step 2:
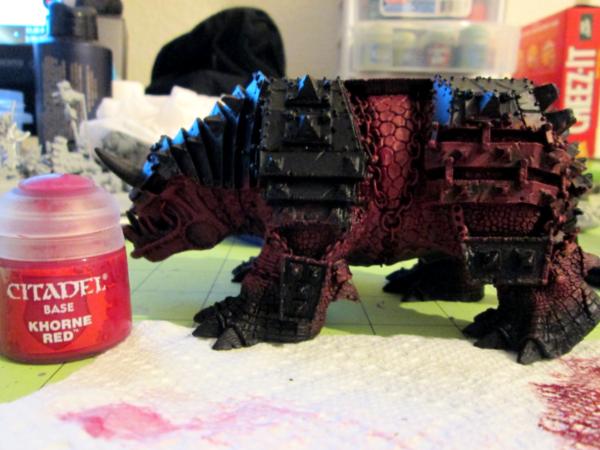
Well what do you know! panda even included the paint he used. The reasons we leave the feat blank is because we dont want to taint the color that we will use for painted paws and bellies! I know what you were thinking.. panda was just lasy, but this really the correct method. A large dry brush was used to apply the coat of paint with the mentioned color in the photo.
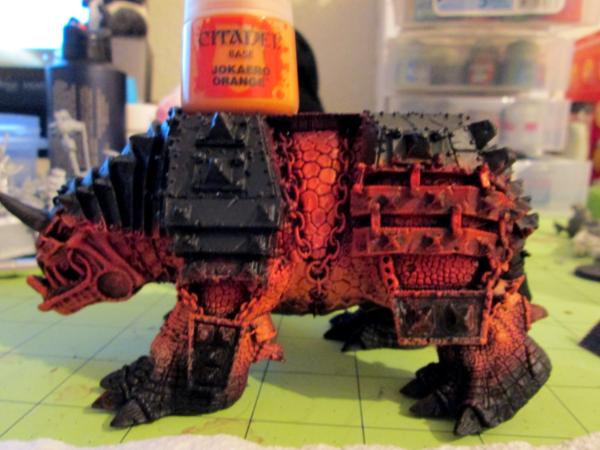
Step 3: Waoh step 3 already?!

Alright the goal here is to leave the upper areas towards the back and such the darkest red! That is right, this is the first color to your transition. enterprising i know. you will notice towards the inside of the ribs and upper back the darker red is clearly visible. That is ok! Keep dry brushing, move it fast left and right and spread the color all about.

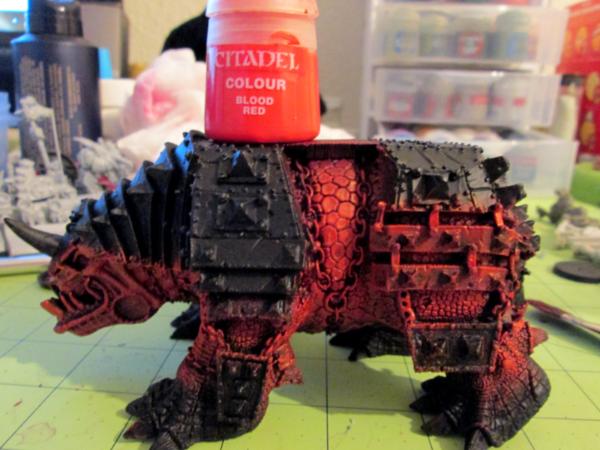
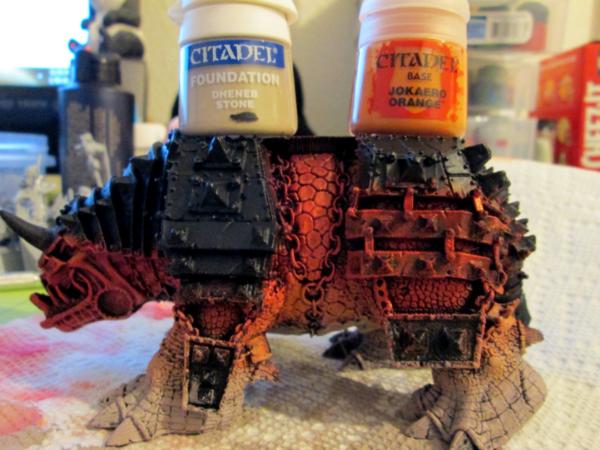
Step 4: Alright keep moving
Now children we keep repeating the above step, building up to the next color and leaving the old color behind, this leaves a transition. And thanks to the nifty dry brush style you can even go very lightly over the old color in a small section adding to the transition!
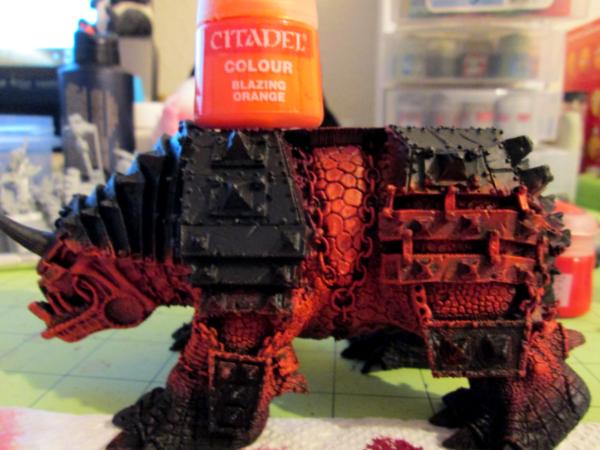
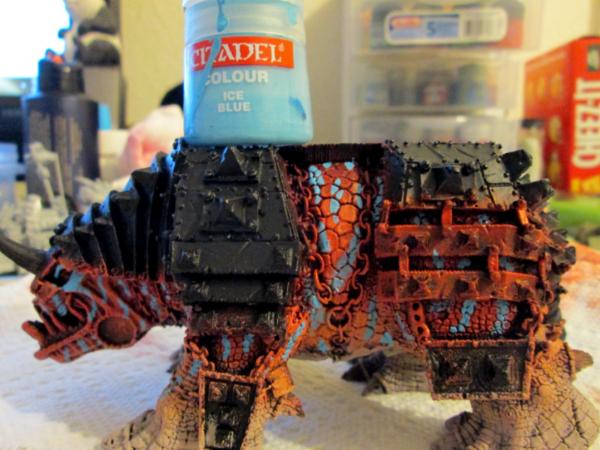
Step 5: Holy.. why so many...
Alright here we are starting to build up towards the painted paw/belly color so do a very thinish line of this color to only about the ankle, leaving a majority of the area the color of the previous color.
Step 6: Meh not much left

This here should take up half of the previous stripe as you can see and cover the ankle. This color should also be very close to your painted paw color you chose! well luckily for me i didnt have to mix paints and
gw makes a color close to my painted paw color!
Step 7: The tricky one.

Here we applied first! pay attention to that word first! we applied the painted paw color! in this case you can see the color i chose in the photo.. Next with the dry brush still having your paw color pigment mix it with your previous transition color and dry brush very quickly in between both colors of the paw and the ankle line. This smooths what otherwise would have been a rough transition. Dont worry if you get it wrong or get color everywhere practice will do it.
Step 8: Add your favorite stripe color!


Step 9: Time to finish it up and make it grim dark! Add a dark wash...

And well your done with the skin, in about a hour! Not bad! it looks good too

Things you should take away from this. Dont be afraid to be messy! this is dry brushing the more you bleed your colors the more likely you are to have a smooth transition, over bleeding can occur, but that is for the eye to judge! Now pick up your large dry brush and have a go at it. If you think i scared to be messy look at that things armor, it is covered in color stages.


