Forum adverts like this one are shown to any user who is not logged in. Join us by filling out a tiny 3 field form and you will get your own, free, dakka user account which gives a good range of benefits to you:
No adverts like this in the forums anymore.
Times and dates in your local timezone.
Full tracking of what you have read so you can skip to your first unread post, easily see what has changed since you last logged in, and easily see what is new at a glance.
Email notifications for threads you want to watch closely.
Being a part of the oldest wargaming community on the net.
If you are already a member then feel free to login now.
2013/04/30 04:12:11
Subject: My reasonably good Necron Tomb Stalker (with obligatory unneeded LED lighting)
I'm getting pretty sick of a certain Ork project, so I wanted something else to take a break from it. I wound up making this.
OK, so, there was a mishap with FW, the details of which are not germane to this thread, but long story short, I wound up with a Necron Tomb Stalker. Since I already have one, I decided to do something a little different with this one.
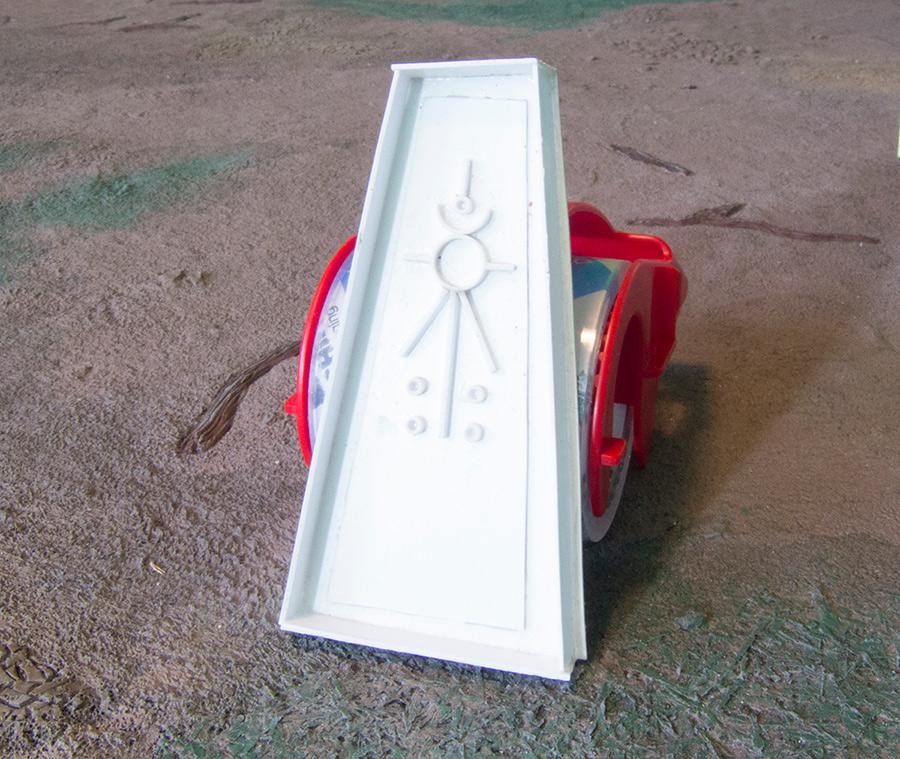
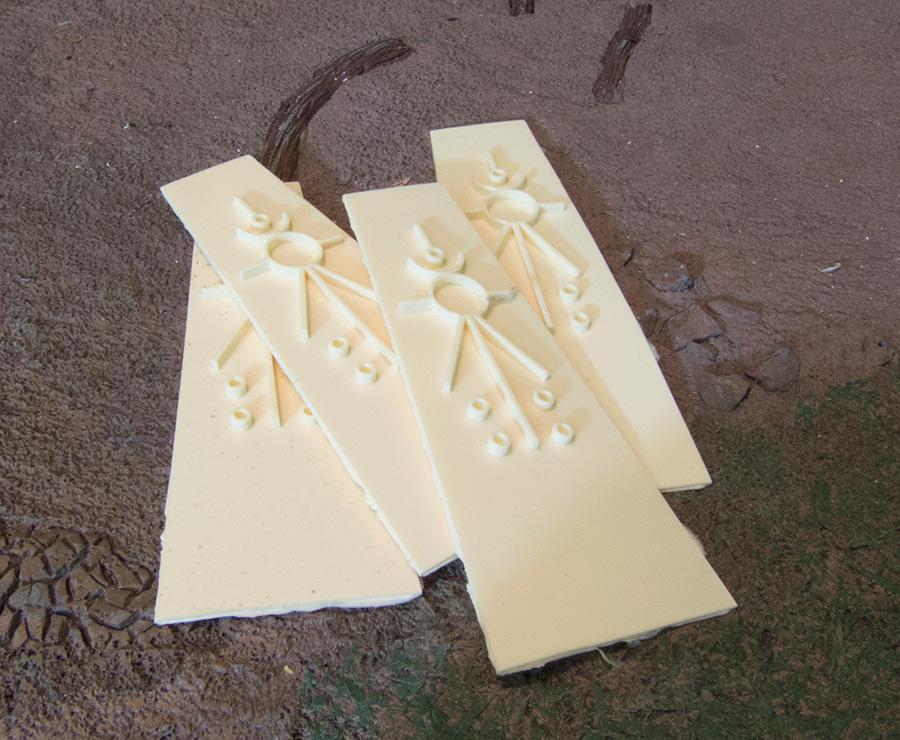
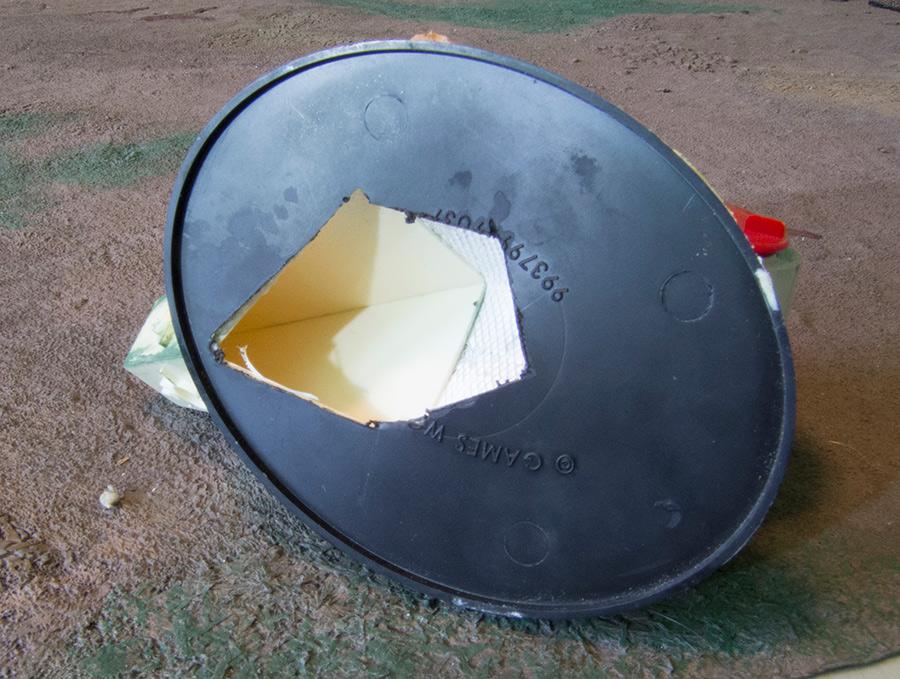
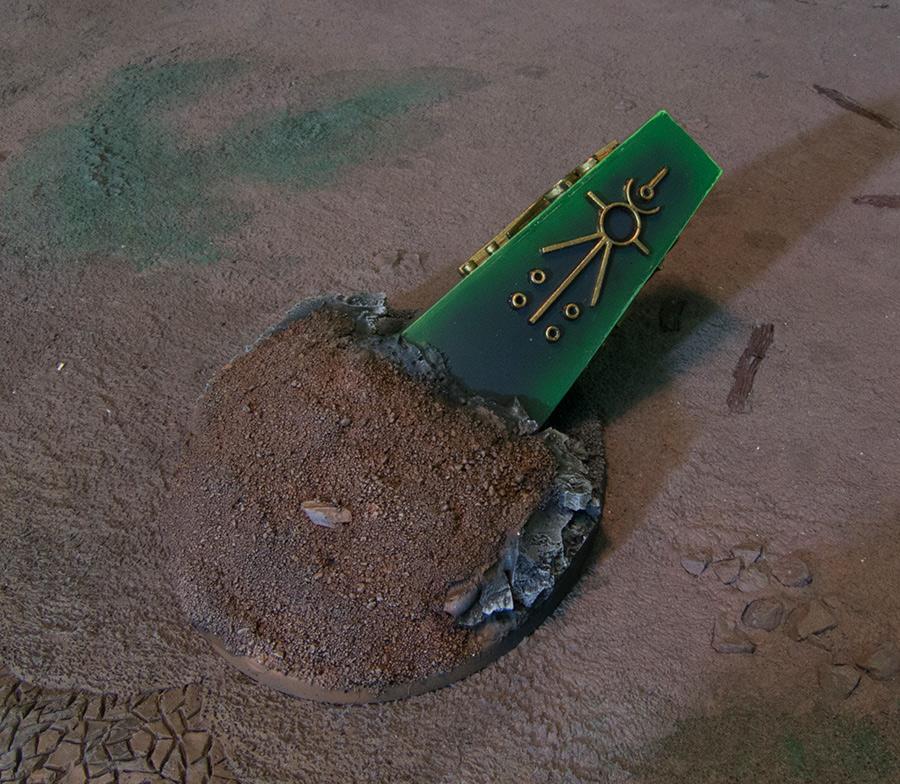
First, I decided to do the base. I wanted electronics, and I needed a way to hide them. I decided to make an obelisk. I created one side of the obelisk, and then sanded it down. I then created a moldbox for it to make a casting, as I am going to need a few.
This is the finished mold
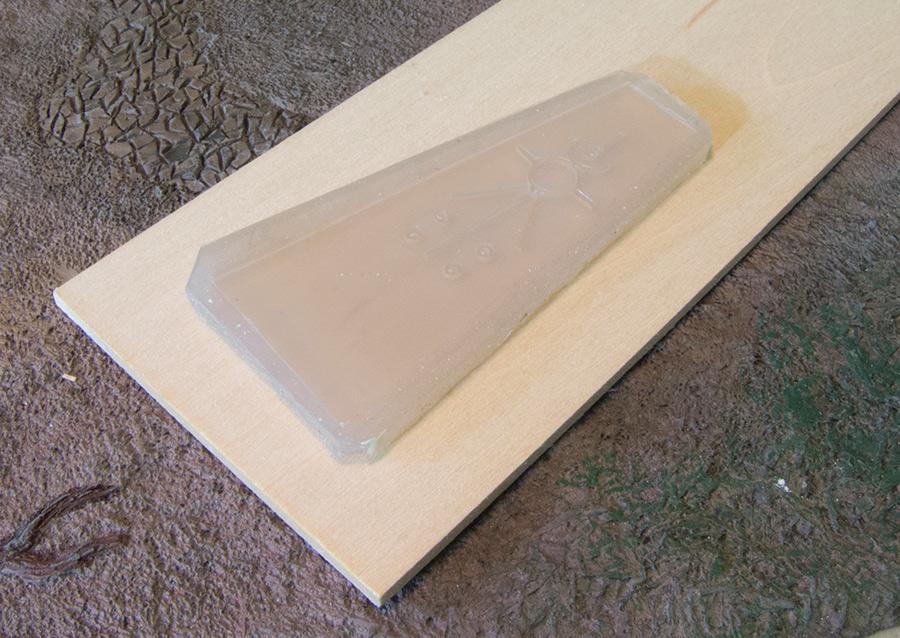
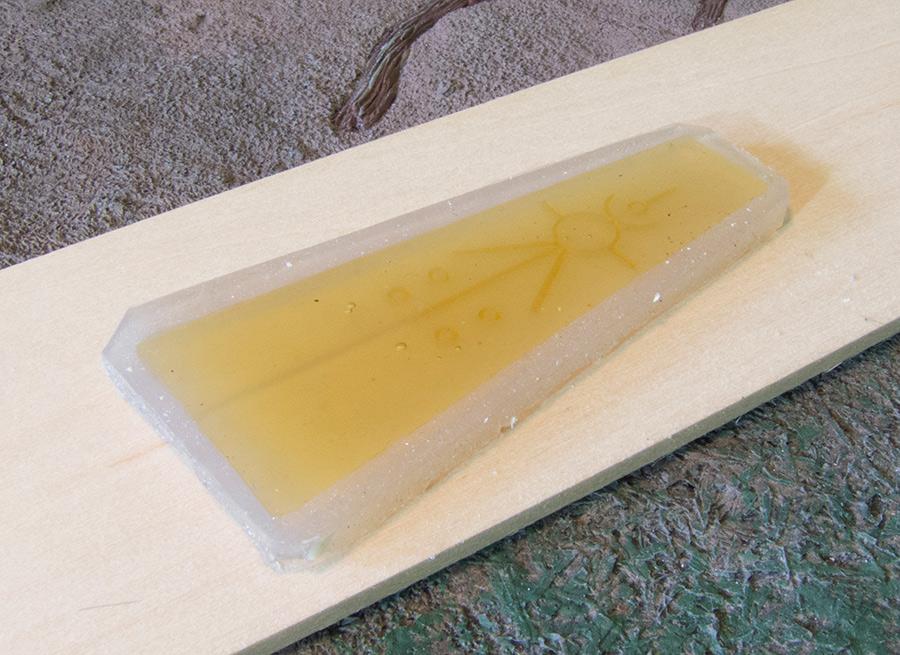
And a resin pour.
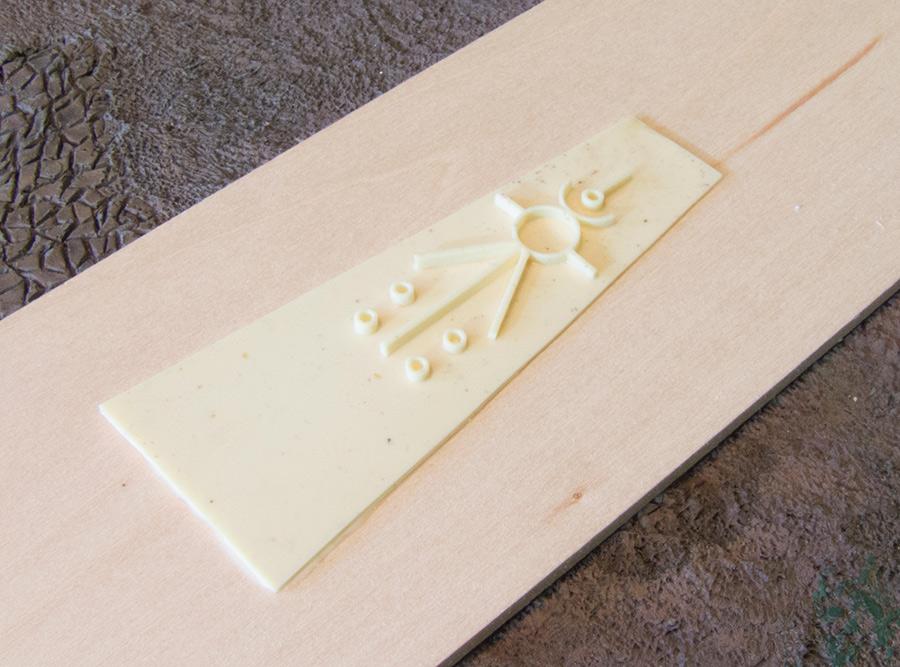
And, a finished obelisk side.
Here are the 4 sides I will use to make the Obelisk.
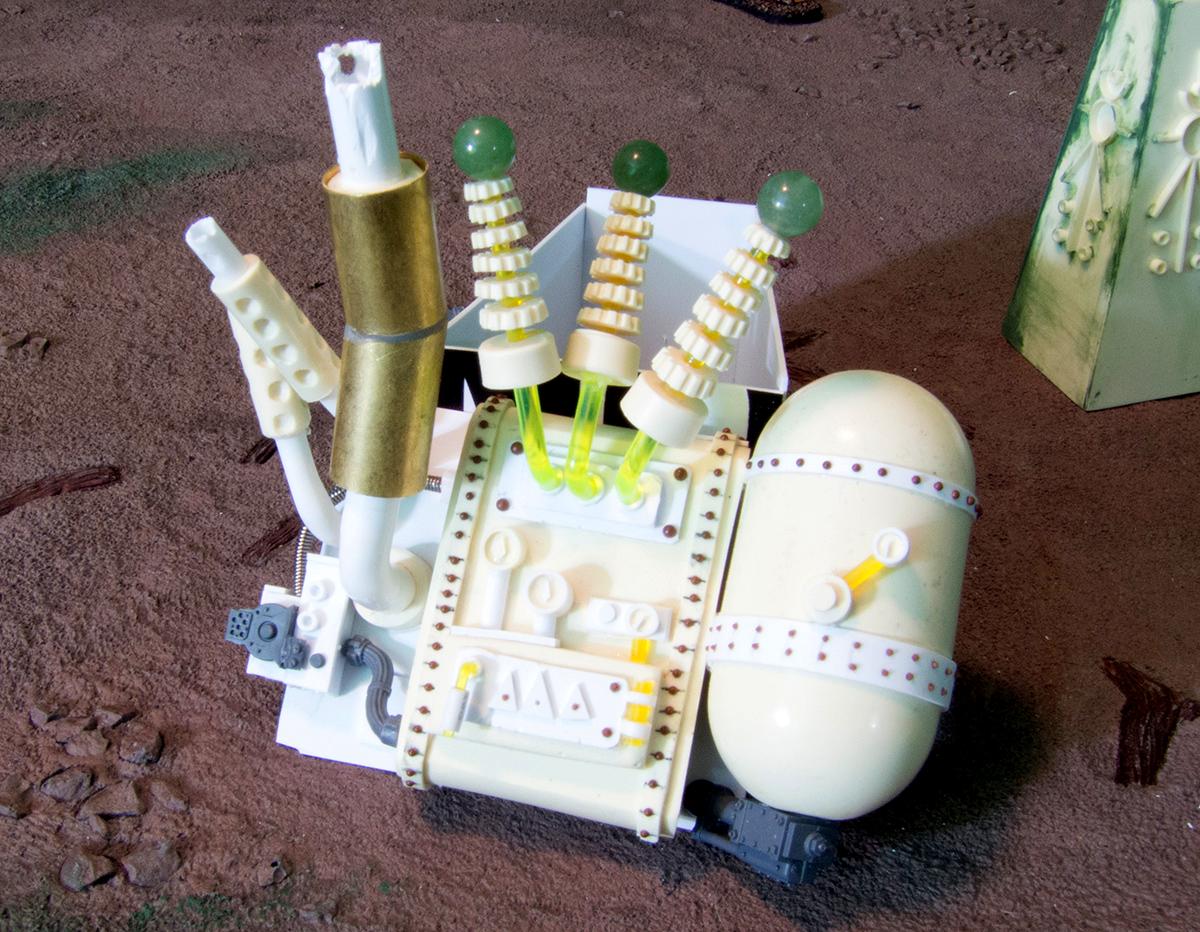
I don't have any images of when I built it, but there was nothing special to it. I glued all the sides together, then flipped it upside down, stuck it on some double-sided tape, and then poured a little resin in there to cap it. Then just fill, sand, fill with liquid green stuff. You can actually see an image off to thes side of the Ork engine here:
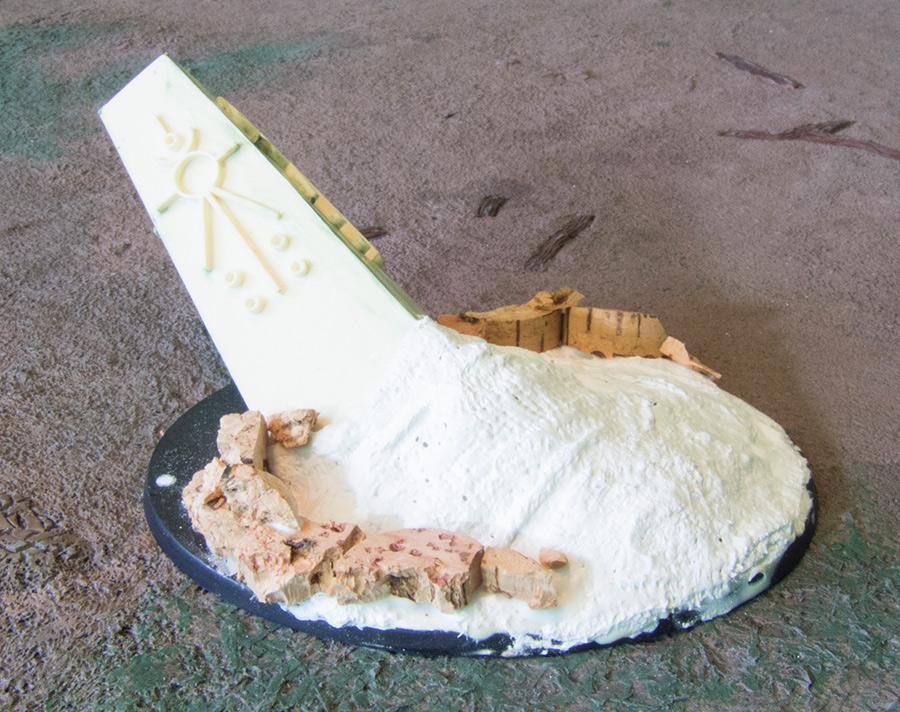
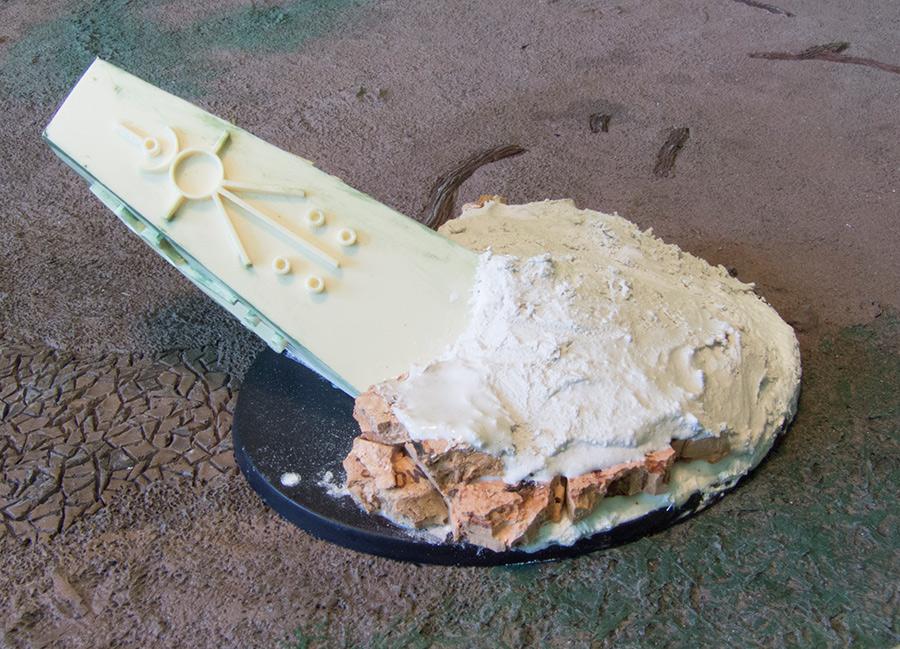
Once that was done, I cut off some of the bottom at an angle to make it tilt, glued it to the base, and cut a hole in the base with a dremel tool.
I then added some wire mesh, glued it on, then some paper mache fabric, and then built up the walls with some chopped up wine corks.
Then filled it in with some Zieterdes plaster.
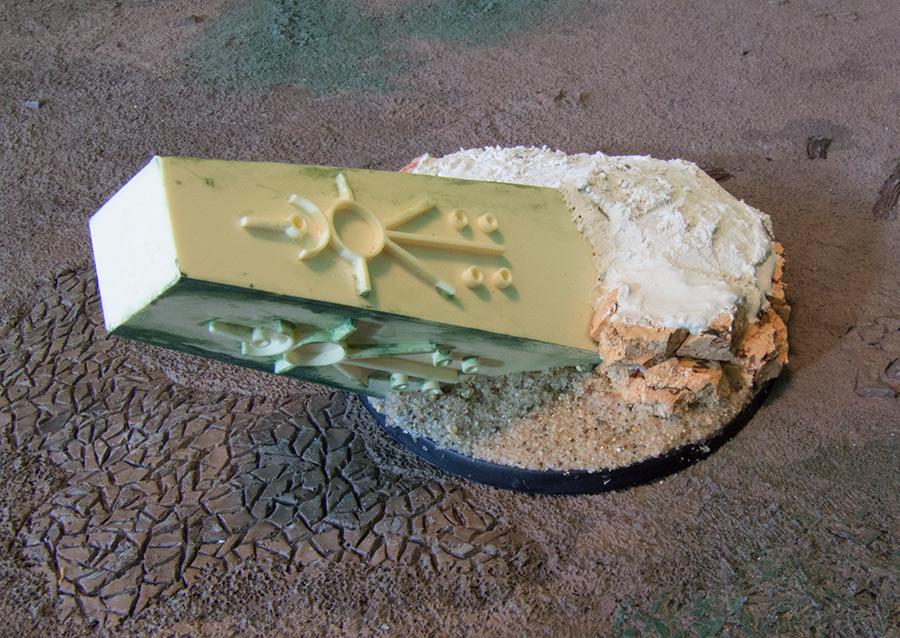
Here's how it looked pre-primed:
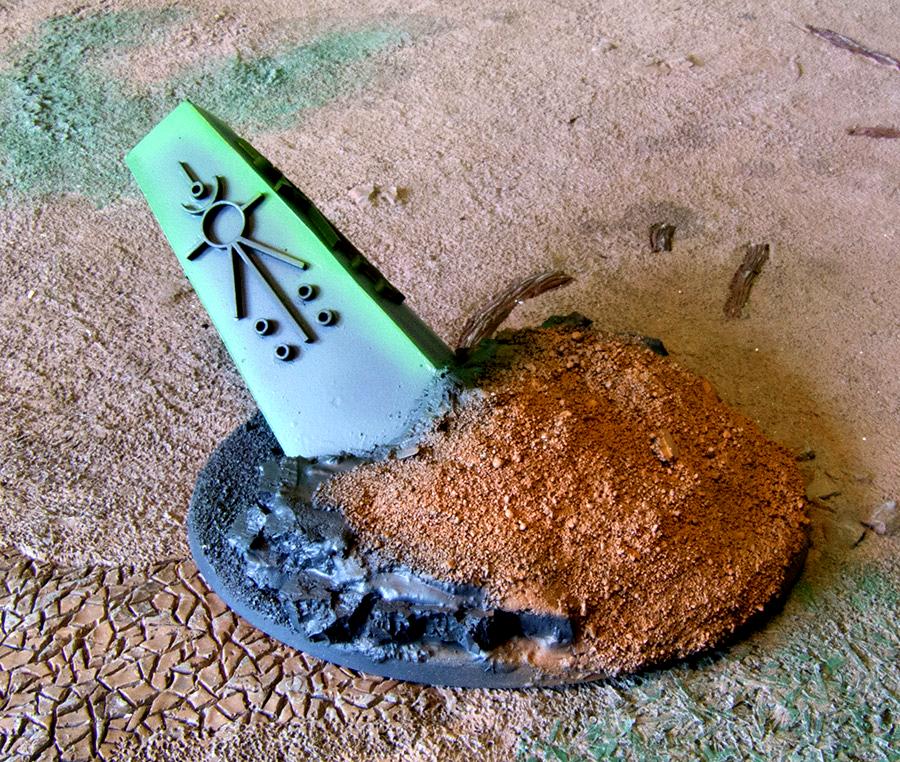
and after I primed it with Vallejo surface primer:
Starting to paint it:
Doing the drybrushes.
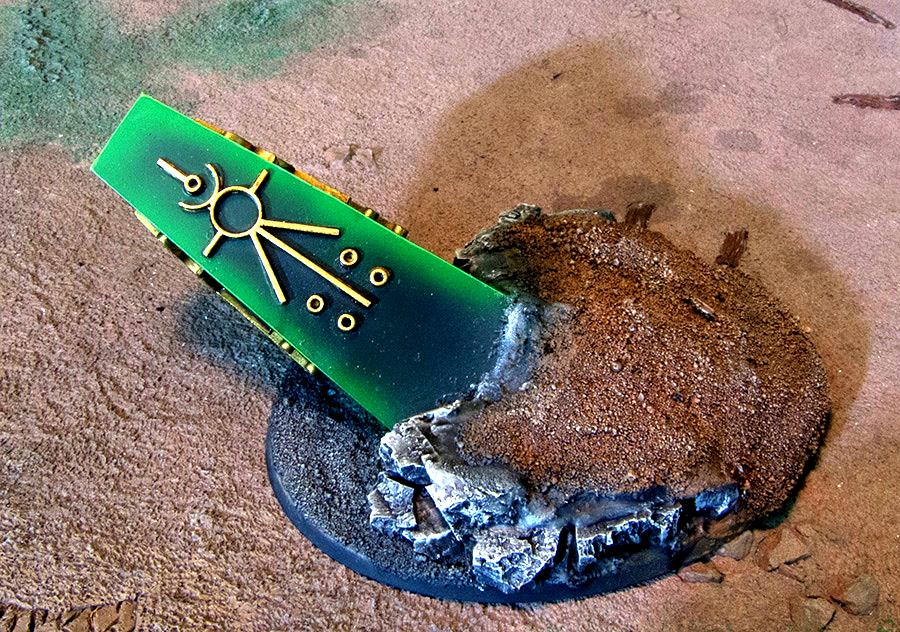
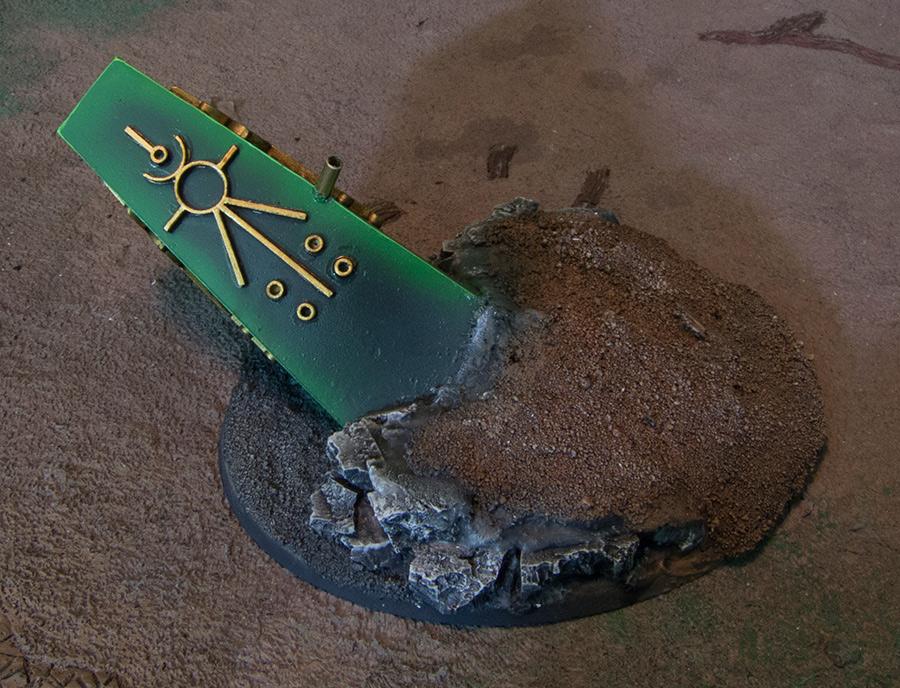
And, painting the symbols:
Another angle on the symbols.
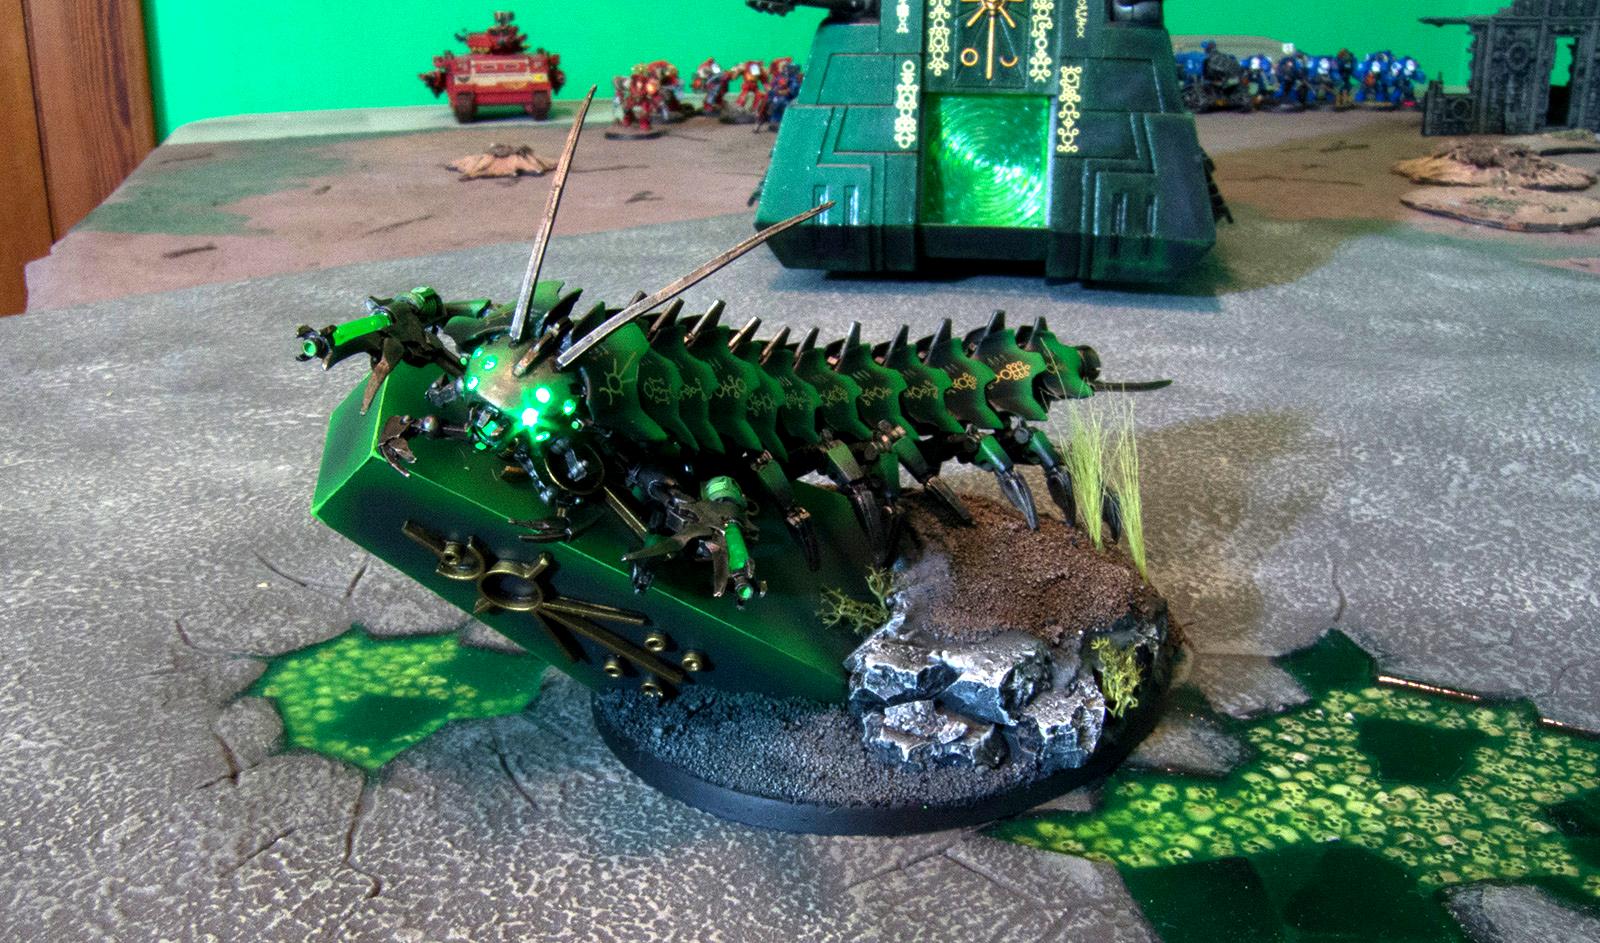
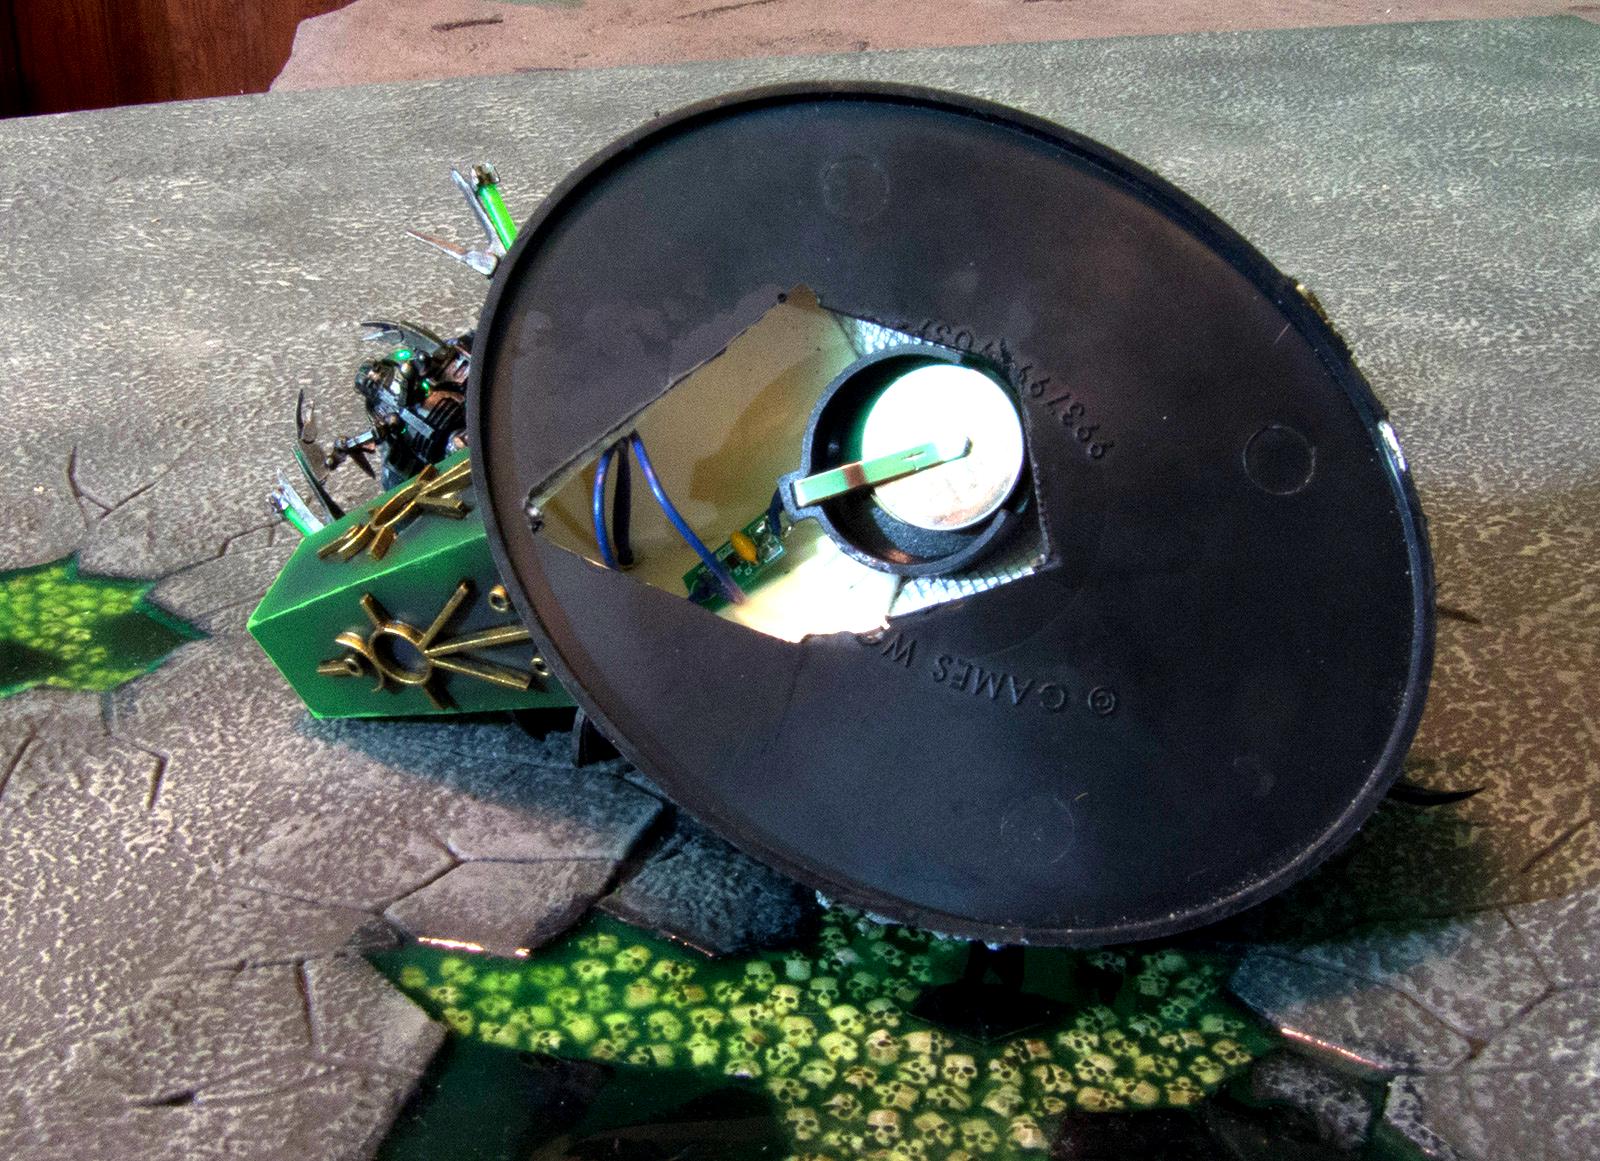
I gave it a wash, and then I drilled a 1/8th hole in the top to run wires through, as well as to give the stalker some support. I added a brass peg.
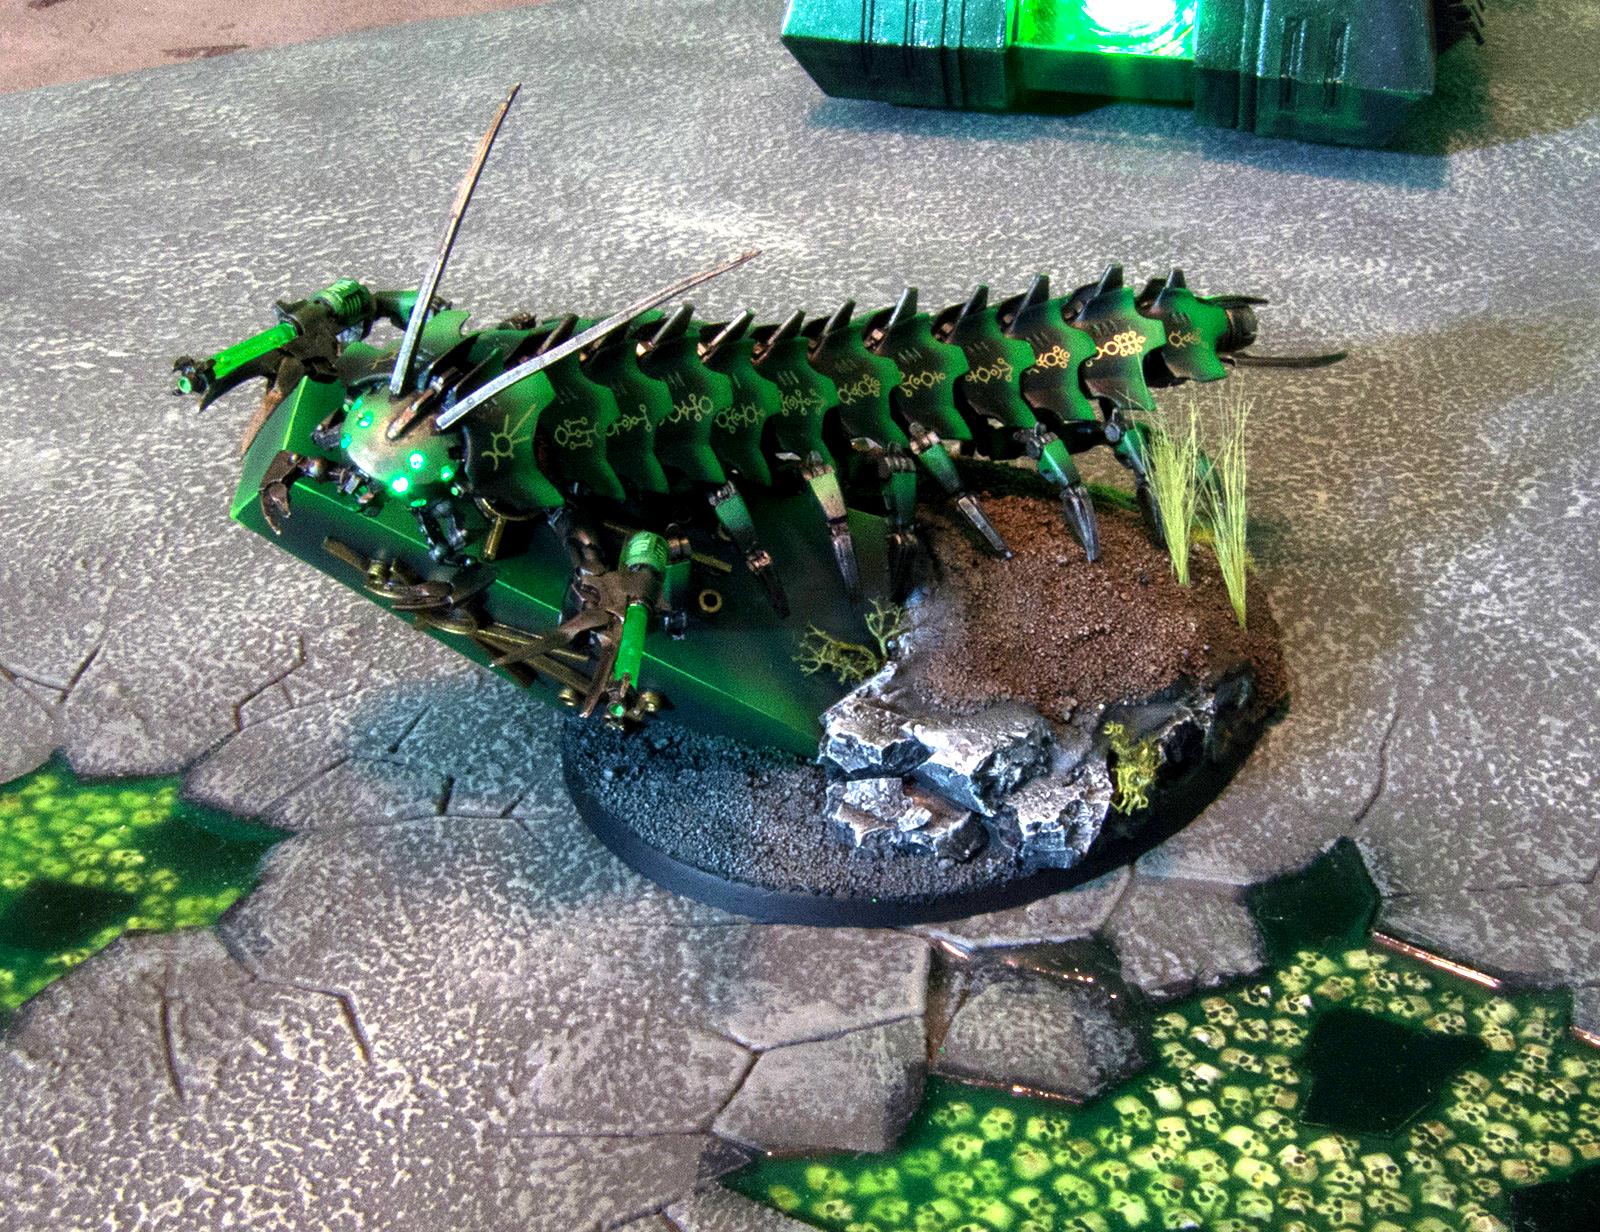
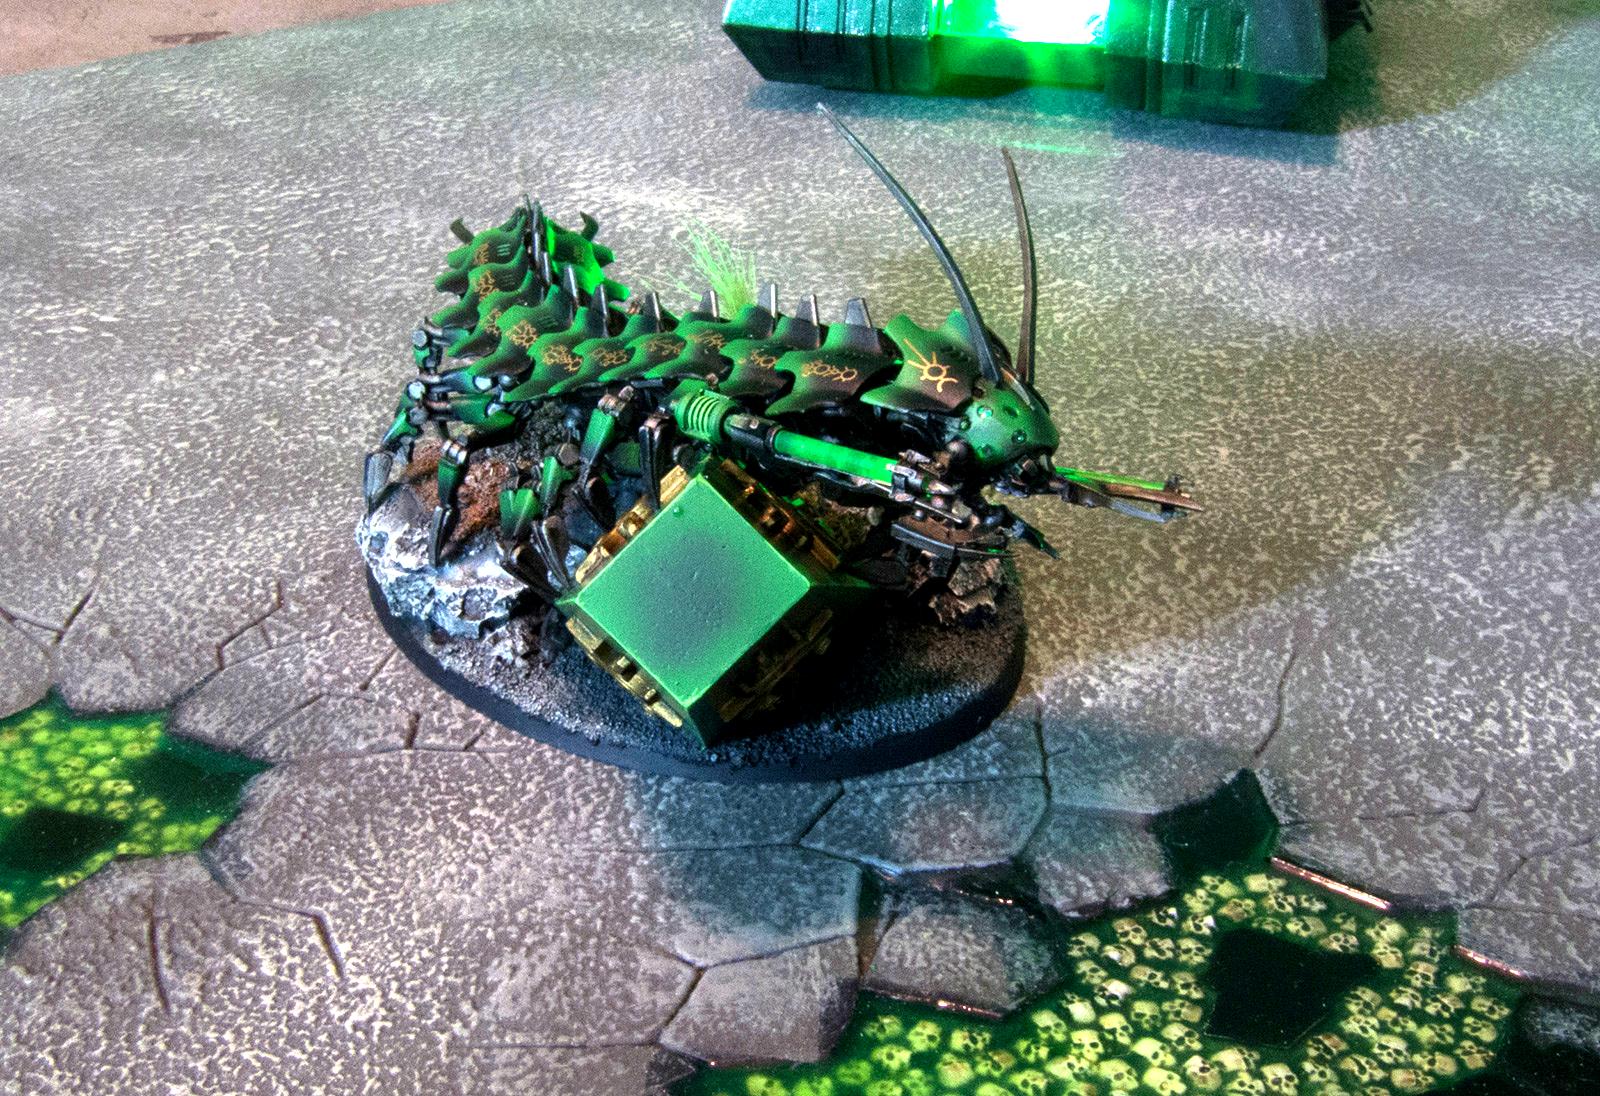
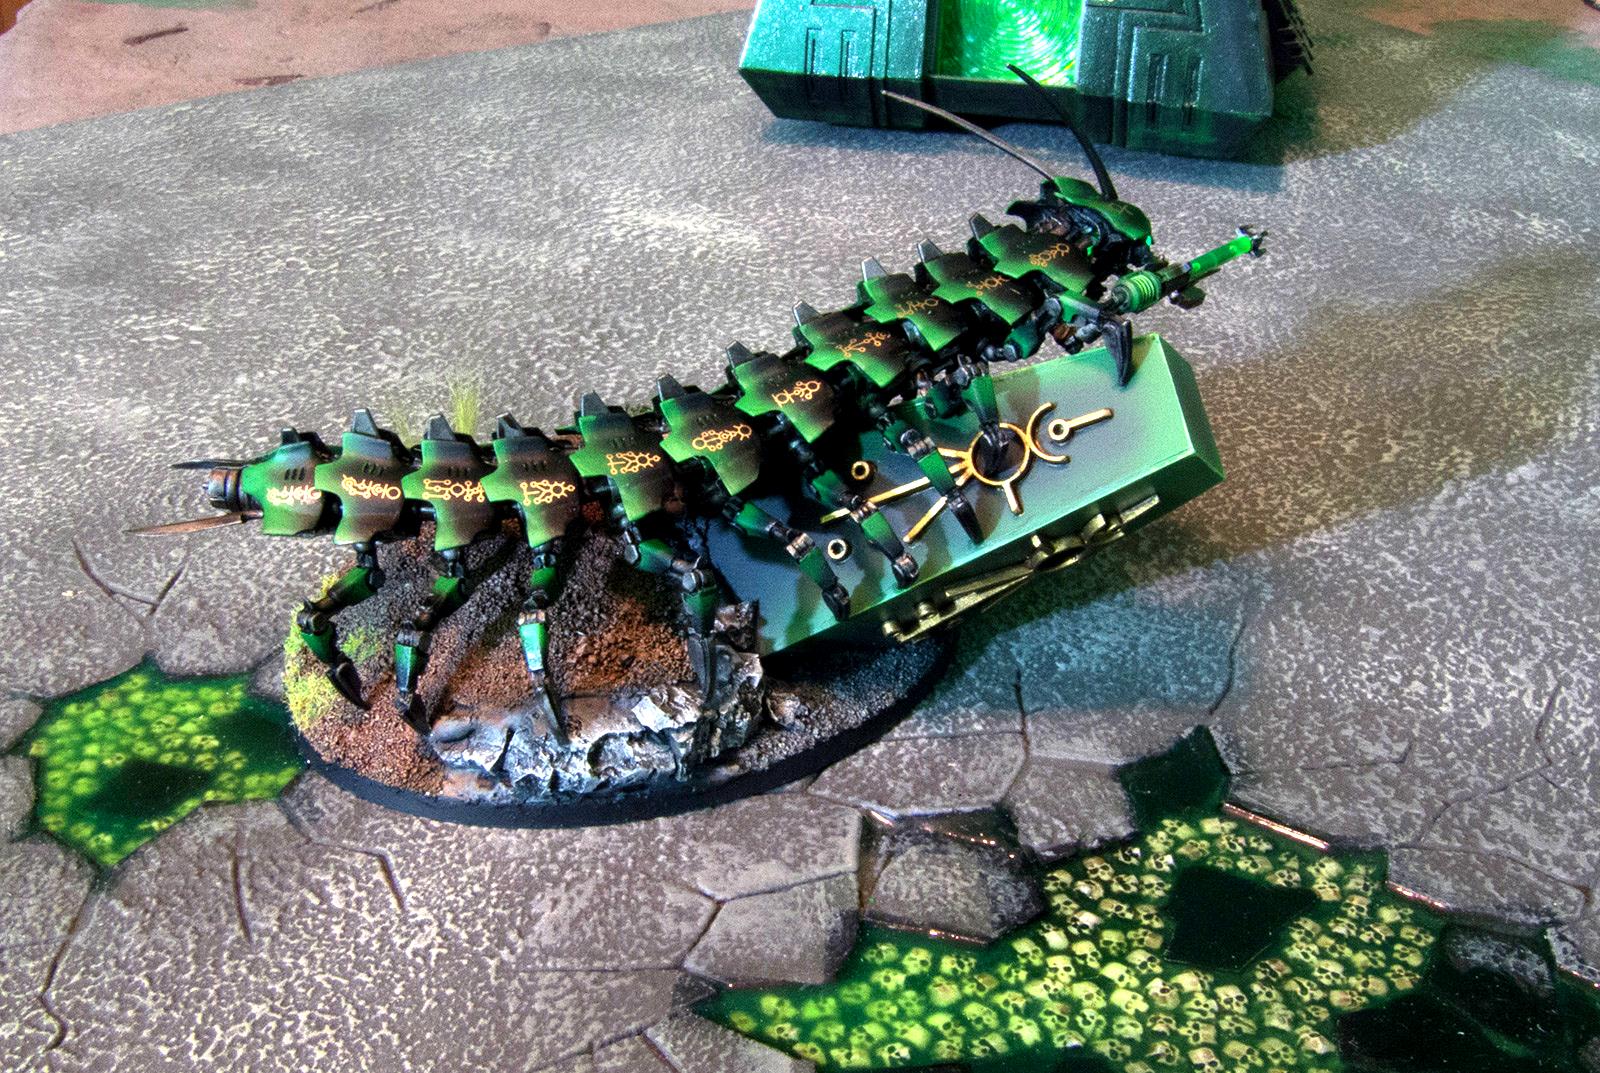
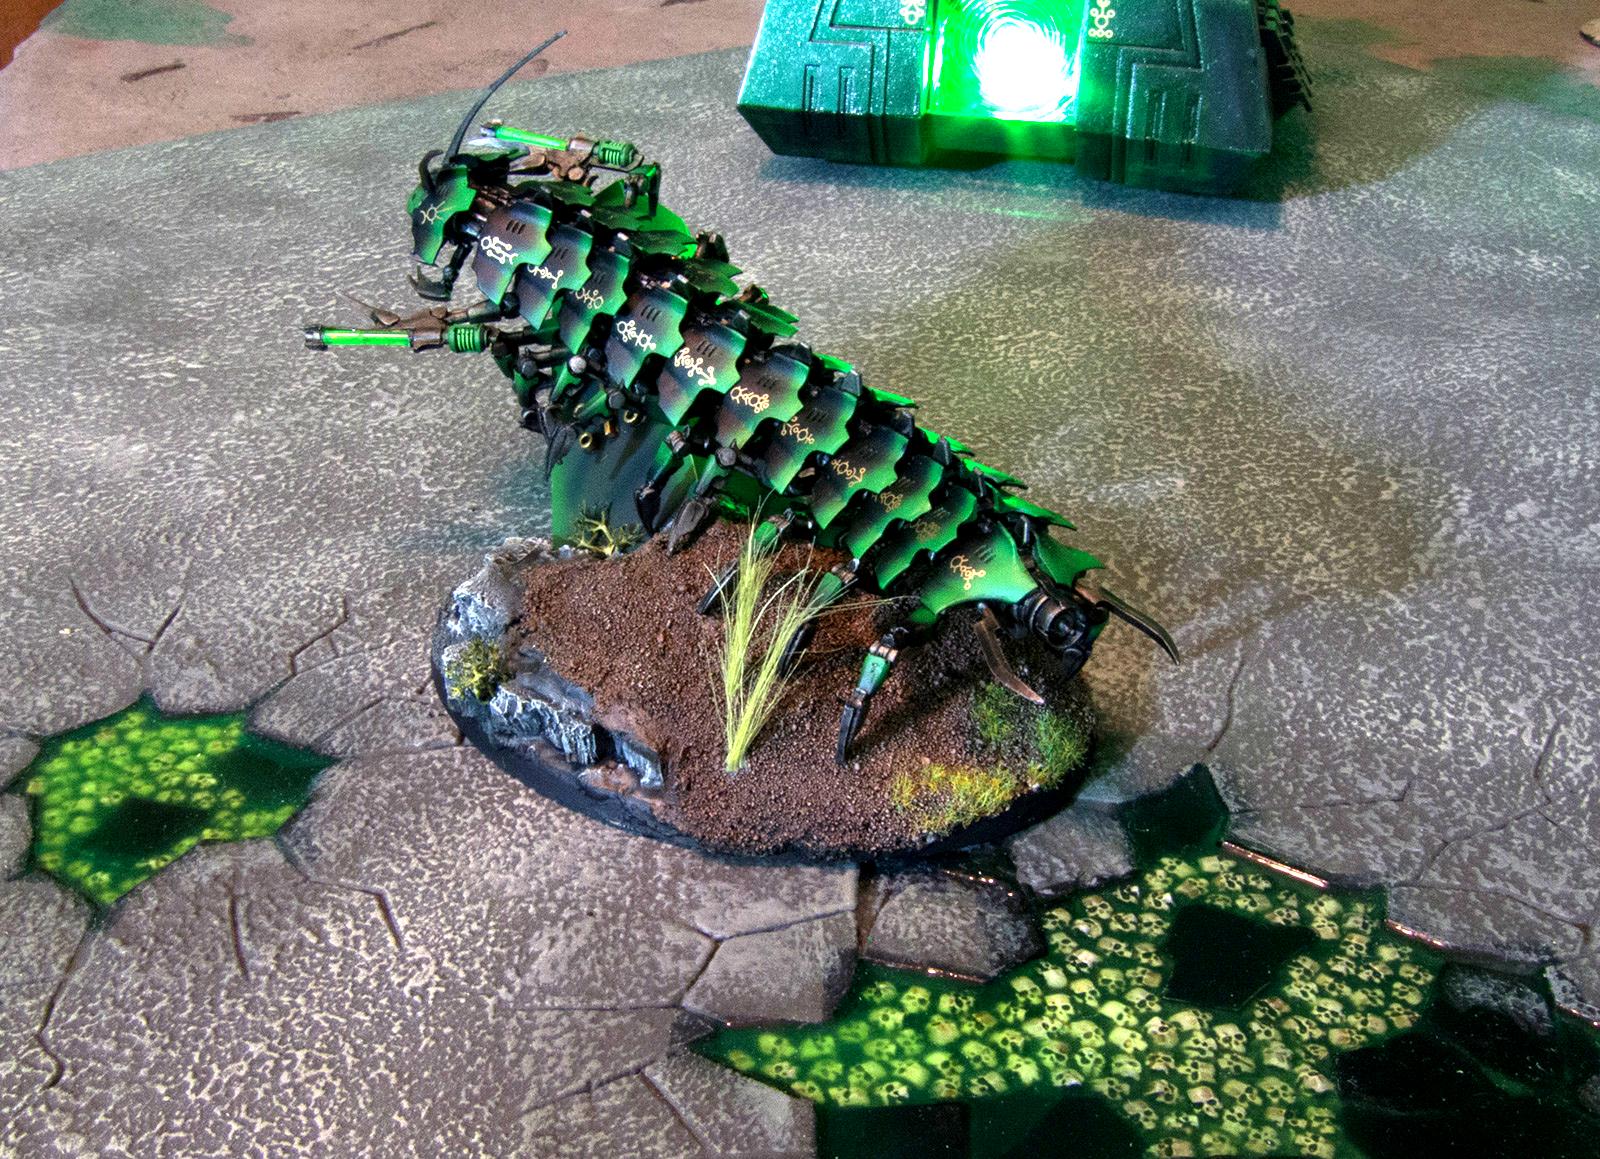
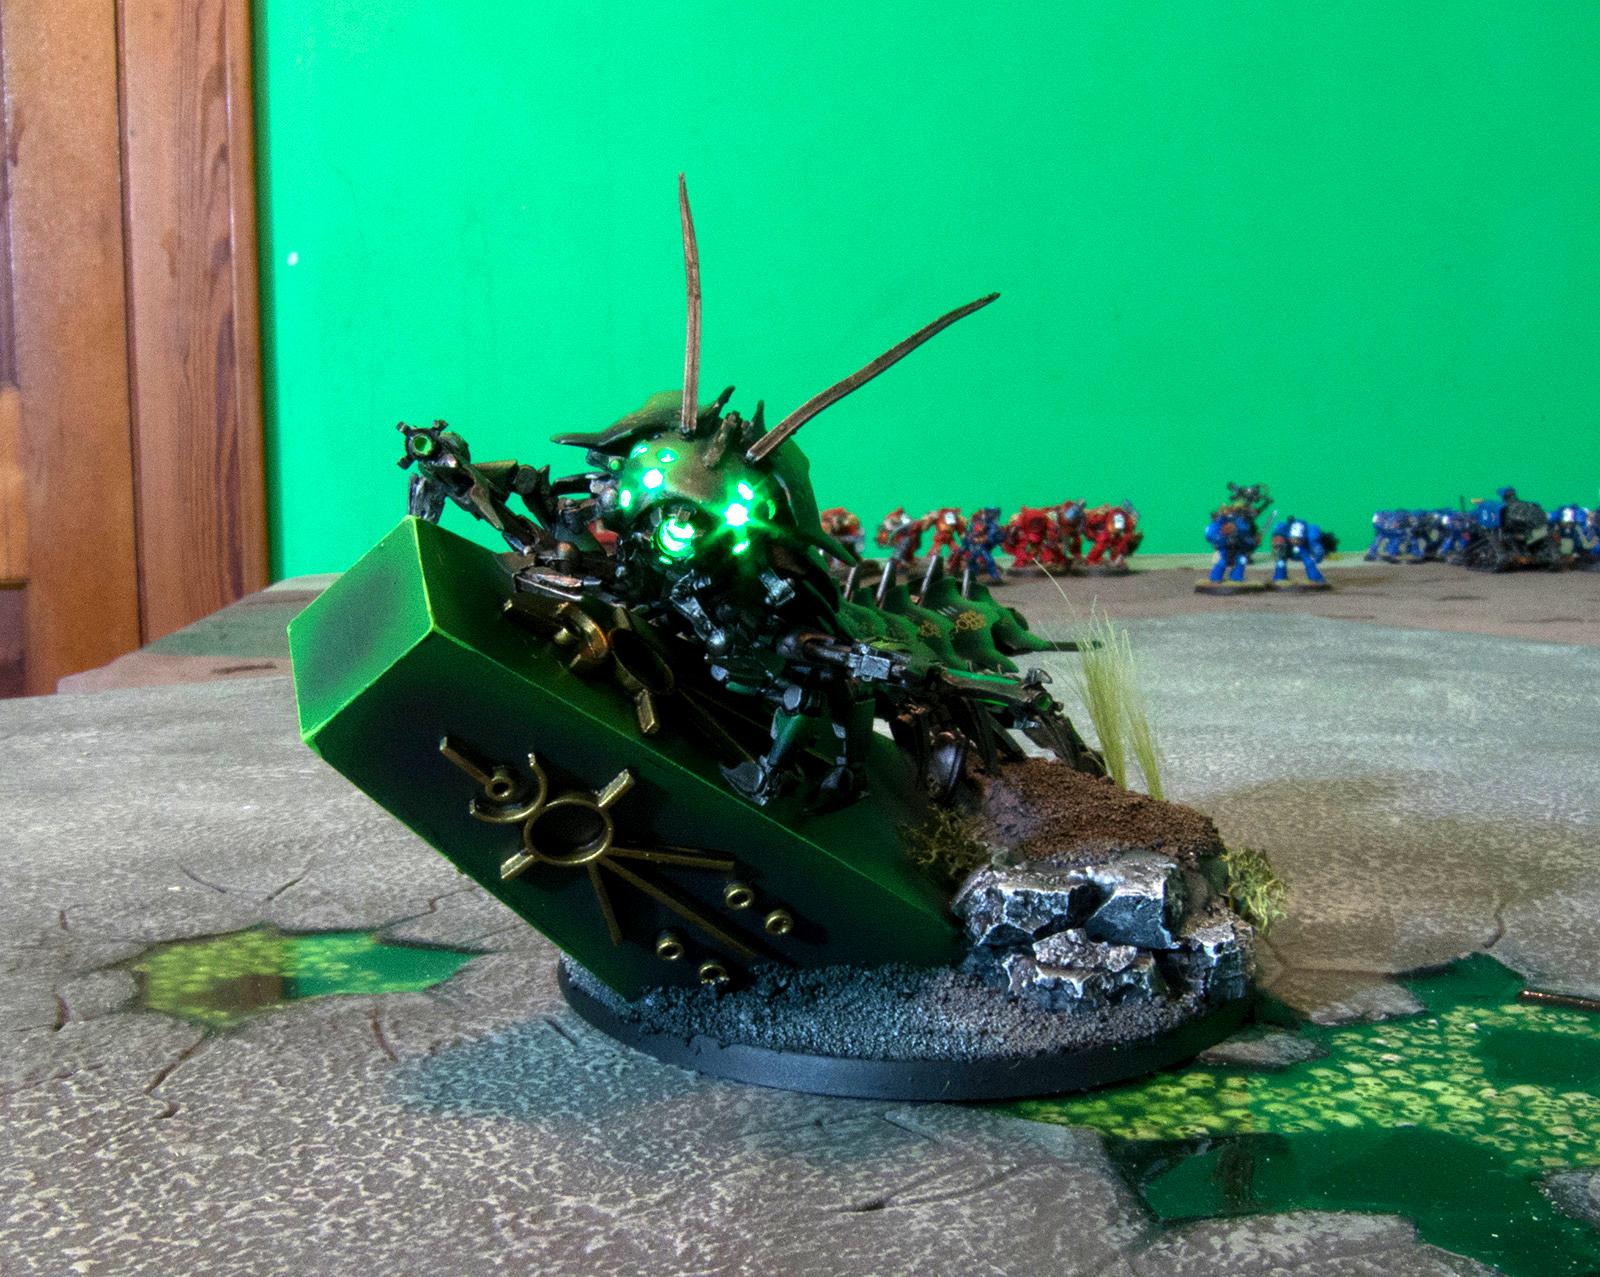
At this point, I built and painted the tomb stalker.
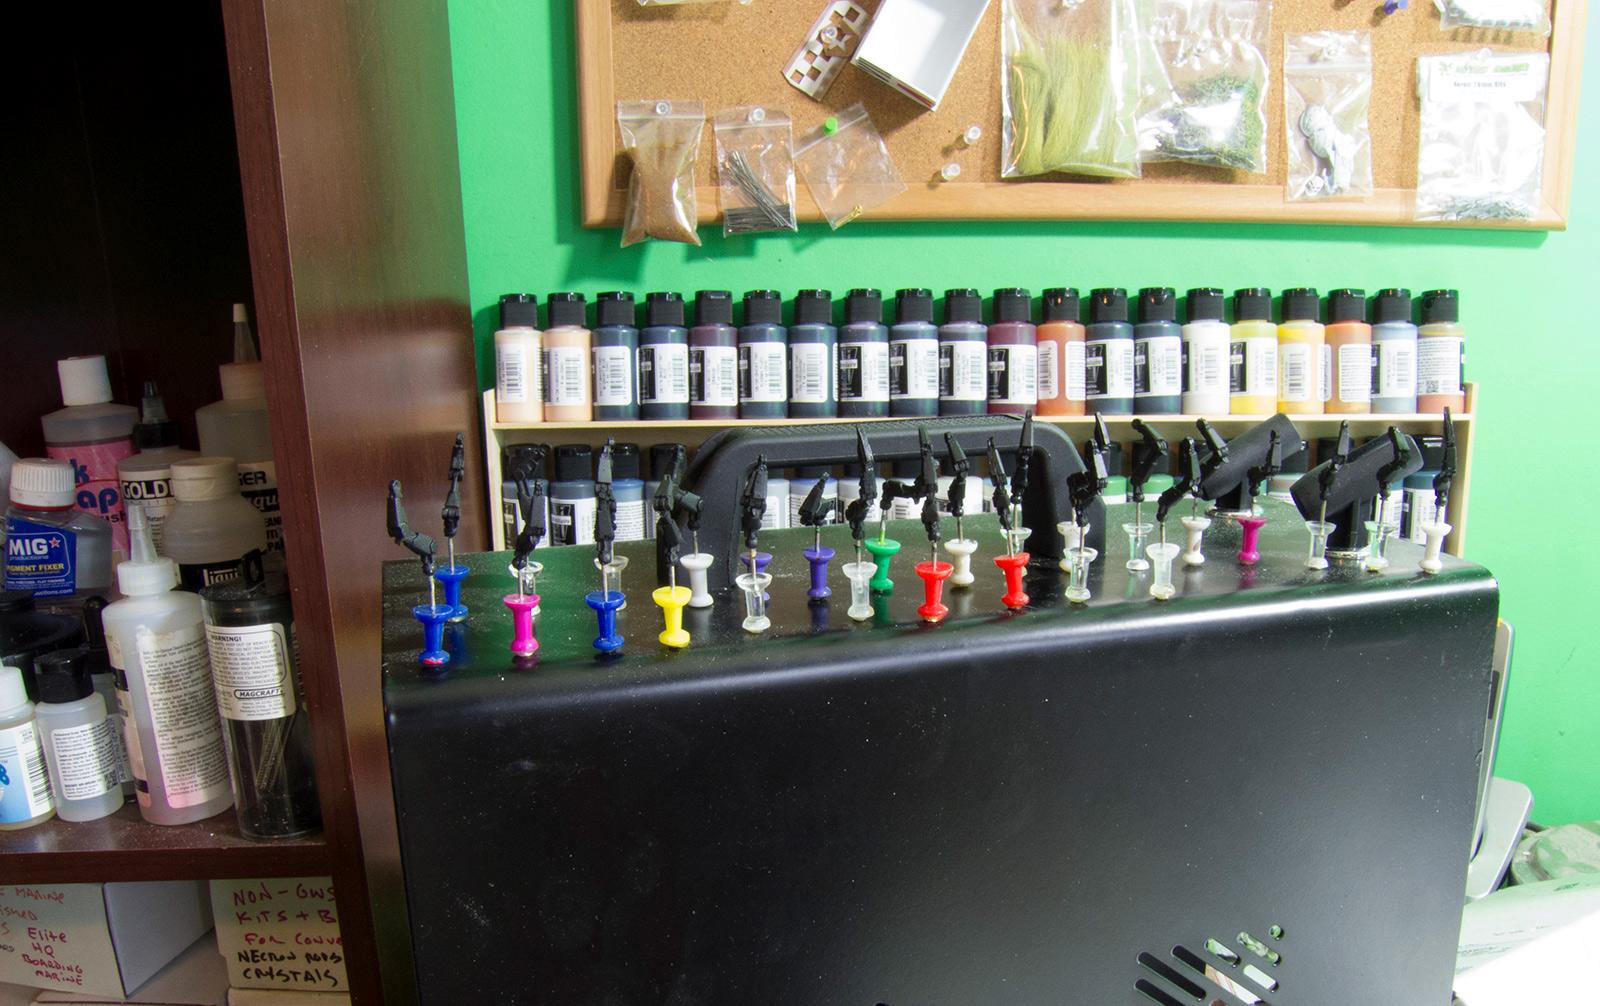
I do have an image showing you my method for holding the legs for airbrushing: I drilled a small hole in the part where they get glued, then used push pins that I've added magnets to. It's very handy for many projects.
Enough of that - Here it is, painted up:
I imagine this is the last thing quite a few guardsmen have seen.
and the electronics in place:
And there is a youtube video showing the pulsing LED's here:
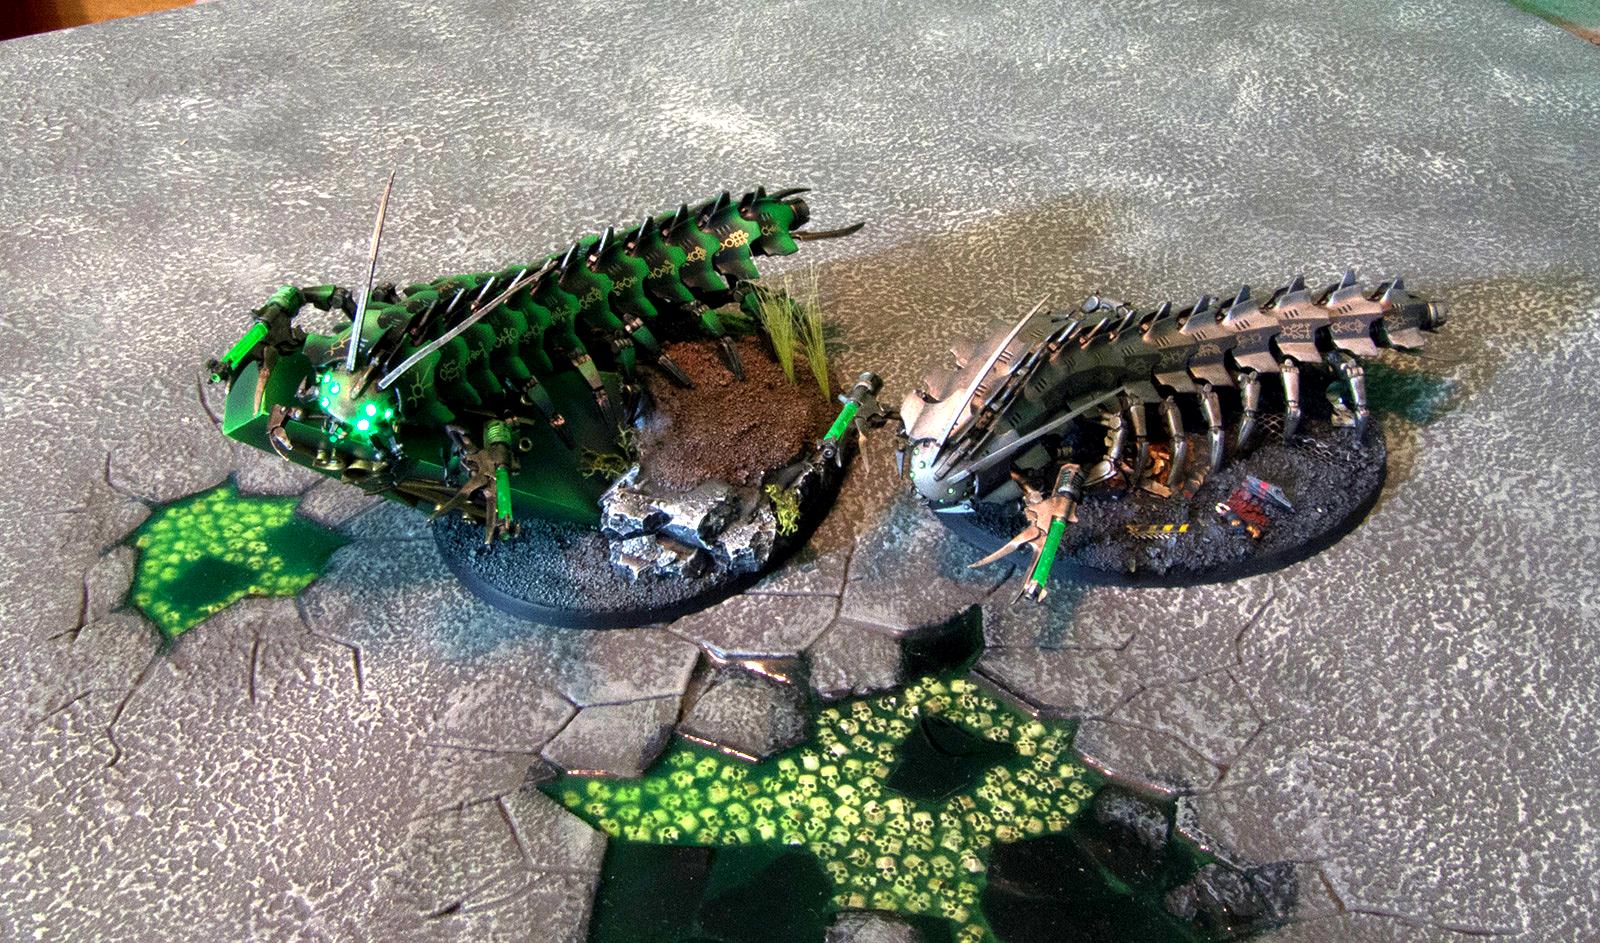
So now what am I supposed to do with 2 tomb stalkers?
I guess that's a good problem.
This message was edited 2 times. Last update was at 2013/04/30 04:37:18
2013/04/30 07:15:27
Subject: Re:My reasonably good Necron Tomb Stalker (with obligatory unneeded LED lighting)
The symbols on the armor are right off the Necron transfer sheets. After I painted the segments with the airbrush, I also painted them with Future floor polish, for a high gloss protective surface so my handling didn't rub the paint off, and that is also ideal for laying down bubble-free waterslide transfers. I also painted future over them afterward., and then eventually once it was all done, dullcote. If you paint dullcoat directly onto transfers you have a really high chance of silvering, in my experience.
I'll add better pictures tomorrow, I didn't realize they came out so grainy until I posted this thread.
This message was edited 1 time. Last update was at 2013/04/30 07:16:30
2013/04/30 08:25:39
Subject: Re:My reasonably good Necron Tomb Stalker (with obligatory unneeded LED lighting)
Elmir wrote: Inspiring. This is about the coolest rendition of this model I've seen thus far.
I wish I could say that was true, but frankly, I'd vote for Darath's as the coolest:
There is nothing about this that doesn't delight me.
I think I did fairly well overall, though. I am very fond of this kit.
Also, I forgot to mention this in the worklog, but it's totally salient.
After drilling out the eyes, and having everything totally done, I plugged the eyeholes with little snips of 1/16" fiber optic cable I got from this guy. The light doesn't really focus well if they're just empty holes, and it looks bad when the battery is off. I wound up not using the illuminator he included since the room in the head was too tight, I used this largish SMD LED. I needed intense brightness because there is some kind of bug/issue with the chip that does the pulsing that reduces the brightness quite a bit. I had dreams of running the fiber through the body, but 8 strands of 1/16th fiber is of course quite a bit of diameter, and it wound up being totally unnecessary, since a 1/8th inch snip of it makes a great light pipe. I'd totally recommend that guy's fiber optic kits, they are easy to use, and since I've only used about an inch of the fiber, I look forward to ruining a good deal more perfectly good kits with my stupid shenanigans in the future. .
The pulsing chip is a kit based around the Fairchild FAN5646; all the kit includes is a tiny breadboard, schematics, and a capacitor. It is allegedly a reprogrammable chip but the guy who sells the kit says he doesn't believe they ever released any way of actually reprogramming it, so Atmel's ATtiny is better if you need to change the program. That is more than I need, though. I think the breathing is technically possible merely with transistors, but I wasn't able to make it work. Anyway, these kits require some reasonably fine soldering, so if you cannot solder, you're out of luck. Also, they ship from Australia, so it takes a bit.
This message was edited 8 times. Last update was at 2013/04/30 08:50:16
2013/06/02 04:57:18
Subject: My reasonably good Necron Tomb Stalker (with obligatory unneeded LED lighting)
TheSpillmonkey wrote: Ouze, you said " I created one side of the obelisk" in your first post.
What did you use to create it? 3D printer? Mold?
I made it out of sheet styrene, and styrene tubing. The little tubes are 1/8th, the bigger tubes are... I dunno, I'm at work and can't check, but, a bigger tube which also had the same thickness. I simply sliced a bunch of tubing, took the best ones, made the patterns with some styrene strips, and then sanded it all down until it was even before I made the mold - you can see it inside the moldbox here. . It sure would have been a lot less labor intensive to have done so with a 3d printer, but the only one I have access to gives pretty poor resolution.
2013/05/23 00:37:41
Subject: My reasonably good Necron Tomb Stalker (with obligatory unneeded LED lighting)
nickron wrote: okay, i gotta ask, how did you paint the base? did you throw some real dirt on that thing or are you seriously that good at painting dirt? because if you are... please teach me T-T
Anyone can do it; the dirt part requires, I swear to you, no talent at all.
1.) Glue down some sand to your base. Woodhouse, I don't know if they grade it but..... coarse.
2.) Prime black
3.) Do a messy basecoat of dark brown, like a nice dark color. I use craft paint for bases, but you want the equivalent of what is now called Mournfang Brown, or in that neighborhood - you don't need to be exact.
4.) Now give a good drybrush of a lighter brown, like on that chart, Tallarn sand or in the area. Use a flat, square ended brush with somewhat longish bristles because it's way easier to drybrush with such a brush.
5.) Now, a light and uneven drybrush of a cream color, like Ushabti Bone on the chart, something like that. Maybe more yellowish, whatever. It should look a little too light at this point.
6.) Wash it all with a dark brown wash, such as Devlan Mud, Army Painter Strong Tone Warpaints, or the Les Bursley equivalent (I went for the last option).
The whole thing takes maybe 10 minutes not counting drying time and I have literally taught children to do it, it's easy as pie. The rocks were made of cork, again drybrushed in the exact same technique but with dark grey, medium grey, light grey. Add some flock or clumps of grass as desired.
This message was edited 1 time. Last update was at 2013/05/23 00:38:47