| Author |
Message |
 |
|
|
|
|
Advert
|
Forum adverts like this one are shown to any user who is not logged in. Join us by filling out a tiny 3 field form and you will get your own, free, dakka user account which gives a good range of benefits to you:
- No adverts like this in the forums anymore.
- Times and dates in your local timezone.
- Full tracking of what you have read so you can skip to your first unread post, easily see what has changed since you last logged in, and easily see what is new at a glance.
- Email notifications for threads you want to watch closely.
- Being a part of the oldest wargaming community on the net.
If you are already a member then feel free to login now. |
|
 |
2013/05/09 00:16:36
Subject: Eldar Wave Serpent
|
|

Enginseer with a Wrench
|
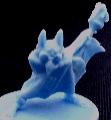
I downloaded newobmij's eldar wave serpent. Instructions are lacking for the build so I will make a build thread for it. You can find the download here on Armorman's thread. item entry number 353. http://www.papermodelers.com/forum/alternate-dimensions/9966-whole-bunch-o-40k-goodness-36.html As usual, I tend to embellish my models and this will be no exception. There are some fit problems and some structural differences, the main one is in that the curved wings should fold down, but if you do, then you will have fit problems with the bottom engine structure. The cockpit does not lay back on the front glacis and the weapons under the cockpit is over the front intake. With the cockpit in the postion depicted in my build, it would fit great with the Farseers grav tank. That is the one with a head that looks like the BSG Cylon raider. So here is the start of the build. The first photos, is where I am at the moment. The second, is the creators photos which I used for the build reference.
I have been absent from the forums with a builders block, but I am back and I will finish the San Salvador hybrid. Enjoy and see you all around the forum.
![[Thumb - 055.JPG]](/s/i/at/2013/5/9/9cb47c56770a257a16321062b996d0a6_15523.jpg__thumb)
|
![[Thumb - 1352175775496.jpg]](/s/i/at/2013/5/9/8241b320c0ba4faeddac86c5f861c330_15523.jpg__thumb)
|
![[Thumb - 001.jpg]](/s/i/at/2013/5/9/d3cdfeed0b6d47a0c3b902986cbd766c_15523.jpg__thumb)
|
![[Thumb - 002.jpg]](/s/i/at/2013/5/9/fec614b9f850703c8c9fbdc7c9219157_15523.jpg__thumb)
|
![[Thumb - 003.jpg]](/s/i/at/2013/5/9/1db281e11cb25b4d05729c43f3ab58ec_15523.jpg__thumb)
|
![[Thumb - 004.jpg]](/s/i/at/2013/5/9/5ec195d4775f8926464a379eda2300d3_15523.jpg__thumb)
|
![[Thumb - 005.jpg]](/s/i/at/2013/5/9/01e8e1aee034eed13f61b0e9e4a80f60_15523.jpg__thumb)
|
![[Thumb - 006.jpg]](/s/i/at/2013/5/9/f58076f7dbd7ded7aaa0c8dc3152d0bf_15523.jpg__thumb)
|
|
|
This message was edited 1 time. Last update was at 2013/05/09 00:17:37
Strength and Honor
Silveroxide |
|
|
 |
|
2013/05/09 21:40:33
Subject: Re:Eldar Wave Serpent
|
|
Enginseer with a Wrench
|
The build continues with the enhancements which start from here on. Enjoy and see you around the forum with the next installment to come soon.
If you went to the link provided for the model, Glance through the thread and you will find a bunch of more models that might intrigue you all.
|
Strength and Honor
Silveroxide |
|
|
|
|
2013/05/11 01:34:04
Subject: Re:Eldar Wave Serpent
|
|
Enginseer with a Wrench
|
So here is another sequence on the build. The engine construction is on and greebles are made. The enhanced parts are laminated sections except the the grills, which are made from regular heavy card stock paper, 110lbs here in the U.S. Enjoy and more photos are being edited for the next posting.
|
Strength and Honor
Silveroxide |
|
|
|
|
2013/05/11 04:16:07
Subject: Re:Eldar Wave Serpent
|
|
Shas'la with Pulse Carbine
|
Openly admitting you're making copies of GW models rather than buying them might get you in trouble around here (not entirely sure, pepakura isn't exactly recasting) but I for one love the idea of making pep versions of vehicles, especially if you can get a good look out of them...I may do that with my tau to get more piranhas...
|
|
|
|
|
|
2013/05/12 01:30:54
Subject: Re:Eldar Wave Serpent
|
|
Enginseer with a Wrench
|
 dbsamurai wrote: dbsamurai wrote:Openly admitting you're making copies of GW models rather than buying them might get you in trouble around here (not entirely sure, pepakura isn't exactly recasting) but I for one love the idea of making pep versions of vehicles, especially if you can get a good look out of them...I may do that with my tau to get more piranhas...
No Pep here, PDF format and changed to jpeg's. For designing, I use either Gimp or paint shop pro. and work with jpegs format. Another good program for designing, is skecthup.
When I started Warhammer RPG in the mid 90's, The last section of the rules book, had information and allowances for scratch build models. White Dwarf was also great, in that it had design templates for making your own scratch build Baneblade (Cottrel) and Grav tanks. These paper models follow those same principles but they are more in depth scratch build than those supplied by the templates. In fact, some of the first bane blades were scratch built before forge world and GW came up with their designs. In other words, there is a precedent for allowances. Now one thing that GW has in their new rules, is that these models are not sanctioned for sponsored tournaments and if you should use them in local non-sanctioned games, there should be an agreement between the players to allow for their use. I do not play anymore, due to the constant rule changes and the codexes. After spending a few hundred dollars in rule books and codexes, I found it too expensive to keep up with the rules and changes. There is one thing that I do, I still buy models and build my own, I enjoy building the Warhammer models. I am more into making dioramas or just plain building the vehicles than in playing them
More on the engine pods and the down thrusters. So far so good and more is in store. See you all next posting.
![[Thumb - 019.jpg]](/s/i/at/2013/5/12/88d82a02753ab581b1054a62b22c3890_15523.jpg__thumb)
|
![[Thumb - 020.jpg]](/s/i/at/2013/5/12/0d56b28b3aaf74bdcfac60169abddbdc_15523.jpg__thumb)
|
![[Thumb - 021.jpg]](/s/i/at/2013/5/12/b783b6dcffded6198fb00730dce465d2_15523.jpg__thumb)
|
![[Thumb - 022.jpg]](/s/i/at/2013/5/12/c7f76b758ebe5e5c257f160e8eee6b39_15523.jpg__thumb)
|
![[Thumb - 023.jpg]](/s/i/at/2013/5/12/ac92a5ed6a21668a020e25cdda2468eb_15523.jpg__thumb)
|
![[Thumb - 024.jpg]](/s/i/at/2013/5/12/9310963587f8dc2ba0d5e6b68b021871_15523.jpg__thumb)
|
|
Strength and Honor
Silveroxide |
|
|
|
|
2013/05/13 13:56:16
Subject: Re:Eldar Wave Serpent
|
|
Enginseer with a Wrench
|
The main body of the Grav Tank is finished, now I am working on the turret. The final part, will be the feelers that stick out from the wings. this will be done last so as not to damage them while working on the details. The turret is a challenge. I modified the it somewhat but that is for another posting. In the meantime, here is the next batch of photos for your pleasure. Enjoy and see you all around the forum.
|
Strength and Honor
Silveroxide |
|
|
|
|
2013/05/14 15:44:12
Subject: Re:Eldar Wave Serpent
|
|
Enginseer with a Wrench
|
The work on the Wave Serpent continues. The bottom of the Grav Tank is taking shape and the extra greebles and stuff is coming out better than I planned. Enjoy and see you all next posting
|
Strength and Honor
Silveroxide |
|
|
|
|
2013/05/15 21:46:53
Subject: Re:Eldar Wave Serpent
|
|
Enginseer with a Wrench
|
So the work continues, The upper part is laminated with parts from the extra parts sheet. I hand colored the red parts to give it a richer color contrast. There various finger print marks but some will be covered by extra plates or lamination and the others will be colored. For the curvature on the upper wings, there is a thin spine that curves around the contour and that is why there is a crest on the curved wings. To make this happen, I had to cut a slit in one of the forward plates but this will not show up, since it will be covered with the extra laminated plate. By laminating the plates, it is thick enough that it will cover the the rib and make the plate fall smooth over the primary skinning. Enjoy and see you all next posting.
|
Strength and Honor
Silveroxide |
|
|
|
|
2013/05/16 12:55:44
Subject: Re:Eldar Wave Serpent
|
|
Enginseer with a Wrench
|
So far it is taking shape. I am working on a display base for it and the model is finished. The only thing left, is to edit the photos for your enjoyment.
The first photo is the finished model sans the jewel runes and the base. Enjoy and see you all next posting.
|
Strength and Honor
Silveroxide |
|
|
|
|
2013/05/16 17:39:58
Subject: Eldar Wave Serpent
|
|

Dakka Veteran
|
This is sooo cewl! Love it!
|
Always outnumbered, never outgunned. |
|
|
|
|
2013/05/19 02:14:16
Subject: Eldar Wave Serpent
|
|
Enginseer with a Wrench
|
I am glad that you are enjoying the build thread. I was apprehensive in making it, because I did not know how the curvatures were going to look like, but overall, it came out feasible.
The model is finished, and now the photo editing is left to do. Enjoy and see you all next posting.
|
Strength and Honor
Silveroxide |
|
|
|
|
2013/05/19 19:30:06
Subject: Eldar Wave Serpent
|
|
Dakka Veteran
|
My first thought when I started toying with the idea of making one myself (just for the fun of it) was that the curvatures must be a real pain to pull off. But yours look great so it can be done!
|
Always outnumbered, never outgunned. |
|
|
|
|
2013/05/19 20:17:52
Subject: Eldar Wave Serpent
|
|
Enginseer with a Wrench
|
 c0un7_z3r0 wrote: c0un7_z3r0 wrote:My first thought when I started toying with the idea of making one myself (just for the fun of it) was that the curvatures must be a real pain to pull off. But yours look great so it can be done!
The trick in the curvatures, lies in making two templates. The first construction will have some kinks and bends, but the second part is made up off cut smaller plates. They help in making the curvatures more pliable since you are working with one small part of the curve.. Thanks for looking in and wait to see the techniques for the weapons systems coming up soon.
I am pleased with the outcome. As mentioned before, the Wave serpent is finished with the exceptions of those runes. It has a different stand that compliments the finished model but those items are still a bit out for now but they are coming. Here are some side and under views of the grav tank.
|
Strength and Honor
Silveroxide |
|
|
|
|
2013/05/20 02:29:21
Subject: Re:Eldar Wave Serpent
|
|
Enginseer with a Wrench
|
Another update on the Wave Serpent. This time it is on the chin mounted double liked guns. Enjoy and I will be back with more guns
|
Strength and Honor
Silveroxide |
|
|
|
|
2013/05/20 16:55:43
Subject: Re:Eldar Wave Serpent
|
|
Enginseer with a Wrench
|
More on the weapons system. The main part for this section, is the use of paper sticks (Paper ears swabs). I could have used wooden dowels and shaped them but I opted for paper, which I treated like a wooden dowel and sanded the pieces carefully so as to not rip the paper strips. There is more to come and I took care of the raised runes but that will be for another posting.
|
Strength and Honor
Silveroxide |
|
|
|
|
2013/05/21 00:36:48
Subject: Re:Eldar Wave Serpent
|
|
Enginseer with a Wrench
|
So here we have the making of the turret. Here I used the spacklling compound. This one depicted, is a celluloid base. There is another spackling compound but it is a putty base and stays soft. The sides will be placed on later in the build since I have to drill a hole and if the side was up, it could get damaged. The next posting will cover how the turret twin cannons are construted. Enjoy and see you all next posting.
|
Strength and Honor
Silveroxide |
|
|
|
|
2013/05/21 14:09:19
Subject: Re:Eldar Wave Serpent
|
|
Enginseer with a Wrench
|
And now for more techniques and modeling tricks. The main housing of the cannons and the barrels are made by using regular bond paper. If you use heavier weight paper, it will tend to wrinkle and split. Be sure to glue all of the surface of the paper strip. If you use the glue sparingly, there will be dry spots and when you sand or file the part, it will rip apart at that point. It will tend to be messy, so keep a paper towel or rag handy to keep your finger glue free. If you do not keep your fingers clean, the excess glue will attach to the surface of the model and create smudges. Enjoy and see you all next posting.
|
Strength and Honor
Silveroxide |
|
|
|
|
2013/05/21 18:56:59
Subject: Re:Eldar Wave Serpent
|
|
Enginseer with a Wrench
|
Here are some photos of the turret build. The eldar wave serpent by all accounts is finished at this junture but it needs more details. The plans do not call for a stand so that will be coming up shortly and the details for making the runes. Until then, see you all next posting.
|
Strength and Honor
Silveroxide |
|
|
|
|
2013/05/21 23:27:45
Subject: Re:Eldar Wave Serpent
|
|
Enginseer with a Wrench
|
This is the section where I build the feelers. The plans have them being glued at the end tip, but I went and cut them of and made an extension for the ends. This part was laminated into a raised end at the glue point. it will help to hold the cover in place when it is placed on the wing connection point. The cover also was forced into a cup shape by using the tweezer point but a small rounded dowel or paint brush end could be used. I forgot to show the bottom support bracket but it helped in shaping the position for the feelers so that they will not droop.
Next on the build, will be a custom stand and finally the making of the runes.
|
Strength and Honor
Silveroxide |
|
|
|
|
2013/05/22 06:29:56
Subject: Eldar Wave Serpent
|
|
Dakka Veteran
|
That looks pretty sweet! Is that plasticard I see on some pictures or is it just some of that white cardboard you can buy in art and craft-stores?
|
|
This message was edited 1 time. Last update was at 2013/05/22 06:32:03
Always outnumbered, never outgunned. |
|
|
|
|
2013/05/22 12:40:37
Subject: Eldar Wave Serpent
|
|
Enginseer with a Wrench
|
c0un7_z3r0 wrote:That looks pretty sweet! Is that plasticard I see on some pictures or is it just some of that white cardboard you can buy in art and craft-stores?
It is heavy card stock. The printed color templates are in (US) 110lbs paper weight. The laminated parts are about the thickness of a cereal box carton, or poster card stock. The technique learned in my early days of scratch building using styrene sheets comes in handy and transfers over to paper modeling real well.
|
Strength and Honor
Silveroxide |
|
|
|
|
2013/05/22 13:30:00
Subject: Re:Eldar Wave Serpent
|
|
Enginseer with a Wrench
|
Here is the part on the base construction. Enjoy and see you all with the next posting on the making of the runes
|
Strength and Honor
Silveroxide |
|
|
|
|
2013/05/22 13:35:54
Subject: Eldar Wave Serpent
|
|

Morphing Obliterator
|
That is pretty cool, I am amazed that is made of card and looks just like the original!
If I didn't already have 3 serpents and 2 falcons (hopefully dedicated transports in the new codex) I would give this a go.
|
Chaos Space Marines - Iron Warriors & Night Lords 7900pts 
|
|
|
|
|
2013/05/23 01:17:48
Subject: Eldar Wave Serpent
|
|
Enginseer with a Wrench
|
 rohansoldier wrote: rohansoldier wrote:That is pretty cool, I am amazed that is made of card and looks just like the original!
If I didn't already have 3 serpents and 2 falcons (hopefully dedicated transports in the new codex) I would give this a go.
Thanks for looking in, Sometime in the future, give it a try.
And now, the final sequence in the build thread. I hope that you have all enjoyed my build thread as much as I did in making it. If just one person learned something from my works, then it was well worth the effort. The next model is already in the works but I will not post until I am almost half way done with it. So until the next posting, enjoy and see you all around the forum.
|
Strength and Honor
Silveroxide |
|
|
|
|
2013/05/23 12:37:37
Subject: Eldar Wave Serpent
|
|
Dakka Veteran
|
Looks good! This is what I'd like to call guerrilla grafts, fighting constant changing of rules that in a blink of an eye will leave you with shelves full of useless miniatures as well as ridiculous prizes (or something along that way)! Looking forward to your next project!
|
Always outnumbered, never outgunned. |
|
|
|
|
2013/05/25 15:57:13
Subject: Eldar Wave Serpent
|
|
Enginseer with a Wrench
|
Thanks for looking in and letting me know that you enjoyed the build thread. My next thread will start soon and it will be a treat on an old item done my way. Until then, enjoy and see you around the forum.
|
Strength and Honor
Silveroxide |
|
|
|
|
2013/07/16 20:22:36
Subject: Re:Eldar Wave Serpent
|
|

Hurr! Ogryn Bone 'Ead!
Borden
|
really like this page, can't seem to get any wave serpents so this is awesome.
|
|
|
|
|
|
2013/07/17 00:05:26
Subject: Re:Eldar Wave Serpent
|
|
Enginseer with a Wrench
|
Slayer222 wrote:really like this page, can't seem to get any wave serpents so this is awesome.
Thanks for looking in. I am glad that you have enjoyed my build thread. As mentioned earlier, you can use plastic card but some of the curvatures may be a bit tricky. Give it a try and ho9pe to see your works as well. Enjoy and see you around the forum.
|
Strength and Honor
Silveroxide |
|
|
|
|
|
|


