Hello everyone, I'm currently building a table for the new Batman game from Knights Models, and while creating it I realized I wanted to add a bit more to it aesthetically although it wont add much to the game, so I went about creating some electrical poles. This is my first tutorial so please, any C&C you may have, feel free to share so I can improve or help out in any way I can.
So without further adieu, here's how you make an electrical pole.
First: Here's everything you're going to need to create them
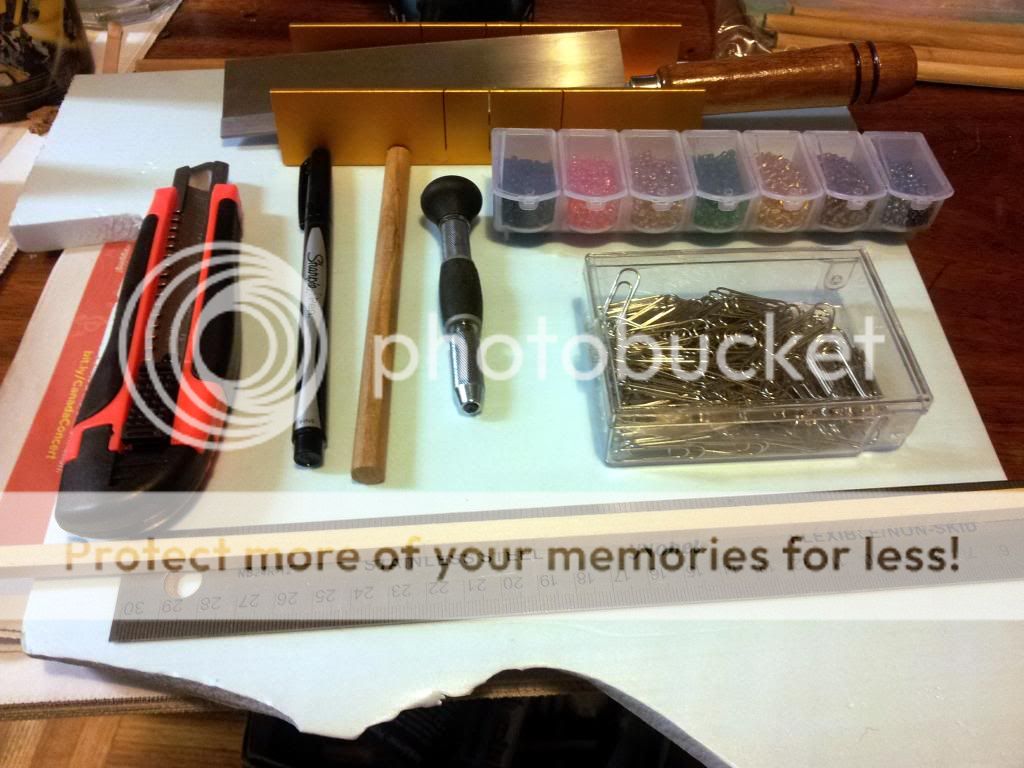
A ruler,knife, marker, clippers,razor saw, paper clips,super glue, 6" long dowel rod, 1/4 inch square balsa wood, hobby drill (or dremmel with the appropriate drill bit) and some indian beads (preferably green)
All in all the balsa wood, dowel rods and beads only cost about 4$ altogether, and supplies enough material to do well over 10 of these.
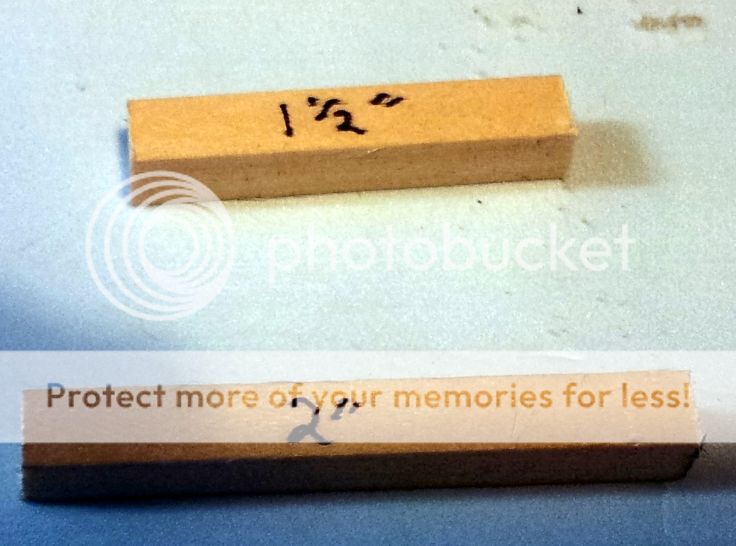
First thing I do is cut 2 pieces of balsa wood, 1 piece at 1 1/2 inches long, the other at 2 inches.
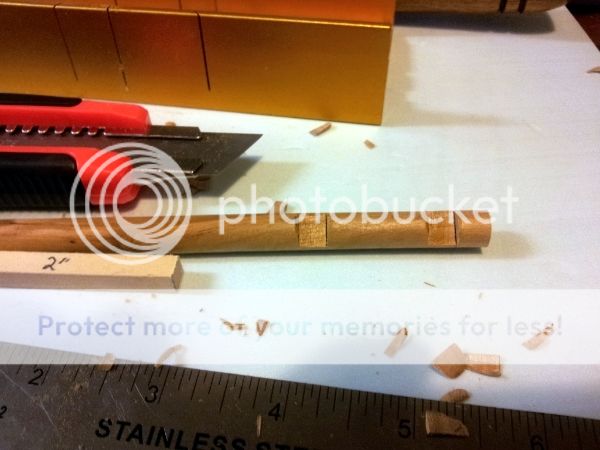
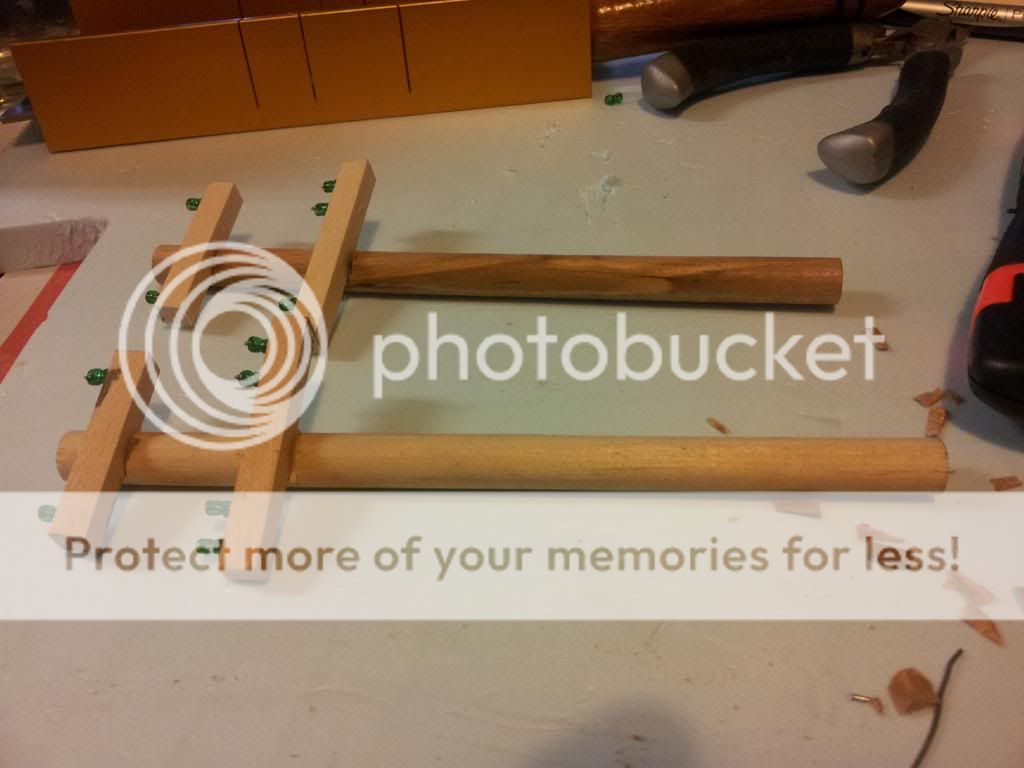
Second step is to measure out two 1/4 inch gaps in the dowel rod 1 inch apart from each other. one near the top of the dowel rod, and the other below. and cut into the marks with the saw, making sure it's about 1/4 way through the rod

Now the only tricky part of this process is to take your knife (make sure the blade is sharp) and while cutting away from you, shave the wood out of the gaps. Now it's important you get the surface flat and relatively even on both gaps, or when you put the balsa wood into it, it will look really crooked. Once you're done you can dry fit the balsa wood into the slots you cut to make sure it's even.
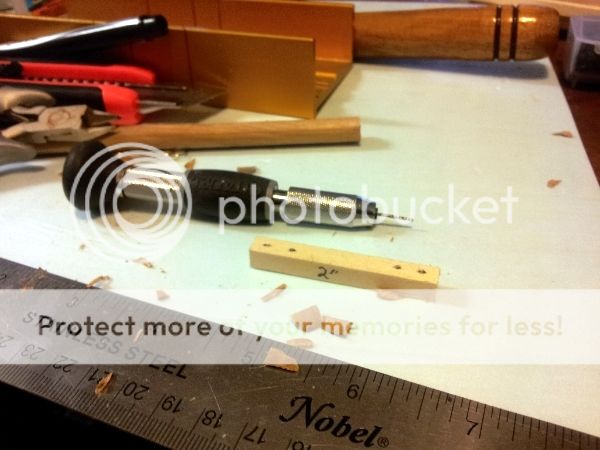
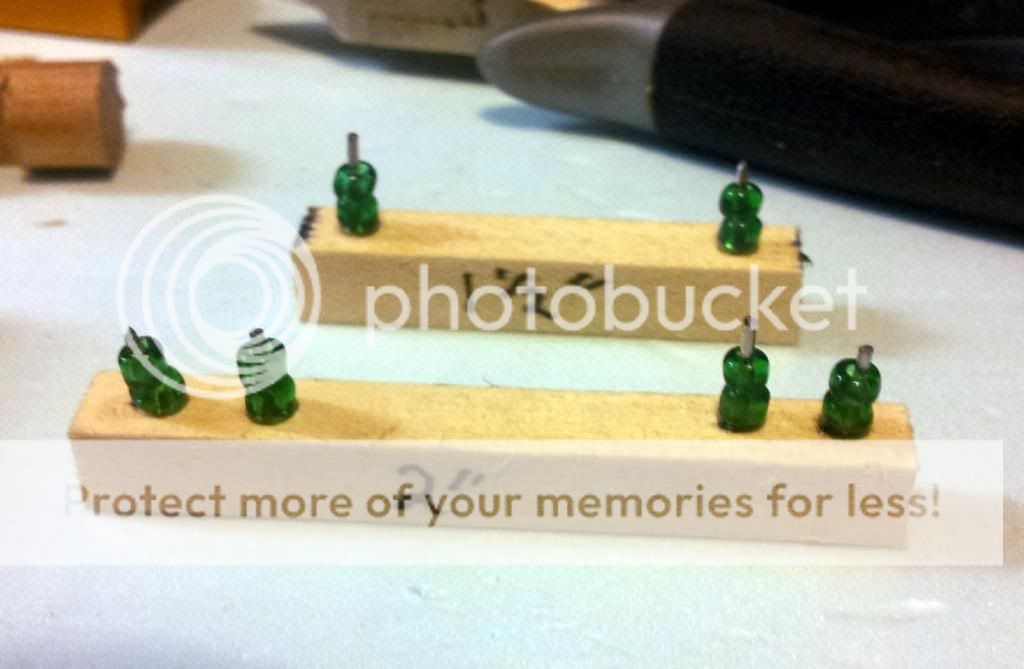
Now take your hobby drill, and on the 1 1/2 inch balsa wood you cut out, drill 2 holes, one on either end of the wood, just inside of the edge. Do the same for the longer piece of wood, but with 2 holes on either end like so.
Now I'm going to combine 2 steps here, because it's easy and I took a really blurry picture trying to explain the next step because I'm classy like that

Straighten out a paper clip (doesn't have to be absolutely perfect) and using the clippers, clip 6 equal length pieces off of it. they should have enough length to stick into the holes you drilled while having enough sticking out to glue the beads onto.
(Don't worry if they're too long, you can clip them properly after the beads are set)
Glue them into the holes using super glue, once it's dry glue 2 beads onto each piece sticking out
Now just mount the balsa wood onto the dowel rod with super glue and you're done

Once you get through your first one, you get to the point you can make 4 or 5 every 20 minutes are so, and it's an easy way to add some style to your terrain, the dowel rods are thick enough that you can drill them and add magnets into the base so you can magnetize them to your board allowing easy storage. and you can add some wire looped in between each set of beads to connect the poles together for extra amounts of awesome.
Thanks for taking a look, hope this helps.


