Find a banner design, scene, picture from the web that you like. Save it as a BMP. Open it in paint and shrink it down to a size that fits your banner. Test print to make sure your printer can handle the level of detail in that small of a picture.
When you've gotten the designs you like, import them onto a WORD Doc (2 images per banner, image reversed...you will see why) and make sure the word doc is A4 sized.
Now, go to any Hobby store and buy the Testors decal kit. They are under 10$. They come in either clear or white. Get the clear. The sheets are A4 sized.
Print your banner WORD Doc onto the decal sheet. DO NOT TOUCH THE PRINT.
Unlike paper the ink will lay on top of the decal sheet rather than absorb into the paper. Let this dry for an hour or 2.
Spray the sheet lightly with clear varnish. Let dry. Spray a second coat of clear. This locks the ink image together.
Cut and trim the decal as close as possible.
Paint your banner whatever color the cloth will be. Apply the decal carefully (they will be pretty delicate compared to typical
GW/model decals). Once set use Micro-Sol/Micro-set to fix the decal and dissolve some of the varnish topcoat. Afix the reversed image decal to the other side of the banner (now it looks like a real banner where you paint one side and the paint bleeds through the other side and creates a reverse image).
Once dry spray with varnish to lock the decal to the banner and mask the edge lines of the decal.
Some examples I did:
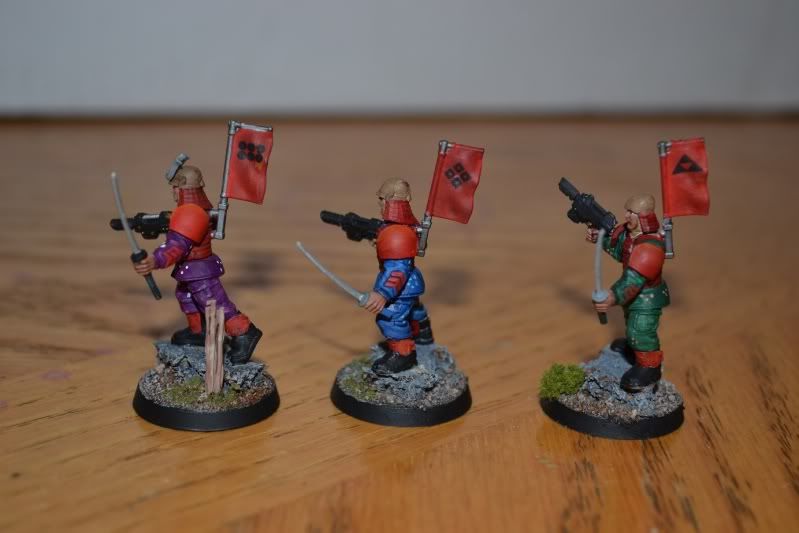
IG Squad SGTs with Samurai Shasimono banners (each squad has a unique clan symbol).
A Land Raider with Kanji writings.
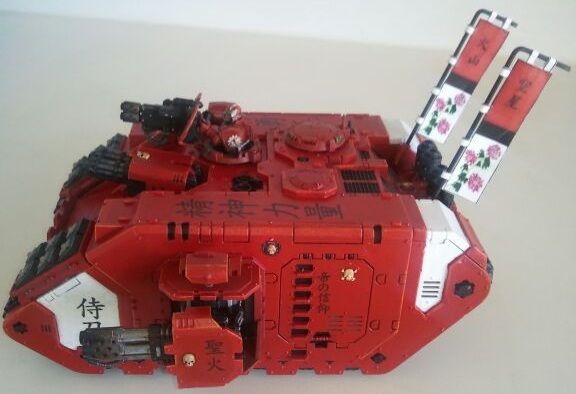
I made the vehicle banners the same way...just printed them on paper and cut out, bent a 1/6" plastic rod 90 degrees, and glued the banner on. They are removable since I use then to mark Hull Points on the tanks.


