Forum adverts like this one are shown to any user who is not logged in. Join us by filling out a tiny 3 field form and you will get your own, free, dakka user account which gives a good range of benefits to you:
No adverts like this in the forums anymore.
Times and dates in your local timezone.
Full tracking of what you have read so you can skip to your first unread post, easily see what has changed since you last logged in, and easily see what is new at a glance.
Email notifications for threads you want to watch closely.
Being a part of the oldest wargaming community on the net.
If you are already a member then feel free to login now.
2013/09/20 13:30:38
Subject: To TSHFT and beyond! (To the invitational?) An all eldar journey.(Perhaps change to battle reports?)
Hey all. Planning on running an eldar list for the seattle hearts of fire tournament, otherwise known as TSHFT. I'm going to play a bunch of test and training games, work through tactics and explore my list against popular internet lists. I'd love to hear what people think of the list and how you would play a game differently, lists I should try gaming against, or any other thoughts.
One of my base tenets is non-spam. I do my best to avoid repeated units.
HQ Autarch (Mantle, banshee mask, bike, laser lance)
Spirit seer
Troops
Dire avengers (5)
In a wave serpent (Bright lance, holo fields)
Rangers (5)
Jet bikes (5)
Wraith guard (5) (wraith cannon variety)
In a wave serpent (scatter laser, chin cannon, holo fields)
Heavy
Wraithknight (sun cannon, scatter laser)
Fire prism (holo fields)
Shadow weaver artillery (3)
Automatically Appended Next Post: Here is the TSHFT website for those who are interested. http://bloghammer.net/ TSHFT is run with two book missions as the primary and secondary objectives. Then a tertiary oddball objective is added in twenty mintues into the round.
Tertiary objectives:
Crippling Blow – destroys all selections from 1 FOC choice.
Iron Gut – Each HS survived in opponent’s deployment zone is worth 1 BP.
Mismatch – EL choice gets 1 BP for each TP destroyed (or sent running off the table).
Overrun – Every 2 surviving TP is worth 1 BP.
Perilous Sky – Having more FA choice survived.
Rampage – Your Warlords killed more units than the opposing warlord’s
* Dedicated transports neither count towards nor against any of the tertiary objectives.
Game one Pregame
This will be against a friends chaos army, he's also planning on attending tshft.
Spoiler:
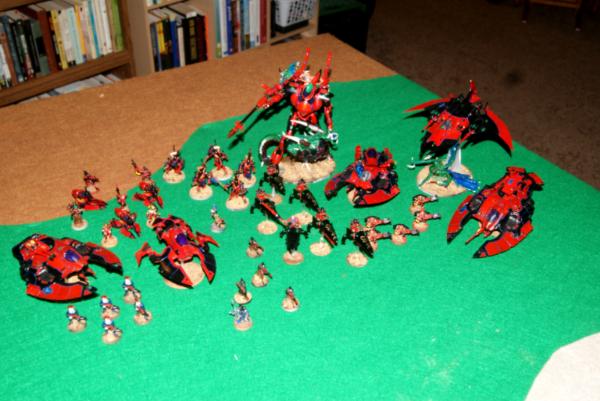
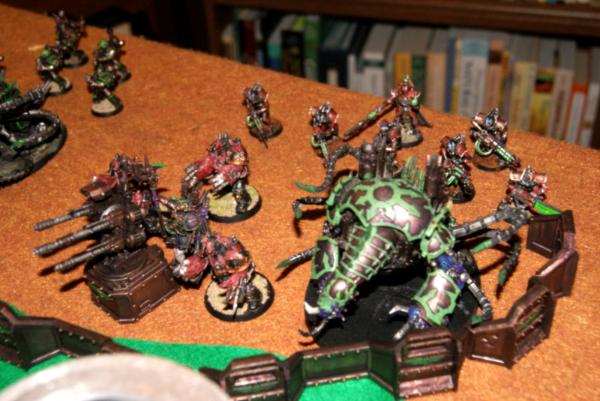
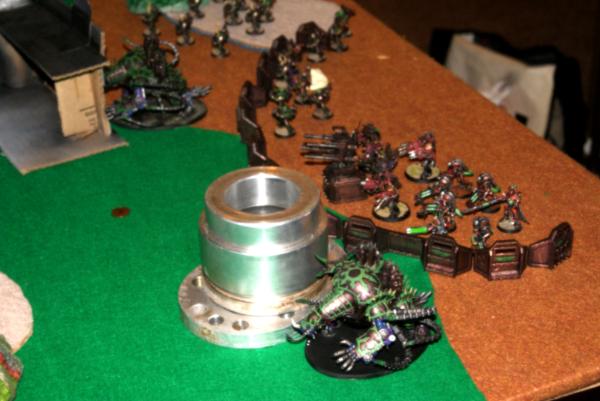
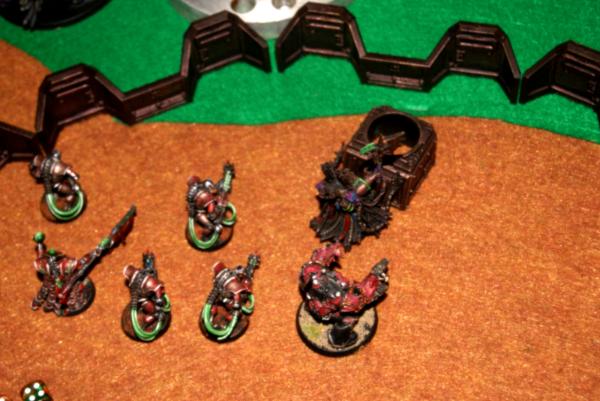
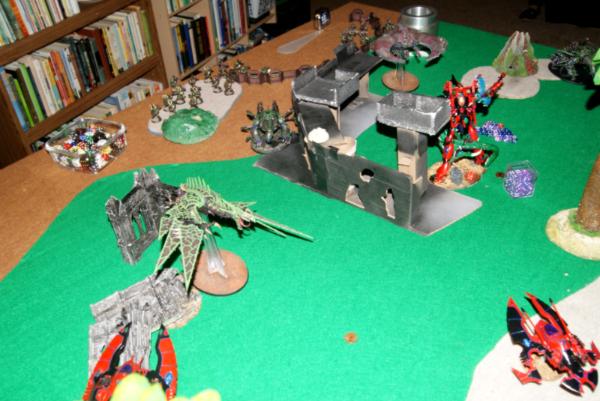
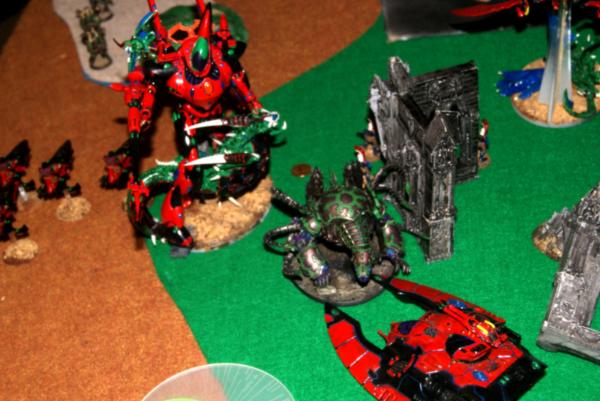
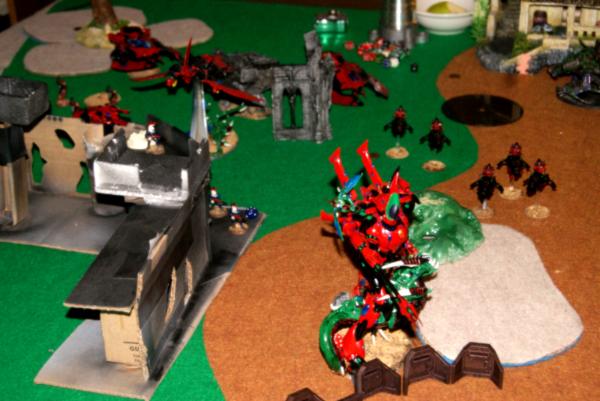
Some pics as I gather my forces.
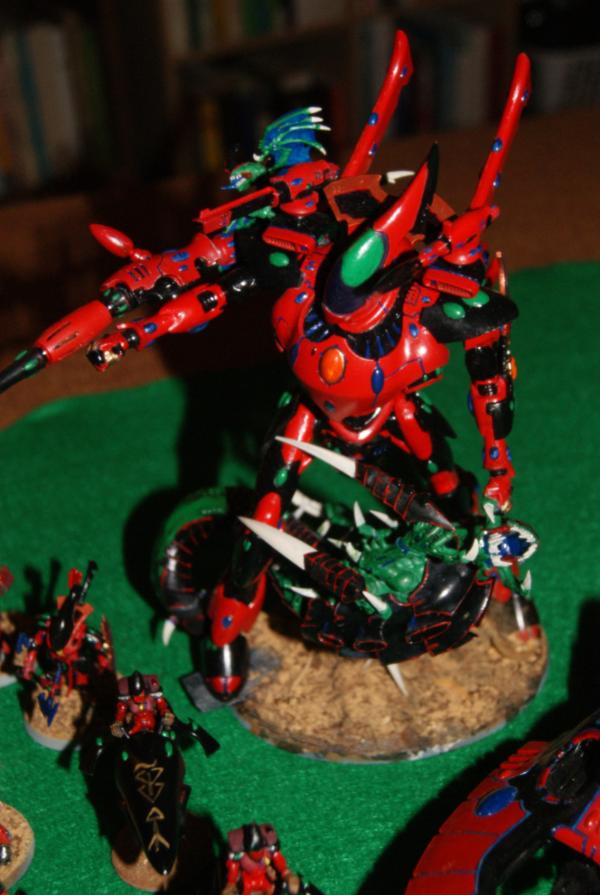
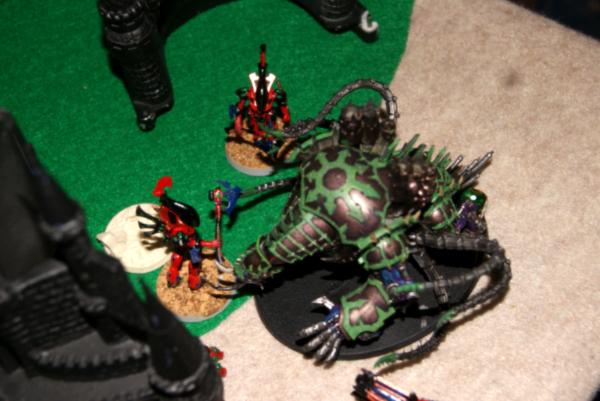
Close up on the wraithknight killing a trygon.
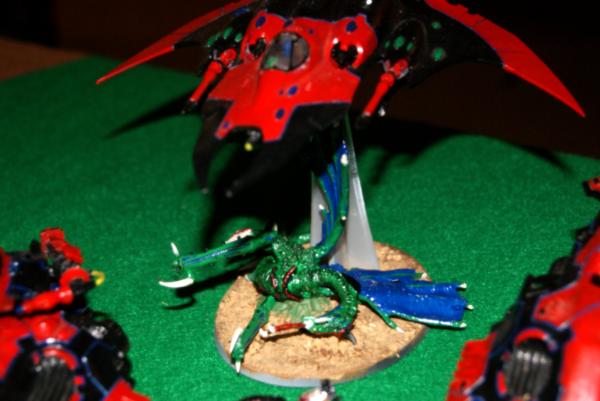
Dead harpy on the flyer base.
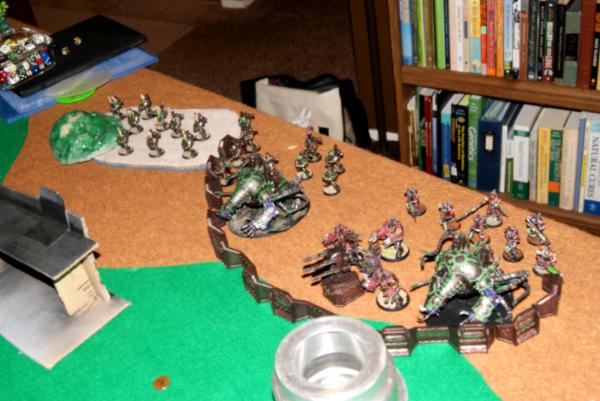
The chaos army I'm facing:
HQ Warpsmith: mark of nurgle, sigil, blight grenades
Troops
Chaos space marines (9) : cc weapons, mark of nurgle, VOTLW, melta gun
Chaos space marines (9) : cc weapons, mark of nurgle, VOTLW, melta gun
Fast attack
Heldrake: baleflamer
Heavy support
Maulerfiend
Maulerfiend
Obliterators (3) Mark of nurgle, VOTLW
Aegis defense line: quad gun
Allies
Necron overlord: warscythe, phylactary, MSS, semipiternal weave, res orb
Troops
Immortals (6)
Heavy
Doom scythe
Pregame thoughts
Primary objective: Scouring
Secondary objective: Big guns never tire (three objectives.)
My opponent often dominates me when we get games in. He likes to play interesting and often under utilized units in his army. This particular list is no exception. Marked chaos marines led by a warp smith. Our last couple of games have heavily featured spawn and a land raider, so my pregame image of his army was very different. One of the things I will rely on is the limited number of units he has. Generally players with an Aegis line hide their units behind that cover and tend to be tentative about leaving that protection. This popular strategy for TSHFT is a base strategy I have built my army around. Shadow weavers, the sun cannon and my fire prism excel at piling up the wounds on bunched units. His mauler fiends are probably are probably my primary concern, they make it to my side of the table very quickly and can rip their way through my tanks at high speed, making up their points in no time. My counter to this is to place the wraith knight between his mauler fiends and the tasty snacks. The knight should punch through the mauler fiends with ease. A possible weakness I note is his complete lack of mobility. With no transports (fiends and doomscythe are his only av.) he has to hoof it to any objectives, and with how many, and how spread out the objectives are, it should be easy to isolate and dominate his army one unit at a time.
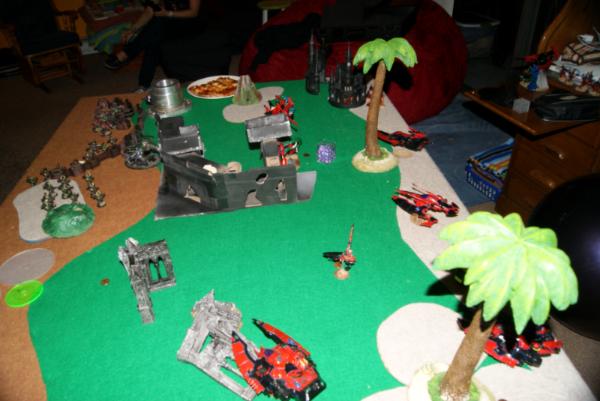
Game one deployment
Spoiler:
Warlord traits:
Eldar: Deep strikers don't scatter within 6" of my warlord
Chaos: Re-roll on boon table
Spirit seer: Embolden/horrify, Terrify
Whenever I roll Embolden/horrify I make the second power on telepathy in the hopes of this combination. It can destroy a death star unit easily and cause major battle plan damage to an opponent. However, this time around, I probably should have gone for a different combination.
I won the roll off and decide to go second.
Objectives were evenly scattered about the field Secondary objectives in each right corner and middle of the board. The scouring primary objectives were placed in left corners and an x shape from the center objective.
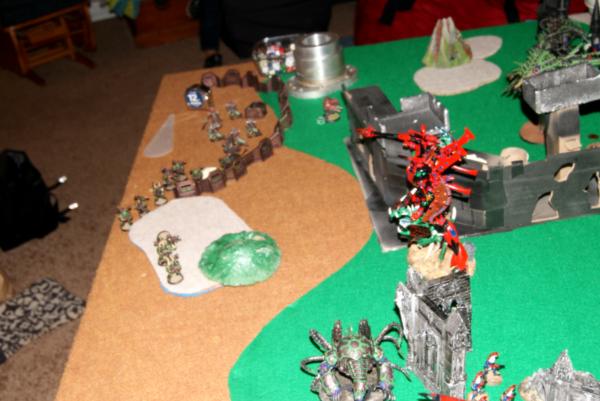
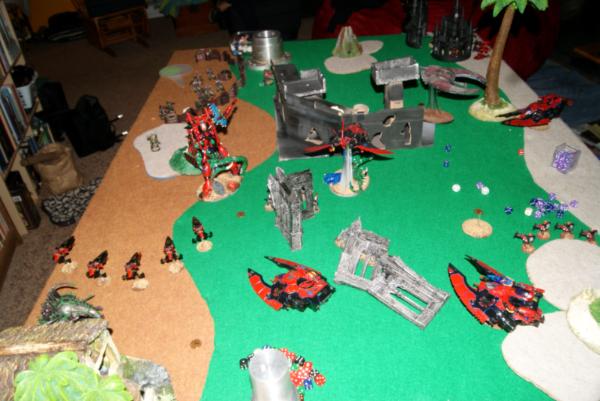
Chaos deployment:
Aegis defense line was set up to the far right as I view the field. Quad gun manned by the warp smith who was joined by the obliterators. Two mauler fiends to the outside of him. Behind the fiends were the necron hq and troop. To the center, but still behind the ADL were his two squads of nurgle marked marines. His two flyers were in reserve.
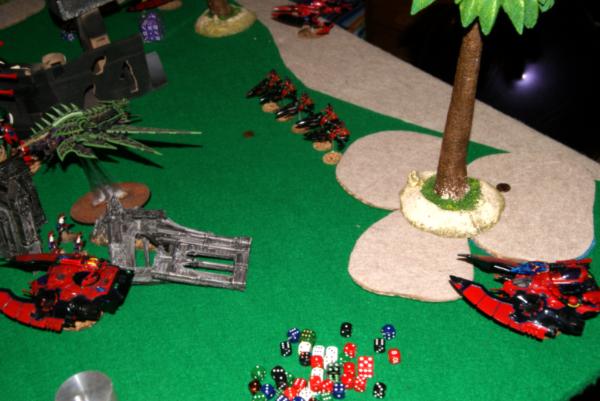
Eldar deployment:
I set up in the middle and far left corner of the table with most of my models. Only my artillery in the right corner opposing his units, they were hiding in ruins around the big gun objective. Only one model was visible to wound, so this would not make a good target for him shooting in the first turn. My rangers set up with good line of sight to the quad gun. Most of my units are either out of LOS or out of range. Warp spiders, jet bikes, and crimson hunter in reserve. After deployment he shattered the ruins my artillery was in, making it a 5+ instead of 4+.
Game one, turn one
Spoiler:
I elected to not sieze the initiative. I would prefer to react to his flyers coming on the board, and I would like that last turn to reach objectives at the end of the game.
Chaos turn One
Mauler fiends shifted forwards a bit, the center one fading to the left and the right corner one moving forward but doing it's best tot hide behind terrain and bide its time. I believe the plan he has at this point is to rush the right side fiend into my artillery , pulling my units into the firing range set up by his aegis line. The center fiend likely hoping my units will come too far forward in my turn and be opened up by the arriving flyers. His shooting phase was surprisingly effective. His marines leave the safety of the ADL and move into the area terrain just outside of it. Quad gun and las cannons from the oblits lit up my rangers who happily went to ground. (Their job in my list is to soak up fire and throw a couple wounds on quad guns/monstrous creatures. However they failed three out of five wounds, then failed their leadership test and promptly ran off the board. Well there was first blood. (Good thing first blood is a tie breaker in TSHFT more then a way to get points.)
Eldar turn one
Knowing that the heldrake and the doom scythe were likely to arrive next turn, I wanted to spread out my units, and get myself into a position to unload as much firepower as possible on his bunched units behind the defense line. If I put enough blasts on him, it might convince him to abandon that cover save and spread out. My Warlord I will turbo boost across the table just at 24 inches from his marines, I hope that this is where the heldrake will then come in. If he vector strikes my warlord, I should be able to make half the saves and live, and his turkey will have only vehicles to flame. It should also draw his marines closer, pulling them out of their terrain. My Wraith knight has been placed equidistant between his fiends.
Shooting, the suncannon blasts at his warlord unit, along with the shadow weavers. I put three wounds on obliterators, one on the quad gun and three immortals are not so much. My hornet finishes off the quad gun and my scatter serpent puts down a wounded oblit.
On the other side of the battle field, my fire prism kills a couple of marines, and my bright lance does nothing to the center fiend. I made three units take leadership tests, but they all pass and nobody runs off the board. Silly veterans and such.
At this point we rolled for the tertiary: It was the have more fast attack units survive then your opponent.
Game one, turn two
Spoiler:
Chaos turn two
Both flyers come on the board. Heldrake does as I kind of wanted, slaps my warlord on the way past, and causes two wounds. (A little more then I wanted, but okay, one left.) The doom scythe comes right up the middle of the field and draws a bead on my wraith knight. The mauler fiends surge forwards. Center one coming up against the ruins in the middle of the field. The right one hugging the side of the board. Oblit and warp smith step out in front of the ADL to get into range of assault cannon on the wraithknight. Necron ground unit spreads out to avoid blasts.
Shooting: Everything on the left side fires at my wraithknight causing a total of four wounds between the doom scythe, oblit, and necron unit. The big man fails all four of his saves. With nothing to flame for the most part, the heldrake farts on my warlord, and he fails his save. (It wasn't quite supposed to go like that.) The rest of my army is out of range of any of his weapons.
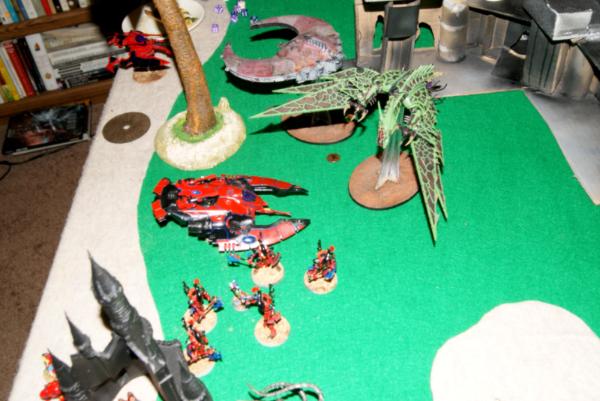
Eldar turn two:
I'm hoping my reserves will arrive and I will be able to have a decisive strike against his now spread out forces. With the death of my autarch, my warp spiders in deep strike fail to come in. (I only placed them in deep strike because of the warlord ability. I might never do that again. I much prefer to use their crazy mobility from the first turn instead of chancing them scattering.) My crimson hunter also fails to arrive, leaving my only reinforcements, my jet bikes. I send them across the board, right under the heldrake and beyond. I place them in a very similar spot as the autarch was. Their goal is to again, give a reason for the chaos marines to stay out from behind their ADL, pot shotting at extreme range. My wraithknight Hops over the large ruins in the middle of the board and tries to block off the center fiend. I don't want to charge him because it would be through the area terrain around the ruins. Hitting at initiative one, he would actually have a chance to hit first. I'm hoping he will make the tactical error of charging me next turn. Dire avengers get out of their ride directly behind the heldrake. I'm hoping for a lucky glance or two. On the other side of the board. My scatter serpent shifts slightly and out hops the wraithguard and spirit seer. Their target the right side mauler fiend. (I spirit mark the fiend). Hornet and fire prism shimmy around a bit for good shots.
Shooting:
Because I'm not charging the center fiend, my wraith knight unleashes at the nearby chaos marines. Some twelve hits caused and I manage to kill two marines...that's it. Fire prism whiffs. Artillery put one non-rending wound on the obliterator, he saves. Five wraithguard shoot the right side fiend causing one glance and two pens! He daemon saves two of them, then shrugs off the resultant stunned roll with his daemonishness. Scatter serpent fires up at the necron doom scythe and put a stunned result on it, which it also ignores. The hornet fires at his obliterator/warp smith squad and manages three wounds, two of which are saved by the obliterator, toughness five means no instant death. What was supposed to be a super successful second turn...resulted in two dead marines.
Game one, turn three
Spoiler:
Chaos turn three:
Right side maulerfiend ignores the wraithguard and moves within one inch of my shadow weaver artillery. Hel drake lines up to barbecue the wraithguard instead. His doom scythe zips up to the hornet and prepares to zap it. Warp smith abandons the injured oblit and joins the larger of the two chaos marine units who line up to shoot my wraith knight. The center mauler fiend goes around said knight and prepares to hug my bright lance serpent which still has done nothing.
Shooting: Chaos marines whiff on the bikes, but warp smith and his buddies cause one wound on my wraith knight, he fails his save dropping to one wound remaining. Hel drake bakes three wraith guard. Doom scythe turns the hornet into a big crater.
Assault: Delayed an assault all the way to turn three. Right side mauler fiend kills only one artillery gunner, but they brake and run off the board. Center fiend tears the serpent apart, causing an explosions that kills one of the nearby dire avengers. This has not been a good couple of turns for the eldar.
Eldar turn three:
Spiders and crimson hunter come in. Now I have a chance to do something to those pesky fliers. I set my spiders up nine inches behind the hel drake, figuring they can battle focus close enough if they scatter from there. Instead they miss and land right on the drake, and end up being placed half way across the board in my left corner. To ad to the ignominy, one of them trips on the area terrain they land on and dies. (This is feeling pretty rough here.) Crimson hunter flies into the middle of the board and vectors so he is looking right at the heldrakes backside. Scatter serpent lines up another run at the doom scythe. Wraithknight jumps behind the now left side mauler fiend, dire avengers shift towards the middle of the board and take aim at chaos marines. Jet bikes move forward to target the same unit. My spirit seer and the two remaining wraith guard move close to the right side mauler fiend. Fire prism lines up a shot on the hq chaos marine squad. (I'm hoping I can cause enough casualties that he just runs off the board.)
Shooting: Heldrake is shot out of the sky by my crimson hunter when it scores four all four hits and they turn into two pens and a glance. He fails all of his daemon saves. Doom scythe sustains four hits, decides to evade and still is glanced once. Wraithguard can't hit the broad side of a barn and miss their mauler fiend. Wraith knight glances the back armor of the left fiend. Dire avengers and jet bikes combine to kill two marines, leaving just the sergeant alive. Fire prism causes a couple of wounds, although they are saved. Warp spiders run and eventually assault move onto one of the nearby scouring objectives.
Assault: Wraithknight goes after one fiend, while the spirit seer and his buddies go after the other one. (My thought here was that while the wraithguard can't hurt the maulerfiend, the spirit seer can, though he needs to roll really well. Also by charging I'm taking away one of his attacks. Sure enough he lands three hits on the charge and rolls...nothing that gets through. Return swings lands two wounds, the first one is saved by my spirit seer, the second, not so much. Not sure why I didn't let him kill one of the guard first, but oh well. On the other side of the table the wraithknight crushes his mauler fiend with very little effort, and then consolidates towards the chaos marines.
That actually worked out really well. I've shut down his fliers, taken out one of the mauler fiends and at least tied up the other fiend for another turn. I think this might turn around.
Game one, turn four
Spoiler:
Chaos turn four:
Doom scythe flies off the board since it is snap firing. Chaos marines and Necron squad move into a position to shoot at the wraithknight. Hoping to get that one last wound. Chaos marines unload at the wraith knight. Melta gun and the melta from the warp smith both miss. (That's just what melta weapon do though.) Necrons fire and can't cause a single wound. (Good because he hadn't made a single save yet.)
Mauler fiend totally whiffs against the wraithguard, so I don't have to worry about him for another turn.
Eldar turn four:
With the wraithknight surviving, my fire power vastly outweighs my opponent. Wraithknight stays put, I don't want him getting charged by the necron lord with his high strength and mind shackle scarabs. Bikes and avengers move forward to target the remaining marines. Scatter serpent and fire prism move up as well. Crimson hunter moves to the edge of the table with a good field of fire over all his remaining units that I can shoot at. Warp spiders move towards a more valuable scouring objective.
Shooting:
Jet bikes and dire avengers kill off the last marine in one squad. Scatter serpent, fire prism, and wraithknight take out the warp smith and his unit, as well as the rest of the necron immortals. Fire power from the flyer kills the last oblit. Dire avengers battle focus onto the middle objective. Overlord is killed as well, however he rolls on his phylactary and comes back with two wounds.
Assault
Mauler fiend manages one hit on a wraithguard and squishes him, melta follow up misses, leaving him still trapped in combat. Other then the mauler fiend, the only thin my opponent has left in his necron overlord.
That's a lot for one overlord to take out.
Game one, turn five
Spoiler:
Chaos turn five:
My opponent wanted to play one more turn out, so we did. His Necron overlord ran forward hoping to be just in range of the wraithknight, which he was. He needed triple box cars to run through the terrain and get into close combat. However he got four inches instead. His doomscythe came back on the board as well, lined up to take out the fire prism. He managed a good pen, but having moved the last turn my fast skimmer sashayed out of the way. In the far corner his maulerfiend finally killed the last of the wraithguard and found itself free to claim the big guns never tire secondary objective.
Eldar turn five:
Bikes and the scatter serpent moved into a position to take out the necron lord. My wraithknight jumped around him to get at the big guns objective in his backfield. Dire avengers moved right next to the big guns objective in the center of the field. Warp spiders, and crimson hunter zipped about to take aim at the doom scythe. There was really nothing I could do to table him. Either the maulerfiend or the doom scythe would have survived most likely.
Shooting:
Crimson hunter knocked out the doom scythe, it fell on the fire prism but did no damage. Jet bikes and scatter serpent killed off the overlord. Dire avengers, bikers, spiders, and wraithknight were all able to move onto objectives.
The wrap up
Spoiler:
Conquering army: Eldar!
Primary: Scouring Eldar 6/Chaos 0
Secondary Big guns never tire: Eldar 9/Chaos 3
Tertiary: Eldar: Two surviving units/Chaos zero surviving units.
Turn two and into turn three I was really getting nervous there. A little frustrated how the dice were failing me even on 3+ saves, yet it seemed my opponent was making all of his 5++ saves. That's just the way the dice go sometimes though. I stuck with the game plan and tried to minimize my losses. Eventually I think my wraithguard tying up his second mauler fiend was the turning point. If he had been free to catch up with my other serpent or get into the fight in the middle of the board, that would have been very difficult to over come. Eventually the dice started rolling my way and I was able to come out victorious. I'm really happy with the way that my team came out in the end.
In retrospect I think I would have placed my rangers in the center ruins. They would have been better suited to withstand the fire, as well as being harder to see. If his mauler fiend had charged them, it would have drawn that unit close enough to kill with my wraithknight. I also probably should have kept warp spiders deployed instead of deep striking them. Another good unit that could have helped counter the mauler fiends from the start.
This message was edited 9 times. Last update was at 2013/09/22 17:35:30
~seapheonix
2013/09/20 14:20:15
Subject: To TSHFT and beyond! (To the invitational?) An all eldar journey.
First game is up in its entirety. Looking at the vagaries of dice in this game, I think I might explore that. I'm going to do a pair of games back to back. I'll try and watch exactly how each model moves and try and replicate it. Set up the same, shoot at the same targets. I think there will be enough of a difference that by turn three the games will be completely different.
~seapheonix
2013/09/29 19:21:09
Subject: Re:To TSHFT and beyond! (To the invitational?) An all eldar journey.(Perhaps change to battle reports?)
Troops
Devil gaunts (10) in death spore
Devil gaunts (10) in death spore
Tervignon, scything talons
Tervignon, scything talons
Elite
Doom in death spore
Zoanthropes (3) in death spore
Ymgarl genestealers (5)
Fast attack
Ravenors (3) rending claws, spine fists
Heavy
Biovore
Biovore
Primary: Big guns never tire (3 obj)
Secondary: relic
Tertiary: Crippling blow
This is my other competitive army, and it's all based on the second turn. Hive commander allows almost the entire army to drop in after my opponent has had two turns of shooting. They can then target the most dangerous units in the opposing army and remove them from the game. The two flyrants share out their preferred enemy bubble, it's important to get them near the ravenors, genestealers, and most of all devil gaunts. The wraithknight can be countered by the zoats and the doom. Rolling on telepathy for the zoats should give me a couple psychic shrieks, and perhaps terrify or puppet master. Devil gaunts and spores dropping behind wave serpents will be the best counter for those av 12 with wave generators. The two tervignons and the biovores are the only thing that will be out turn one, all they have to do is survive.
For the eldar, the best chance is to knock out the units in the first turn. However, that isn't very likely. Option two is spread way out and try to protect my rear armor by hugging the large piece of terrain in the center of the board. Third option is to castle up in a corner, although the tyranids do a good job of blocking in the castled army and eating them up. I'm going to go for the spread out option and hopefully force the tyranids to disperse their focus.
~seapheonix
2013/09/30 02:03:03
Subject: To TSHFT and beyond! (To the invitational?) An all eldar journey.(Perhaps change to battle reports?)