| Author |
Message |
 |
|
|
|
|
Advert
|
Forum adverts like this one are shown to any user who is not logged in. Join us by filling out a tiny 3 field form and you will get your own, free, dakka user account which gives a good range of benefits to you:
- No adverts like this in the forums anymore.
- Times and dates in your local timezone.
- Full tracking of what you have read so you can skip to your first unread post, easily see what has changed since you last logged in, and easily see what is new at a glance.
- Email notifications for threads you want to watch closely.
- Being a part of the oldest wargaming community on the net.
If you are already a member then feel free to login now. |
|
 |
2013/11/15 05:33:08
Subject: Lockark's projects: zone mortalis, HH, orks, and more
|
|

Lit By the Flames of Prospero
|
1st thing 1st. For new commers here is my casting set-up and the list of my mold collection since i get asked it alot. lol
Sci-Fi:
#320, #321, #326, #327, #277, #273 and #302
Gothic/inn
#40, #51, #57, #58, #45, #63
Fieldstone:
#701
msc:
#203
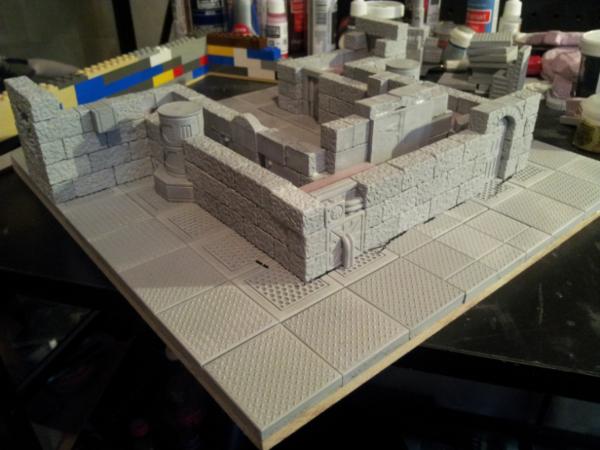
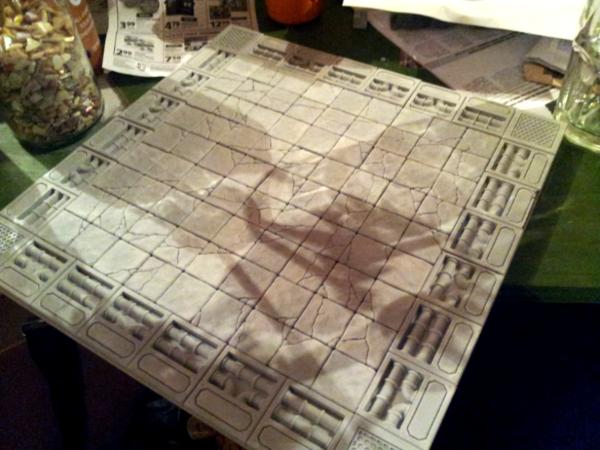
This project is Cray-cray. But it's going to be awsome when it's done.
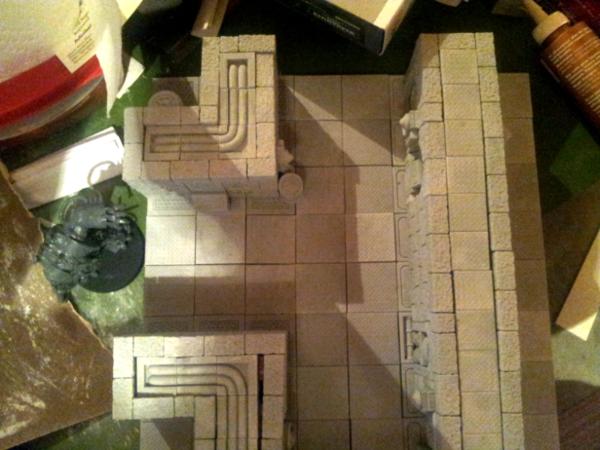
This is my 1st tile. I learned alot from doing this one, and already made improvements in how I'm building the next ones.
 Automatically Appended Next Post:
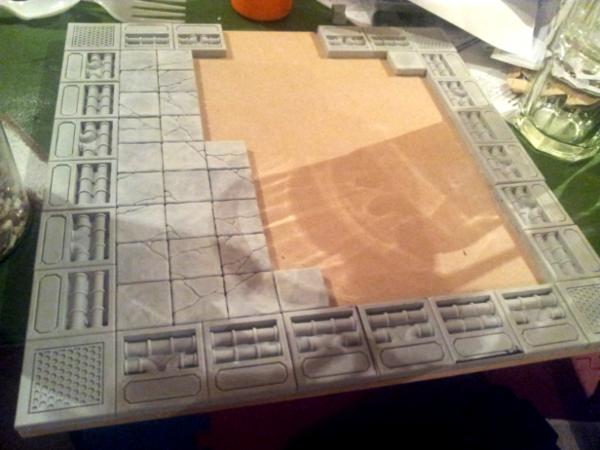
The next two tiles I'm working on.
|
|
This message was edited 8 times. Last update was at 2014/03/19 22:36:36
|
|
|
|
2013/11/15 18:59:16
Subject: zone mortalis in hirst blocks.
|
|
Lit By the Flames of Prospero
|
 Malika2 wrote: Malika2 wrote:That's actually not that bad! While the FW stuff looks a bit tighter, the ones you've got here don't seem to suffer that much from miscasts that the Mortalis set is so infamous for.
Thank you! The 1st tile was my 1st time working with the blocks, and casting plaster. you will notice in the WIP shots of my next tiles, much tighter fits. I've also learned the importance of pre building sections.
=)
I miscast a TON of blocks when building that 1st sections, but now I've also improved my skill at plaster casting to boot. Once I find some colours I like I will also be starting to paint that 1st tile.
|
|
|
|
2013/11/16 01:34:24
Subject: zone mortalis in hirst blocks.
|
|
Lit By the Flames of Prospero
|
 Depraved wrote: Depraved wrote:Looking great. Hirst art molds are a lot of fun to work with.
thanks, and yes they have been.

Here is a shot I took to show how I support the roof of the sections.
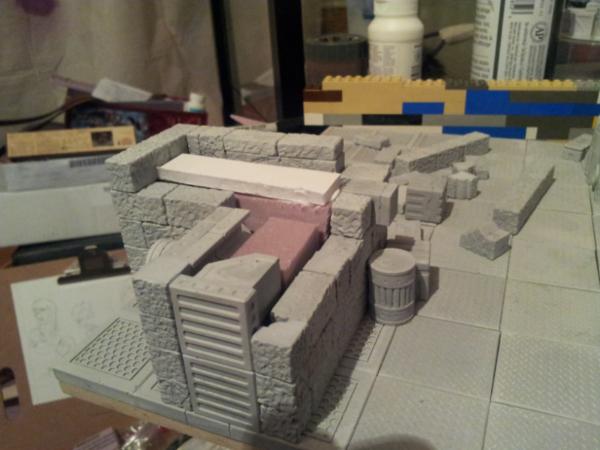
I have found just makeing a stack of pink foam glued flat side to flat side creates the best level surface to glue the tiles to to support them. The foamcore adds smaller increments to the height.
I did not do this in the 1st tile, and the top did not come out levelled properly saddly.
|
|
|
|
2013/11/16 19:58:08
Subject: zone mortalis in hirst blocks.
|
|
Lit By the Flames of Prospero
|
 Alfndrate wrote: Alfndrate wrote:Lockark, that is awesome, subscribed my friend! Keep up the awesome work.
And once this project is done, i plan on makeing a endless fantasy table the same way.
=)
Zone mortalis came 1st sadly since it would get more use. More 40k players and all that jazz.
|
|
This message was edited 1 time. Last update was at 2013/11/16 19:59:41
|
|
|
|
2013/11/19 04:22:15
Subject: Re:zone mortalis in hirst blocks.
|
|
Lit By the Flames of Prospero
|
Thanks, I at 1st wasn't sure if it was going to work or not, but have been very happy with how it looks. Automatically Appended Next Post: So today I'm getting the 1st tile painted, and will be posting up a pic. Then the rest of the week is casting more blocks so I can start assembling agien. Sadly this means updates will slow agien, unless i feel compelled with start posting pics of piles of freshly casted blocks.
=S
In other news I wish to share this:
http://www.amazon.ca/gp/product/B00EN8RMBK/ref=oh_details_o02_s00_i00?ie=UTF8&psc=1
Great price for dropper bottles! I've transfered my GW base paints and P3's into these bottles, and they have been a life saver!
|
|
This message was edited 1 time. Last update was at 2013/11/19 04:37:33
|
|
|
|
2013/11/20 03:07:02
Subject: Re:zone mortalis in hirst blocks.
|
|
Lit By the Flames of Prospero
|
|
|
|
|
2013/11/20 15:25:43
Subject: zone mortalis in hirst blocks.
|
|
Lit By the Flames of Prospero
|
It's hard to say exactly. But for perpective. It takes abour 8-10 casting runs to make 1/4 of the tile. It takes 30min for a casting run to cast. It takes 3+ hours in a food dehydrator for the blocks to be dry enough to use.
The trick is well casting, you need to work on other things like painting and building. Its a project that gets done in spurts.
|
|
|
|
2013/11/23 05:49:52
Subject: zone mortalis in hirst blocks.
|
|
Lit By the Flames of Prospero
|
Altruizine wrote:This absolutely crushes the FW ZM, in my opinion. Much more granular detail, and doesn't suffer from the numbing repetition visible on the actual ZM tiles.
My friend wants to buy the big ZM set, and seeing this thread has me thinking I should get him to save half of the cost and do it up this way.
Lots more time and effort required, though.
Thanks! I really appeceite the kind words!
In all honesty I might of over estimated the time abit, because one thing about doing these tiles is that the more the cast the more "surplus blocks" you end up with. Assembleing this surplus blocks into prebuilt sci-fi/tec pannels you can drop into a wall helps alot in speeding up assembly and the amount of casts you need to complete a section. The more you build and cast, the faster it feels like it goes.
I am currently painting the 2nd tile, and casting up the blocks to get more done on the 3rd/4th. If you take the plung let me know, I would love to see how you progess. In this blog you are actully seeing the end results of my 1st attempts are casting and building. Just prepare properly, and break everything down into a plan. It's not as daunting as you might think it is at 1st.
And if you mess up you 1st cast don't worry about it. I mark bad casted blocks with a red marker to mark unusable sides. In a project like this as long as you have one "usable side", you end up with very little waste. This turned out to be a great project to learn how to cast with!
Altruizine wrote:Would you be able to link to the specific Hirst Arts moulds you're using?
Also, do you feel like they're enough for you to achieve the whole board, or do you wish/plan to acquire more?
I'm useing these molds:
327(sci-fi Machinery), 326(sci-fi Machinery), 273(Pipe flooring), 45(Gothic Dungeon Builder), 277 (Large Grate floor), and 302(Med lab) for the most part. 302 is probly the one you could cut out if you had to in a 5 mold order, it's nice since it lets you make doors, and ad some more verity to the machinery. It also adds some extra floor tiles to use/mix in.
I actually didn't have my pipe mold yet when I built most of the 1st tile, thus way their is some issues with the tops lineing up right. In future tiles I have already improved my building technique to eliminate this, and it's already looking every better!
I also am using 203 so i can make stone floor areas that I will paint as marble.
I also picked up and useing 51 (Dragon's inn) recently for extra blocks, and it will also be useful latter once this project is done and I start some other projects involveing brushfire, War machine, and Endless tactics I plan on doing. In retrospect, the bassic gothic blocks blocks, and have already put in a order for it. I realy need a mold that makes more of the 3/4th blocks for a project like this.
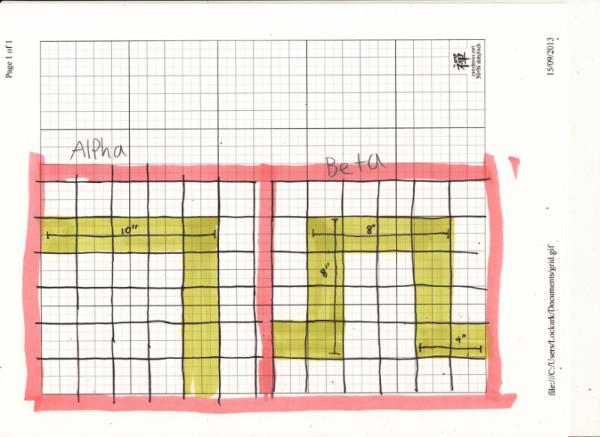
I also drew out the bassic zone mortalis layouts in grid form as guids to help me make sure everything line up correctly. I would HIGHLY recomend doing this if you plan a project like this, keping them on hand. I can scan these layouts and notes and post them if you wish.
That's the basic formula for how I'm throwing this all together. What is nice is once I'm done this project, I'm left with a bunch of molds that will be great for smaller projects.

I will probly roll this blog over into thows projects, once the moutine that is this project is over.
 Prophet40k wrote: Prophet40k wrote:I have always wanted to make the jump into Hirst molds... I might just take that leap soon.
Casting this stuff is a very zen way to wind down at the end of a day before you hit the shower believe it or not.
|
|
This message was edited 5 times. Last update was at 2013/11/23 06:29:23
|
|
|
|
2013/11/23 06:19:13
Subject: zone mortalis in hirst blocks.
|
|
Lit By the Flames of Prospero
|
Altruizine wrote:Another question; are the dimensions/grid size identical to the FW Zone tiles, or did you have to change them to accommodate the dimensions of the Hirst blocks?
Threw research I figured out the FW Zone mortalis tiles are 12'xd12". They are layed out on a 6x6 grid, made up 2x2 squares.
The large floor tiles are 1.5"x1.5" tiles, so to make sure my wall sections line up correctly, I created some jigs to help line up the wall sections the correct distances. In theory these sections should be compatible with the real FW tiles. If you look in my pics you will notice that my wall sections actually do not actually line up with my wall sections.
I scanned some of the notes I made on the topic. I realized now I forgot to do notes on the zeta tile, so thows will be coming soon. I don't know how helpful they will be fore you since they are my own personal notes, and I need more visual representations. (I know my spelling is something to be much desired, and feel awkward when I have to write long posts.)
http://www.dakkadakka.com/gallery/images-52617-37722_Project%20Notes.html
Hope that helps, and feel free to ask any more questions! I am always happy to help my fellow hobbists. If you do decide to do a simular project please let me know! I would love to see how you progress with it!
This is my 1st time casting and building with hirst art blocks. As long as you make the proper preparations, give their website a good reading and plan ahead it's not that hard to get into in all honesty.
|
|
This message was edited 4 times. Last update was at 2013/11/23 06:33:10
|
|
|
|
2013/11/23 08:07:24
Subject: zone mortalis in hirst blocks.
|
|
Lit By the Flames of Prospero
|
 deadmeat85 wrote: deadmeat85 wrote:Can you please make a list of the Additional equipment you use. (i.e. Plaster, drying apparatus, ect.) Really interested in maybe starting my own projects with the molds . Also does it take up alot of room to do, I have am office desk in the corner of a room and 2 kids running around.
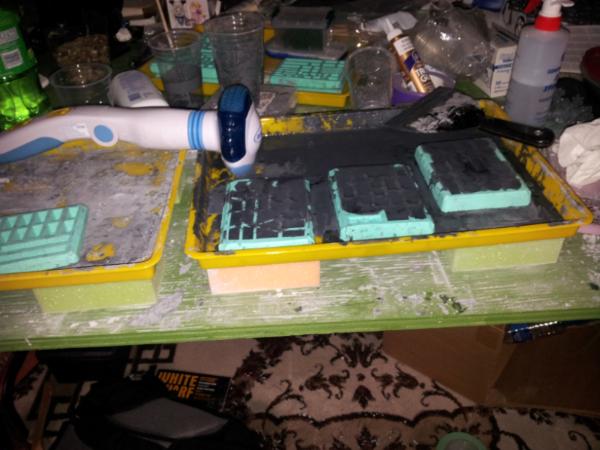
-I use two finger painting trays, with spong glued to the bottom for a vibration table. I then have a small foot massager that I use to vibrate the tables. I was lucky and got it cheap since it was on Clearance.
-A spray bottle I fill with water/dish soap to spray my molds with before I poor. This helps the plaster flow better. They refer to this as "wet-water" on the website.
-A food scale I use to message my volumes of powder to water. getting the correct mixing ratios is very important for getting a good cast. I prefer this to the other methods out there.
-A wide mouth bin with a garbage bag to help with quick clean up.
and that's bassicly it. I just follow the instructions you can find on this page:
http://www.hirstarts.com/casting/casting.html
I also strongly sujest getting a food Dehydrator to reduce drying time, and insure each block is fully cured before I use them. It' not necessary, but so useful it might as well be. I never would of been able to to work on this project as quickly as I have with out it.
For the most part it doesn't seem to take up much room in all honesty as long as you are able to organize yourself. You can bassicly fit a whole set up on a single desk. Due to drying times, it's nice for it to have it's own area so you can paint and build well you wait for the plaster to set before pulling the blocks and putting them in the dehydrator.
As for what I'm making my jig, it's literately just a bunch of old Lego I raided from my old toy chest... XD
You can see the concept on this page:
http://www.hirstarts.com/goth/basicgoth.html
Bassicly their is little I'm doing that's ground breaking in my set up. I just bassicly read all the hirst art articles and took notes. Trying to replicate his sujested set up as cost effectively as I could manage. I can take pics of the mess I call a set up if you want thow.
XD
|
|
This message was edited 2 times. Last update was at 2013/11/23 08:11:13
|
|
|
|
2013/11/23 17:26:27
Subject: zone mortalis in hirst blocks.
|
|
Lit By the Flames of Prospero
|
Altruizine wrote:I'd love it if you took some "in progress" shots once you get into your next tile.
Anything that can help illustrate the solutions you've worked out for keeping things symmetrical and properly modular (since those are the sort of troubleshooting tips that will help someone like me get a similar project off the ground with less of a learning curve).
Wouldn't a household oven perform more or less the same function as the dehydrator?
There's no way I'm investing in a food dehydrator, but it seems like you could avoid the problem of a blocks bottleneck by simply starting to cast several days before you started to build (so that you always had several batches in-waiting at any given time).
Also, what brand of plaster are you using, and where do you find it in Canada?
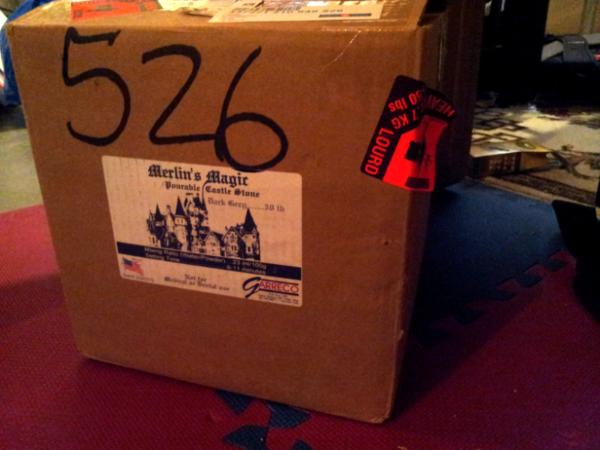
I use Merlin's Magic, witch can be perched here in Canada:
http://www.meeplemart.com/search?x=0&y=0&q=merlin%27s+magic
I will make sure I take some shots of how I line up the walls on the next one.
As for using a oven, Bruce talks about it here:
http://www.hirstarts.com/building/building.html
I prefer a food dehydrator because I just leave a day's worth of casting in it over night so it's good to go the next day.
|
|
This message was edited 1 time. Last update was at 2013/11/23 17:37:33
|
|
|
|
2013/11/25 01:56:32
Subject: Re:zone mortalis in hirst blocks.
|
|
Lit By the Flames of Prospero
|
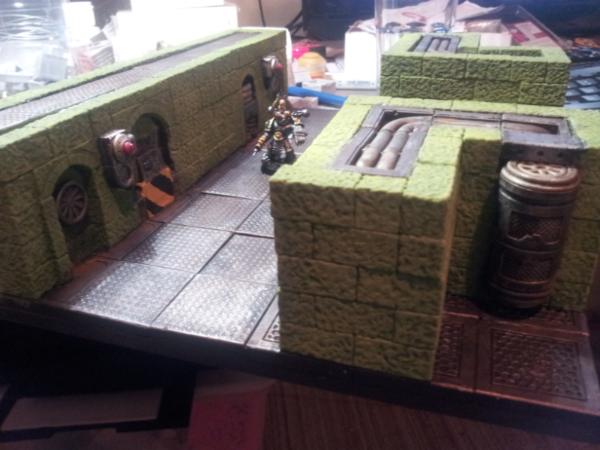
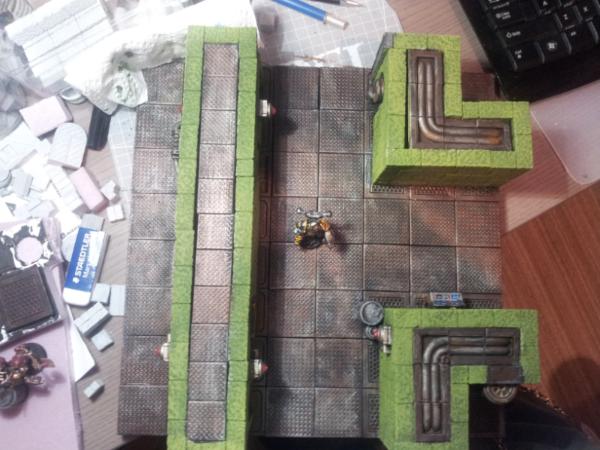
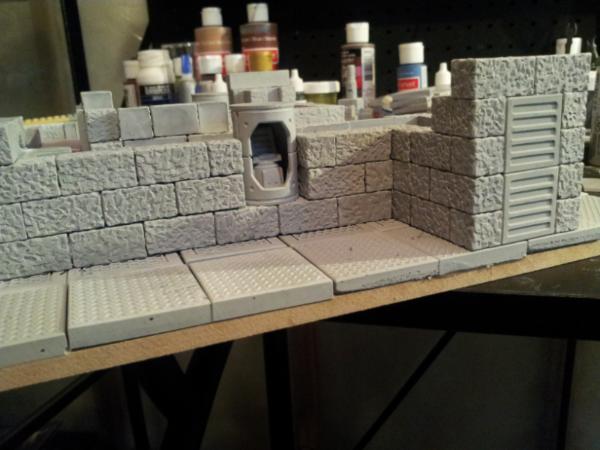
Hopefully this will help show how I learned to keep my walls straight.
This is the jig a made from lego, being used to keep the floor tiles stright.
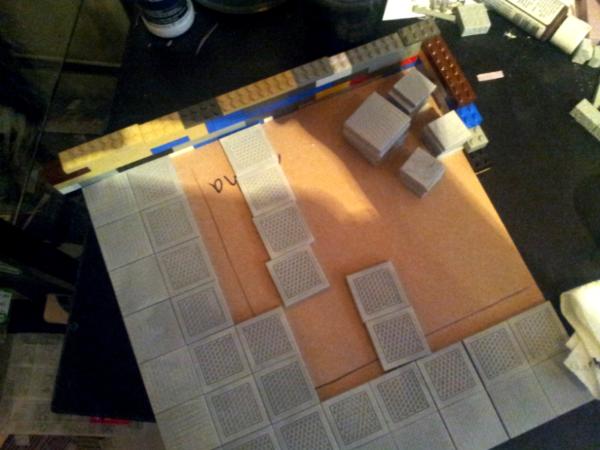
By setting down a 2" wall block I am able to make sure the proper spaceing from the edge is maintained.

Here is a end cap being glued in using this trick. Remember to always start from the ends of the wall and then work inwards. this makes sure tiles will line up between tiles. On of the ends on one of my tiles is slightly off from not doing this.
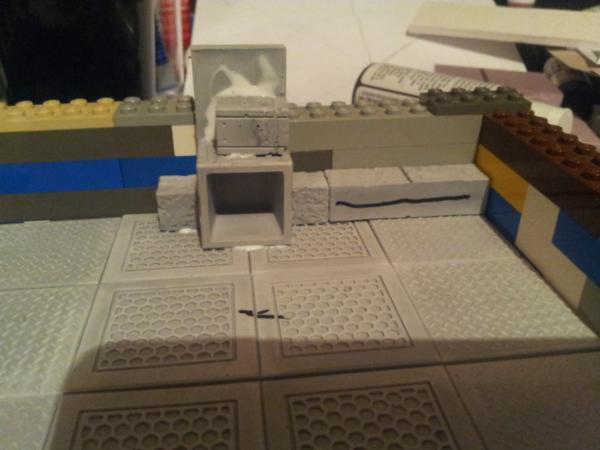
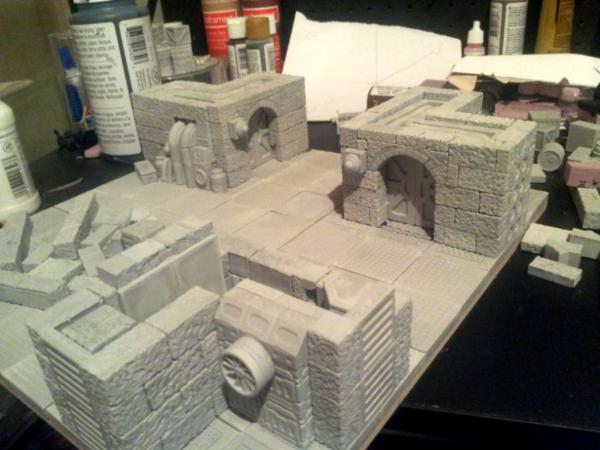
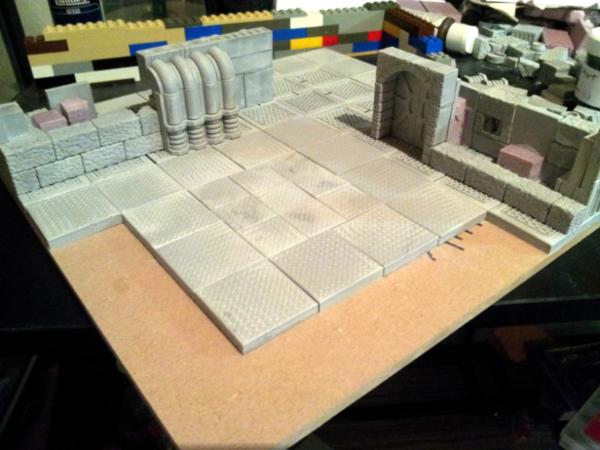
I preassable all Sci-fi elements of the wall so they can be dropped in. I can then build the gothic walls around these elements. this is much easier then how in the 1st wall i tried building the gothic elements and sci-fi elements all at once. I use the same jig to keep the elements properly allinged. Once fully dired that sci-fi elements can also be sanded flat for a better fit in the wall.
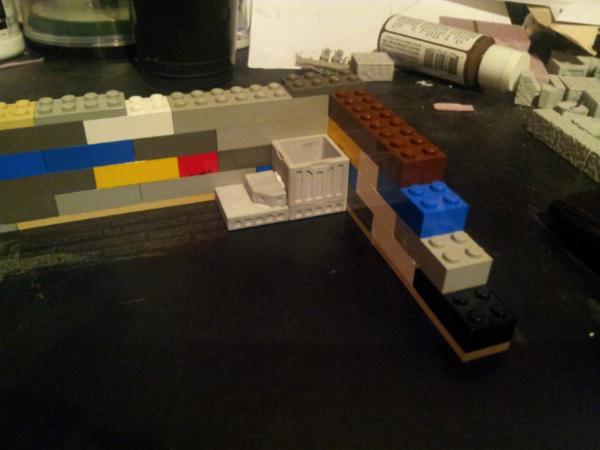
Another example of a sci-fi element.
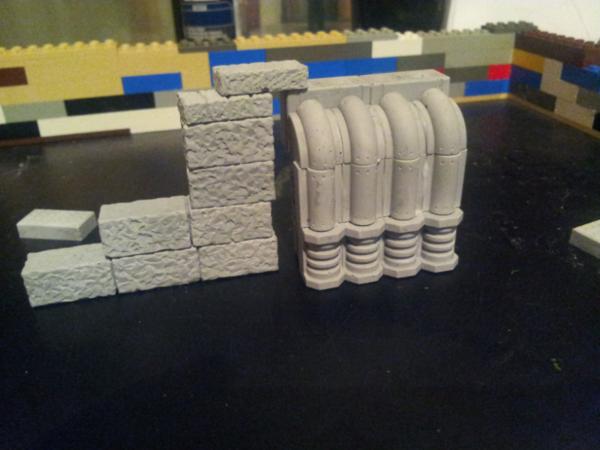
I also use the blocks as a stright edge to make sure blocks are lineing up correctly.
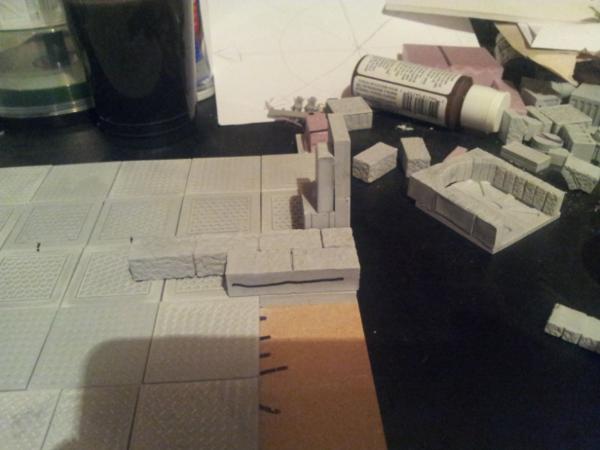
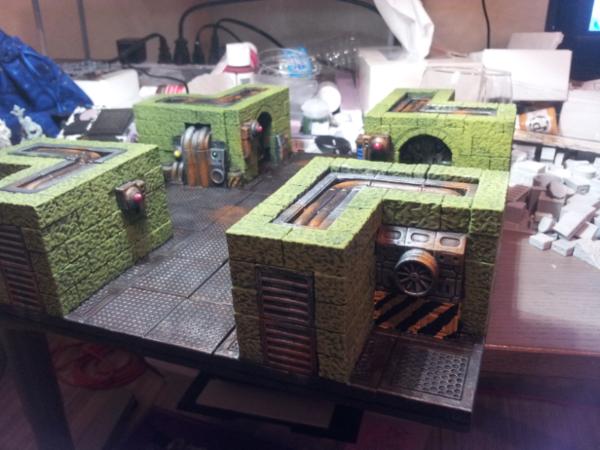
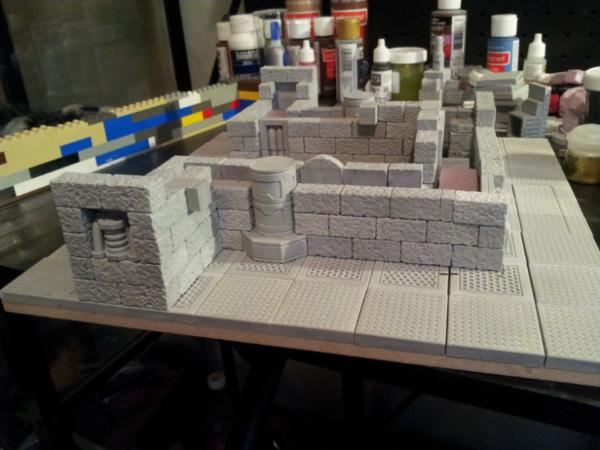
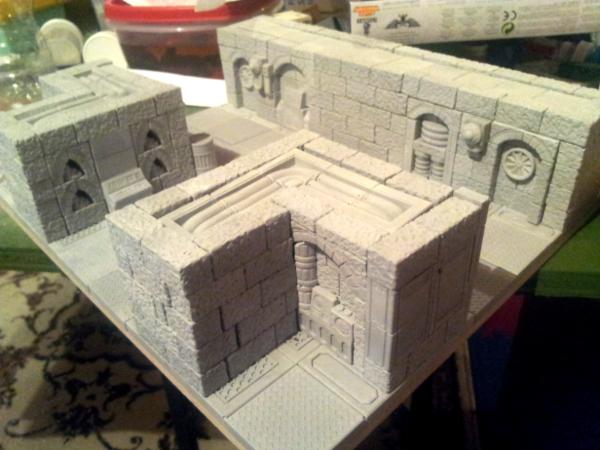
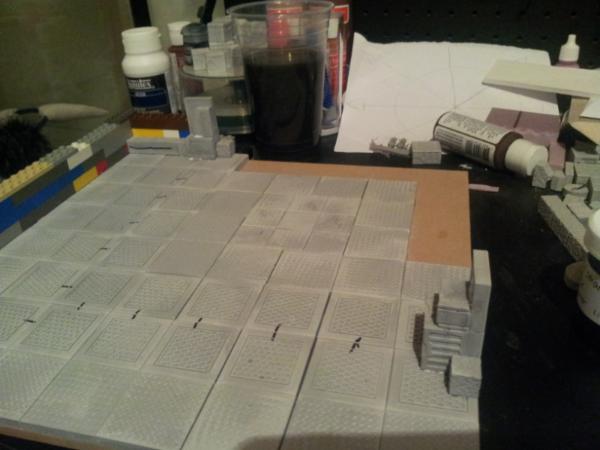
edit: I renamed that thread, since I plan on also throwing up some pics of my mini painting, but the focus will probly still stay on terrian and hirst arts projects for the most part, because I feel it's a subject not covered very often. Automatically Appended Next Post: More WIP shots.
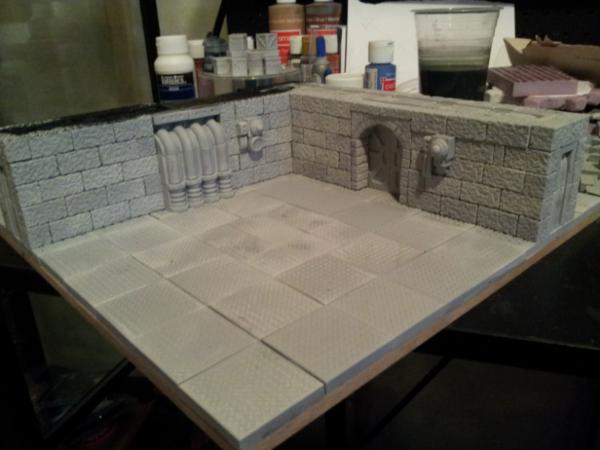
My 1st delta tile is finished, and has been primed in black gesso. Not to piaint.
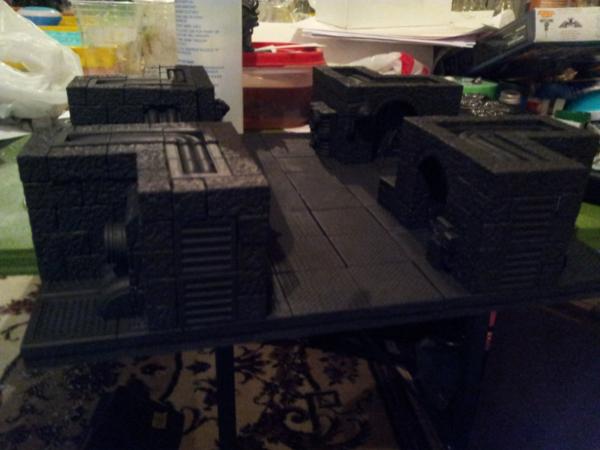
Here is a theta tile finished, and ready to be primed. lighting is wired here, never noticed untill I uploaded it.
More work done on my alpha tile.

|
|
This message was edited 2 times. Last update was at 2013/11/25 03:45:28
|
|
|
|
2013/12/03 21:29:22
Subject: Re:Lockark's project: zone mortalis in hirst blocks.
|
|
Lit By the Flames of Prospero
|
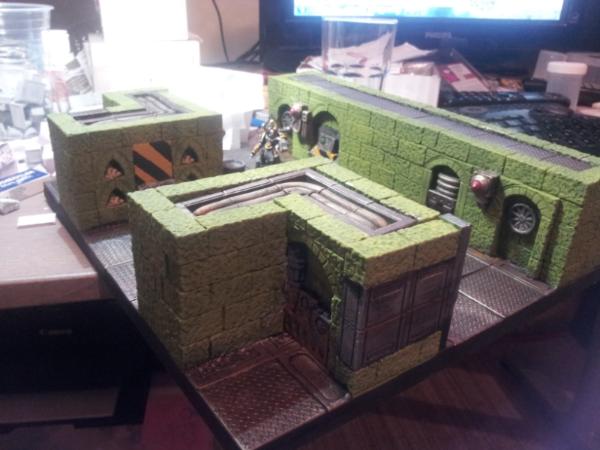
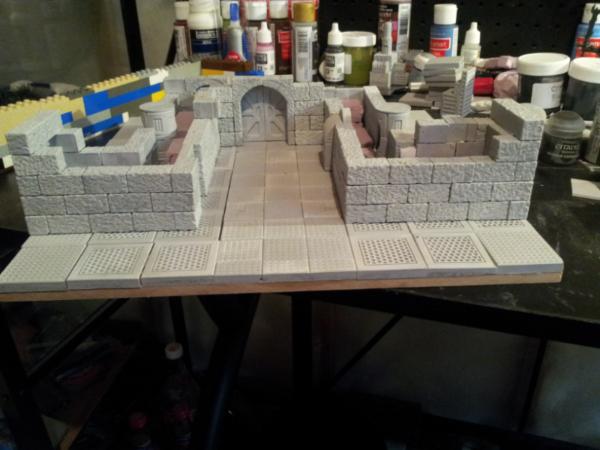
Sorry for the dry spell of updates. got alot of post. here is the 4th tile put together. I started primeing it then realized I forget to take pics.

Group shots will be comeing, getting the 2nd tiles paint job finished up.
Dureing black friday I ordered some more merlin's magic, and some bits and bobs to start work on some small zone mortalis forces. I'm planning on doing clear bases for the forces, i figured that will look really sharp!
|
|
This message was edited 1 time. Last update was at 2013/12/03 21:30:50
|
|
|
|
2013/12/04 02:51:58
Subject: Re:Lockark's project: zone mortalis in hirst blocks.
|
|
Lit By the Flames of Prospero
|
|
|
|
|
2013/12/04 03:53:31
Subject: Lockark's project: zone mortalis in hirst blocks.
|
|
Lit By the Flames of Prospero
|
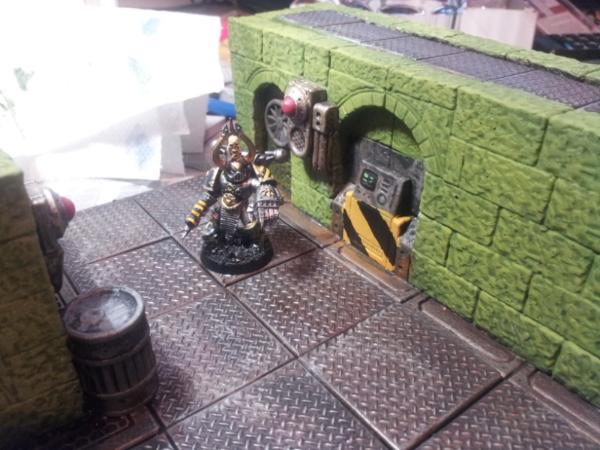
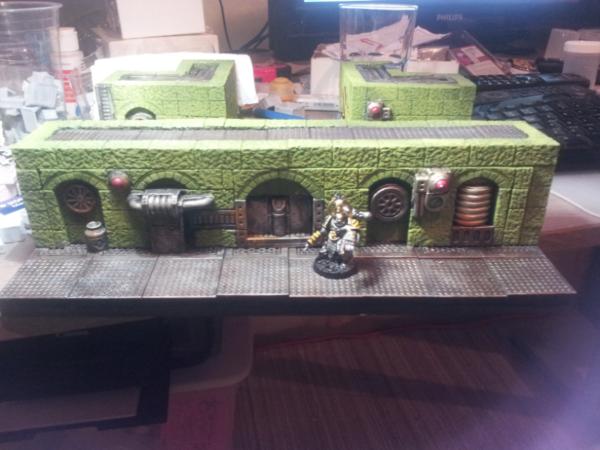
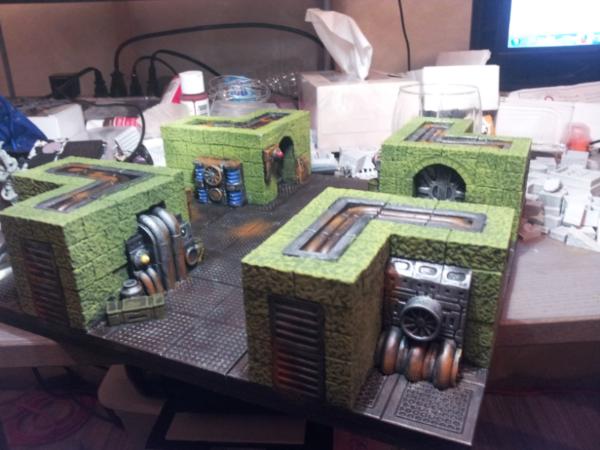
deadmeat85 wrote:Nice choice on the green. Really stands out from the flooring and other bits
Yah, I wanted to advoid a grey stone wall since, it felt like it would all just blend together to much. Still wasn't sure if green was the right choice for some time.
So appreciate the compliment!
|
|
|
|
2013/12/04 21:19:20
Subject: Lockark's project: zone mortalis in hirst blocks.
|
|
Lit By the Flames of Prospero
|
 SilverMK2 wrote: SilverMK2 wrote:Looks pretty awesome. Have you considered making some flat boards and free-standing walls to expand your choice of layouts?
I plan on makeing flat tiles for deployment zones, and areas for area terrian for some varriation. But i like the wall sections glued in place to prevent the pieces from shifting dureing a game. Im picking up non slip rubber mats from the hardware store to put on the table when i use these tiles.
I also realize as i start running out of my 1st 50lb bag of plaster, This table will be over 100lbs. A more rugged gameing table will need to be a investment...
|
|
|
|
2013/12/07 02:51:55
Subject: Lockark's project: zone mortalis in hirst blocks.
|
|
Lit By the Flames of Prospero
|
deadmeat85 wrote: Lockark wrote: Lockark wrote:
I also realize as i start running out of my 1st 50lb bag of plaster, This table will be over 100lbs. A more rugged gameing table will need to be a investment...
 How many tiles do you have after your first 50lb bag?
I got about 4 and a half tiles done so far, with about 15-20 lb of plaster left.
I will also post a pick of the miscast bin to give a idea were a good volume of plaster as ended up. I've gotten better at advoiding miscasts, but sometimes you just end up with a bad cast. You pick out what came out ok, and move on.
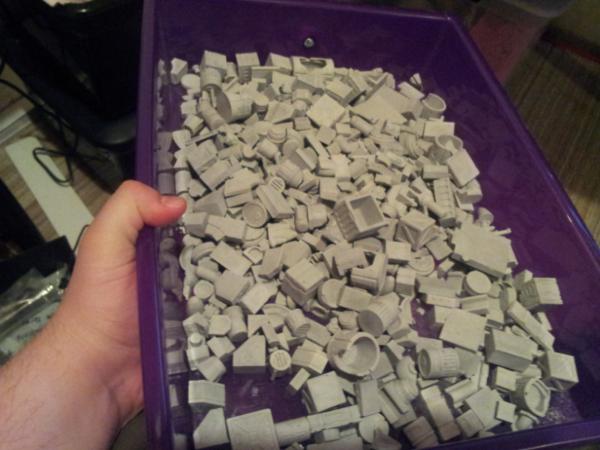
I always try to pick threw and use what I can from the miscasts when building, but their is only so much I can do. I hope to use alot of this as rubble for some scatter terrain.
|
|
This message was edited 2 times. Last update was at 2013/12/07 02:53:43
|
|
|
|
2013/12/14 06:45:26
Subject: Re:Lockark's project: zone mortalis in hirst blocks.
|
|
Lit By the Flames of Prospero
|
So I've been swamped with writing some papers so haven't had much time to burn the hobby oil. But I've got some tid bits to tie things over untill i can start in proper. I've ordered alot of stuff during black friday and it's started comeing in. Alot of stocking up on bitz for future projects and some things for current projects.
For starters: Box #2
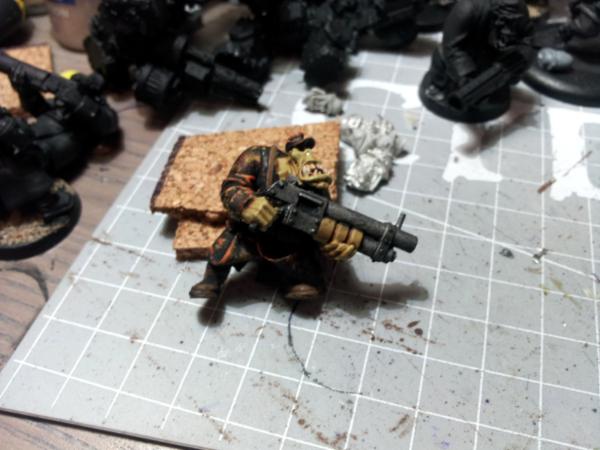
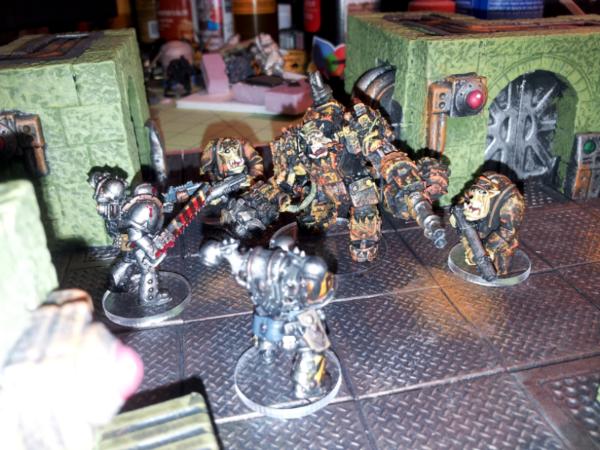
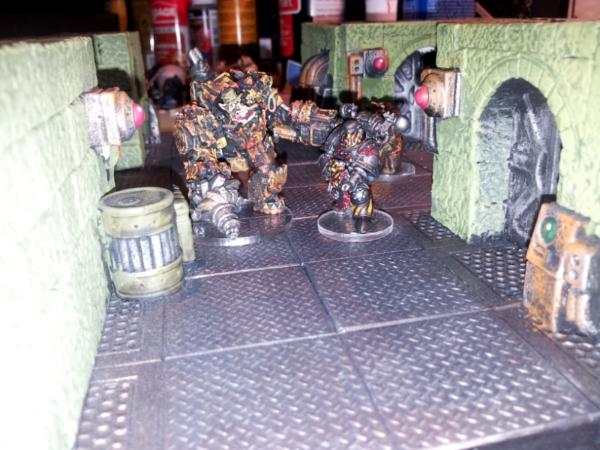
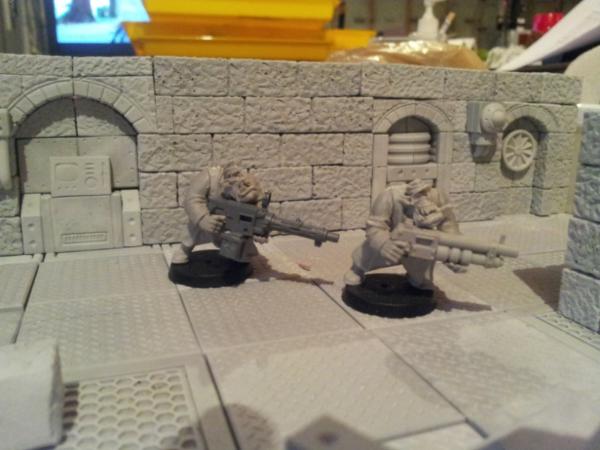
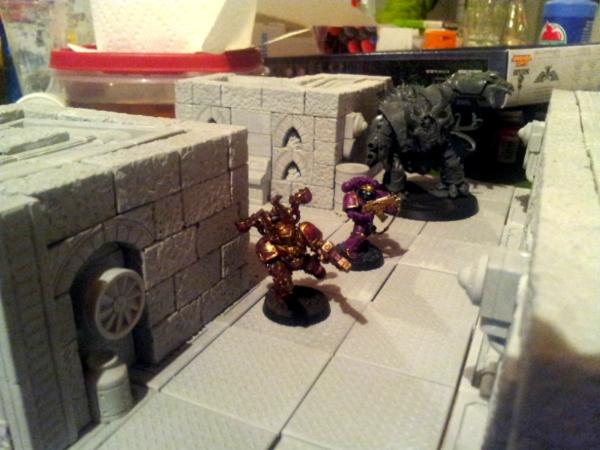
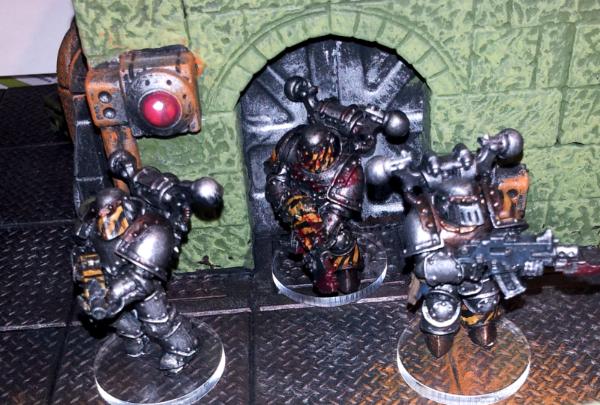
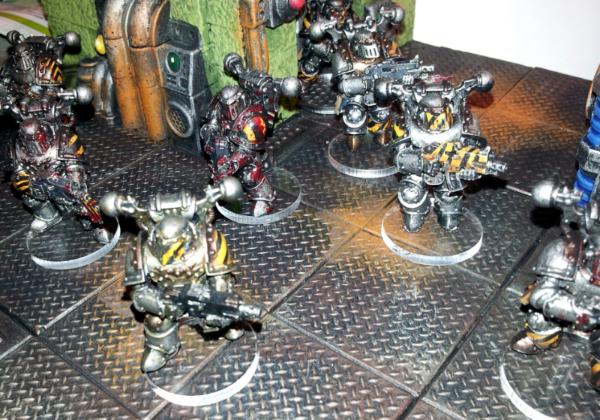
And my Blood Axes got some heavy support for Zone mortalis.
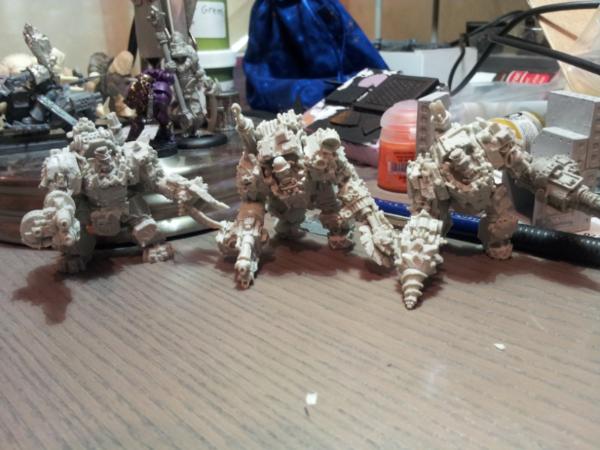
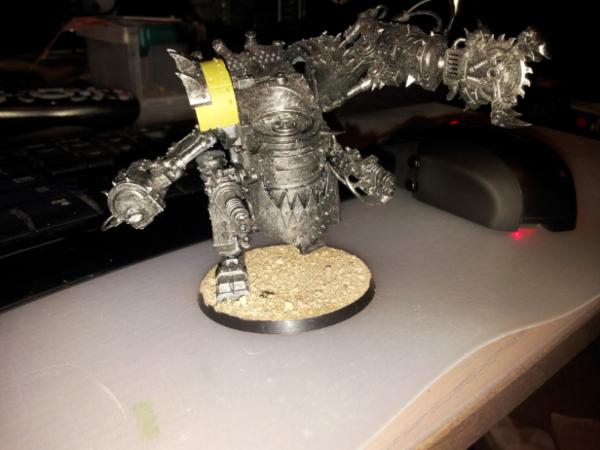
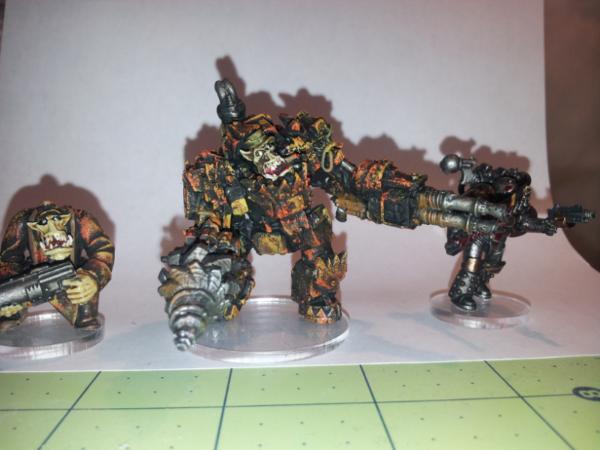
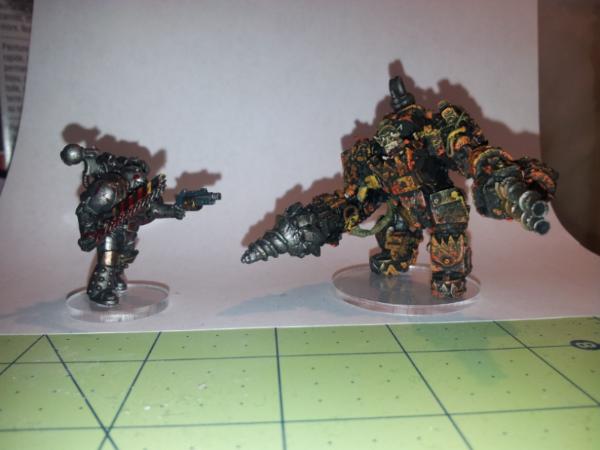
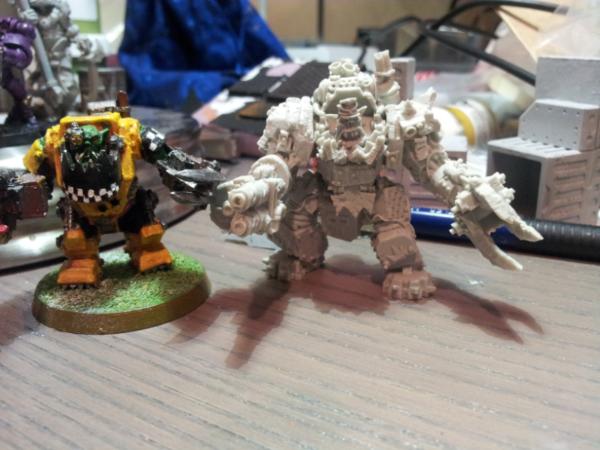
The khromlec meganobz are great! Here he are to a normal GW meganob I got 2nd hand. (not my paint job. Was going to strip the paint off these guys but never happened.
Also here is a Mini review on the MaxMini Necrotec power fists.
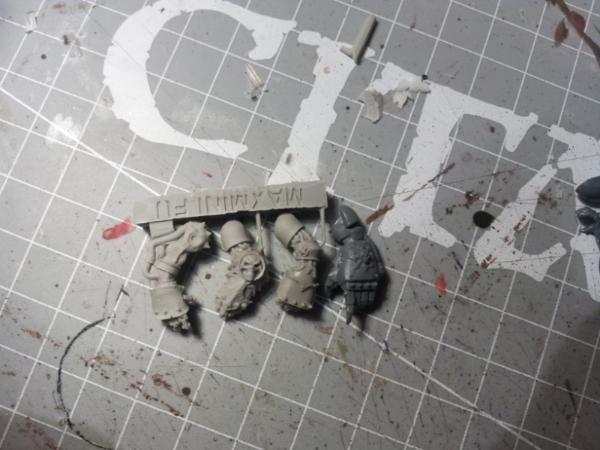
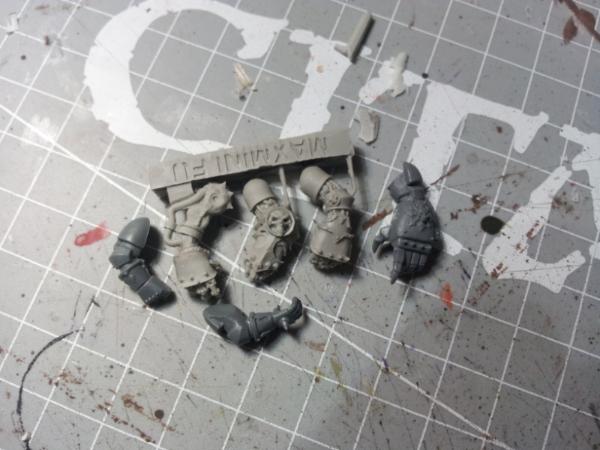
They look great, but they are IG sized. Wanted to use them for some CSM, but they are way to small. Maby I might use them for Chaos servitors or something.
I will be posting scale reference shots of alot of kits and stuff I've gotten, just for other people's reference. As a advid converted i know stuff like that is super important for me. So will be sharing what I've found for others.
|
|
This message was edited 1 time. Last update was at 2013/12/14 06:47:06
|
|
|
|
2013/12/31 02:28:12
Subject: Re:Lockark's project: zone mortalis in hirst blocks.
|
|
Lit By the Flames of Prospero
|
|
|
This message was edited 2 times. Last update was at 2013/12/31 03:53:36
|
|
|
|
2014/01/09 04:47:36
Subject: Re:Lockark's projects: zone mortalis, orks, and more
|
|
Lit By the Flames of Prospero
|
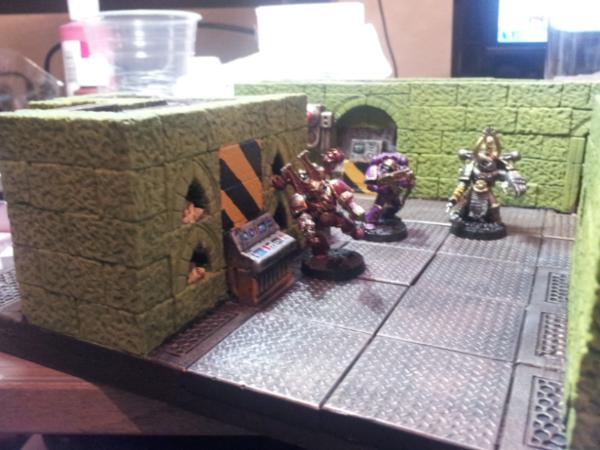
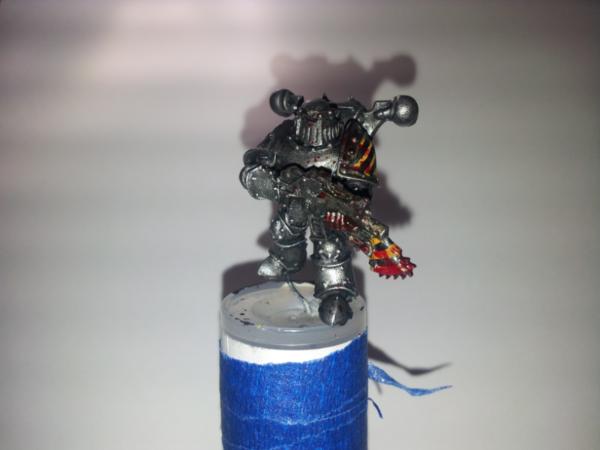
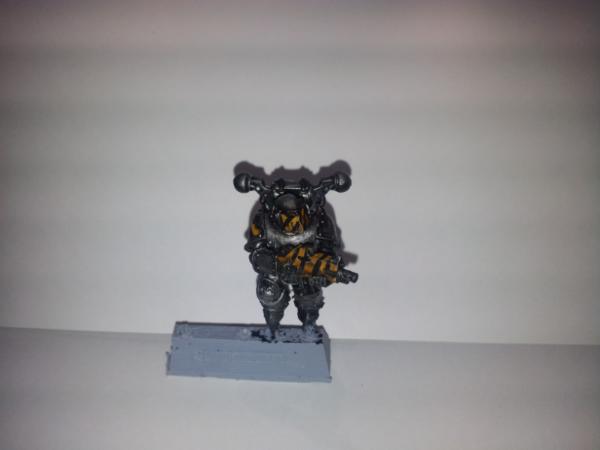
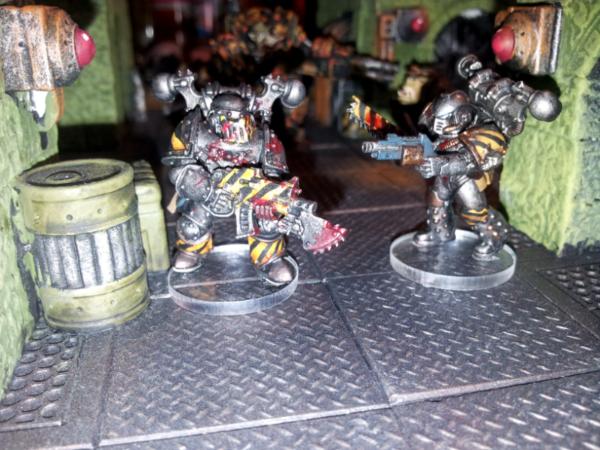
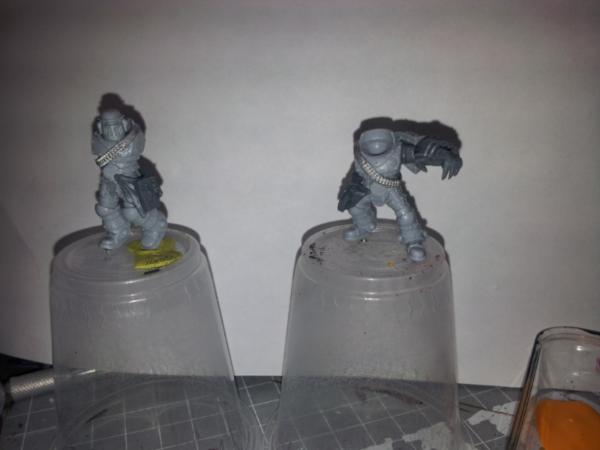
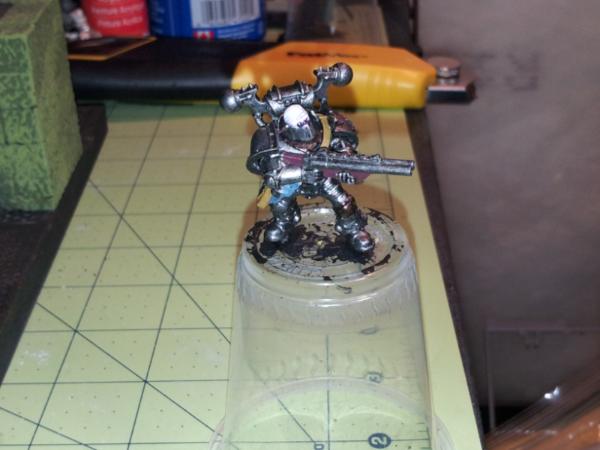
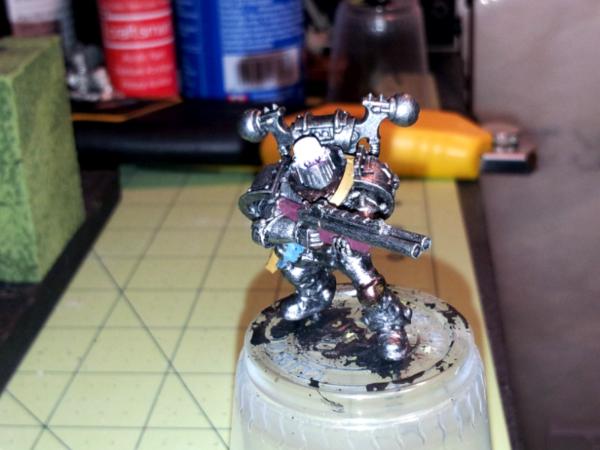
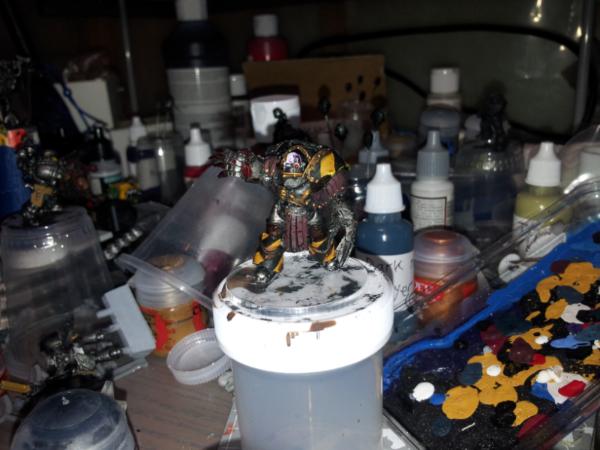
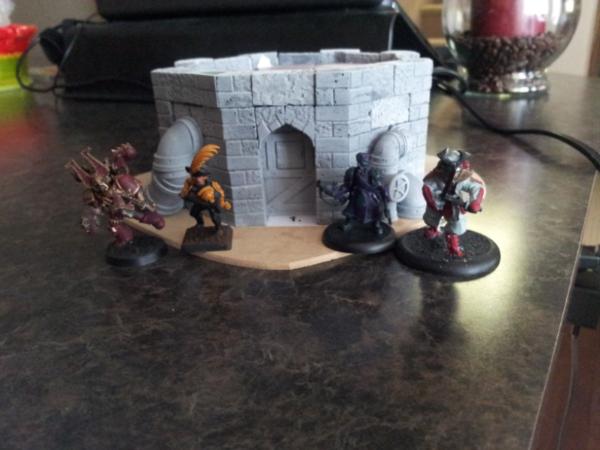
Ok so the Iron Warrioirs are based and i'm realy happy with how they came out. These guys are for a HH era Iron warrioir force and repersent Iron warrioirs after the events of Angel Exterminatus, and the Iron warriors learned of the power of chaos. In this force i will be kitbashing in some CSM bits to help give that chaosy look to them, but they will be useing the HH rules.

Soon I will be rebaseing my orks in these style of bases. Look ace on boards like these!
|
|
|
|
2014/01/22 20:07:50
Subject: Re:Lockark's projects: zone mortalis, orks, and more
|
|
Lit By the Flames of Prospero
|
|
|
This message was edited 1 time. Last update was at 2014/01/22 20:08:44
|
|
|
|
2014/01/24 01:23:39
Subject: Re:Lockark's projects: zone mortalis, HH, orks, and more
|
|
Lit By the Flames of Prospero
|
I actually got mine advance deployment during black Friday. They had some crazy great prices. Got 200+ 25mm bases, with some 30mm and 60mm bases too.
http://www.advanceddeployment.com/
litko is awsome all the same. XD
|
|
This message was edited 1 time. Last update was at 2014/01/24 01:26:58
|
|
|
|
2014/02/08 00:10:57
Subject: Re:Lockark's projects: zone mortalis, HH, orks, and more
|
|
Lit By the Flames of Prospero
|
|
|
|
|
2014/02/08 02:29:34
Subject: Lockark's projects: zone mortalis, HH, orks, and more
|
|
Lit By the Flames of Prospero
|
This is in fact something i have thought of. Sadly their is a number of hurdles that means I would not be able to offer a attractive price.
Issue 1)Due to the amount of hour i put into each tile, i would have to charge alot for it to be worth my time. The hours of block casting and assembly that goes into each tile, bassicly a spend a whole day out of a weekend building just one tile. Not to mention recouping the cost of materials.
Issue 2) It would also be hard to make casts of the whole tiles in one go due to the amount of undercuts I've been putting into the tiles. The coast of materails to make a mould of that size would be crazy, not to mention I've not even invested in custom molds.
Issue3)To top it of these tiles are heavy. I would estimate 5-10 lbs each, once it's safely packed shipping would hurt... ALOT.
Issue 4) If i end up selling these in a large quantities or amounts i would need get a license from hirst arts to be able to sell my work. Thus driving the coasts up more.
If i was to do commistion work, I would rather do smaller terrain pieaces were I would be able to avoid these issues.
I hope that helped. If your interested in starting the same project, I'm happy to answer any questions.
|
|
This message was edited 2 times. Last update was at 2014/02/08 02:36:14
|
|
|
|
2014/02/26 00:05:50
Subject: Re:Lockark's projects: zone mortalis, HH, orks, and more
|
|
Lit By the Flames of Prospero
|
sorry fotr the long reply, by the #'s have rubbed off my moulds. I belive i posted the #'s earlier.
|
|
This message was edited 1 time. Last update was at 2014/02/26 00:08:54
|
|
|
|
2014/03/19 22:39:32
Subject: Re:Lockark's projects: zone mortalis, HH, orks, and more
|
|
Lit By the Flames of Prospero
|
Alrighty so here is a nice image dump for you guys.

My step up since some have asked:
It's such a mess! D=
And with my recent addtions to to my collection, I have started work on some fantsey/steampunk terrian due to wanting to start warmachie and have some more stuff for my brushfire games.

|
|
|
|
|
|