 zammerak wrote:
Yes, Please give more info on this press molding. Also great tips, I also do not like the feet on mk 1 and the tips you gave are a great way to fix that.
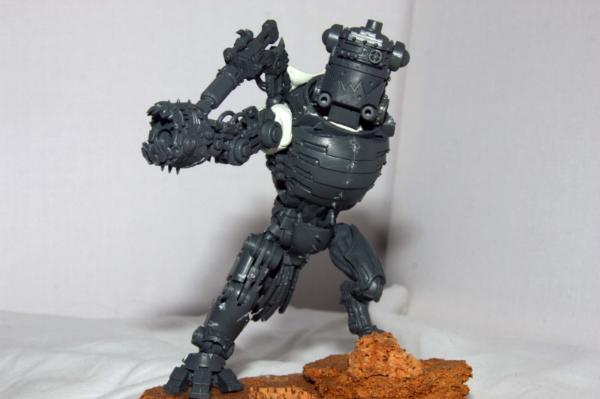
Back to work on the dreads!
Ok, so basically what it is:
Oyumaru comes in plastic rectangles and is basically a re-usable mold. You simply put it in a cup of boiled water and the heat softens it up, you leave it a few mins until its nice and soft. You then press your shapes, sigil, or detail you wish to replicate into the soft dough like plastic. You leave it in there for 10-20 minutes or until its basically stiff and solid again. You then take your piece out. Oyumaru is ever so slightly flexible, which means most of the time its pretty easy to get it out and the oyumaru springs back to the shape you'd made. The only problems come if you trap the piece in there by hooking the edges or something.
With this mold you can now press greenstuff into it to create a piece of
GS with the details from the mold. Typically I use a mix of greenstuff and another modelling putty milliput. The reasons for this are generally that: greenstuff dries flexible and rubber like - thus being hard to sand, but resiliant to brittle breaking. the milliput on the otherhand dries hard and brittle - good for sanding but prone to snapping. by mixing you can take the best of both worlds. a 50:50 mix is a good balance for working with, it remains sandable but not particularly brittle.
You press the mixture/ your putty into the mold shapes and leave it to set (2 hours or whatever). then when you pull it out you have your details that you can now, cut, trim, edit and add more to put on your model. the photo I gave
id created armour plates. But ive used it for: cloaks, sigils, faces and any detail I really liked but wanted on another piece. I think its a very valuable tool and i picked the idea up off this guy:
https://www.youtube.com/watch?v=a4shU7dCXUg He creates some amazing character with it.
Some tips ive picked up too:
When you put the greenstuff into your mold, if you leave it to set for half the time (so its not fully set) and carefully remove it, you can actually take it out with the details undamaged but the greenstuff is still flexible. You can then bend it to change the shape, I did that to add the curvature to my boats plates. In fact he does this in the video.
Secondly, this i tested out as an idea this weekend. The main issue with pressing the greenstuff in is that because you trap air, you force it into the details and corners, this means that you'll lose that particluar bit. Normally i just add it in slow small amounts to counter this. However, I bought a pot of expensive liquid greenstuff. Now usually i wouldnt touch it for the price tag it carries. However, I only need a small amount for this application. You take your mold and before you put in the main of your green stuff you use a brush and apply a coat of liquid greenstuff to the inside of the mold, because its a liquid it allows the air to escape and you coat all the details. However, you dont want to use your expensive liquids to fill the whole mold. So now you take your greenstuff-milliput mix and push that in to (as its way cheaper). What this does is it mixes ever so slightly with the liquid greenstuff, creating a slightly rubberised front detail part, with a much more solid and resiliant core. The only draw backs would be - The front details wont be very filable (as its pure
GS) and i dont think you could remove it halfway through drying to bend. But im not sure I havent tested this yet, if the liquid greenstuff dries faster and fully while your core mix still dries then it will be possible.
Here is a link to the stuff on amazon in the
UK:
http://www.amazon.co.uk/Oyumaru-Reusable-Modelling-Compound-Clear/dp/B0058GYGAQ/ref=sr_1_1?ie=UTF8&qid=1396263196&sr=8-1&keywords=oyumaru
I honestly really like this stuff and have been doing some awesome stuff that I clearly could not achieve through my
GS sculpting skills.


 Perhaps have a scout about for an interestingly shaped piece of plastic, and old toy, or any item that you think would make a great body piece. Then from that you can start adding parts from your bits box and build up some armour panels etc in plasticard. In terms of size, I wouldn't be too worried. As long as it fits onto a base that the mega-dreads fit onto and its not stupidly small then you'll be fine
