This is my first of hopefully many tutorials please leave advise on how I can make them better in the future! I hope this is helpful, enjoy!
HOW TO CREATE TANK CAMO USING STICKY STENCILS ON THE CHEAP!
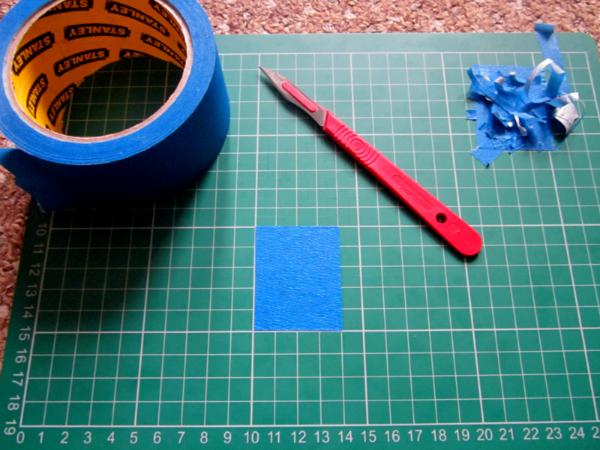
You will need:
-Roll of professional grade masking tape extra wide (£1-2 form most diy stores)
-Sharp craft knife
-Cutting mat
-Rubber paintbrush or cotton bud
-3 colours of spray paint or an airbrush (optional but preferable)
Step One: Prime your Tank, cut out your stencils.
For this project I wanted a way of showing tau vehicles disruption camo. I decided on a mix of digital camo and noise.
For the first layer you will need to have primed your tank a colour of choice, im working dark to light but you could go light to dark or even multi colour.
Set the tank aside for awhile to (24 hours in my case) to properly dry.
Once your happy cut a piece of tap from the roll and stick it to the grid on your cutting mat, neaten up the edges so its square.
Now you can either use a pencil and ruler so draw out your pattern or just get cutting using the grid to guide you. I was in a rush so I went free hand.
 Step Two:
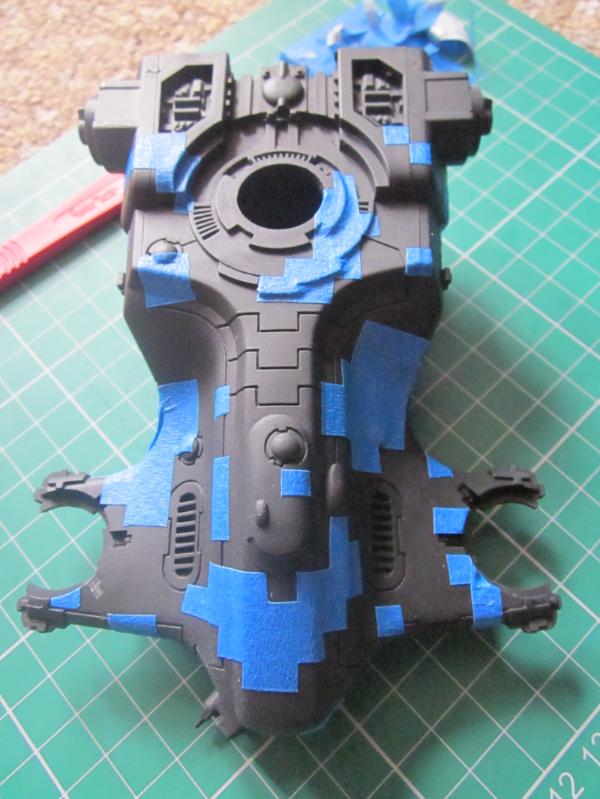
 Apply the decals.
Carefully peal off your designs and line up your decals on to the tank and stick them into place.
Use your finger nails, rubber paint brush/spreader or cotton bud to push it firmly but gently into the recesses and to get it to conform to the shape of the tank.
 Step Three:
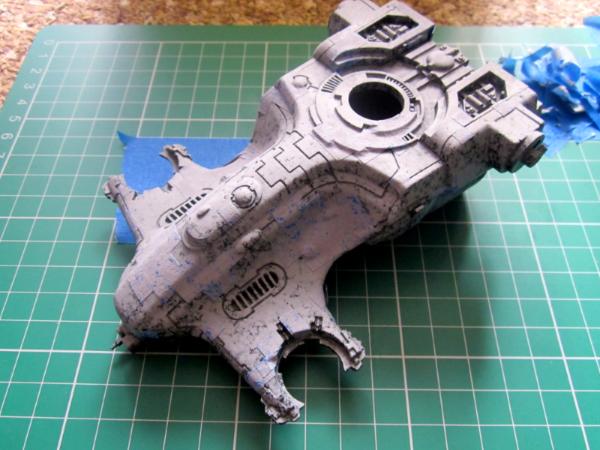
 Paint your chosen mid-tone.
I wanted to have a bit more texture and interest to the design and in my mind fluff the tau disruption camo moved and distorted creating different shapes and sizes along with fluctuating noise patterns to work like an advanced form of WW2 navel camo.
So I applied the grey layer as a spatter using a tube nozzle. You can get a lot of different spray can nozzles, look at pro graffiti suppliers for bitz.
Apply the paint slowly and evenly, if its too wet or it pools it will bleed under the tape.
Set aside and allow to dry (as above).
(Notes on brush painting: If you wish to hand paint, use a paint that hasn't been overly thinned and apply it lightly using your brush outwardly from the centre of each decals, never up against/on to the edges of them. This should reduce any bleeding.)
Step Four: Second set of decals.
Repeat step two over the top of step three, at this point we do not remove any thing! Just add your layers of decals don't be afraid to have them over lapping it will add to the effect.
(sorry no picture for some reason

)
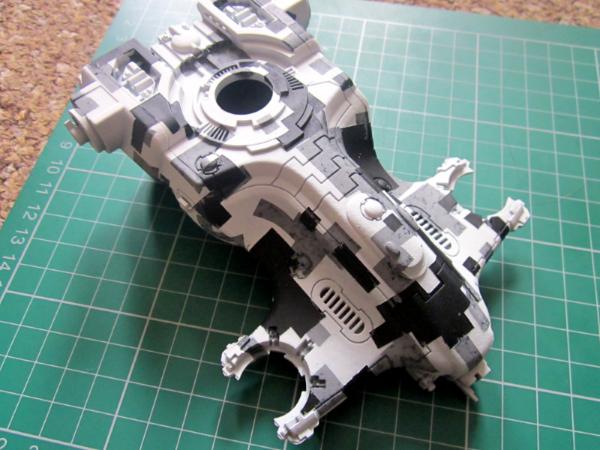
Step Five: Paint the top layer.
As with step three, apply the paint slowly and evenly, if its too wet or it pools it will bleed under the tape.
Set aside and allow to dry (as above).
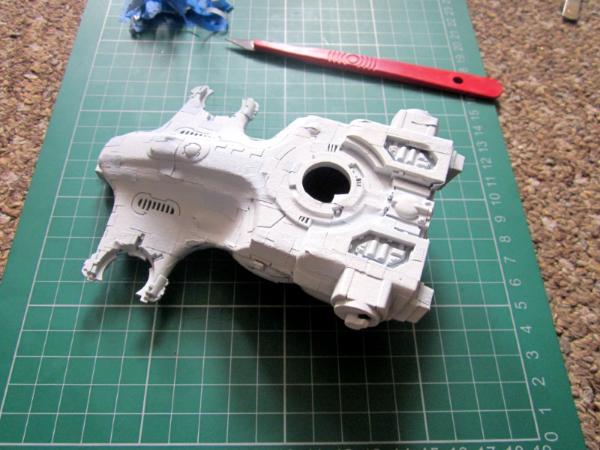
Step Six: Remove decals.
Once the model is (fully!!!) dry peal off the decals pull them in a direction suiting to the shape so they don't pull at the paint work but peal off. I found my nail or the back edge of the knife where good to get it started some times at a couple of angles to loosen the design.
try to do a layer at a time to reduce stress on the paint work.
Once off you may have a little peeling or bleeding here and there, so go ahead and use a brush to touch up any spots that need it.
I rushed this and used a wet coat of dry and I only had one tiny tiny peel and a hand full or so grey bleeds mainly into the line work between armour panels, and only from the grey paint, so normal spraying should leave perfect results.
Now you can get to work adding in details and shading the armour panels!
I repeated these step simultaneously on the engines and weapons, so which ever vehicle you do
id do the same and leave off any big pieces to be decaled and painted separately.
Once the model is fully painted i'll post up shot.
Good Luck with your own CAMO!


 3500pts
 1500pts
 2500pts
 4500pts
 3500pts
 2000pts
  2000pts plus several small AOS armies
  Brotherhood of redemption 4000
 Children of the grave 8000
 Errendor militia 3500
 Waaagh an' a 'alf
 1500 Pts WIP