Forum adverts like this one are shown to any user who is not logged in. Join us by filling out a tiny 3 field form and you will get your own, free, dakka user account which gives a good range of benefits to you:
No adverts like this in the forums anymore.
Times and dates in your local timezone.
Full tracking of what you have read so you can skip to your first unread post, easily see what has changed since you last logged in, and easily see what is new at a glance.
Email notifications for threads you want to watch closely.
Being a part of the oldest wargaming community on the net.
If you are already a member then feel free to login now.
2014/08/03 02:29:59
Subject: Strangelooper's Tyranids (1500 pts) at AstroTO: 6 battle reports (photos). Games 1-5 complete
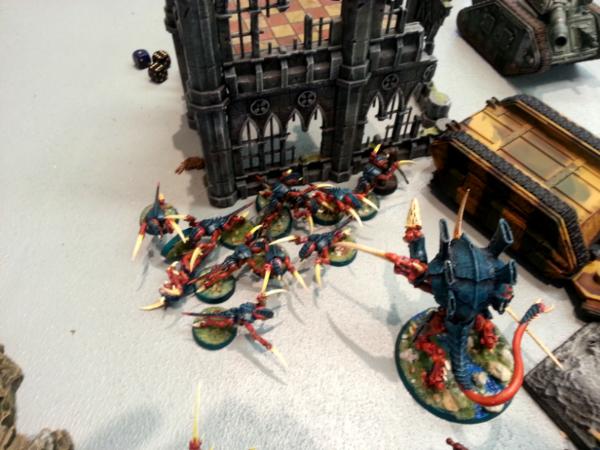
I took my Tyranids to Astronomi-con Toronto last weekend, and had a blast! Got in six games against some great opponents.
Billed as "the tournament for people who hate tournaments", and catering to "the complete hobbyist" (ie using heavy weighting on soft scores) AstroTO tends to have a wide variety of armies and lists. Hardcore netlists are rare. The tournament has a unique format where each of the 30 tables has a specific custom mission. Also, each player may select a Warlord trait (must remain the same throughout the tournament) instead of rolling for one. For each Psyker, the discipline tables that they will roll on must be preselected (and remain consistent throughout the tournament) as well.
Other than that, the format is 1500 pts: required 1 Combined Arms detachment; and also allowed ONE of the following detachments: Allied, Inquisitional, Legion of the Damned, or a Formation of your faction. Forgeworld is explicitly allowed, but no Lords of War.
I thought that being able to lock in Master of Ambush might make assaulty Nids semi-competitive. I would have loved to have bolstered it with a Living Artillery formation, but I sadly just didn't have time to paint up the models. :(
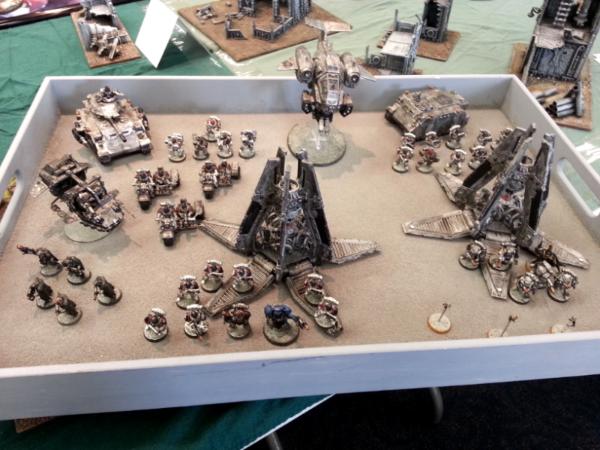
My List:
HQ: Warlord (Master of Ambush)
Hive Tyrant with 2x Twinlinked Brainleech Devourers, Adrenal Glands, Toxin Sacs, Old Adversary
3 Tyrant Guard with Adrenal Glands, Toxin Sacs
Fast Attack Harpy with twinlinked Stranglethorn Cannon, Cluster Spines
4 Raveners with Scything Talons and Rending Claws
Heavy Support: Trygon with Adrenal Glands
List Design: Ok, most of the design was based around what models I already had painted up and ready to go This is obviously not a hard-as-nails list, not even close. However, with Master of Ambush locked in I'd have great flexibility of deployment, so I could tailor to my opponents and the various missions using infiltrate and deepstrike. My Hive Tyrant would always have Infiltrate. I'd have to use up one Inflltrate slot for the Tyrant Guard unit, and that would give me two more. I could give those to the Warriors, Raveners, Hive Guard, even the Trygon or Hormagaunts. The Trygon, Harpy and Raveners would also have the option of deepstriking.
HQ: WARLORD: STORM OF FIRE Captain with Artificer Armour, Power Fist
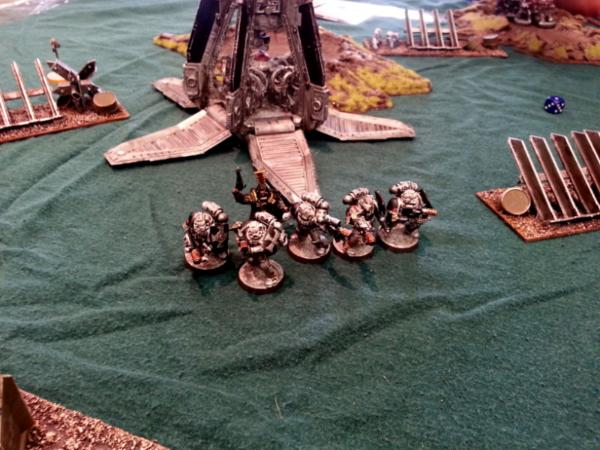
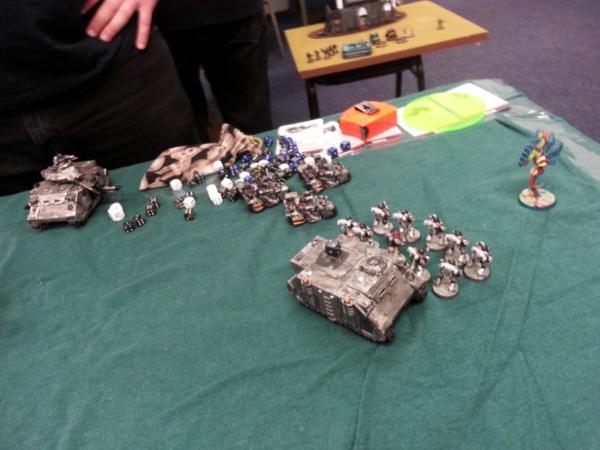
ELITES: Terminator Assault Squad Sgt with TH/SS 4 Assault Terminators (2 TH/SS, 2 paired LC) Dedicated Transport: Land Raider
TROOPS: Tactical Squad Veteran Sgt with Power Weapon 9 Space Marines, 1 Flamer
Tactical Squad Veteran Sgt with Power Fist 9 Space Marines, 1 Plasmagun Dedicated Transport: Rhino
FAST ATTACK: Land Speeder Typhoon MultiMelta, Typhoon Missile Launcher
HEAVY SUPPORT: Devastator Squad Sgt (BP/CCW) 4 Space Marines, 2 Lascannons, 2 Missile Launchers (with Flakk)
Land Raider Proteus (FW) Multimelta, Explorator Augury Web (grants Scout; can either give -1 enemy reserve rolls OR +1 own reserve rolls)
MISSION AND PSYCHIC POWERS: "Urban Sprawl"
Spoiler:
Special Rules: Clearing Ruins: A ruin is cleared at the end of any player turn when one player has scoring units in the ruin, and the other player has none. Place a marker to show that the ruin has been cleared. Markers remain even if you then leave the ruin vacant. However, if an enemy unit ends its movement in a vacant ruin with your marker, the marker is removed.
Primary Objective: +9 Cleared more than opponent. +5 Cleared same number of ruins as opponent +1 Cleared fewer ruins than opponent
Secondary Objectives +2 Cleared a ruin in opponent's deployment zone +1 Cleared a ruin that is completely in opponent's table half +1 Warlord is occupying a cleared ruin at end of game +1 Removed an opponent's Cleared Ruins marker during the game +1 Have units in more Table Quarters than opponent.
PSYCHIC POWERS: I get Psychic Scream and Catalyst on the Tyrant; Onslaught on one Zoey and Paroxysm on the other. My opponent has no Psykers.
Thoughts: This should be pretty straightforward with Master of Ambush: Pin him in his deployment zone with aggressively infiltrated units (which also clear mid-field ruins on the way in, and remove his markers after killing his units) and use my weak units to clear ruins in my own deployment zone.
I definitely want to start all my models on the table, for both threat overload and to claim as many ruins as possible. Also, he can give me -1 Reserves with his Augury Web, so I don't want to have anything in Reserve anyways.
Catalyst on the Tyrant is sweet, though Psychic Scream is lame. Onslaught on the Zoey is nice if he's in range of the Hive Guard or Harpy, Paroxysm is situationally useful (at least it's long range).
DEPLOYMENT
Spoiler:
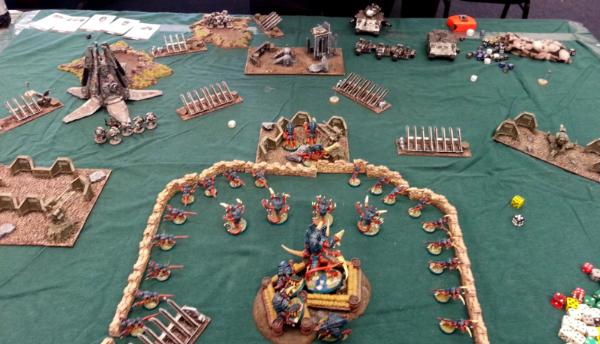
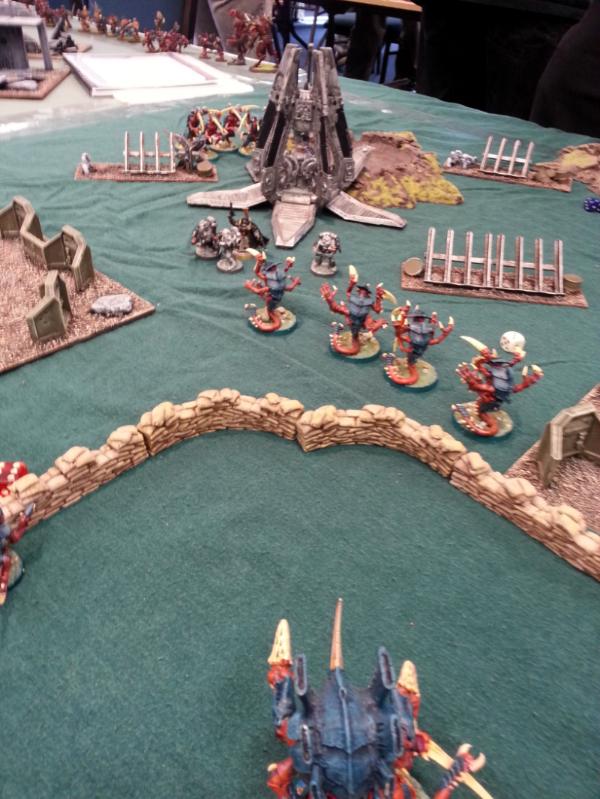
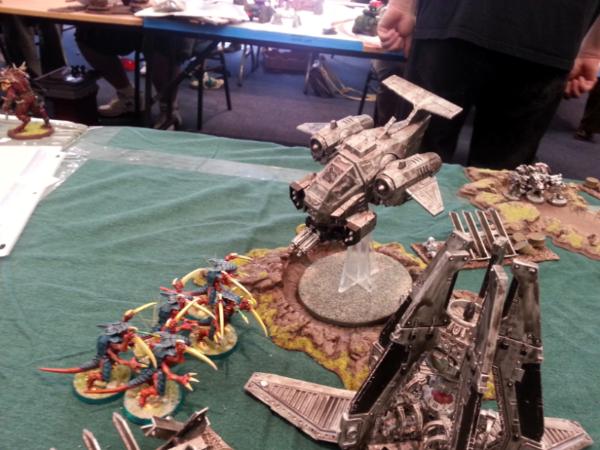
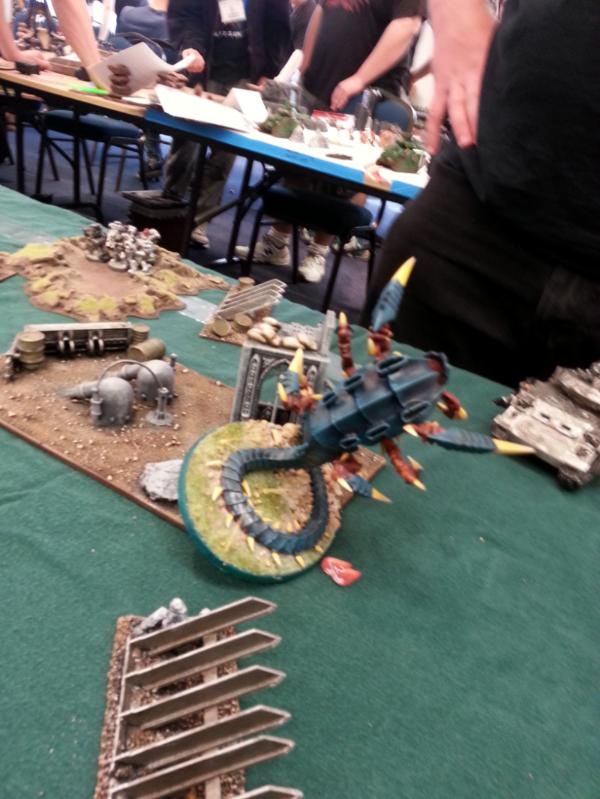
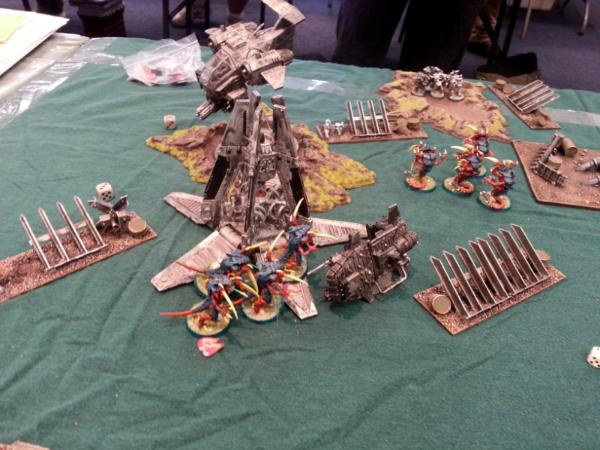
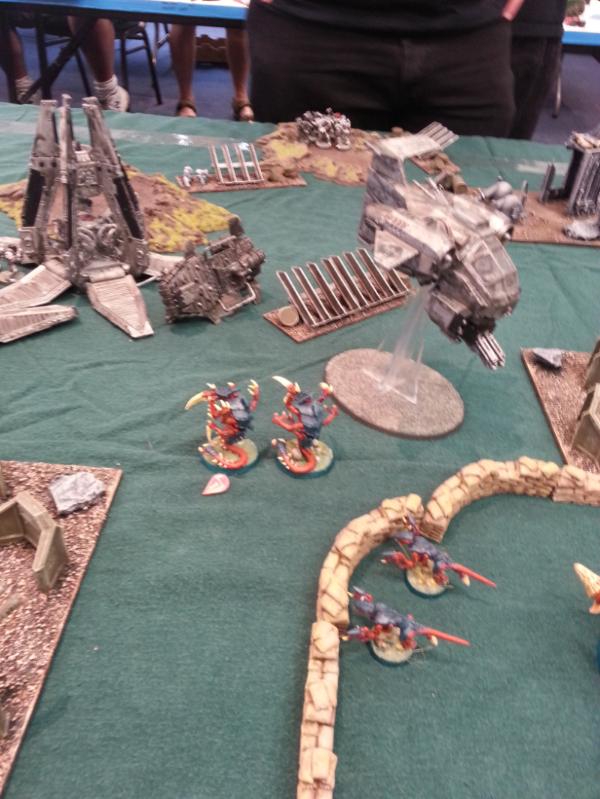
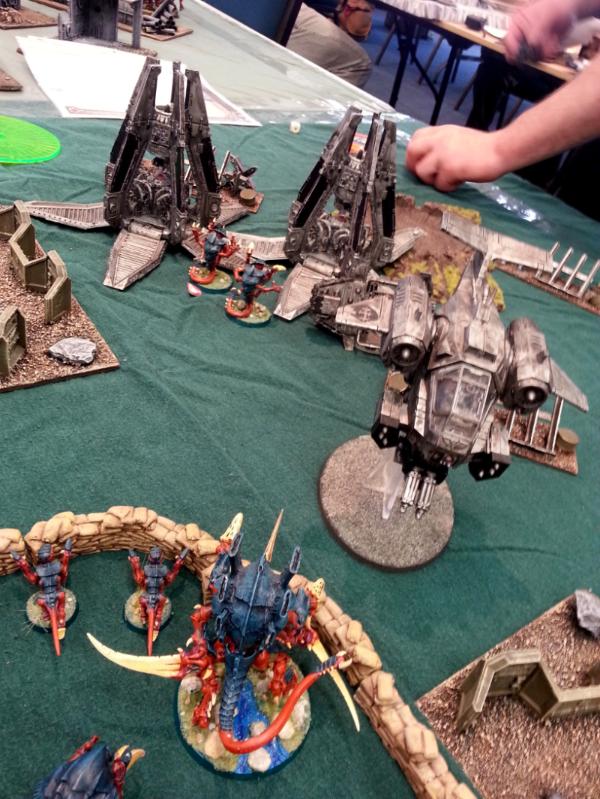
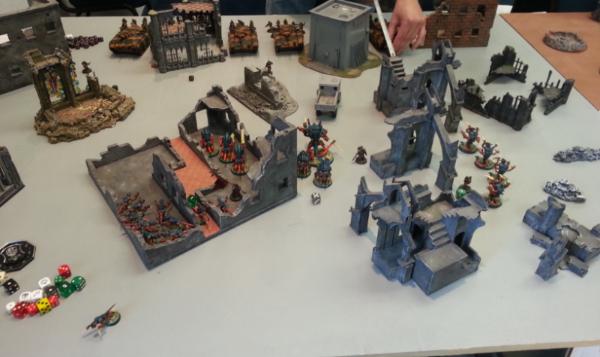
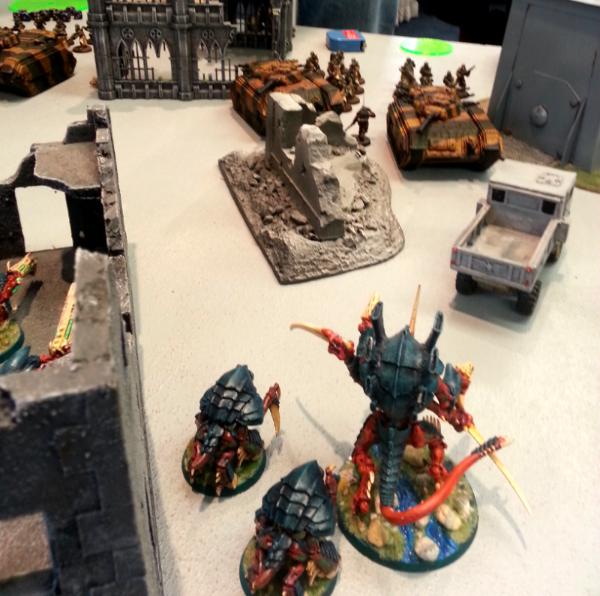
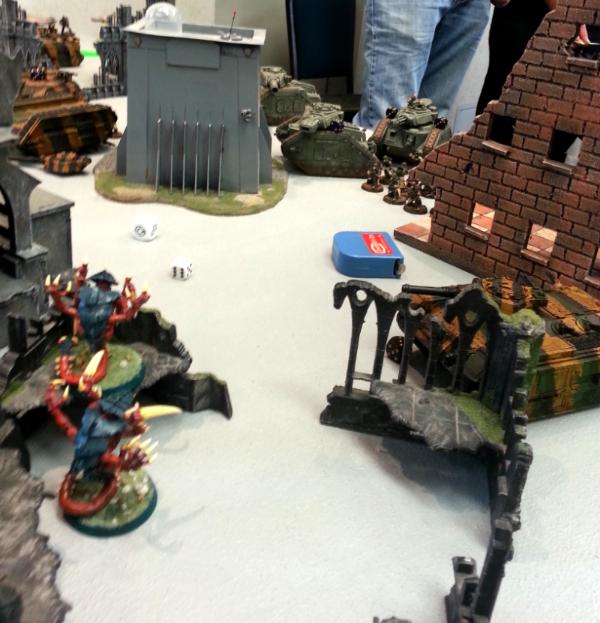
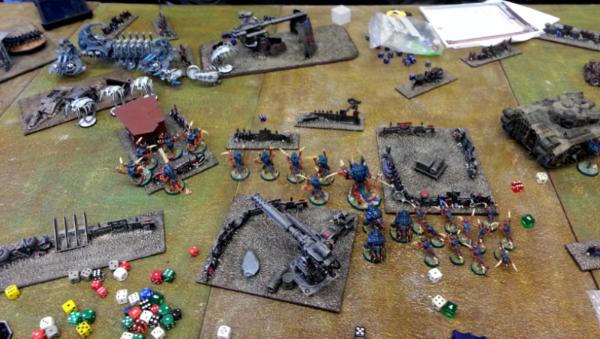
I deploy first: Hormagaunts and Paroxysm Zoey on the left, then Raveners, Spinegaunts and Onslaught Zoey, Harpy and Trygon. I infiltrate the Tyrant and Tyrant Guard, as well as the Hive Guard, on the center-left in cover. The Warriors infiltrate to the left of them, in front of the Raveners (and opposite those juicy Terminators)
He reserves (outflanking) his LR Proteus with his Captain and a combat squad of his first Tactical Squad inside (with Sgt and Flamer). The other combat squad of that unit will walk on from reserves normally. He puts his Assault Termies in a ruin on the left (from my perspective), then their Land Raider. Landspeeder hides behind the ruin next to the Land Raider, and the Rhino with plasmagun Tac Squad hide behind a center-right ruin. Devastators deploy into a ruin on my far right.
He rolls to Seize Initiative - and is successful! I'm glad I deployed (mostly) into cover...
Turn 1a Space Marines
Spoiler:
Assault Terminators move up. Land Raider hits the Hive Tyrant with a Lascannon shot, but he makes his cover save. The Land Raider's Heavy Bolters under Machine Spirit strip a wound from a Warrior. Landspeeder typhoon shoots at the Tyrant Guard, but they make 3 of 3 cover saves. Rhino moves up: its stormbolter hits the spinegaunts, but fails to wound. The Devastators manage to put a single wound on the Trygon.
My save dice are hot this turn!
Space Marines clear all 4 ruins in their Deployment Zone: one each by Assault Terminators, Land Raider, Rhino, Devastators
Tally of Cleared Ruins: SM 4, Tyranids 0
Turn 1b Tyranids
Spoiler:
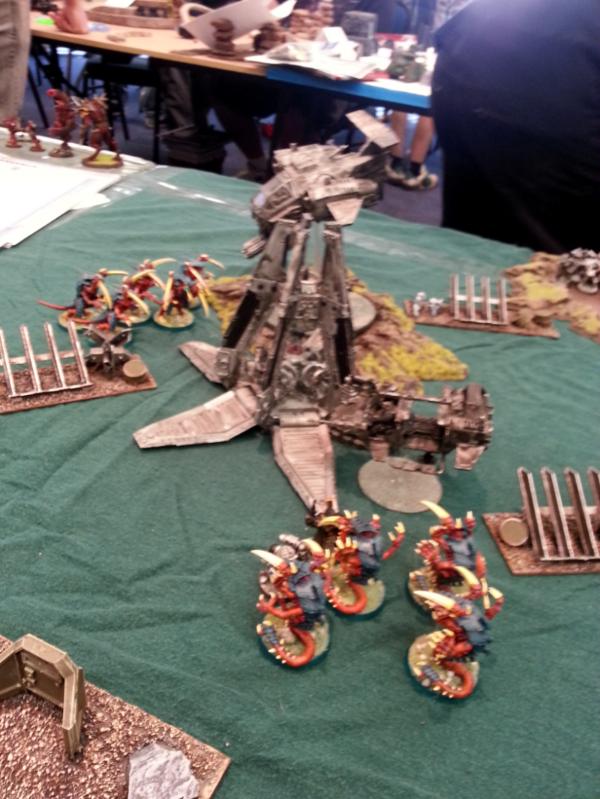
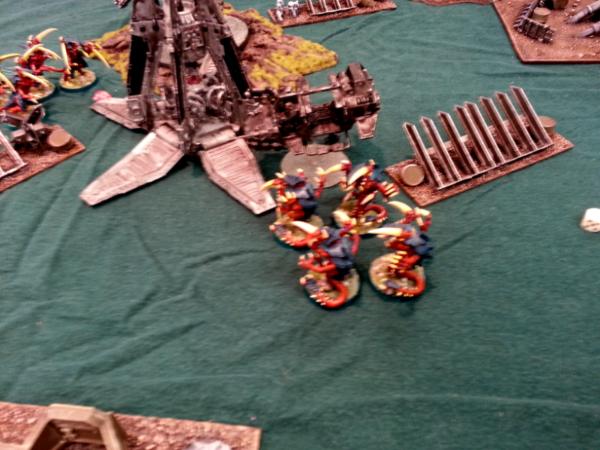
Warriors and Hormagaunts move up on the left, both entering ruins. Tyrant moves out into the open. He successfully casts both Catalyst (on himself and on the Warriors) and Dominion, and shoot the Landspeeder (glancing it for 1 HP). The Hive Guard move up to claim the center-left ruin, and fire blind into the Rhino, destroying it and dumping out the tac squad (who clump up conveniently behind it. The Harpy swoops straight forward over 2 ruins and dumps 2 large blasts into the tac squad, hitting all of them twice but only killing 2. Zoanthropes stay put in their ruins; the center one tries for Dominion but gets denied. The Spinegaunts spread forwards and backwards into two separate ruins. Trygon moves up but does not make it to the center-right ruin. I retroactively (oops) do Instinctive Behaviour for the Harpy and Trygon, but they're both fine.
Tyranids clear 7 ruins: Zoanthropes each clear one and spingaunts clear a 3rd in my deployment zone; Hormagaunts, Warriors, Hive Guard and Spinegaunts each clear one in the middle of the table.
Tally of Cleared Ruins: SM 4, Tyranids 7
Turn 2a Space Marines
Spoiler:
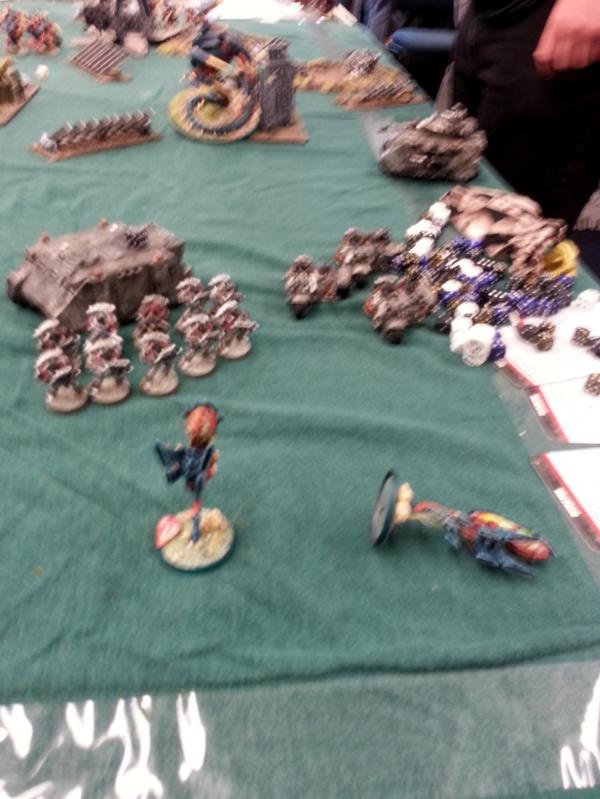
Land Raider Proteus outflanks on my left, disembarking a combat squad (with PW Sgt and Flamer) as well as his Captain. The bolters put a single wound on my nearby Zoanthrope. The other combat squad walks on from his table edge, behind his Land Raider. The Assault Terminators move up but don't quite make it out of their ruin - the edges of their bases are half-out though, which will prove critical. Land Raider shoots my Tyrant, putting 2 wounds (one LOS'd to a Guard) on the unit despite Feel No Pain from Catalyst. The Landspeeder, Devastators, and Tac squad pour fire into the Swooping Harpy, which I elect NOT to Jink - it takes 4 wounds, but passes it's grounding test.
Space Marines do not clear any additional ruins this turn. Would have got one (and removed one of mine) had my Zoanthrope failed one more save...
Tally of Cleared Ruins: SM 4, Tyranids 7
Turn 2b Tyranids
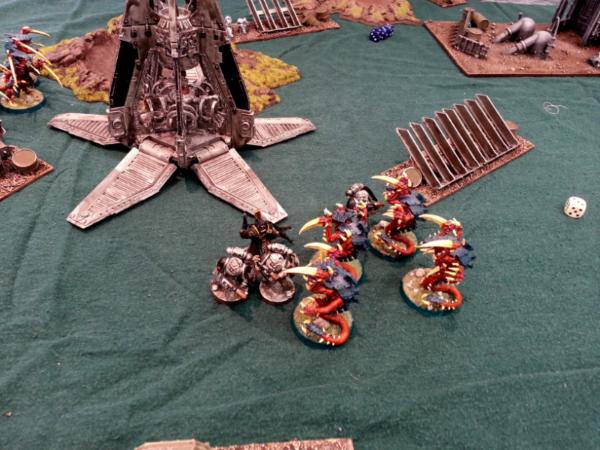
Spoiler:
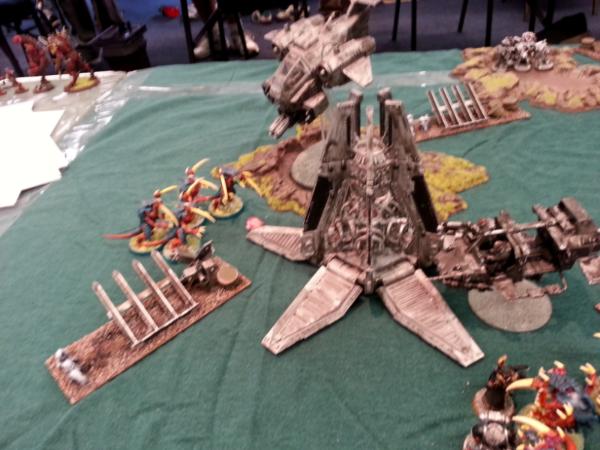
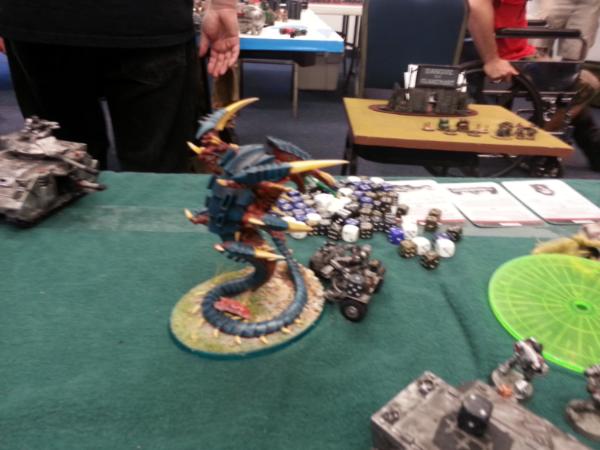
The Hive Tyrant moves up, casts Catalyst on itself and the Warriors, and then charges the Land Raider. A smash from the Tyrant and a few rends from the Furious-Charging Tyrant Guard put 3 HP on it, shake and stun it.
The Hive Guard shoot the Landspeeder, which is easily destroyed after realizing that Jink is, indeed a cover save (that is ignored by Impaler Cannons).
The wounded Zoanthrope casts Paroxysm on the Captain and his combat squad, reducing their WS and BS by 1. The Hormagaunts move back and charge in to the squad, losing 1 to the Flamer's overwatch and 2 more in close combat. The remaining 8 Hormagaunts kill 3 Marines, but the squad holds.
The middle Zoanthrope gets Dominion off and gets the Spinegaunts in synapse. The Harpy and Trygon both pass their IB tests, and each moves to clear a building. The Harpy glides so it can do so (the Flakk missiles are certain to kill it next turn even if it swoops), and shoots the Tac squad again. The blasts kill another 4 Tactical Marines, but the remaining 4 hold firm. I consider trying to get a long charge in from the Trygon, but elect to stay put and claim the ruin that it's in for now..
The Warriors and Raveners both charge the Assault Terminators - fleet on both is critical here for achieving the charges. I move the Warriors in first, and manage to leave room on the far right only for the Raveners to get in. The Raveners contact two Termies who have their bases sticking out of cover, so they get to strike at Initiative 5. Their 20 attacks hitting on 3+ deal several rends and a bunch of normal wounds: he loses one TH/SS termie to a rend, and then the only Termie in base contact with the Raveners is a lightning claw guy, who also falls (before he gets to strike!). The remaining lightning claw Termie misses all 3 attacks at 4+ to hit the WS5 Warriors (!). The Warriors hit at Initiative 4 (Flesh Hooks) on 3+, wounding on 3+ with a re-roll (poison and S5 from furious charge). They wipe out the last two Thunder Hammers before they can swing. Only a single Lightning Claw Terminator remains alive, but in a fit of optimism he holds firm (and checks the batteries in his claws)...
Tyranids cleared 2 more ruins (one each by the Harpy and Trygon)
Tally of Cleared Ruins: SM 4, Tyranids 9
Turn 3a Space Marines
Spoiler:
Unbelievably, time is called just before we get to turn 3! Only two turns in two hours...wow, that is crazy, even considering that it was first game and everyone was moving a little slowly.. The only other time that has happened to me was fighting against a Tyranid swarm army a few years ago.
Game Over
Turn 3b Tyranids
Spoiler:
Game Ended before Turn 3
Turn 4a Space Marines
Spoiler:
Game Ended before Turn 3
Turn 4b Tyranids
Spoiler:
Game Ended before Turn 3
Turn 5a Space Marines
Spoiler:
Game Ended before Turn 3
Turn 5b Tyranids
Spoiler:
Game Ended before Turn 3
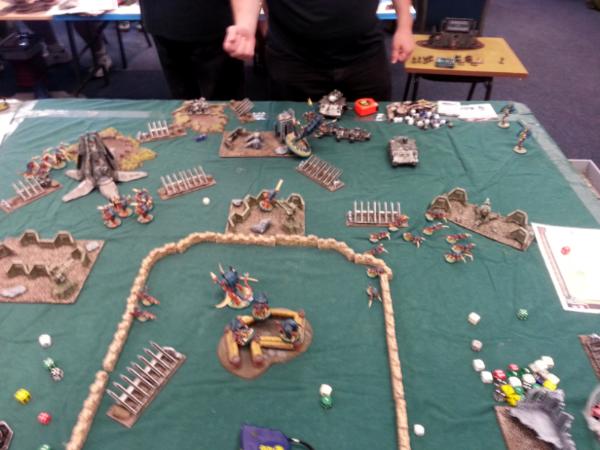
RESULTS AND POST-GAME THOUGHTS:
Spoiler:
Results: Clear win for the Tyranids, who cleared 9 ruins to the Space Marines 4. The only secondary objective achieved was that the Tyranids had models in all 4 table quarters, while the Space Marines had only 3.
Final Score 10 - 1 Tyranids!
Post-Game Thoughts
The mission definitely favoured my army, with the ability to infiltrate into ruins outside my DZ and move quickly. I was able to stall his advance (especially with the 1st-turn kill of his Rhino) and put my rending claws on high-value targets. Adrenal Glands were key here, and poison + furious charge on the Warriors definitely helped against the terminators - 25 attacks hitting on 3's, then wounding on 3's with a re-roll was devastating. I was glad I hadn't chosen to Jink with my Harpy, as her shots were quite effective against the Tactical Squad. Leaving her and the Trygon out of synapse didn't hurt me at all: with LD 10 and 8, they made their tests every turn. I should probably have deployed my Onslaught Zoanthrope nearer to the right side though, in retrospect.
My opponent poured a lot of high strength shots into my Catalyst-ed Tyrant, instead of focussing down the Hive Guard and/or Warriors which would have been more productive.
The Hormagaunts were surprisingly effective against the combat squad on the charge, and it was a bit of a toss-up as to whether (had the game continued) they would have been able to hold the Captain long enough for the Raveners and/or Warriors to get back there to finish him off.
As for the short game: Part of it can be chalked up to my opponent and me both having played few games of 7th edition prior to the tournament. However, I really think that tournaments need to be 2.5 - 3 hrs long, even if fewer games get played. While all of my subsequent games.went to further turns than did this one, I only finished one of them - all of the others ended prematurely.
Had the game continued, I would surely have lost my Harpy and probably my Trygon to the Devastators, but the Tac marines would get eaten first. I think I would have cleaned up on the left side. The Tyrant would have finished off the Land Raider easily, eaten the combat squad behind it, and maybe eventually have gotten range on the Devastators by turn 5. The Captain and sgt would surely die to the Raveners and/or Warriors. The LR Proteus would likely have had fun driving around clearing ruins, since only the Tyrant was really a threat (Warriors could technically glance AV14, but only on 1/18 of their furious-charging hits). I suppose any surviving Zoanthropes could have tried to Lance it. I can't see how I could have lost the primary objective due to my early momentum of ruins-clearing - he just didn't have enough units left to reverse that.
All in all, I think my list was a pretty good foil for his. He had a lot of defensive power that was ineffective against all the infiltrating/fleet rending that I brought, and his offense was insufficient considering the sheer number of units that I had. Although, if the Land Raider and Speeder had focused down the Warriors and/or Hive Guard instead of the Tyrant, it would have gone considerably worse for me.
This message was edited 2 times. Last update was at 2014/08/10 15:33:13
HQ:
WARLORD: LORD OF UNREALITY
Herald of Tzeentch: Psyker level 2, Exalted Gift
Herald of Nurgle: Psyker level 1, Locus of Fecundity (Feel No Pain), Lesser Gift
Herald of Nurgle: Psyker level 1, Locus of Fecundity (Feel No Pain), Lesser Gift
TROOPS:
10 Pink Horrors of Tzeentch
10 Pink Horrors of Tzeentch
15 Plaguebearers of Nurgle, Plagueridden with Lesser Reward
15 Plaguebearers of Nurgle, Plagueridden with Lesser Reward
FAST ATTACK:
4 Screamers of Tzeentch
10 Flesh Hounds of Khorne
HEAVY SUPPORT:
Flaming Chariot of Tzeentch, Greater Reward
Soulgrinder, Phlegm
Soulgrinder, Phlegm
MISSION AND PSYCHIC POWERS:
"Fire and Ice"
Spoiler:
Special Rules: Six Supply Crate objectives are placed before Deployment. Must be 8” apart and not in Deployment Zones. A model must end its Movement Phase in base contact with a Supply Crate to pick it up (or consolidate into base contact with it). A model will drop the supply crate it is carrying if it does any of the following: shoots (or overwatches), runs, is part of a unit that either declares an assault or is successfully assaulted. Models carrying supply crates may not Turbo-boost and if they move more than 6” must make a dangerous terrain test.
Escalation: Only infantry, beasts, jump/jetpack infantry and artillery may deploy. All others must go into Reserve.
Lava Flows: All lava flows are Dangerous Terrain.
Blizzard: A weather table is rolled on at the beginning of every game turn. Ranges from clear through snowing to a blizzard, with increasing effects on shooting and movement. Can only change one step per turn.
Primary Objective:
+9 Hold more Supply Crates than opponent at end of game
+5 Hold the same number of Supply Crates as opponent at end of game
+1 Hold fewer Supply Crates than opponent at end of game
Secondary Objectives +2 Hold 4 or more Supply Crates at end of game
+1 First Blood
+1 Your highest point unit is not destroyed at the end of game
+1 You hold a Supply Crate within 12” of your table edge at the end of game
+1 Your Warlord is holding a Supply Crate (or is within 3” of Supply Crate that one of your units is Holding) at the end of game
PSYCHIC POWERS:
I get Psychic Scream and Paroxysm on the Tyrant; Onslaught on both Zoeys.
My opponent gets Prescience and one other power he never used on his Tzerald; Endurance on one Nurgle Herald and Enfeeble on the other. Can't recall what the Horrors got, they were just Warp Charge batteries anyways.
Gifts: Grimoire on the Tzerald, Etherblades on the Nurgle Heralds and Plaguebringers. Can't recall what the Chariot took for its Greater.
OBJECTIVES:
We place objectives; He puts one on the top of the central big LOS-blocking building, one to my left of that, and one to my right back towards his edge. I put all three of mine on my right, in a shallow triangle just in front of my Deployment Zone
PRE-GAME THOUGHTS:
My MCs don't like the amount of Poison that all the Plaguebearers are bringing, but they do have only 1 attack each and are slow – I can probably kill enough on the charge with Raveners and/or Warriors to minimize return damage. The Grinders and Chariot are going to shred my little guys, and the Grinders are nasty in assault against my MCs and my medium 3-wound T4 bugs. However, I can bunch up my objectives and infiltrate onto them, making a castle of sorts to interfere with any deepstriking he does. Tyrant and Harpy shooting will shred Horrors and should do pretty well on Plaguebearers too.
Onslaught Zoeys are great for Hive Guard, and possibly Spinegaunts (vs Horrors) as well. Paroxysm is fun, and even Psychic Scream might be ok against LD7.
DEPLOYMENT
I win the roll-off, and deploy first:
I deploy my Raveners on my left (opposite one of his objectives), then the Warriors, then the Hormagaunts (just behind one of my objectives) then the Spinegaunts on the right just behind my second objective. I declare the Hive Guard and both Zoanthropes as infiltrating, hoping to get in position for an “alpha strike” on any deployed units of his. I declare the Harpy and Trygon as deepstriking, and put the Tyrant + Guard in normal reserves.
He declares he will deepstrike everything!
So much for infiltrating to shoot his stuff, oh well. I infiltrate the Hive Guard just behind the LOS-blocking building in the middle. One Zoanthrope goes into my DZ behind the Hormagaunts, and the other goes beside the Spinegaunts just behind my right-most objective.
I wasn't able to infiltrate my Tyrant or Trygon, as the special rules explicitly forced them into Reserves. I didn't infiltrate directly onto the objectives as originally planned: I didn't want to spread out too much and let the Daemons deepstrike behind my lines, and I figured if I hung a valuable unit out front, it would get focussed down on the alpha strike. I had units within movement range of 4 of 6 objectives anyways, and wouldn't be able to pick any up until the end of the my first movement phase even had I infiltrated onto them.
He then rolls to Seize Initiative - and is successful! Boo. I was hoping to have an extra turn to bring the objectives back towards my table edge to form a better castle.
Sorry, no Deployment photo. There are lots of photos of the Daemons coming in on Turn 2 though!
Turn 1a Daemons
Spoiler:
Nothing at all. The Warp roils slightly in anticipation.
Tally of Held Supply Crates: Daemons 0, Tyranids 0
Turn 1b Tyranids
Spoiler:
Raveners scoot forwards onto the leftmost objective. Hive Guard try to scale the building but roll a 1 on their difficult terrain test. Warriors move up but not far enough. Hormagaunts, Spinegaunts and the rightmost Zoanthrope move up and take my three objectives. Thankfully all my move-through-cover and Beasts autopass Dangerous Terrain tests, so they laugh at the Lava Flows.
Tally of Held Supply Crates: Daemons 0, Tyranids 4
Turn 2a Daemons
Spoiler:
Weather table: No change, still Snowy
He makes successful Reserves rolls for his entire army!
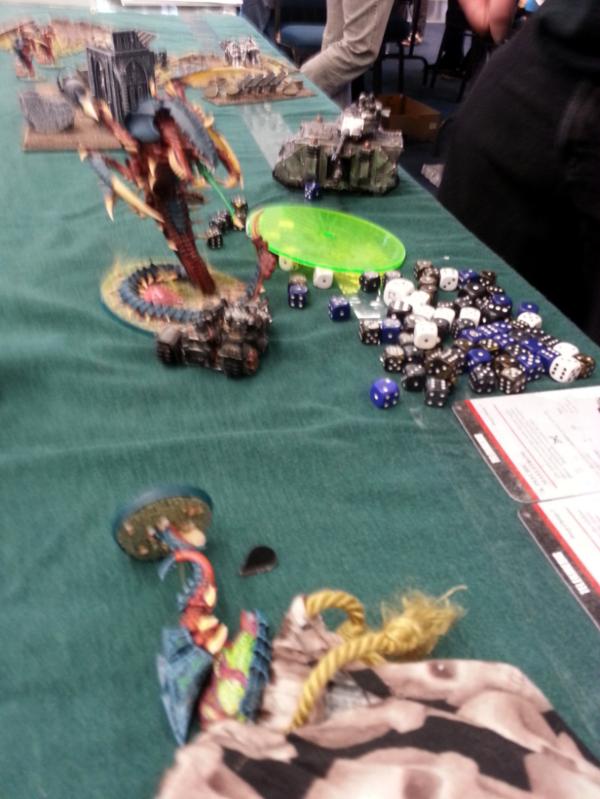
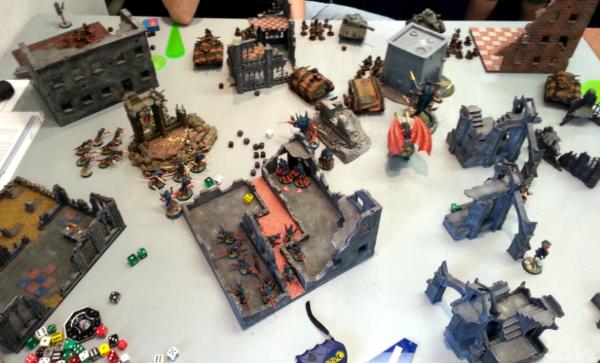
His Flesh Hounds materialize on top of the central building, right on one of his Objectives. Soulgrinders go in the top left corner facing my Raveners and Warriors (eep). One Soulgrinder lands on his rear Objective. The Flaming Chariot materializes smack in front of my Spinegaunts, with the Screamers back a bit to (my) left of it and a unit of Plaguebearers (with attached Herald) back a bit and to (my) right of it.
The unit of Horrors with his Warlord attached comes down a little further back, between the central building and his Screamers. The second unit of Horrors tries to deepstrike somewhere too close to everything, and bounces back into Reserves. The second unit of Plaguebearers (with Herald) elects for a safer dropzone, and comes in to my back left corner, scattering even farther to my back left.
His Herald tries to get Prescience off but I manage to Deny him (ha!). The Grimoire fails as well, dropping the Flesh Hounds' save to 6+ (oops). I don't think he succeeded a single Grimoire roll all game, come to think of it... The Horrors put 2 wounds on a Warrior with Flickering Fire. The Flaming Chariot torrents my Spinegaunts, melting 5 of them (including the one holding an Objective). They fail their Toughness test and another 3 are lost to the vagaries of Tzeentch. Ouch.
Soulgrinders take aim through the snow: The first one instakills the objective-holding Ravener with Phlegm and puts 1 wounds on another with his Harvester. The second Soulgrinder instakills 2 Warriors.
The Screamers turbo-boost past my right-most Zoanthrope, slashing him as they overfly him. He fails one save but is still alive and holding onto his Objective..
Yikes...pretty nice alpha strike by him, knocking me off two objectives and doing decent amounts of damage.
Tally of Held Supply Crates: Daemons 2, Tyranids 2
Turn 2b Tyranids
Spoiler:
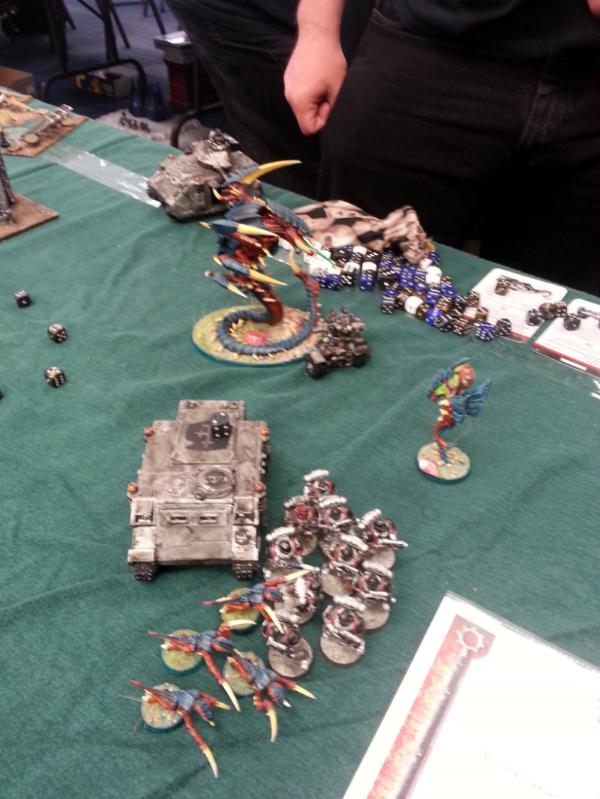
My Tyrant + Guard and my Harpy come in, but my Trygon does not.
Ok, my main goal this turn is to get rid of the Flesh Hounds so I can take that central Objective, and take out that Chariot! Hopefully the Harpy will be able to shoot at some bunched up Daemons as well, but that depends on how many doggies the Tyrant can kill.
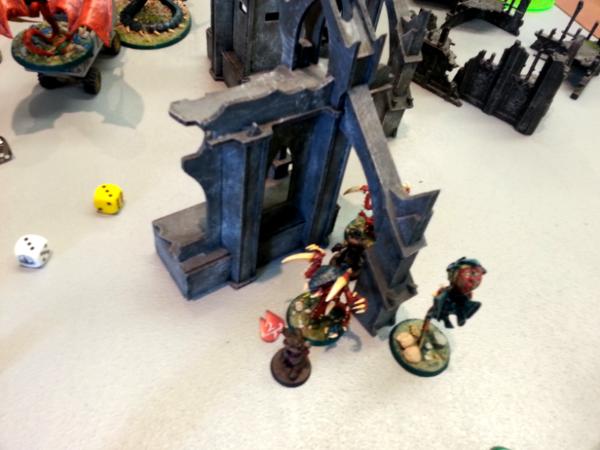
The Tyrant and Guard walk on from the middle of my table edge, behind the Warriors and Hormagaunts. Harpy deepstrikes in front of the Horrors and within 18” of the Flesh Hounds (I should have just swooped on from my board edge to avoid risking a mishap).
One Zoey takes a wound from Perils, but succesfully casts Onslaught on the Tyrant. The Tyrant casts Paroxysm on the Flesh Hounds, then runs and shoots them. The Harpy also drops 2 large blasts on the Khorne Dogs. Due to cover and the snowstorm, the combined shooting only kills 4 of them (!). The Hive Guard turn and smoke the Flaming Chariot, sneaking an instakill through the rider's invulnerable save. Whew.
The Raveners give up the left-most Objective and move back, with the intention of getting locked in combat for a while with the Plaguebearers behind my lines (to protect themselves from getting Phelgmed and to delay/weaken the Plaguebearers). They easily make the charge, but their attacks are blunted on the invulnerable saves and Feel No Pain of the Plaguebearers. Not a single Daemon falls, and I lose 2 Raveners to plagueswords and Etherblades.
The Warriors then proceed to fail their charge on the Flesh Hounds, despite a reroll for Fleet.
Tally of Held Supply Crates: Daemons 2, Tyranids 2
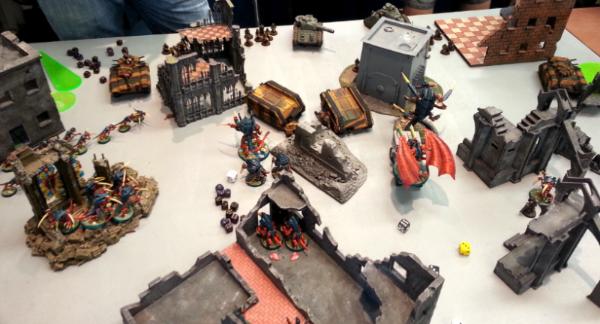
Turn 3a Daemons
Spoiler:
The second unit of Horrors deepstrikes and just barely misses the Objective that had been held by my Spinegaunts. The surviving Flesh Hounds move their Objective off of the building and hand off to the Warlord's unit, then run to form a defensive line in front of it. The Screamers overfly my Zoanthrope a second time, killing him with their slashing attacks and freeing up the Objective that the Zoey had been holding.
Soulgrinder with Prescience from the Warlord puts 2 wounds on my Harpy (no jink). Troops units spread out to avoid giving good targets to the Harpy pie plates. The Plaguebearers in my rear corner easily dispatch the last Ravener and consolidate in the direction of the left-most Objective.
Tally of Held Supply Crates: Daemons 2, Tyranids 1
Turn 3b Tyranids
Spoiler:
My goal this turn is to get rid of the new unit of Horrors to allow me to take the 2 Objectives I've lost. Ideally do some damage to the Warlord's unit as well, so that my Warriors and/or Harpy can eventually roll them in Assault. Horrors are only T3, how hard can it be, right?
The Hive Guard contemplate chipping at the Soulgrinders, but I feel that's a waste of time – I'm going to ignore them and try to kill the rest of his army (or enough to grab 4 Objectives). The Hive Guard instead instakill two of the Screamers. The Hive Tyrant tries to Paroxysm the front unit of Horrors to give the gaunts a better chance in close combat, and manages to Perils himself, taking a wound and losing Psychic Scream! He shoots the Horrors, killing about half the unit.
Satisfied that the front unit will die to gaunts, the Harpy takes a shot at the Warlord's unit. Both pie plates scatter , but manage to kill a couple of Flesh Hounds. That's some snow...
The two Warriors make a 9” charge into the remaining 4 Flesh Hounds, but neither side manages to inflict any wounds at all! They compare notes on how to make a nice cup of tea I suppose.
Hormagaunts hand off their Supply Crate to a Tyrant Guard, then charge across the lava into the front unit of Horrors. The 2 remaining Spinegaunts charge in for good measure, but don't get to swing: all of the Horrors go down at Initiative 5 to the Hormagaunts. The Hormagaunts consolidate onto the Horrors' Objective.
Tally of Held Supply Crates: Daemons 2, Tyranids 2
Turn 4a Daemons
Spoiler:
The Warlord's Horror unit moves back towards the Soul Grinders, but they can't run without dropping the Supply Crate...if the Warriors can dispatch the Flesh Hounds this turn, they will likely be able to charge the Horrors in the bottom of turn 4 and make them drop the Supply Crate.
Prescience fails to go off; the Soulgrinders fire at the Harpy anyways, who declares a Jink this time. Even with Jink and the snow, she takes another 4 wounds from the Harvester Cannons.
Time is called at this point: turn 4 will be the last turn.
The Warriors kill a Flesh Hound, but they pass their Instability test. That's terrible, I was hoping to be able to charge the Horrors next turn and make them drop their Objective. Oh well,
The Plaguebearers in my rear left corner move doggedly towards the left Objective, but won't make it! The Plaguebearers on the right manage to assault the Hormagaunts and wipe them out (only losing 3 of their own number), consolidating onto the Objective dropped by the Hormagaunts
Tally of Held Supply Crates: Daemons 3, Tyranids 1
Turn 4b Tyranids
Spoiler:
This is looking pretty bad, but if I can kill the Plaguebearers and consolidate onto that objective, I can tie up the game. Sadly I have nothing that can get onto the rightmost objective (held by my Zoanthrope at the start of the game), so I have to play for the tie.
Tyrant casts Paroxysm on the right-hand Plaguebearers but is denied! Zoanthrope fails to cast Warp Blast. Hive Guard and Tyrant both shoot at the Plaguebearers on the right, killing 5. Not enough....
The Zoanthrope and 2 Spinegaunts charge the 7 Plaguebearers + Herald, causing them to drop their Objective...however, the Tyranids are wiped out in assault, and the Plaguebearers consolidate back onto the Objective for the win. To add injury to losing the game, my last Warrior falls under the jaws of the Khorne Dogs.
Tally of Held Supply Crates: Daemons 3, Tyranids 1
Turn 5a Daemons
Spoiler:
Game Ended on Turn 4
Turn 5b Tyranids
Spoiler:
Game Ended on Turn 4
RESULTS AND POST-GAME THOUGHTS:
Spoiler:
Results: The Daemons squeaked out a win, holding 3 Supply Crates to the Tyranids' 1. I got almost all the secondary objectives however: First Blood (for the Flaming Chariot), having a Supply Crate within 12” of my table edge, having my most valuable unit still alive, and having my Warlord within 3” of a friendly-held Supply Crate. The Daemons got the last two secondary objecives as well.
Final Score 11 - 5 Daemons!
Post-Game Thoughts
This was a very close game, and could have gone either way. Stealing the Initiative helped my opponent a lot – I was counting on having an extra turn to bring multiple Supply Crates back towards my table edge and set up a screen with non-crate-holding units.
I had expected my Raveners to do much better against Plaguebearers, and my Warriors to do much better against the Flesh Hounds. The Plaguebearer unit did have 2 Etherblades on models with more than one Attack (one model at S5) which accounted for most of the damage they dealt.
I should probably have aimed the Harpy at one of the bunched up Horror or Plaguebearer units on the turn he came in, instead of the Flesh Hounds. She didn't kill many Flesh Hounds in the end, and she could have seriously hurt, say, the Warlord's unit.
As I was putting my models away, I looked down and saw my Trygon staring up at me...after he failed to come in on turn 2, I completely forgot to roll for him to come in again. He might well have won me the game! Oh well.
P.S. The Warpstorm table wasn`t mentioned in my report, because it did literally nothing. He`d always get one of the `roll vs all Tzeentch and enemies` (or `vs all Nurgle and enemies``) and then never roll a 6. He used Lord of Unreality only once, I believe, and again got one of the previously mentioned results.
This message was edited 1 time. Last update was at 2014/08/10 15:32:06
Great reports so far, very enjoyable read. Some good pictures too!
Just a note, however, you should have won game 2. At the end of game turn 1 your opponent had no models on the table, which is an automatic loss in the rule book.
Awesome report! A pity about the loss, but it was wonderfully refreshing to see a Daemon vs Tyranid game that involved lots of infantry and mid-sized critters on both sides, rather than just a lot of winged monstrous creatures duelling in the air like you see with most netlists. The fact that both armies (especially your Bugs) were well painted was a bonus.
Definitely looking forward to more of this report. Hopefully, one of these days, when I have a kinder schedule, I'll be able to make it to Astro myself.
I am rooting for ya. My most treasured event award was my best sportsmanship at Astro Van many years ago. With nidzilla-ish army (comp of course).
jifel wrote: Great reports so far, very enjoyable read. Some good pictures too!
Just a note, however, you should have won game 2. At the end of game turn 1 your opponent had no models on the table, which is an automatic loss in the rule book.
He didn't mention it but Astro missions frequently remove that rule.
snoogums: "Just because something is not relavant doesn't mean it goes away completely."
Iorek: "Snoogums, you're right. Your arguments are irrelevant, and they sure as heck aren't going away."
Brutal second game, so much stuff happening all over the table. Having a bunch of daemons manifest all over the place is an interesting tactical challenge!
Hive Fleet Ngaro 4800 points
Cult of the Red Saviour 1700 points
Zerg Infested Terrans 2300 points
Yes, I forgot to mention the "Acceptable Losses" rule that is in every Astro mission that includes the Escalation Rule. It states that you don't lose the game if you have no models on the table at the end of a turn.
The Daemons were really fun to play against, and several times I thought I'd manage to pull out a win. I like that we mixed it up in assault a lot, even if it didn't go well for me most of the time. I probably should have been more aggressive with my Tyrant, but I was leery of the poisoned Plaguebearers and the assault capability of two Soulgrinders.
Here is a teaser image from my next battle report: Game 3 vs Tau. The report should be up tomorrow night.
-S
2000 2000 1200
600 190 in progress
2014/08/08 11:09:39
Subject: Re:Strangelooper's Tyranids (1500 pts) at AstroTO: 6 battle reports (photos). Report 3 in progress
HEAVY SUPPORT:
6 Sniper Drones, 2 Firesight Marksmen
MISSION AND PSYCHIC POWERS:
"Convoy Raid"
Spoiler:
Special Rules: Convoy:
2 Sentinels and 3 Chimeras form the convoy. Each Chimera carries one Supply Crate objective. When a Chimera is destroyed, its Supply Crate is placed in base contact with its rear hatch. A model must end its Movement Phase in base contact with a Supply Crate to pick it up (or consolidate into base contact with it). A model will drop the supply crate it is carrying if it does any of the following: shoots (or overwatches), runs, is part of a unit that either declares an assault or is successfully assaulted. Models carrying supply crates may not Turbo-boost and if they move more than 6” must make a dangerous terrain test.
The Convoy takes its own turn at the beginning of each game turn. Sentinels will each move towards, shoot and assault (if possible) the nearest enemy unit that is in range and LOS (both players' forces count as enemies of the convoy). Chimeras will move 6” straight forward across the length of the table; each will shoot the nearest enemy unit that is in range and LOS.
Escalation: Only infantry, beasts, jump/jetpack infantry and artillery may deploy. All others must go into Reserve.
Acceptable Losses: You do not lose the game for having no models on the table at the end of a turn.
Deployment Zones: Only 6” deep, and 48” from the short edge opposite to where the Convoy starts.
Primary Objective:
+9 Hold more Supply Crates than opponent at end of game
+5 Hold the same number of Supply Crates as opponent at end of game
+1 Hold fewer Supply Crates than opponent at end of game
Secondary Objectives +1 You were the first player to Hold a Supply Crate during the game
+1 You hold a Supply Crate within 12” of your table edge at the end of game
+1 Your Warlord within 3” of Supply Crate at the end of game
+1 If the Convoy is destroyed at the end of the game
+1 Your highest point unit is not destroyed at the end of game
+1 You have scoring units in more table quarters than does your opponent, at the end of game
PSYCHIC POWERS:
I get Psychic Scream and Warp Blast on the Tyrant; Catalyst on one Zoey and Psychic Scream on the other.
The Tau are not even aware of the Warp, the innocent little blue dudes.
PRE-GAME THOUGHTS:
Spoiler:
I haven't played against Tau since their latest codex. Tau have always been weak in assault, so I will try to overwhelm them with infiltrating assault units. I understand that Riptides are hard to bring down unless in assault, so my plan is to ignore the single Riptide until it gets close enough to assault with something. I'll ignore the Barracuda unless I can Vector Strike it with the Harpy.
I'll use the Hive Guard to open Chimeras and my gaunts to grab objectives, hopefully out of LOS of most of his army (using the Chimera wrecks as cover/LOS blockers).
My Assault units will infiltrate up and hopefully a few will survive to roll his key units in combat. Deepstrike Trygon and fly on Harpy to support where necessary (probably at the Convoy).
The AP3 small blast of Warp Blast should be fun vs Crisis Suits, and Psychic Scream will actually be good against low LD Tau when I get close.
DEPLOYMENT
I win the choice for deployment zone, and choose the side with the large LOS-blocking rocky ridge in my Deployment Zone. That's the only LOS-blocker bigger than a rock on the whole board...I need something to hide my Hive Guard, and I do NOT want his suits Jump-Shoot-Jumping over the ridge all game.
He wins the roll-off, and deploys first: Crisis Teams, Fire Warriors and Fire Warriors across the front of his 6” DZ, behind a low hedge. Ethereal and Sniper Drones behind the Fire Warriors. He holds back Shadowsun with Stealth Suits to Infiltrate, and is forced to Reserve his Barracuda, Tetras and Riptide.
I deploy: the Psychic Scream Zoey and Hive Guard go behind the big rock. Spinegaunts and Hormagaunts behind a low hedge, with the Catalyst Zoey behind them. I declare that I will deepstrike the Trygon (and remind myself to bring him on this time!), fly on the Harpy from my board edge. Infiltrate the Warriors, Raveners, Tyrant* and Tyrant Guard.
*We had established that Infiltrate superseded the Escalation restriction, so that even though only Infantry, Beasts etc were allowed to deploy, anything with Infiltrate was still allowed to Infiltrate. I wish I'd known that for my previous game!
I infiltrated my Warriors behind a bush on the extreme left, 18” away from his lines. My Tyrant+Guard went behind another bush 18” from the middle of his lines. Raveners infiltrated on either side of a low wall on the far right, against his table edge (I wanted cover from both his units and from the Convoy!)
I try to Seize Initiative – and am NOT successful. Drat.
Turn 1 Convoy:
Spoiler:
The Convoy moves forwards 6”. The lead Sentinel strips a wound from my Tyrant Guard with its Lascannon. The Chimeras manage to remove a grand total of 2 Spinegaunts with their Multlasers and snap-shooting Heavy Bolters. However, the rear Sentinel one-shots a Ravener with its Lascannon.
All in all, not too bad...I expected much worse from the Convoy!
Turn 1a Tau
Spoiler:
Ethereal gives all pulse weapons an extra shot, and markerlights my Tyrant. Apparently Sniper Drone weapons benefit from the Ethereal bonus shot: they unleash 18 shots on my Tyrant's unit at BS5, resulting in 6 Rends and 4 regular wounds (gulp). I LOS everything, but fail all but one cover save (from that little bush) against the rends, and all 3 of my Tyrant Guard evaporate just like that. The Tyrant fails two armour saves to boot.
Wow...one unit shot and my lynchpin unit is almost dead. This looks bad...
Then both units of Firewarriors unload on my Tyrant, finishing him off.
Crisis teams shoot at the Warriors, but they are much better at using the tiny rock for cover and he only kills two of them. The Stealth Suits move up and smoke 2 Raveners, then jump back.
Tally of Held Supply Crates: Tau 0, Tyranids 0
Turn 1b Tyranids
Spoiler:
Hive Guard wreck the lead Chimera with Impaler Cannons, making a bit of a roadblock for the Convoy. The first Supply Crate spills out the back of the vehicle. My Zoanthrope and all the gaunts move to the right and up towards the convoy (and away from the long range guns of the Tau firebase! The Zoanthrope successfully casts Warp Blast, but in its excitement it completely misses the second Chimera.
My lone Ravener grits its teeth and charges the Stealth Suits (my bad, I infiltrated so I should not have been able to declare a charge on turn 1!) but evaporates to overwatch from the Burst Cannons.
Warriors move up (nothing else they can do at this point), leapfrogging to the next bit of cover.
Well, I stopped the Convoy far from the Tau, so that's something. My Assault-in-their-face has turned into a pulse-shot-eating exercise though. I'm pretty demoralized at this point. Oh well, maybe a Warrior will survive and get into assault next turn...?
Tally of Held Supply Crates: Tau 0, Tyranids 0
Turn 2 Convoy:
Spoiler:
The rear Sentinel moves toward the Stealth Suits but misses them. We roll randomly to see which way the 2nd Chimera will deviate around the wreck of the lead one, and it turns towards me thankfully. The 3rd Chimera is able to move straight forward. Multilasers miss a lot, and the few that hit fail to hurt the Catalyst-enhanced Spinegaunts.
The lead Sentinel shoots the Spinegaunts but fails to wound! It then assaults them, killing one. We realize that the gaunts cannot hurt the Sentinel, and they are Fearless in Synapse, so...it's going to be a long fight there. Fine by me, it keeps my Spinegaunts safe from Tau shooting, gives a big bubble of cover to my stuff behind, and I can always free them up later by moving Synapse away (or assaulting in with something that can hurt the Sentinel.
Turn 2a Tau
Spoiler:
Riptide and Tetras come in, opposite the Convoy. Barracuda does not come in yet.
Stealths and Riptide move up, and one or the other strip a hull point from the rear Chimera of the Convoy. The Riptide overcharges its jumpjets and assault-moves in towards the Convoy.
Over on the left, one of my Hive Guard is now exposed to the Sniper Drones and they destroy it with authority. The right-most Fire Warriors start moving over the hedge towards the Convoy. The rest of the Tau firebase kills two more Warriors and puts 2 wounds on the last one. Woohoo! A Tyanid Warrior survives and will be in assault range on my turn! Lots of cover saves made from that moisture-condensor or whatever it is.
Tally of Held Supply Crates: Tau 0, Tyranids 0
Turn 2b Tyranids
Spoiler:
Both the Harpy and the Trygon come in! Trygon pops up in between the two operational Chimeras and electro-blasts the rear one, but only strips one more Hull Point and does not destroy it. The Harpy swoops on the full 24” over the heads of the Spinegaunt/Sentinel battle and fires two large blasts into the FireWarriors who had so thoughtfully advanced into Cluster-Spine range of the midline. Two direct hits! However one of those little bushes is in the way, granting cover saves, so only 4 die and the unit holds.
The central Zoanthrope gets Catalyst off on the Trygon, but Perils on Warp Blast (and misses the shot to boot). It takes a wound and burns out its Dominion power. The two remaining Hive Guard venture out but are not yet in range of the 2nd Chimera.
The Hormagaunts move up behind the Chimeras but have to run to get onto the first Supply Crate (dumped by the lead Chimera), so they don't actually Hold it yet (remember, you have to end your Movement in base contact or Consolidate onto it).
Over on the left, my lone Warrior with one wound remaining lines up his charge on the Crisis Suits! ....and evaporates to overwatch as the six Crisis Suits, an entire unit of Fire Warriors, and the Sniper Drones all use Supporting Fire. Yikes. Assaulting Tau gunlines maybe not such a good idea after all...
Tally of Held Supply Crates: Tau 0, Tyranids 0
Turn 3 Convoy:
Spoiler:
The 2nd Chimera moves forwards on my side of the wrecked lead Chimera. The 3rd Chimera veers randomly towards the Tau side to get around the wreck. This actually makes a great line of LOS-blocking cover for my Hormagaunts, shielding them from the Tau Firebase! Multilasers turn their turrets to shoot at the Trygon, but it makes all of its armour saves.
The rear Sentinel shoots (missing) and assaults the Trygon...which goes very poorly for the Sentinel. It gets drawn and quartered by the huge beast. The lead Sentinel whiffs against the Spinegaunts, who mill about its feet mindlessly.
Turn 3a Tau
Spoiler:
Barracuda is still trying to find the battlefield.
The Crisis Suits start moving across the board, and fire Missile Pods at the two Hive Guard, who amazingly make their cover saves. Fire Warriors and Sniper Drones fire at the Harpy: I elect NOT to jink as usual (since that would make the Harpy unable to shoot next turn), and take 4 wounds. Just like last game, I pass my Grounding Test and am still up!
Tetras marker up the Trygon. The Riptide supercharges its cannon; it and the Stealths strip 4 wounds from the Trygon. Riptide and Stealths jump back.
Not a bad turn...all my stuff survived! And it's becoming apparent how out of position most of his forces are in relation to the Convoy...
Tally of Held Supply Crates: Tau 0, Tyranids 0
Turn 3b Tyranids
Spoiler:
Hormagaunts finally pick up the first Supply Crate! The central Zoanthrope gets Catalyst (on the Trygon) and Warp Blast off, but Perils, fails its Feel No Pain, and blows its own head off. And misses again with the Warp Blast.
I realize that my only remaining Synapse is now on the far left of the board hiding behind the rocky ridge, and everything except the Hive Guard is out of range of it. Not good. If I'm lucky, the game will end this turn and I'll win with my one Held supply crate, before I have to roll for Instinctive Behaviour.
The Harpy continues to swoop forward into the Tau firebase, and shoots at the Sniper Drones. Bad scatters mean that it only kills a single Drone.
The Hive Guard destroy the 2nd Chimera, which kindly moved into range. Supply Crate #2 rolls out the back. The Trygon charges and destroys the rear Chimera, releasing Supply Crate #3! However, it does not get to consolidate after combat with a vehicle, so it can't pick it up (boo).
Time has not yet been called, so we're onto turn 4!
Tally of Held Supply Crates: Tau 0, Tyranids 1
Turn 4 Convoy:
Spoiler:
The only thing left of the convoy is the lead Sentinel – maybe it will kill a Spinegaunt and I can choose to fall back via “Our weapons are useless!” to get out of combat? Nope, the Sentinel misses with its one attack. Sigh...
Turn 4a Tau
Spoiler:
Barracuda finally comes in. It flies on right over top of the Trygon.
The Tau firebase continues moving towards the convoy but it won't get there for a turn or two...almost assuredly too late. It obliterates the Harpy's last wound, jinking notwithstanding. The Crisis Suits get Plasma Rifle range on the Hive Guard and kill them a lot.
Riptide fails to overcharge it's cannon...but gets a re-roll due to its Earth Caste upgrade, and succeeds. It and the Stealth suits pour fire into the Catalysted Trygon, and easily remove its last two wounds. Sigh.
The Barracuda shreds the Hormagaunts, killing all but 2. They fall back but are still (barely) on the board. The 1st Supply Crate was dropped by one of the now-dead Hormagaunts.
Time is called at this point!
The Riptide and the Stealths use their assault moves to jump onto Supply Crates #1 and #3. My opponent was under the impression that assault moves are equivalent to consolidation moves, and thought he could pick up the crates....he is most chagrined when it is pointed out that this is not the case (I'd wondered why he wasn't moving more aggressively).
Since time has been called, he won't get another turn to pick them up!
Tally of Held Supply Crates: Tau 0, Tyranids 0
Turn 4b Tyranids
Spoiler:
Hormagaunts fail to regroup and run off the board. I have only one out-of-position Zoanthrope and 8 Spinegaunts (locked in combat) left in play.
The Zoanthrope moves over and tries to Warp Blast some Crisis Suits for fun, but the blast scatters wide of course. The Spinegaunts and Sentinel massage one another, gently.
GAME ENDS
Tally of Held Supply Crates: Tau 0, Tyranids 0
Turn 5 Convoy:
Spoiler:
Game ended last turn
Turn 5a Tau
Spoiler:
Game ended last turn
Turn 5b Tyranids
Spoiler:
Game ended last turn
RESULTS AND POST-GAME THOUGHTS:
Spoiler:
Results: Tie Game!
Wow, I should have lost that hard. I was almost tabled, and he had not lost a single unit. I didn't feel too good about his not winning, but I had mentioned the “only after movement or consolidation” rule when my Hormagaunts had run onto the first crate...
Primary Objectives:
Hold the same number of Supply Crates (0).
Tyranids 5 pts
Tau 5 pts
Secondary Objectives:
Tyranids
+1 first to Hold a Supply Crate
Tau
+1 highest point unit still alive
+1 units in more table quarters than opponent
+1 Warlord is within 3” of a Supply Crate at end of game
Final Score:
Post-Game Thoughts I really squandered an opportunity here, in retrospect. I could have easily infiltrated my Tyrant + Guard, Warriors and Raveners in the back corner behind the convoy, with the Tyrant out front to soak up Lascannon and Multilaser shots. The vehicles would have all been destroyed on turn 2, and I'd have been able to scoop up all the Supply Crates. Infiltrating up into his Firebase was a really bad idea! Supporting Fire was impressive with them all bunched up like that. I certainly wished that I'd had a trio of Biovores and/or a Mawloc with which to blast the Firebase.
The Sniper Drones with the extra shot from the Ethereal were murder on my MC's. I hadn't realized just how deadly they were going to be.
As it was, when my infiltrators were largely neutered on turn 1, I was pretty demoralized and figured I would just try to make my opponent's victory cost as much as possible. My Harpy and Trygon were MVPs, soaking up most of the Tau shooting for half the game. Catalyst is certainly great on the Trygon. Warp Blast underperformed for me – I'd get the power off, but then miss the shot. And it caused Perils a couple of times too, do to the greater number of dice thrown to get the Warp Charge 2 power off reliably.
My infiltrators did delay him starting to move his troops over to the Convoy, which turned out to be critical – I guess that was brilliant in hindsight, though not planned I was very surprised when I realized he was not going to move his Riptide and/or Stealths onto the Objectives on his last turn. In retrospect I should not have destroyed the last two Chimeras, as he could have easily won even if my Hormagaunts had held their Supply Crate; I should have left them intact for him to try to destroy on his own turn, so I could scoop the crates in Consolidation if necessary (assuming I'd have had anything left on the board with which to assault him....)
This message was edited 6 times. Last update was at 2014/08/10 15:31:34
-S
2000 2000 1200
600 190 in progress
2014/08/08 14:45:46
Subject: Strangelooper's Tyranids (1500 pts) at AstroTO: 6 battle reports (photos). Report 3 in progress
Overwatch from Tau gunlines is very hard to get through unless you have lots of threats in range at the same time to force Tau to make some decisions on what to overwatch, if you do hit them in assault... fun times for nids!
Good work on keeping the game so close!
This message was edited 2 times. Last update was at 2014/08/10 21:06:54
Hive Fleet Ngaro 4800 points
Cult of the Red Saviour 1700 points
Zerg Infested Terrans 2300 points
HEAVY SUPPORT:
4 Devastator Marines, 2 Lascannons, 2 Missile Launchers with Flakk ammo
+ Devastator Sgt, Bolter, Bolt Pistol, Signum
Predator Tank, Autocannon turret, Lascannon sponsons, Extra Armour
INQUISITORIAL DETACHMENT:
HQ Ordo Xenos Inquisitor, 2x Needle Pistol, Psyk-out Grenades, 3 Servo-skulls
Psyker level 1: one roll on Divination
MISSION AND PSYCHIC POWERS:
"Fight or Flight"
Spoiler:
Special Rules: Attacker / Defender: Roll off before Psychic Powers are rolled for. Winner may choose to be Attacker or Defender. Defender must deploy as in On The Scene (below), in a zone that extends 24” from their table edge but stops 24” from each side edge (ie a 24” x 24” zone from the center of the Defender's table edge). Attacker does not deploy; on the attacker's first turn, his units may move on from his table edge or from either side edge. Attacker gets first turn.
Prepared Defenses: Defender may arrange the sandbags in his DZ into any configuration desired.
Exit Strategy: Defender may move units off of the Attacker's long table edge; units moved off no longer participate in the game, but do not count as destroyed for Unit Points. A unit may not move off during the first turn, nor during the turn in which they come in from Reserves. Swooping Flying Monstrous Creatures and Zooming Flyers cannot use the Exit Strategy rule; if they exit the board, they go into Ongoing Reserves as usual.
On The Scene: The Defender must deploy all HQ in his DZ. Defender's Warlord must be deployed in the central bunker in his DZ. Any other of the Defender's units may also be deployed in the DZ. Escalation: Only infantry, beasts, jump/jetpack infantry and artillery may deploy. All others must go into Reserve.
Acceptable Losses: You do not lose the game for having no models on the table at the end of a turn.
Unit Points: Each side scores Unit Points equal to the point cost of any units completely destroyed. Units which are at least half-destroyed give up Unit Points equal to half of their point cost.
The Attacker scores +150 Unit Points if he destroys the Defender's Warlord.
The Defender scores +150 Unit Points if his Warlord escapes via the Exit Strategy rule.
Primary Objective:
+9 Score >150 Unit Points in excess of your opponent's score
+5 Score within 150 Unit Points of your opponent's score
+1 Score > 150 Unit Points less than your opponent's score
Secondary Objectives +2 Your Warlord was not destroyed
+1 First Blood
+1 Opponent's highest point value unit was destroyed
+1 You destroyed more units than did your opponent.
+1 None of your non-Vehicle Troops units are destroyed
PSYCHIC POWERS:
Tyrant gets Onslaught and Psychic Scream. Both Zoanthropes get Psychic Scream. All have Dominion of course.
I definitely want Defender – that way my Tyrant can start out in the middle of the board. As Attacker he'd either have to walk the length of the board or risk coming in to one side and having the Marines redeploy away from him. Also, as Defender I can outflank 3 units near his board edge, potentially walking them off the following turn with Exit Strategy.
If I get Attacker I'll have to reserve my outflankers and deepstrikers, otherwise his Drop Pods and Flyers will get an alpha strike
DEPLOYMENT
I win the roll-off for Attacker/Defender, and choose Defender. Excellent!
I deploy my Tyrant + Guard in the central bunker, the Hive Guard at the far edge of my zone (nearest to table center), and line the edges with Spinegaunts (left) and Hormagaunts (right) spread out at maximum coherency behind the sandbag lines. My Raveners deploy between the Tyrant and the Hive Guard. I outflank (via Master of Ambush) the Warriors and the two Zoanthropes. Harpy will come on normally from my board edge, and the Trygon will deepstrike.
The Sentinels of Terra declare that on their first turn they will move the Devastators, Attack Bikes, Predator, and Rhino Tactical Squad on, as well as the Sternguard Drop Pod (with attached Inquisitor). The smaller Tactical Squad (with attached Librarian) in their Drop Pod will come in from Reserves, as will the Stormtalon and Scouts in their Speeder
I try to Seize Initiative – and am successful!
Hmmm... I didn't really want to do that, I want his Pods to be deployed before I bring in my own Reserves. Oops, oh well.
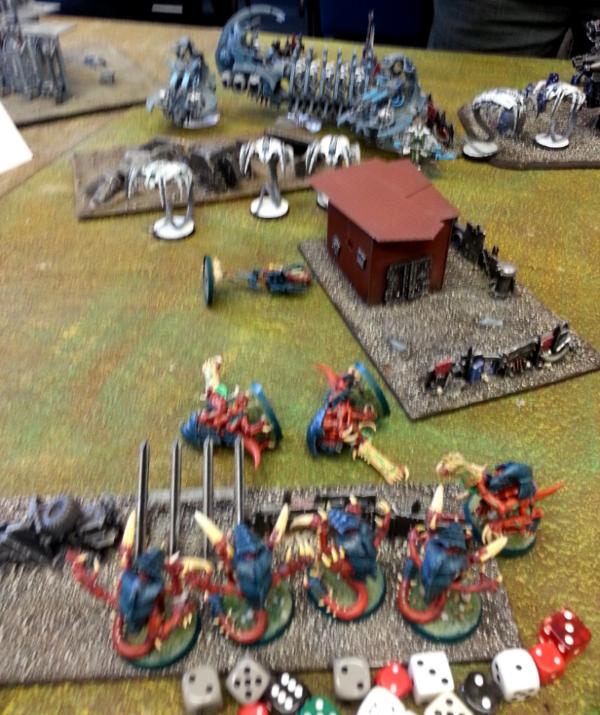
No Deployment Pic per se, but here is a photo of Turn 1b when the Space Marine player moves on:
Turn 1a Tyranids
Spoiler:
Hive Guard move up into the bunker outside of my DZ. Everyone else stays put. I'm keenly aware that a Pod could drop in behind my Tyrant, but there's nothing I can really do about that. I keep my Tyrant in the bunker to avoid giving him too much room to drop in behind (hopefully he'll be too afraid of scattering off the board)
Tyrant casts Dominion to keep Hive Guard in Synapse.
Turn 1b Space Marines
Spoiler:
His ground forces all move on from his long edge. Devastators install themselves in a crater on (my) left near his edge. Predator comes on just to (my) right of center, then Attack Bikes, then Rhino with Plasma Tac squad.
His Drop Pod with Sternguard and Inquisitor comes in, but scatters back from my DZ. His infantry deploys out the front of it.
(see “Deployment” photo, above)
The Predator and Attack Bikes shred my Hive Guard, knocking them down to only one model remaining. Oops...if I had't cast Dominion, they could have gone to ground (and then got back up with Synapse on my next turn).
Inquisitor fails Forewarning; Sternguard use “ignore cover” ammo, which happens to be AP5, and blow away 8 Spinegaunts (all that were in range).
Turn 2a Tyranids
Spoiler:
My Warriors, Trygon and both Zoanthropes come on. Harpy is still out.
The Warriors outflank from the left and run, coming on so as to keep a crater between them and the Devastators, for cover. Trygon deepstrikes aiming for the Devastators, but scatters right and into cover. It shoots at the Attack Bikes instead, causing a wound.
Zoanthropes both come in from the right. The surviving Hive Guard strips the Storm Bolter off the Rhino. Zoeys both Warp Blast the Rhino, but one misses and the other only shakes it. Damn, I really wanted that destroyed or at least immobilized!
Tyrant moves up and shoots at the Sternguard, dropping two. Raveners then make an easy 2” charge into them, slaying another marine. The squad holds.
Turn 2b Space Marines
Spoiler:
Landspeeder Storm and Stormtalon arrive from reserves. Libby's Pod is still out.
The Speeder and Stormtalon both shoot the Warriors, but due to many 1's to Wound from the Assault Cannon, and lots of successful cover saves from the Speeder's weapons, only a single Warrior is killed! Wow.
Devastators strip 2 wounds off of the Trygon. Plasma Tac Squad disembarks from their Rhino, and with support of the Attack Bikes they shoot up the Zoanthropes. One drops, but the other remains with a single Wound. The Predator attempts to finish it off, but the Warp Field shrugs off the heavy weapon hits. Hmm...there's a lot of juicy Psychic Scream targets all bunched up there....
Raveners predictably finish off the last Sternguard and the Inquisitor, consolidating up towards their next target: the Devastators.
Turn 3a Tyranids
Spoiler:
Trygon moves towards Attack Bikes, Raveners slither up towards Devastators. Zoanthrope insinuates himself between the Attack Bikes and the disembarked Tac Squad, Psychic Screams....and rolls 2 totals of six. No wounds at all. Whoops.
Tyrant Onslaughts himself, runs and shoots down the Landspeeder despite it jinking madly. Hurrah! The Scouts jump out of the wreck, only to get charged by the Warriors and eaten to a man.
However, despite the Fleet re-roll, the Raveners somehow fail their charge against the Devastators and are left hanging out in the open. At least they didn't eat any overwatch. The Raveners share a chagrined look across the field with the Zoanthrope.
The Hormagaunts move up and declare an assault on the Tac Squad. Several are removed by overwatch (his Warlord trait lets him re-roll 1's to hit with Bolter weapons, and there is no exclusion for overwatch...deadly!), leaving the lead surviving Hormagaunt 10” away, and the unit gets a -2” penalty for assaulting through terrain...but with their Fleet re-roll, they manage boxcars and they are in! Unfortunately the Marines strike first, and slay enough of them that the remaining few are unable to contact the Marines with their 3” pile-in, so they don't even get to attack. Boo. The end-of-combat pile-in brings the last few Hormagaunts into contact, keeping the Tac Squad locked (yay?)
The Trygon assaults into the Attack Bikes, and kills two of them while taking 2 more wounds himself. They hold.
Well that was an interesting turn...
Turn 3b Space Marines
Spoiler:
Libby and his Tac Squad drop in, right beside the Warriors. They deploy out the back for cover. The Librarian drops his S10 AP1 blast on the Warriors, killing two. The Tac Marines and Drop Pod Storm Bolters finish off the Warriors.
Devastators kill two Raveners, and they fall back. Predator finally drops the Zoanthrope. Stormtalon kills the last Hive Guard.
In assault, the Tac Squad easily cleans up the Hormagaunts while the Trygon and Attack Bike weave and bob, stripping one wound each. They're each now down to one wound left!
Turn 3 was a carnage turn for both sides!
Turn 4a Tyranids
Spoiler:
Harpy comes in, swoops up the left side of the board and fires 2 large blasts into the Libby's squad. Direct hits with both, killing 6 Marines! The Tyrant finishes off the squad with his Devourers The Raveners, having auto-regrouped once in Synapse range of the Tyrant, had moved up to be in charge position against the Libby's squad while in cover from their overwatch. Their target having evaporated, they instead charge a Drop Pod and strip 2 Hull Points.
Over on the right side, the Trygon misses with all but one attack, then fails to wound with that attack! The Attack Bike, doubled over with laughter, also whiffs.
Time is called, so we can only finish out turn 4 before the game will end.
Turn 4b Space Marines
Spoiler:
Stormtalon shoots at the jinking Harpy, dealing 2 Wounds. The Devastators shoot at the Hive Tyrant, but his Tyrant Guard make all of their cover saves! Predator strips 2 wounds off one of the Raveners with its Autocannon, and a Drop Pod Storm Bolter strips a wound off the other Ravener.
The Tac Squad charges the Trygon. The Trygon manages to bring down the Attack Bike, but is overwhelmed by the Krak grenades of the Tac Squad and falls.
\
Turn 5a Tyranids
Spoiler:
Game ended last turn.
Turn 5b Space Marines
Spoiler:
Game ended last turn
RESULTS AND POST-GAME THOUGHTS:
Spoiler:
Results: We total up the Unit Points killed:
I managed to get 835 for obliterating his Librarian and escorting Tac Squad, his Sternguard, his Scout Squad and their Landspeeder Storm, his Attack Bikes and his Inquisitor, as well as half points for a Drop Pod.
He killed 850: My Hormagaunts, Hive Guard, Trygon, Warriors and both Zoanthropes, as well as half points for the Raveners and Spinegaunts
He didn't manage to kill my Warlord, but I didn't get it off the board via Excape Strategy, so neither of us pick up the bonus 150 Unit Points.
Tie game! And very close, within 15 points!
Primary Objectives:
Tyranids 5 pts Scored Unit Points within 150 of Opponent's
Space Marines 5 pts Scored Unit Points within 150 of Opponent's
Secondary Objectives:
Tyranids
+2 Warlord survived
Space Marines
+1 First Blood (Zoanthrope)
Final Score: 7 – 6 in the Tyranids favour!
Post-Game Thoughts A very fun and carnage-filled game! I'm glad I took Defender, even though I never used Escape Strategy. I suppose I could have plodded my Tyrant up the center of the board, but I think the Devastators and Predator would have killed him once he was out of cover. He contributed some extremely useful shooting as it was, downing the Speeder, softening up the Sternguard and finishing off the Tac Squad and Librarian.
I was really hoping to move the Trygon off the board after eating the Attack Bikes, but the last one held on too long. That would have won me the game, as it turns out.
My Raveners were awesome in eating the Sternguard, and should have eaten the Devastators too. I absolutely love their mobility on the battlefield.
I was disappointed in the Hormagaunts, but learned something about strung-out assaults – ie don't do it. The Zoanthropes disappointed as well. I thought they'd at least be able to take out the Rhino if not the Predator too, but they couldn't even manage that. The Psychic Scream was extremely underwhelming, despite perfect placement.
In the end, this was probably my most fun game of the entire tournament!
This message was edited 4 times. Last update was at 2014/08/12 01:27:53
-S
2000 2000 1200
600 190 in progress
2014/08/12 01:28:37
Subject: Strangelooper's Tyranids (1500 pts) at AstroTO: 6 battle reports (photos). Game 4 complete!
tag8833 wrote: I'm really liking the missions. Are they posted online somewhere? Could you PM me someone to facebook or email to get a complete list of them?
Yeah, the unique missions are what have always set Astronomicon apart, I love (most of) them! The Astro guys have not yet posted the updated missions for 7th yet, but they should be up on the site eventually (probably after the summer and tournament season is done). Check under Scenarios in the menu on
A few years ago I took photos of some 25 of the missions but only the top half of the first sheet of each. You can find those pics, along with photos of the Table (and specific terrain) that went along with each, here:
N.B. there was considerably more terrain on the tables this year, though there was still a real dearth of actual LOS-blocking terrain. For 7th (and 6th) ed, I think there has to be a considerable amount of decent-sized LOS-blocking terrain, or else gunline armies dominate. I sympathize with the organizers though, that it is difficult enough to get 30 tables worth of any kind of terrain, let alone good LOS-Blocking terrain!
This message was edited 2 times. Last update was at 2014/08/12 13:53:16
-S
2000 2000 1200
600 190 in progress
2014/08/18 04:53:47
Subject: Re:Strangelooper's Tyranids (1500 pts) at AstroTO: 6 battle reports (photos). Game 4 complete!
HQ:
WARLORD: OLD GRUDGES
Knight-Commander Pask in a Leman Russ Punisher, hull Heavy Bolter
Leman Russ Executioner, hull Heavy Bolter
TROOPS:
10 Veterans, 7 Lasguns, 2 Meltaguns, 1 Heavy Flamer
Dedicated Transport: Chimera, turret Multilaser, hull Heavy Flamer
10 Veterans, 7 Lasguns, 2 Meltaguns, 1 Heavy Flamer
Dedicated Transport: Chimera, turret Multilaser, hull Heavy Flamer
10 Veterans, 7 Lasguns, 3 Plasmaguns, 1 Heavy Flamer
Dedicated Transport: Chimera, turret Multilaser, hull Heavy Flamer
10 Veterans, 7 Lasguns, 3 Plasmaguns, 1 Heavy Flamer
Dedicated Transport: Chimera, turret Multilaser, hull Heavy Flamer
FAST ATTACK:
Hellhound
Hellhound
HEAVY SUPPORT:
Leman Russ Battle Tank, hull Heavy Bolter
2 Heavy Mortars (Forgeworld)
MISSION AND PSYCHIC POWERS:
"Heretical Purge"
Spoiler:
Special Rules: Escalation: Only Troops may be deployed at the start of the game. All other selections must go into Reserves. Any unit that Infiltrates or Scouts may deploy as per those rules, regardless of force org.
(We debated the fate of my opponent's (immobile) Heavy Mortar artillery: he thought it would make more sense that he would be able to deploy them at the start of the game, whereas I thought they should have to deepstrike in from Reserves. The tourney organizer we called over sided with my opponent).
Acceptable Losses: Players do NOT lose the game if they end a turn with no models on the board.
Accelerated Reserves: Reserves start coming on turn 1 (on 5+).
Scattered Reserves: Roll a die for each unit arriving from Reserves to see which table edge it comes in: 1: short table edge to your left; 2-5: your long table edge; 6: short table edge to your right. Deepstriking Reserves will Deepstrike as normal.
Cultists: There are 6 Cultists: 1 Cult Leader (with Plasma Pistol), 1 Sorceror, 1 Plasmagunner, and 3 Lasgun or Autogunners. Players alternate placing the cultists after sides are chosen, but before Deployment. Cultists are Objectives: they cannot be targeted during the Shooting or Psychic Phases, and cannot be destroyed. They may be targeted during the Assault Phase: see Capturing Cultists. Cultists have WS3, BS4, S3, T3, I3, A1, W1. The Sorceror has W2 and A2, while the Leader has WS4, I4, W3, A3.
Cultist Mini-Turn: At the beginning of each Game Turn, the Cultists get their own mini-turn. Each cultist will move d6” directly away from the nearest enemy unit (both players' forces are considered enemies). The Sorceror will attempt to cast Doombolt at the nearest enemy in the Psychic Phase. All others will shoot at the nearest enemy during the Shooting Phase. Cultists will not charge, but will fight if assaulted. If a Cultist moves into base contact with the table edge, it will escape and is removed from the game.
Capturing Cultists: A Cultist must be defeated (“killed”) in close combat in order to be captured. Place the model in base contact with a model from the capturing unit. Captured Cultists no longer take part in the Cultist mini-turn at the start of each game turn.
A model holding a captured Cultist may neither run nor shoot. The model will release the cultist if their unit declares a charge, or if their unit is successfully assaulted. When released, a Cultist will make an immediate move 2d6” directly away from the releasing unit.
Cultists may be embarked into vehicles along with the unit holding them, as long as there is room (each Cultist takes up one Infantry space in a vehicle).
Primary Objective:
+9 Hold more Captured Cultists than opponent at end of game
+5 Hold the same number of Captured Cultists as opponent at end of game
+1 Hold fewer Captured Cultists than opponent at end of game
Secondary Objectives +1 You Hold the Captured Cultist Leader at the end of the game
+1 You Hold the Captured Cultist Sorceror at the end of the game
+1 You Hold a Captured Cultist within 12” of your table edge at the end of game
+1 Your Warlord or a model in his unit is holding a Captured Cultist at the end of game
+1 You Hold 4 or more Captured Cultists at the end of the game
+1 First Blood
PSYCHIC POWERS:
I get Paroxysm and Onslaught on the Tyrant; both Zoeys get The Horror
The Imperial Guard have brought no Psykers near this Heresy.
PRE-GAME THOUGHTS:
Spoiler:
The Psychic Powers I rolled are fantastic. No Catalyst, but Paroxysm and Onslaught are great on the Tyrant. The Horror might even be useful since I'm fighting Guardsmen.
Capturing cultists in assault should be pretty straightforward for an infiltrating assault army like mine. Raveners especially can escort them back to my rear quickly, since there is no penalty on movement for Holding a Cultist. I should be able to capture the 3 I place near me quickly and pull them back. My opponent has so many vehicles that I should be able to make a roadblock to stymie his freedom of movement, and hopefully strip a cultist or two from him with my advancing forces.
The Heavy Mortars and the Tanks are my main worries. They can erase my troops easily. Oh well, they all (except the Heavy Mortars, sadly) start in Reserve. At least he doesn't have any heavy weapons in his infantry squads: the only things he has that can instakill my T4 W3 medium critters are short-range BS3 Meltas, oh, and the 72” range Battle Tank.
If he gets his anti-troop vehicles on early, and/or I don't kill enough of his Chimeras, then I could be in trouble.
DEPLOYMENT
He wins the choice for deployment zone; he picks the side with more area-terrain ruins. My side has a couple of area-terrain ruins, but my right side is just a bunch of broken column/walls that provide directional cover. Almost every piece of potentially-LOS-blocking terrain is riddled with windows, as usual. He has one big 4” square block of LOS-blocking in his DZ.
We each place three cultists spread across the board, as close as possible to our deployment zones. He snags the Sorceror, and puts it on the right side from my perspective. I put the Cultist leader just right of center in front of my DZ. An Autogunner cultist goes in some ruins that span from the center of my DZ almost to the midline of the board. In the end I am left with the Plasmagunner Cultist, which I place as close as possible to the right of the Cultist Leader.
He deploys his Chimeras in the spaces between the ruins on his side, with each unit of Veterans disembarked behind their Chimera. Melta-vets on the flanks, Plasma-vets in the middle. His Heavy Mortars are as far back as possible, behind a ruin to my left of center.
I deploy: My Hormagaunts go in a large ruin about a third of the way in from the left in my deployment zone. The Warriors go behind them, in the ruin. Spinegaunts go in my central ruin, but a few inches back from the edge of my deployment zone, several inches behind one of the Cultists. That's it for my Troops! Thankfully I can place my Infiltrators.
I infiltrate my Hive Tyrant and his Tyrant Guard 18” away from the Plasmavet Chimeras, in the middle of the board. The Cultist Leader is about 3” directly to their right. The Raveners go in amongst the columns on the right side of the board, a few inches to the right of the Plasmagunner Cultist. The Tyrant Guard and Raveners are arranged in arcs so as to be able to force those two Cultists to run towards one another for easier retrieval later.
The Hive Guard infiltrate as far forward as possible in the central ruin, in front of the Spinegaunts – and importantly, in front of the Autogunner cultist (and closer to him than he is to the Spinegaunts).
I try to Seize Initiative – and am NOT successful. Oh well.
Turn 1 Cultists:
Spoiler:
The Cultist between my Hive Guard and Spinegaunts moves forwards towards my Hive Guard, shoots his autogun but fails to wound. The Cult Leader and the plasmagunner move towards one another, bunching up nicely. The Leader takes a wound off a Tyrant Guard with his Plasma Pistol.
The Cultists on his side run away from his lines a few inches, and shoot ineffectually at his AV12 Chimeras. The Sorceror fails to get Doombolt off.
Turn 1a Astra Militarum
Spoiler:
Pask's unit (Punisher + Executioner) move on from Reserves, rolling on behind the 4” LOS-blocking block. Chimeras all move up; for some reason (to give max cover to his Veterans? To keep their Front Armour facing the Tyrant?) he angles the two middle ones, exposing their Side Armour to the Hive Guard...
The Chimera to my right moves directly right to cut off the Cultist Sorceror from moving towards the side edge.
The Heavy Mortars overshoot the Hive Guard, thankfully missing the Spinegaunts too. The second marker tags my rearmost Hive Guard, stripping a wound. Pask unloads into them, putting 3 wounds on (killing one). The Executioner has no LOS to anything. The Chimeras shoot at the Hive Guard as well, but fail to get a wound through their armour. The unit of Plasma-vets on my left shoots at the Hive Tyrant, but misses (one overheat, but he saves it).
Ah, that's why he turned his Chimeras...he had expected to remove the Hive Guard this turn. Whoops.
Three units of Veterans assault and capture three Cultists. They consolidate back behind their Chimeras.
Tally of Captured Cultists: AM 3, Tyranids 0
Turn 1b Tyranids
Spoiler:
I get a Zoanthrope in, and it moves on from my long table edge. I bring it in behind the two plasma-wielding cultists, to make sure they don't run off my table edge. Hopefully its Warp Field will save it! I realize too late that, having Infiltrated the Raveners, they are unable to assault the two cultists on turn 1 – oops. They scoot up and to the right behind cover, to threaten a second-turn charge on the Veterans holding the Sorceror (or their Chimera, or Pask if he moves around to my right).
On my left, the Hormagaunts and Warriors move and run out of their ruin, spreading out into a long line to minimize any blast/template hits.
The Hive Tyrant moves up diagonally to the left. Gaining LOS on Pask, he successfully casts Paroxysm, reducing the tanks to BS1! For good measure, the Tyrant riddles the side of the right-center Chimera with Devourer beetles, destroying it.
Hive Guard pen the left-center Chimera twice, removing its Multilaser and Immobilizing it. That'll do, I doubt he'll try to bring his tanks up the middle now. Also gives most of my army cover from Pask unless he dares the Raveners by coming around on my right.
The Spinegaunts assault the one autogunner Cultist, capturing him and consolidating 6” back towards my table edge. They brace for Heavy Mortaring, though perhaps the out-of-cover Hormagaunts may prove more tempting...
Tally of Captured Cultists: AM 3, Tyranids 1
Turn 2 Cultists
Spoiler:
The only two free Cultists are the Leader and Plasmagunner. They move away from the Tyrant, back towards my Zoanthrope. They shoot at the Tyrant and deal another wound to the rear Tyrant Guard, killing it.
Turn 2a Astra Militarum
Spoiler:
His Leman Russ Battle Tank rolls on from the middle of his long table edge. Hellhounds are still in Reserve.
The Melta-Vets on my left mount up into their Chimera, along with their Captured Cultist (Chimera transport capacity is 12, of course, so no problem fitting in the extra body). The Melta-Vets on my right retreat with the Captured Cultist Sorceror, leaving their Chimera forward. He points out his Hull Heavy Flamer at this point and glances meaningfully at the Raveners. The central Plasma-Vets each move into a ruin behind their Chimeras (we had decided that the entire base of any ruin counted as ruins, including that of the LOS-Blocking block).
Pask rolls to my right to open up the LRBT's line of sight to my Raveners. Succesfully ordering smoke-and-shoot, Pask and the Executioner target the Raveners. Pask's few (BS1) hits are cover-saved; the Executioner's three blasts all scatter wide The LRBT erases two Raveners with its Battle Cannon, though their deaths take the Chimera's Heavy Flamer out of range. Very far out of Synapse, the two remaining Raveners fall back a good 14”!
The Heavy Mortars shoot at my Hive Guard again, but miss completely this time. The left-most Chimera shoots at the Tyrant, but fails to get through his Armour. The top hatch is thankfully out of Melta-range.
Tally of Captured Cultists: AM 3, Tyranids 1
Turn 2b Tyranids
Spoiler:
The rest of my Reserves come in. The Harpy flies on from my long table edge, and moves its full 24” so as to get LOS on the central Plasma-Vets (and keep the LOS-blocker between it and Pask). The Trygon pops up in front of it. They both shoot at the right-of-center Plasma-Vets, which Go to Ground but still lose 8 of their number. Surprisingly, they hold.
My last Zoanthrope comes on from the left-hand short table edge, and is just within range to cast The Horror on the Heavy Mortars. It is successful, but the Heavy Mortars pass their Pinning test! Boo.
The Tyrant moves up and casts Paroxysm on Pask's unit, again reducing it to BS1! Paroxysm is saving my bacon here. He also Onslaughts himself, running forward and shooting up the Plasma-Vets who hold a Captured Cultist. They also Go to Ground, but despite that he kills enough that the Cultist escapes. It runs towards my Hive Tyrant (excellent).\
The Raveners auto-regroup once in range of the rear Zoanthrope, and easily assault the plasmagunner Cultist, capturing him.
Tally of Captured Cultists: AM 3, Tyranids 2
\
Turn 3 Cultists:
Spoiler:
The Cult Leader moves away from my Raveners, forwards and right. The Cultist who escaped from the Plasma-Vets continues running away from them, left and towards my lines, ending up in front of the ruin to the left of center.
Turn 3a Astra Militarum
Spoiler:
Time is called – this will be the last turn. My opponent is now regretting having Gone-to-Ground, as his Veterans will not be able to move to recapture the fleeing Cultist! He takes heart in the likelihood of his 2 Hellhounds coming in from Reserves...but no! Neither arrive. Yikes.
His Veterans that hold the Captured Sorceror move behind the right-most ruins. Pask's unit moves around to the right of the LOS-blocker, and Pask takes aim at the Harpy (why not, he needs 6's to hit anything due to Paroxysm). He manages a few wounds, but does not fell the beast. The Harpy passes her grounding test. Under the split-fire order, the Executioner aims at the 2 remaining Raveners who hold the Captive Plasmagunner. This time a couple of the blasts hit, removing one Ravener and wounding the other. The right-most Chimera's Multilaser finishes it off, as I can no longer make cover saves at all. Thankfully the Plasmagunner Cultist limps only a few inches away from their corpses.
The LRBT targets my Hive Guard, but it scatters onto my Spinegaunts, killing 3. The Heavy Mortars aim straight at the Gaunt holding the cultist, and for the first time get a direct hit! They take out another 5 Spinegaunts and of course free their Cultist. The Cultist runs away from the remaining 2 Spinegaunts, straight forward towards the Hive Guard.
I now hold ZERO cultists, and my opponent still holds two.
Tally of Captured Cultists: AM 2, Tyranids 0
Turn 3b Tyranids
Spoiler:
Harpy flies straight forward and shoots down the board edge into the bunched up Melta-Vets who hold the Sorceror. Direct hit with the Stranglethorn Cannon due to twinlinking: 9 Veterans die, including the one holding the Sorceror! I have nothing in range to pick it up, but at least my opponent is down to one Cultist held.
The left hand Zoanthrope tries to Warp Blast the left-most Chimera, but fails to get the power off. Oh well, I guess he can keep that Cultist.
The Hive Guard forgo shooting in order to charge the Autogunner Cultist, and manage to recapture him. The Trygon moves back and assaults the Cult Leader, capturing him handily. The only unit I have in range of the Plasmagunner Cultist is the Zoanthrope, so I charge in. Sadly, the Zoanthrope's wee little claws were unable to scratch through the carapace armour of the Veteran, who runs away.
Up front, the Hormagaunts manage to charge the Cultist that had been held by the (now Gone-to-Ground) Plasma-Vets, and capture him handily.
Turn 4 Cultists:
Spoiler:
Game ended on turn 3
Turn 4a Astra Militarum
Spoiler:
Game ended on turn 3
Turn 4b Tyranids
Game ended on turn 3
[/spoiler]
Turn 5 Cultists:
Spoiler:
Game ended on turn 3
Turn 5a Astra Militarum
Spoiler:
Game ended on turn 3
Turn 5b Tyranids
Spoiler:
Game ended on turn 3
RESULTS AND POST-GAME THOUGHTS:
Spoiler:
Results: Crushing Victory!
Primary Objectives:
Tyranids hold 3 Cultists (including the Cultist Leader); Astra Militarum hold only one.
Tyranids 9 pts
Astra Militarum 1 pt
Secondary Objectives:
Tyranids
+1 First Blood (Chimera)
+1 Hold the Cultist Leader
Astra Militarum
+1 Hold a Cultist within 12” of own table edge
Final Score: 11 - 2
Post-Game Thoughts Despite my opponent's efficient capture of the 3 nearest Cultists, I was able to put the pressure on early due to Infiltration. The Tyrant being in range to put Paroxysm on Pask for most of the game was amazing, and really neutered his Warlord.
My opponent spent an inordinate amount of effort trying to wipe out my Hive Guard. They'd done their job of creating parking lot problems by turn 1, which meant that only one Cultist got squirreled away into a Chimera. I had been worried about my Gaunts getting Heavy Mortar treatment, but it wasn't until the final turn that he bothered to Mortar them. The LRBT was as brutal as I'd expected.
I really should have captured the two cultists earlier with my Raveners, rather than moving up with them (only to have them get shot and fall back). They could have handed off to my Tyrant Guard. My Warriors didn't get to do anything: they were too busy hanging back to make sure the Spinegaunts had Synapse.
It was too bad the game only went to Turn 3. My opponent's Hellhounds never came in! They could have caused some serious damage. Also, he had gone-to-ground with his Plasma-Vets with the idea that he'd get another turn in which to move them around and recapture his fleeing Cultist. Unfortunately many of the Astro missions include “extra turns for the mission” (ie Cultist turn, Convoy turn, etc.) and the time required to play those out really adds up.
It looked dire at the beginning of my last turn, since all of my Cultists were loose. Recapturing was pretty easy for my assaulty guys (except for my weak Zoanthrope) and I got to pick up one of his Cultists to boot!
-S
2000 2000 1200
600 190 in progress
2014/08/18 22:16:25
Subject: Strangelooper's Tyranids (1500 pts) at AstroTO: 6 battle reports (photos). Games 1-5 complete
Those hive guard really distracted your opponent in game 5, I guess they were worried about those impaler cannons which gave the rest of your army a bit of time to get the job done
Hive Fleet Ngaro 4800 points
Cult of the Red Saviour 1700 points
Zerg Infested Terrans 2300 points
Those hive guard really distracted your opponent in game 5, I guess they were worried about those impaler cannons which gave the rest of your army a bit of time to get the job done
I can only think that he was planning to roll his vehicles forward and paste my forces with his ubiquitous Heavy Flamers, but didn't want to risk the Hive Guard nailing any of the Leman Russes through side armour. Fair enough, and he really should have been able to eliminate them on turn 2; I just had great luck with cover saves. I'm not sure he remembered that the Hive Guard themselves were 4+ armour; a few Heavy Flamers would be quite capable of taking them out (wounding on 5+, but no saves at all). Or the Inferno Cannons, either of his Hellhounds made it to the battle...
At any rate, they were a great distraction and their survival netted me a cultist in the end!
Game 6 (vs Necrons in a rather odd mission) should get posted by the weekend.
-S
2000 2000 1200
600 190 in progress
2014/08/21 02:15:51
Subject: Strangelooper's Tyranids (1500 pts) at AstroTO: 6 battle reports (photos). Games 1-5 complete
10 Necron Warriors
Dedicated Transport: Night Scythe
11 Necron Warriors
Dedicated Transport: Night Scythe
11 Necron Warriors
Dedicated Transport: Night Scythe
FAST ATTACK:
6 Canoptek Wraiths
HEAVY SUPPORT:
Annihilation Barge with Tesla Cannon
Annihilation Barge with Tesla Cannon
MISSION AND PSYCHIC POWERS:
"Breakthrough"
Spoiler:
Special Rules:
Secured Flanks: Units may not Outflank
Unit Points: You gain Unit Points equal to the point value of an opponent's unit when it is destroyed. Units that are half-destroyed (by # models, or by # wounds/hull points for multiwound models / vehicles) give up half of their point value as Unit Points.
Blitz: If you move one of your own units off of the opponent's long table edge, it is removed from the game and you gain Unit Points for it.
Zooming Flyers and Swooping FMCs may not Blitz; they go into ongoing Reserves if they leave the board, as usual
A unit cannot perform a Blitz during the first Game Turn
A unit cannot perform a Blitz on the turn in which it arrives from Reserves
Primary Objective:
+9 Score >150 Unit Points more than your opponent
+5 Score within 150 Unit Points of your opponent's score
+1 Score >150 Unit Points less than your opponent
Secondary Objectives +2 Your Warlord performed a Blitz
+1 More of your Units than your opponent's performed a Blitz
+1 You destroyed an enemy Unit in Assault.
+1 You destroyed a greater number of enemy Units than your opponent destroyed
+1 First Blood
PSYCHIC POWERS:
I get Catalyst and The Horror on the Tyrant; one Zoey gets Catalyst, the other Paroxysm
The Necrons are dead to the Warp.
PRE-GAME THOUGHTS:
Spoiler:
Great Psychic Powers! Two Catalysts are brilliant. The Horror could be useful since Necrons are not fearless (well, except the Wraiths; I'll have to disembark a unit to use it on them). Paroxysm is always good.
He doesn't have anything that will instakill my W3 creatures, which is great. Lots of S7 and S6, but no AP on those. His Wraiths are scary to non-assault armies, but I figure that any of my hard units (Raveners, Warriors, Tyrant, Trygon) will roll them without too much trouble due to their low Initiative.
My plan was to play this pretty much like Fight or Flight, I'll try to destroy his army and not worry too much about getting off the board. He will have to come to me to get off the board himself, which makes my job easier. I'll probably have to Warp Blast the AV13 shields down, but then the Tyrant should be able to glance down the skimmers. The Nightscythes will certainly be more difficult, but as Flyers that can't Hover, they can never get off the board for points.
DEPLOYMENT
Special Deployment Rules: Deployment Zones are 18” in from the long table edges. The first player deploys a single force organization selection, then the opponent places one, etc. (alternating). No model may be placed within 18” of an enemy model. Once a player decides to stop placing selections, the rest of his forces (except Infiltrators) go into Reserves. After both players are finished normal deployment, Infiltrators may be deployed. No outflanking due to Secured Flanks special rule. Also, NO assaults on the 1st game turn.
My opponent wins the roll-off and deploys his Wraiths in the center of his line (18” in) at max coherency, to push me back. I declare my Hive Guard, Warriors, Hive Tyrant and Tyrant Guard to be Infiltrating, and then place a Zoanthrope as far in as possible (18”) on my left flank, 18” from the end of his Wraith line. He responds with an Annihilation Barge on his right (my left) opposite the Zoanthrope. I place my second Zoanthrope in a mirrored position on my right flank. So far he has pushed me back in the center, but I've pushed him back on both flanks. He attaches his Destroyer Lord to the Wraiths, and puts his Ghost Ark and second Annihilation Barge near the first vehicle on my left. During this time, I place my Raveners on my left flank, my Hormagaunts just right of center, and my Spinegaunts to the far right. I declare my Harpy to be in Reserve (flying on normally) and my Trygon as a deepstriker.
He has no Infiltrators. After some measurements, I realize that there is a small space in his back corner on my right, 18” from the Wraiths. I could probably squeeze all of my Infiltrators in there, and they'd be close to the edge for escape. However, those are my hard hitting and shootiest units, and he's already loaded up the opposite flank; he could easily move all of his forces away from them and they'd be unable to contribute to destroying him. Also, most of my Synapse is there: the rest of my army would be 4 T4 3++ wounds away from being completely out of Synapse.
So instead, I put the Warriors to the left of center (right of the Raveners) in cover; the Hive Guard in front of them, with a small building in between them and the Necron skimmers, and the Hive Tyrant + Guard go in the center of my line. Hopefully I'll have enough shooting and assaulty nastiness on my left flank to either kill his skimmers and/or force them to waste time going around to my right. There are enough gaunts on my right to tarpit the Wraiths until my Tyrant gets to them; if they come up the center, they get Tyrant, Warriors and Raveners; and if they go to my left, they get Raveners and Warriors.
I do not Seize the Initiative!
Turn 1a Necrons
Spoiler:
He makes his decision and jumps the Wraiths + Lord to my left, in front of his skimmers. Annihilation Barge smokes the Zoanthrope there; the other Barge and his Ghost Ark put enough wounds on the Hive Guard that they fail 5 saves, leaving only one remaining (with only one wound)!
Turn 1b Tyranids
Spoiler:
I did *not* infiltrate my Raveners this game, so I move them into position to assault the Wraiths...until my opponent graciously reminds me that the special deployment rules preclude all 1st turn assaults. He allow me to re-move them, and I put them up into the bit of cover behind the small house. The remaining Hive Guard moves up behind them and pens the nearest Annihilation Barge, shaking it and dropping its AV13 shield.
Warriors move up and out of cover, the Tyrant keeping pace but ending up just outside of Devourer range to the Wraiths.
Turn 2a Necrons
Spoiler:
Turn 2b Tyranids
Spoiler:
Turn 3a Necrons
Spoiler:
Turn 3b Tyranids
Spoiler:
Turn 4a Necrons
Spoiler:
Turn 4b Tyranids
Spoiler:
Turn 5a Necrons
Spoiler:
Turn 5b Tyranids
Spoiler:
RESULTS AND POST-GAME THOUGHTS:
Spoiler:
Results:
Primary Objectives:
Secondary Objectives:
Final Score:
Post-Game Thoughts
This message was edited 1 time. Last update was at 2014/08/23 01:23:41


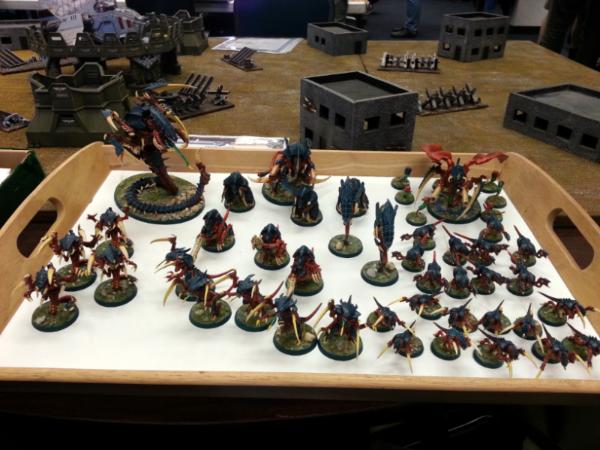
 This is obviously not a hard-as-nails list, not even close. However, with Master of Ambush locked in I'd have great flexibility of deployment, so I could tailor to my opponents and the various missions using infiltrate and deepstrike. My Hive Tyrant would always have Infiltrate. I'd have to use up one Inflltrate slot for the Tyrant Guard unit, and that would give me two more. I could give those to the Warriors, Raveners, Hive Guard, even the Trygon or Hormagaunts. The Trygon, Harpy and Raveners would also have the option of deepstriking.
 2000
2000  2000
2000  1200
1200
 600
600  190
190  in progress
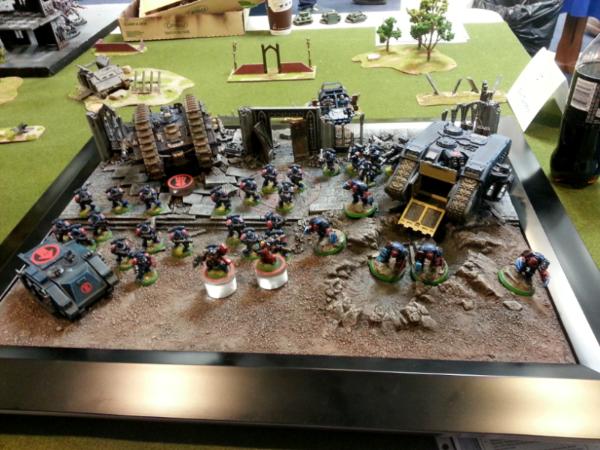
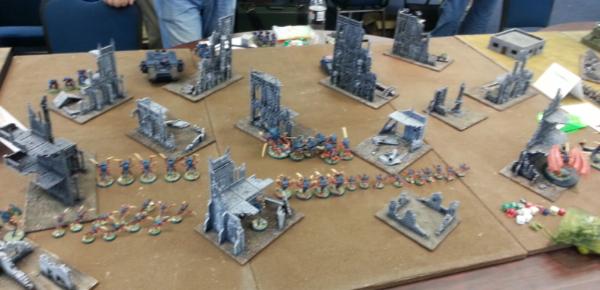
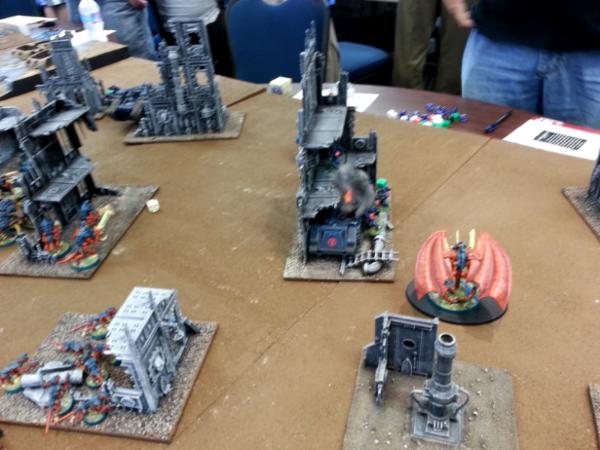
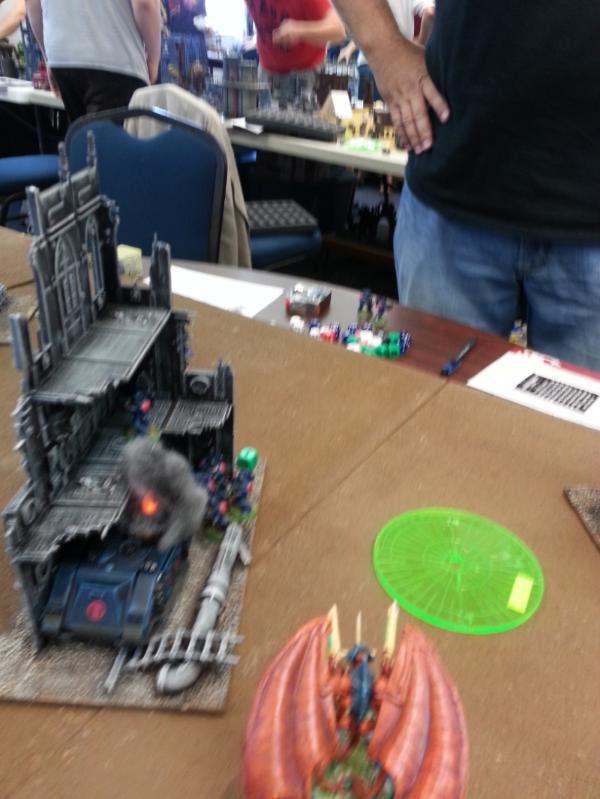
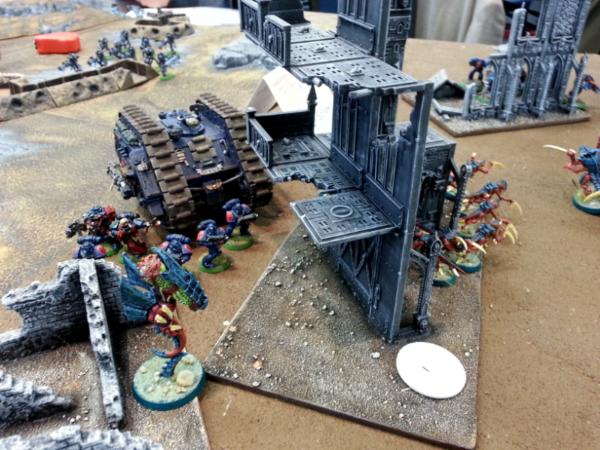
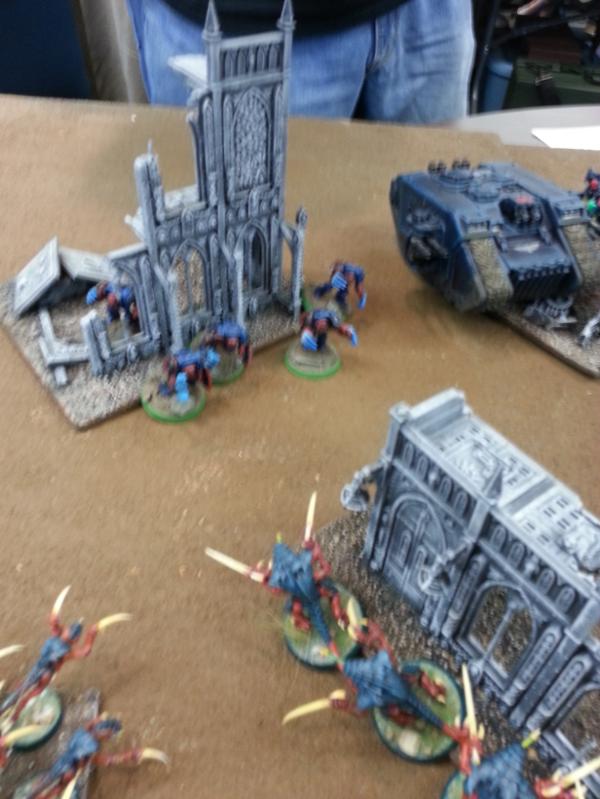
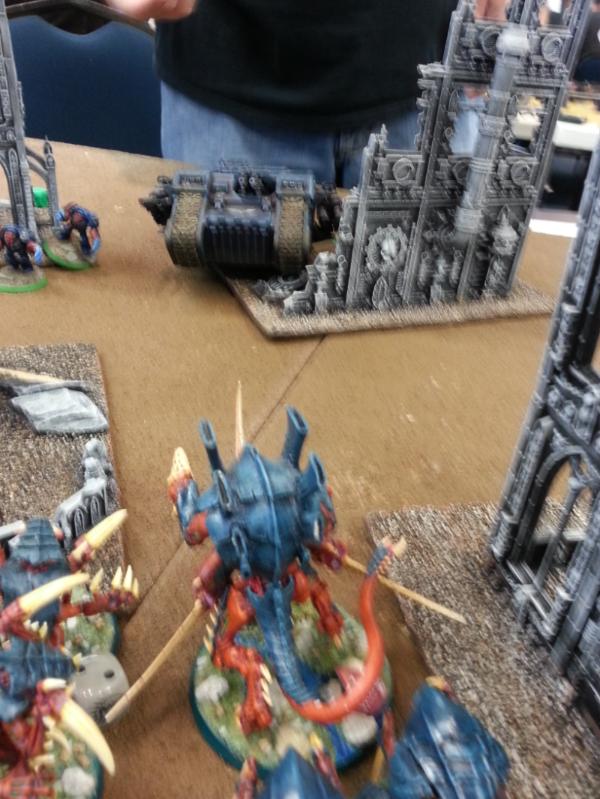
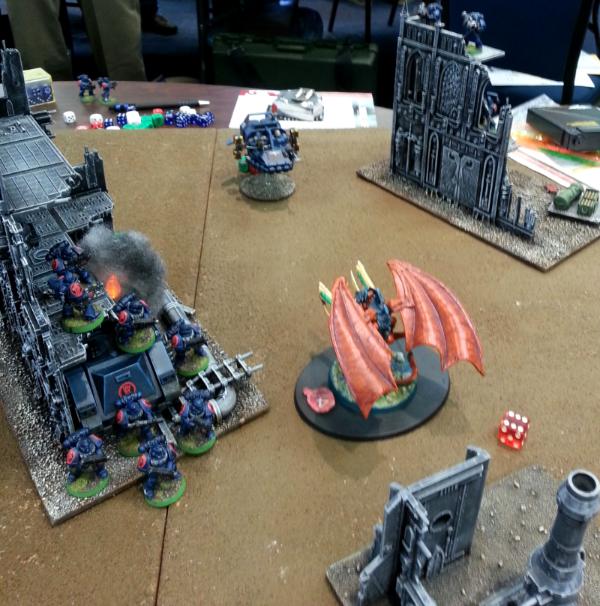
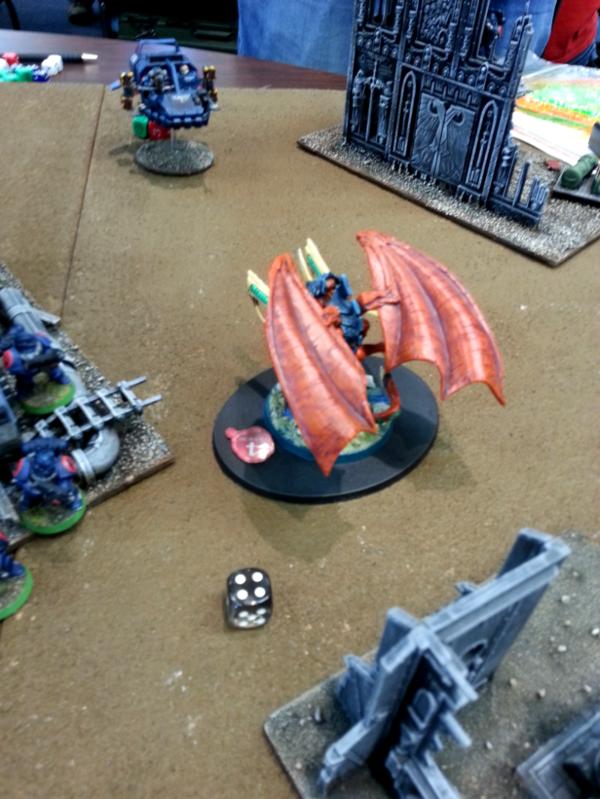
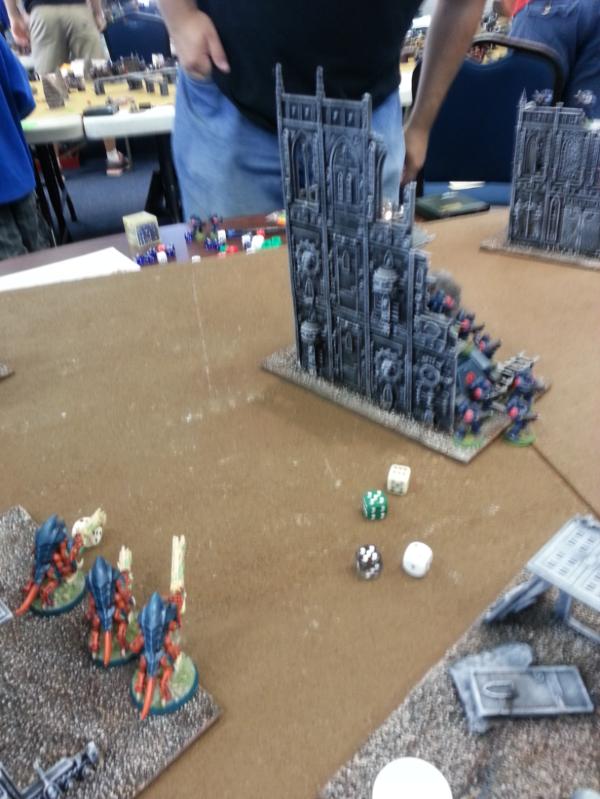
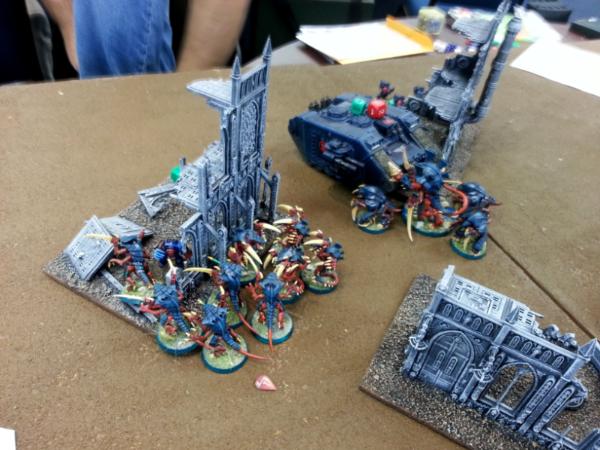
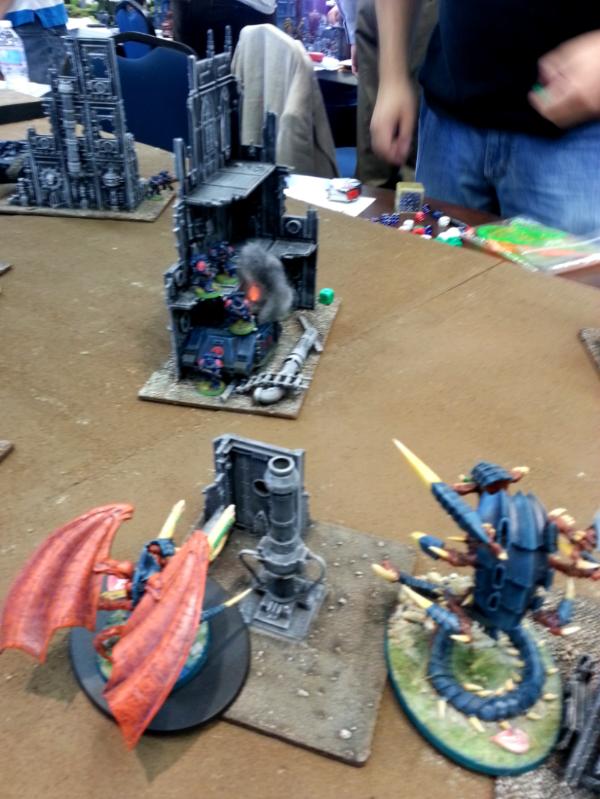
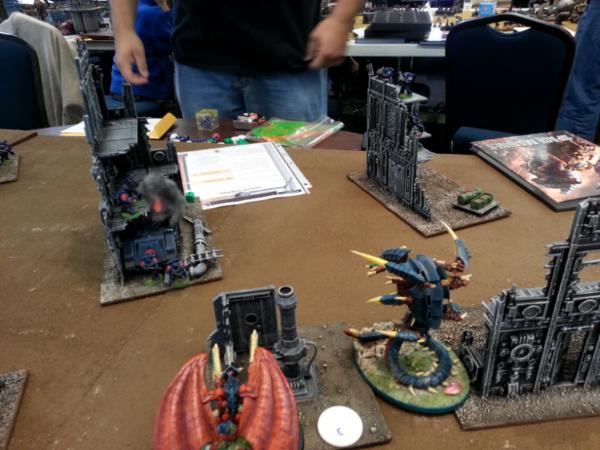
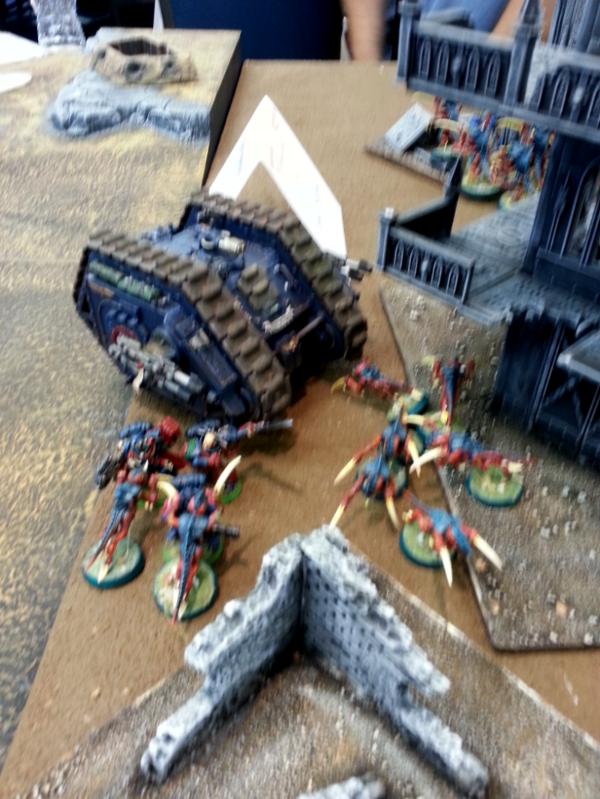


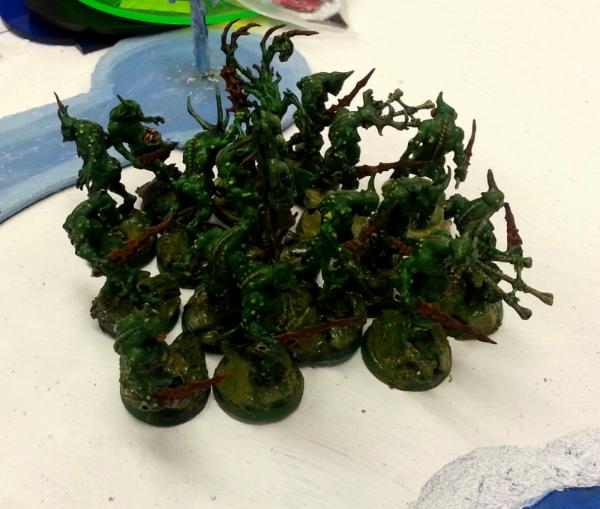
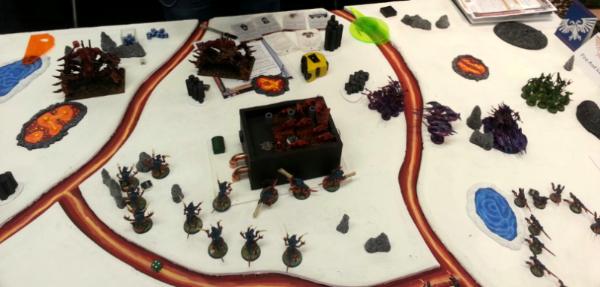
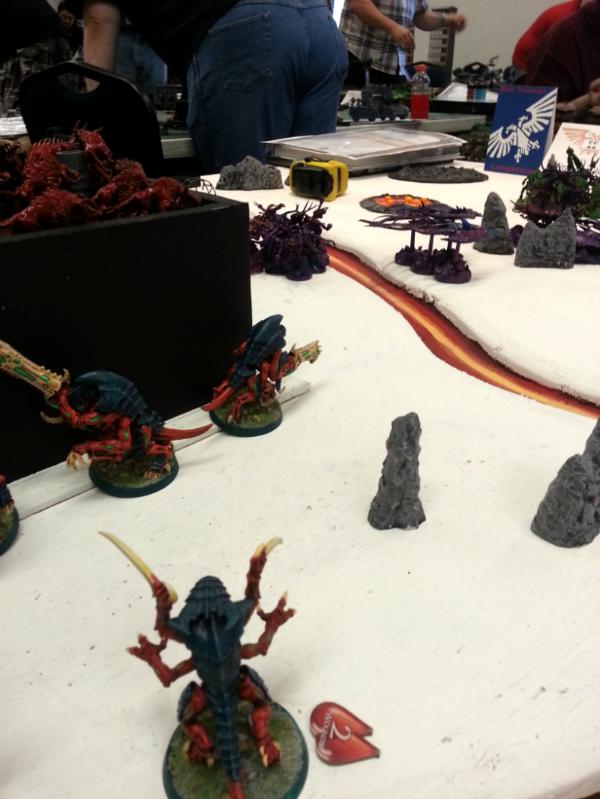
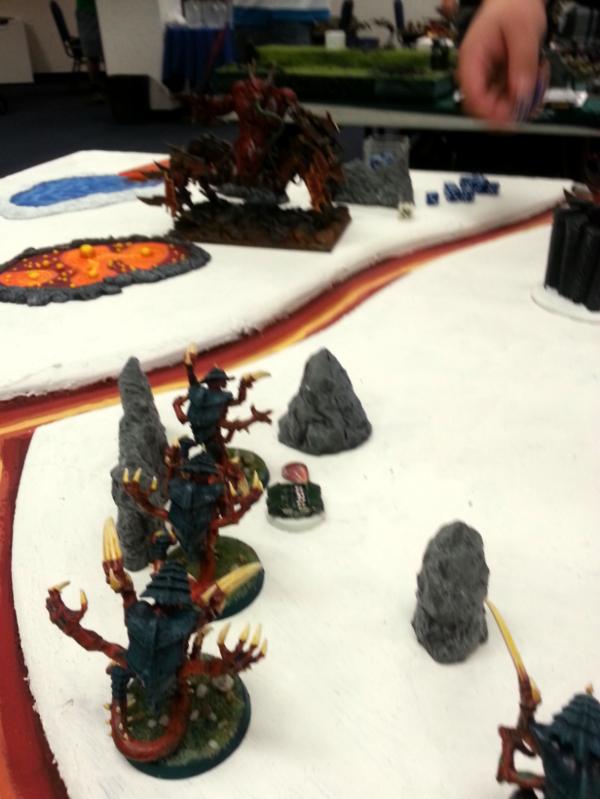
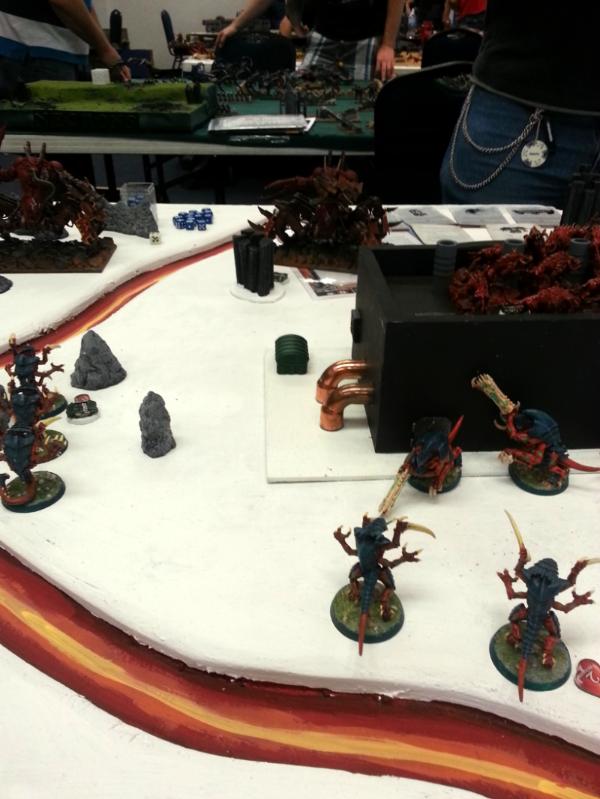
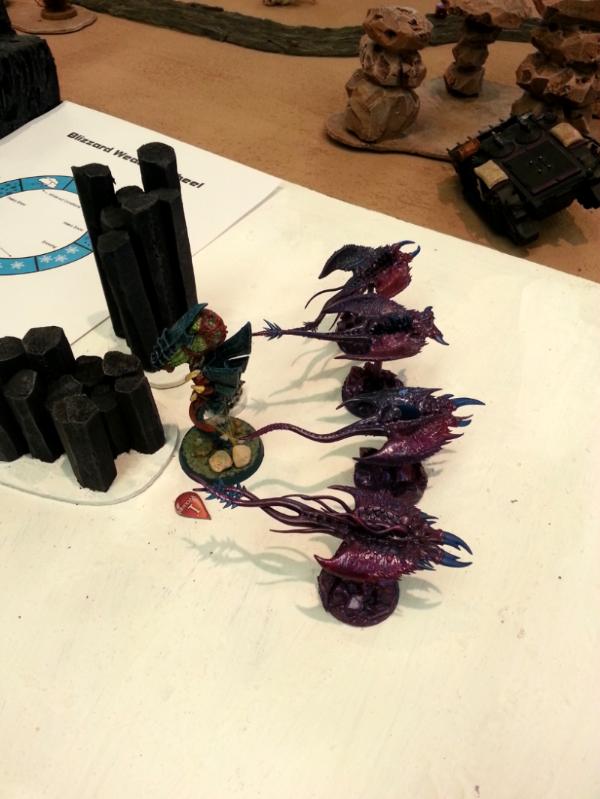
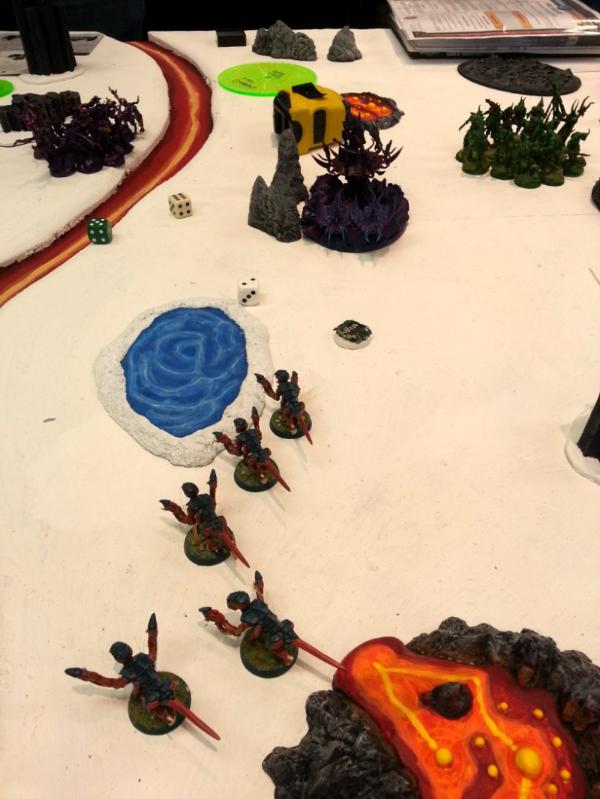
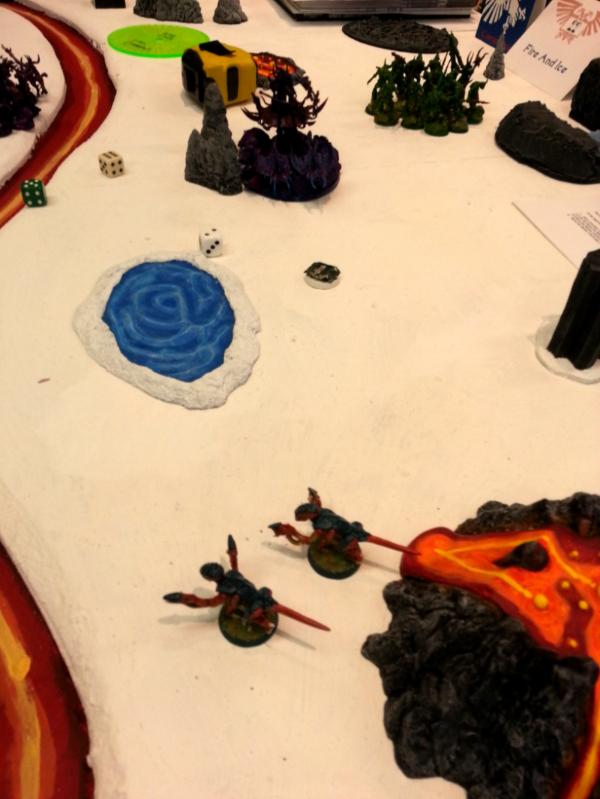

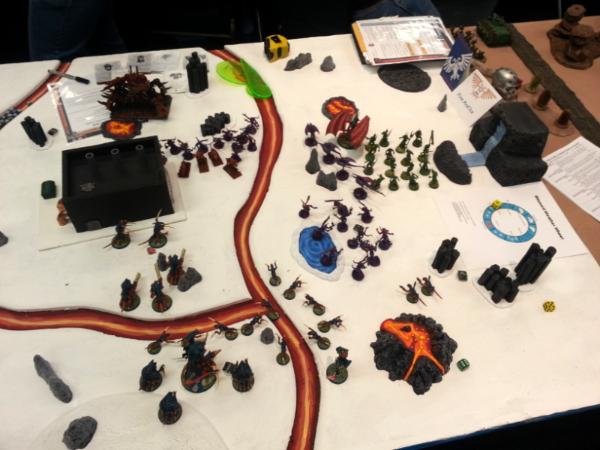
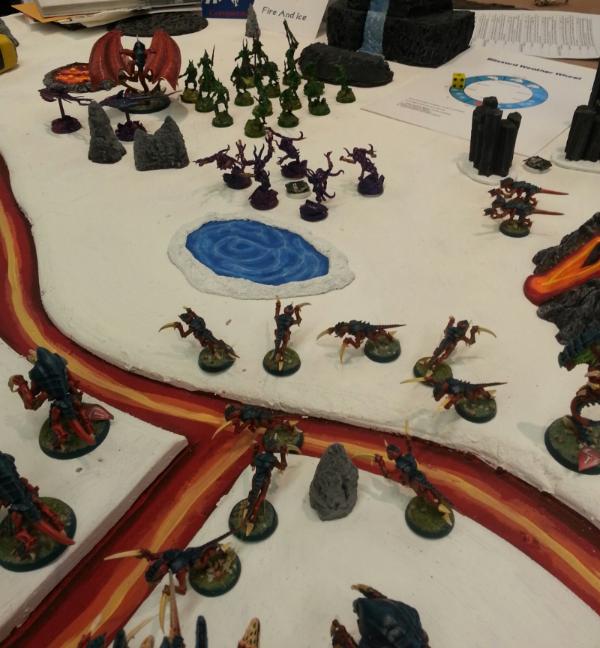
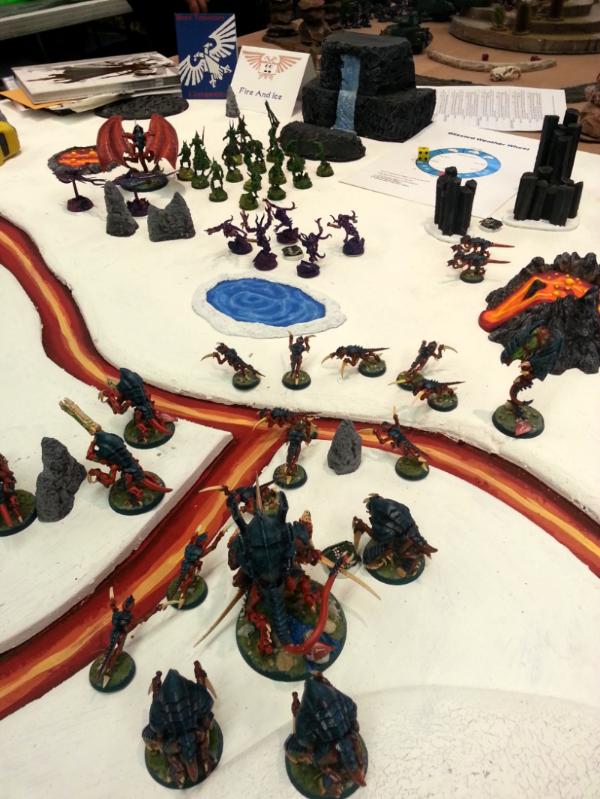
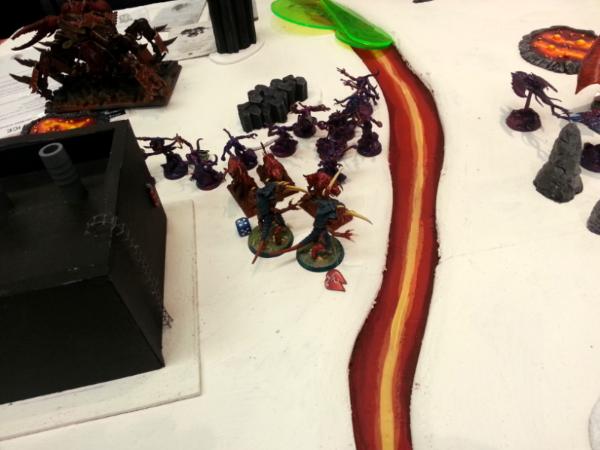
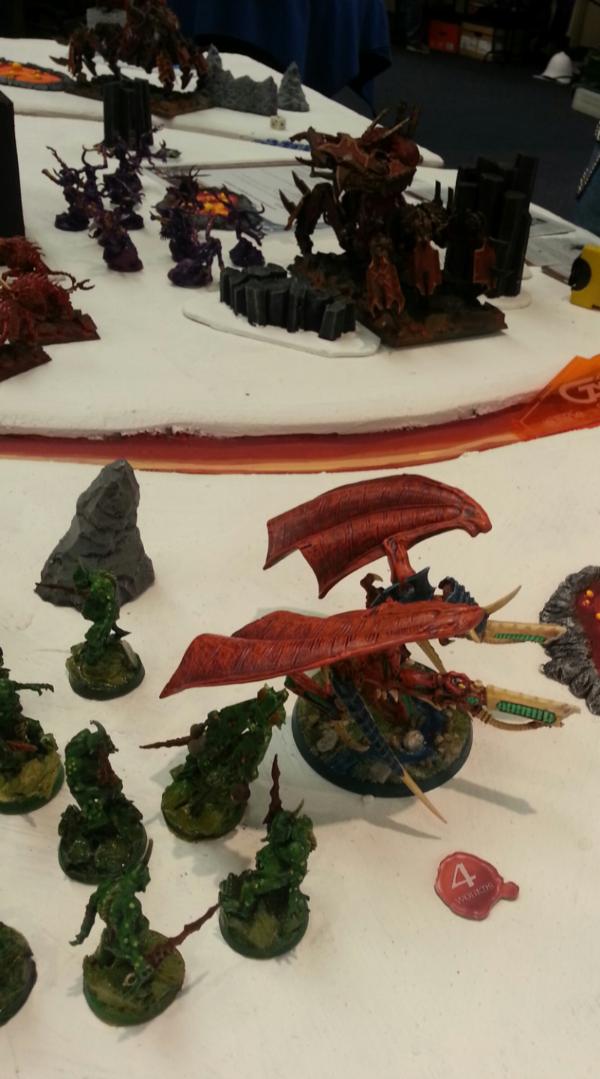
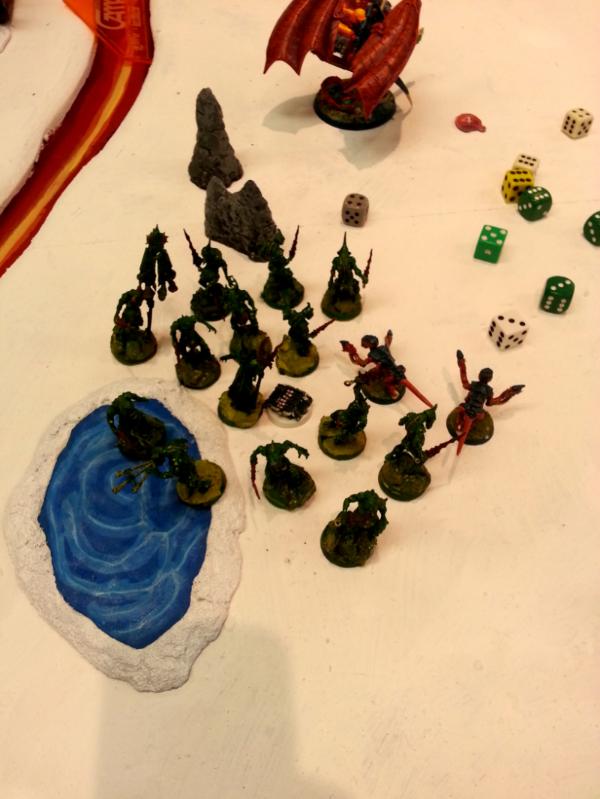
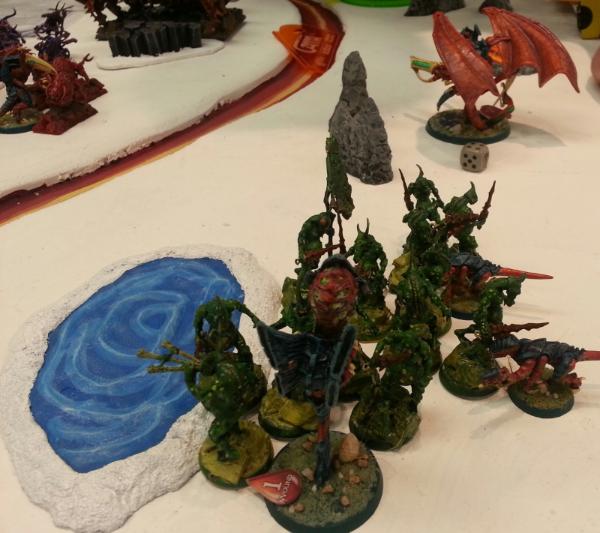
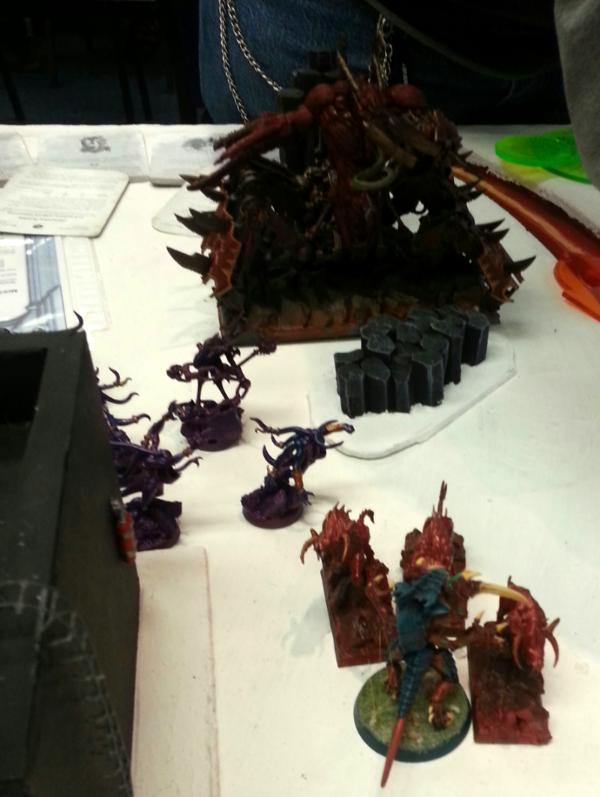
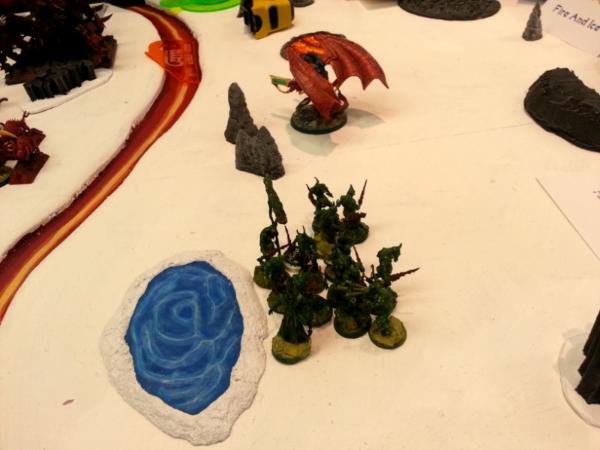

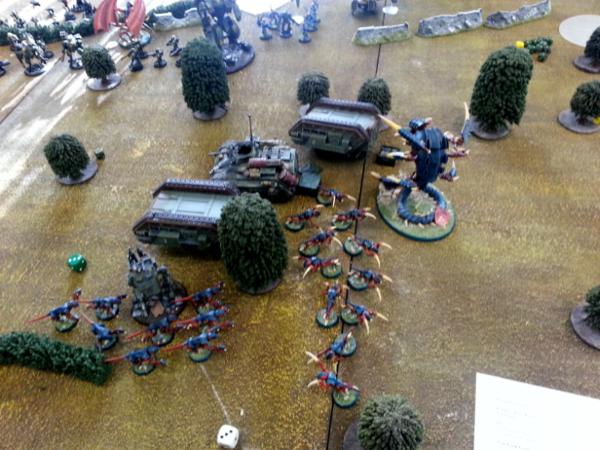
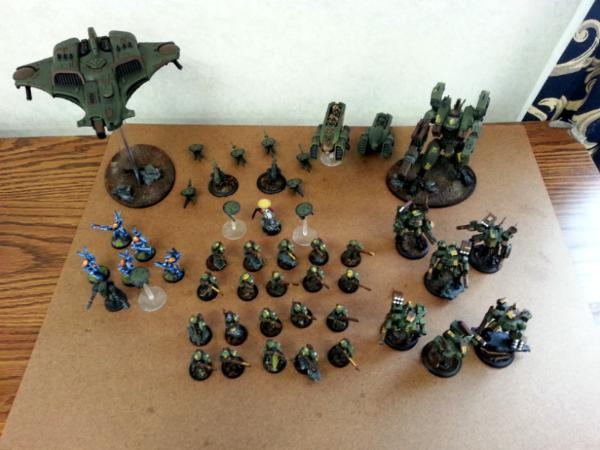
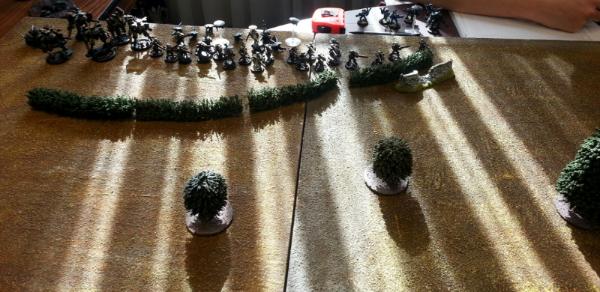
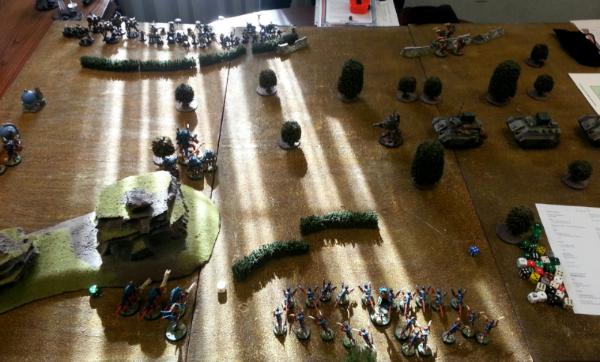
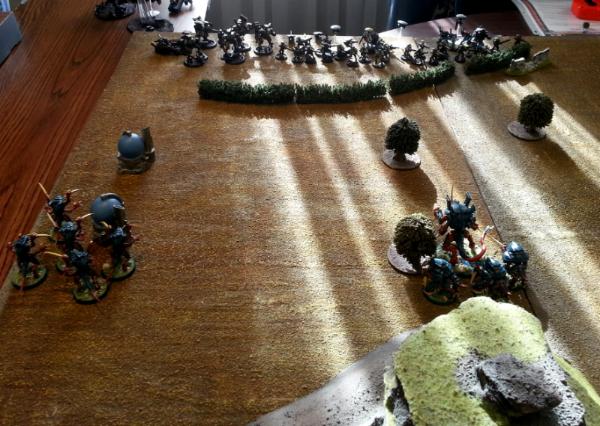
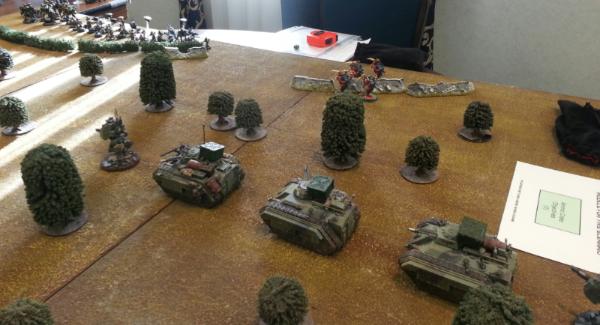
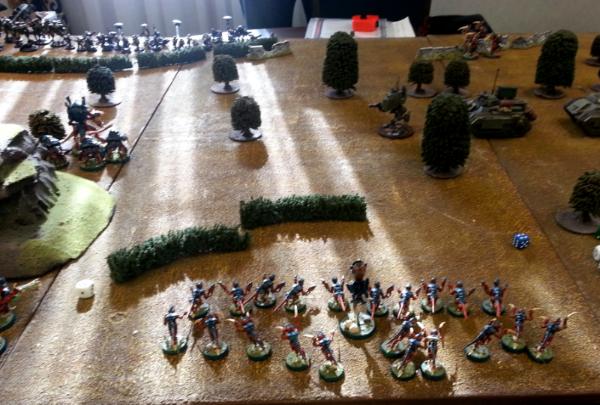
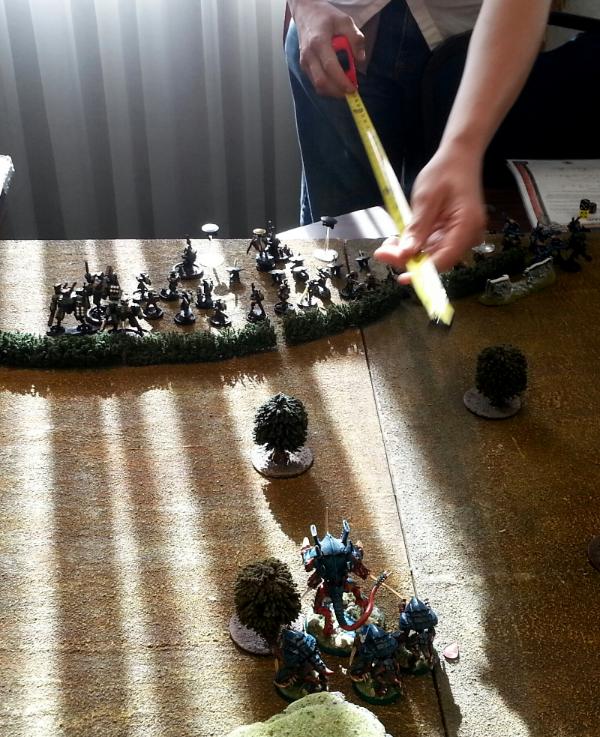
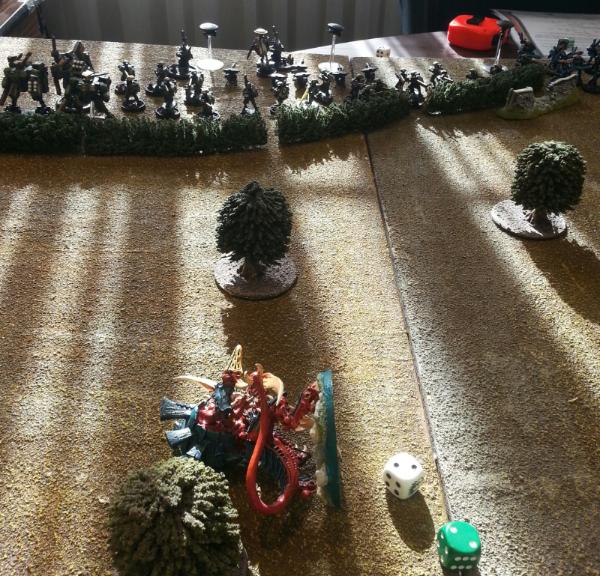
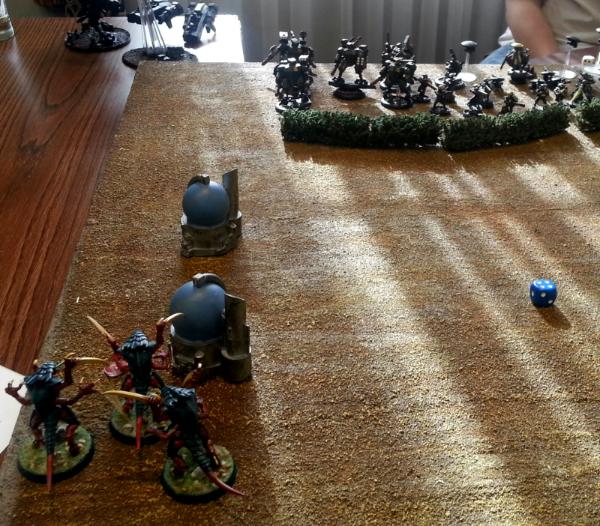
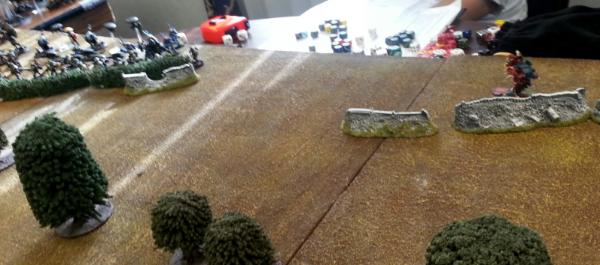
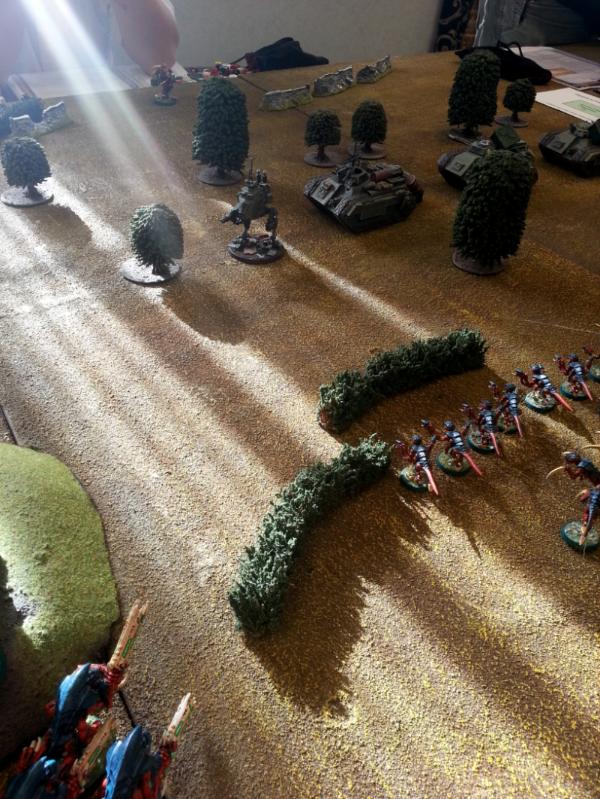
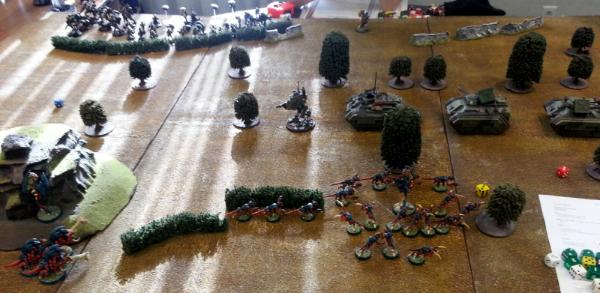
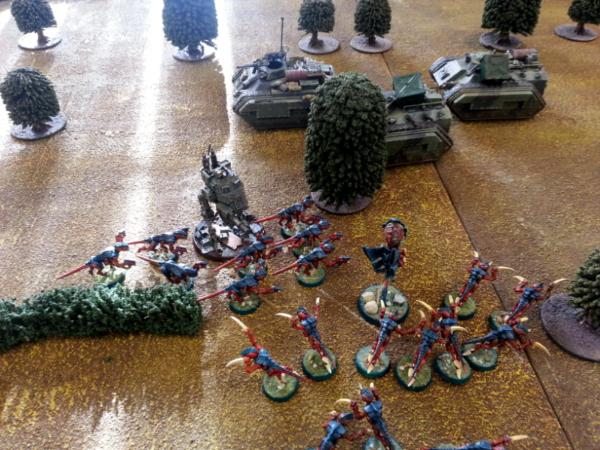
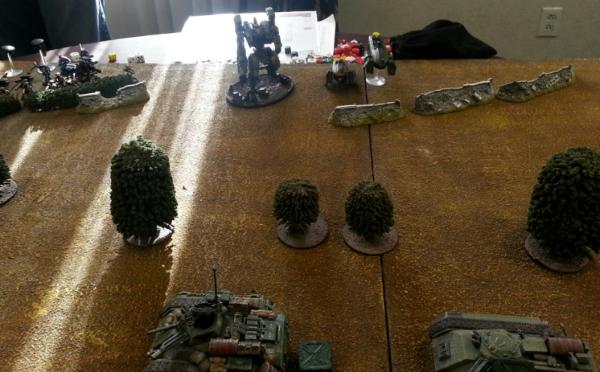
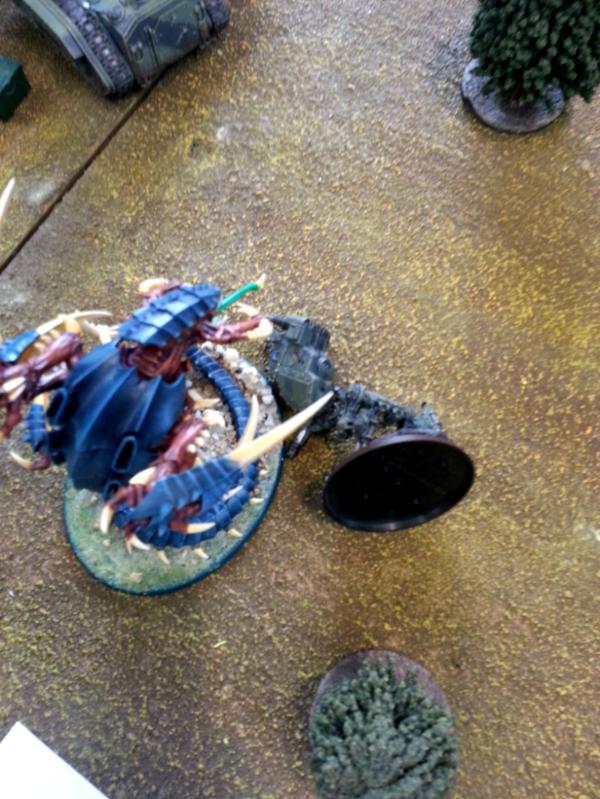
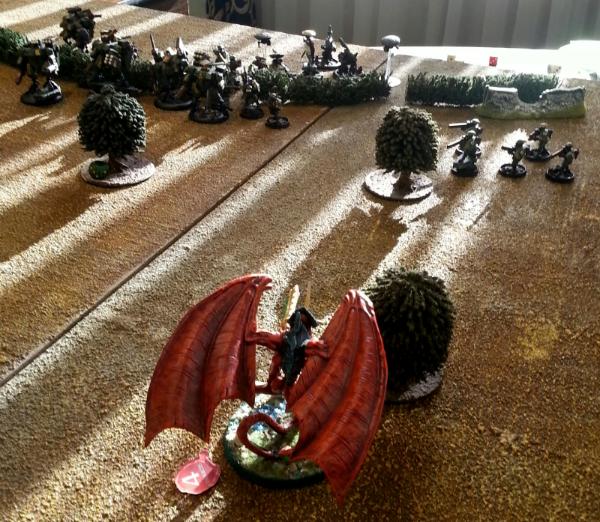
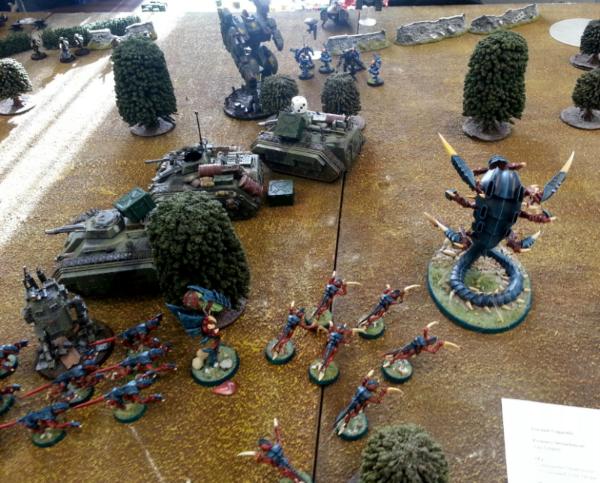
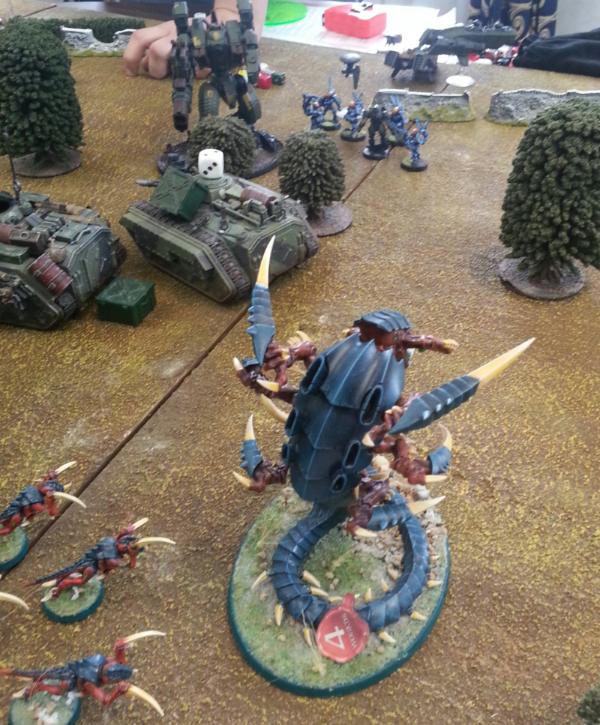
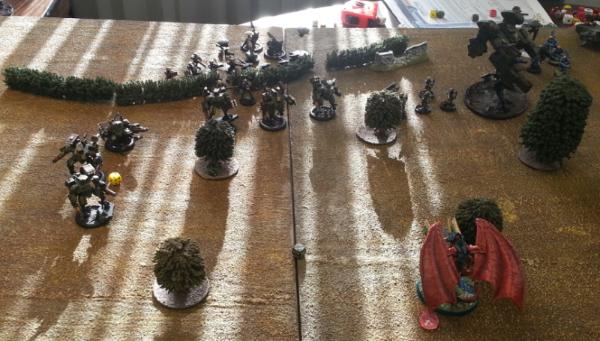

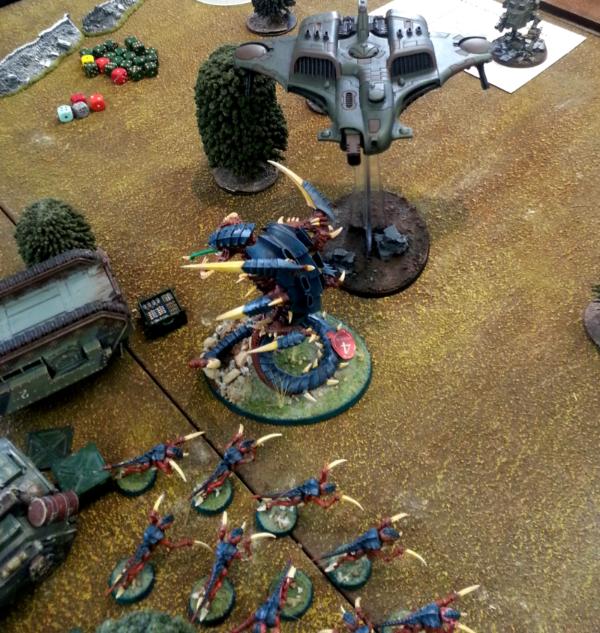
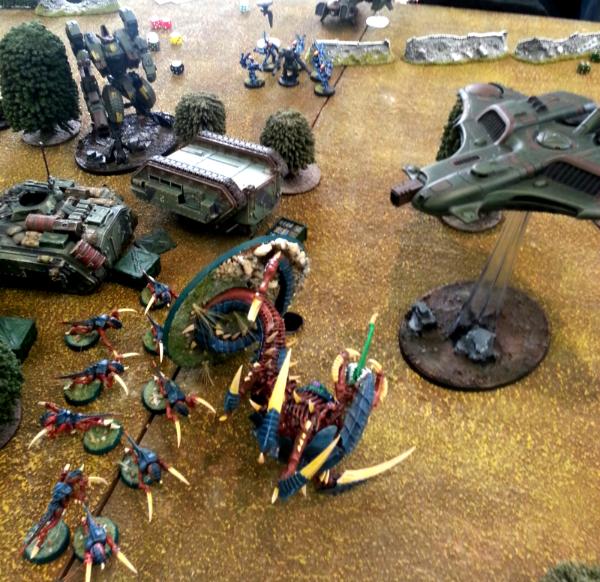
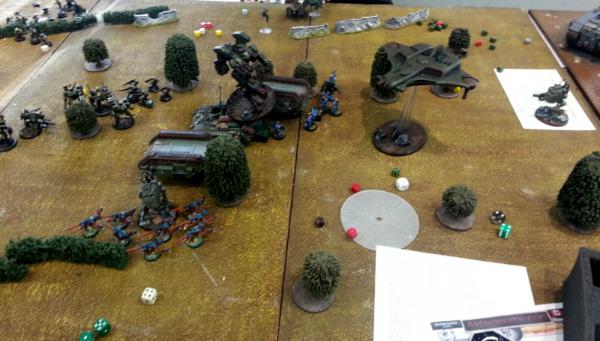
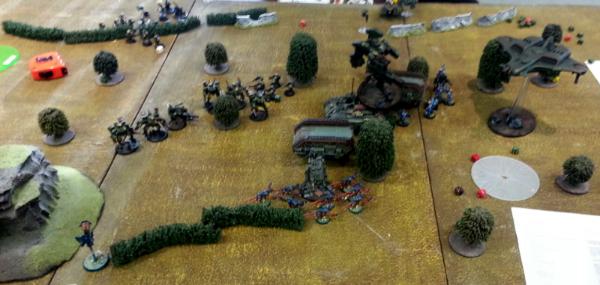

 Cratfworld Alaitoc (