Hey all, this may be useful to some, and to some it may not but i was asked how i made the set below so here's my tutorial on how i did it.
First of all the material you will be needing are;
Some form of base. The ones i used in the pictures are 6mm MDF, it's all i had on hand otherwise i'd have prefered to use 3mm MDF. Plywood works well too.
Your building material - I use a specific material called Kapron, which is very rare to get your hands on. It's a thermal retaining foam used in underfloor heating, and since i work with it, i have access to alot of decent sized offcuts to use for terrain. Essentially it's a pretty dense foam, and is very easy to work with. The same could be achieved with foamboard I suppose although the card on the outside would make it trickier to get the right look.
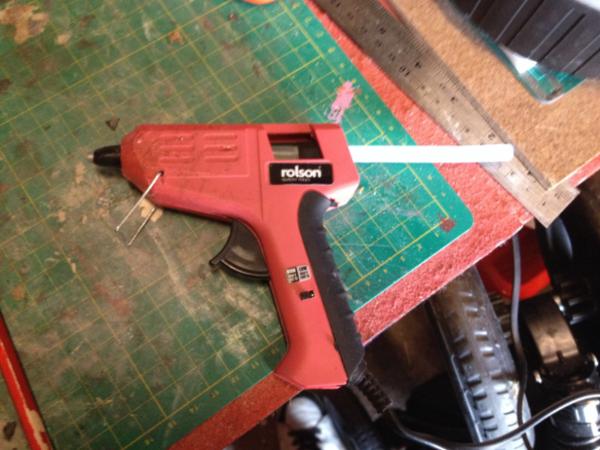
A Hot glue gun, you will see mine later on, it's a simple £4 mini hot glue gun, and the glue sticks were £6 for 100 - plenty.
A sharp stanley blade or other craft knife.
PVA glue and basing materials (i.e Flock, Sand, Small stones, Smaller stone etc etc)
and some form of pen, pencil or marker would be handy
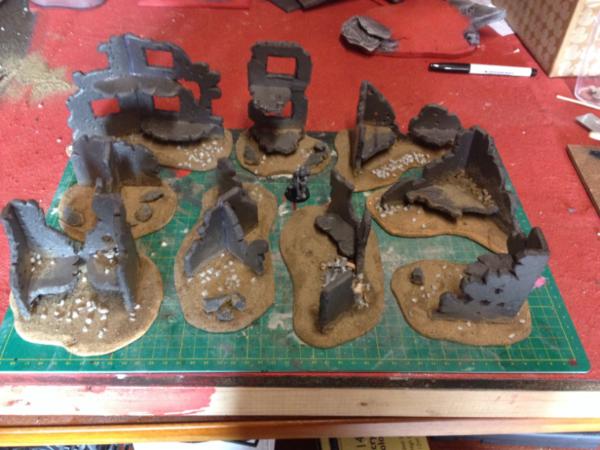
This is the set i made, 9 pieces in total, yet to be painted, I decided to make them since i ended up with alot of gaps in my battlefield between terrain and since i'm a Tyranid player i need lots of cover, (especially when faced with the wrath of Space Marines and Imperial Guard!). I'm currently in the process of making another 8 to bump up the set, hence this tutorial.
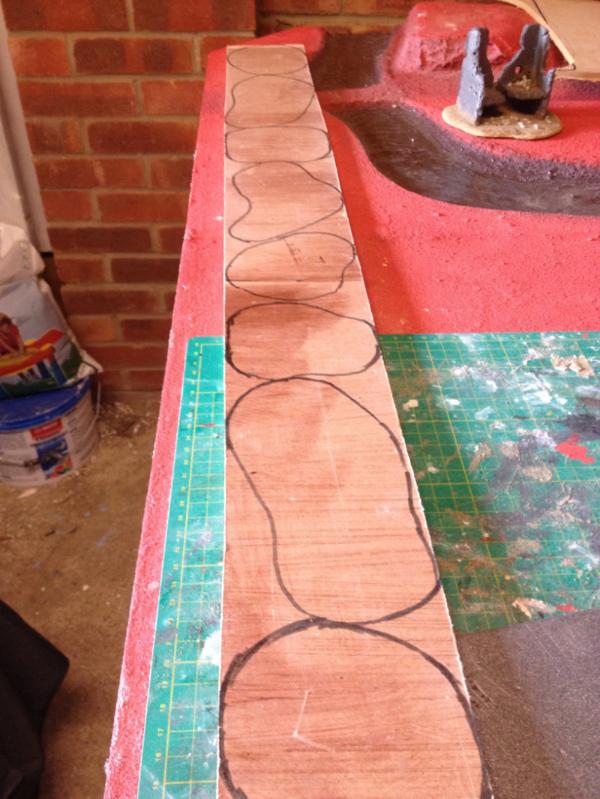
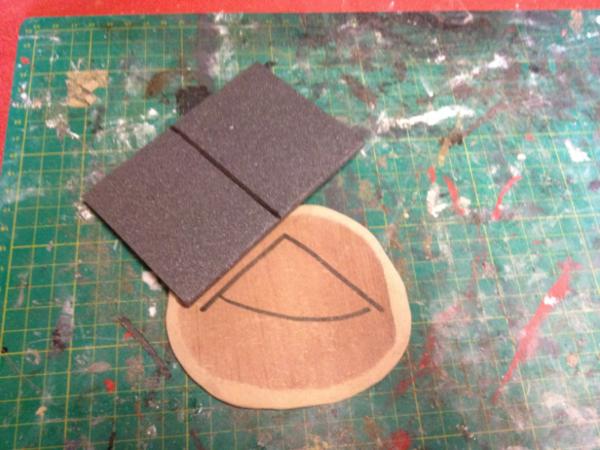
First up is decided on the size of the bases you want, I decided to simply outline a few of the existing bases i had and squiggle out some new ones too. I prefer to cut out a ton of bases in one go so i ended up doing these 8 plus another 10 for other purposes (An afternoon well spent)
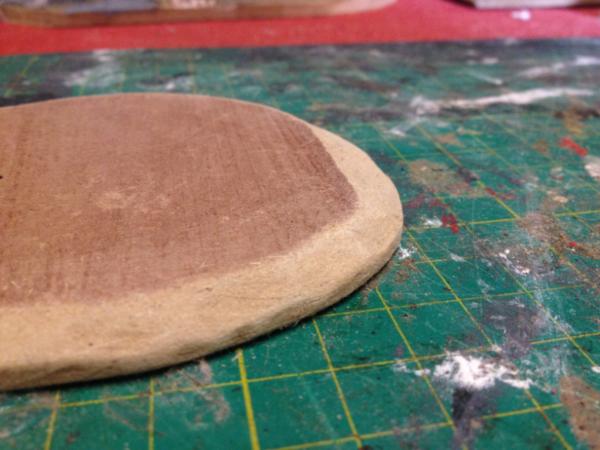
Now that they were all cut out, it bevelled the edges with a
sharp utility knife and sanded them smooth. How much you bevel is up to you but i generally get a good slope and take of 2/3 of the thickness of the base, so from 6mm down to 2mm. Also be careful when doing this, it's an easy way to lop off a finger, or at least get a half decent slice into one.
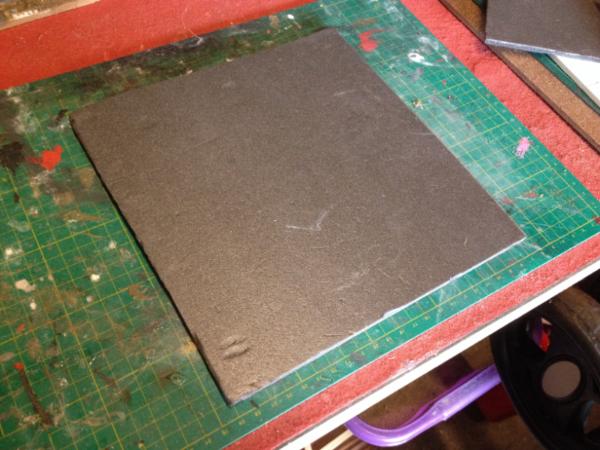
Here is the wonderful Kapron, it comes in large 2 metre square sheets, but i usually end up with offcuts about this size for
40k use which is more than plenty!
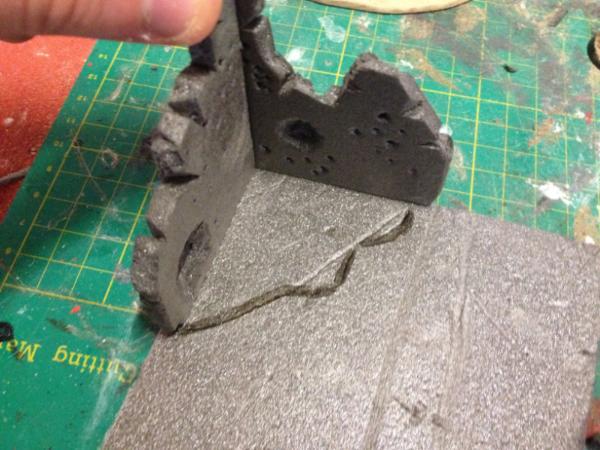
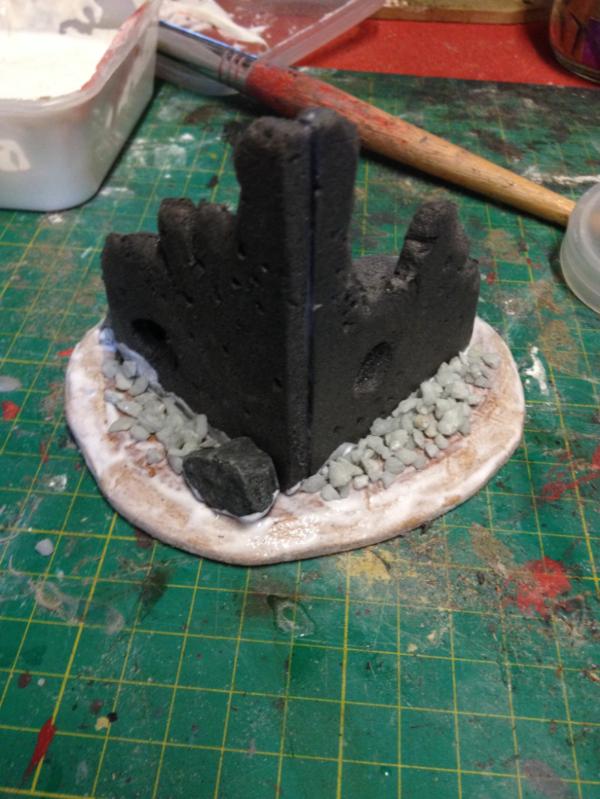
I cut myself a chuck of the kapron and drew on where i'd like the terrain piece to go, so you can see i've marked on two walls and a joining floor section. After that i test fitted the pieces together with a mini to see how much i'd need to alter them in the next couple of steps.
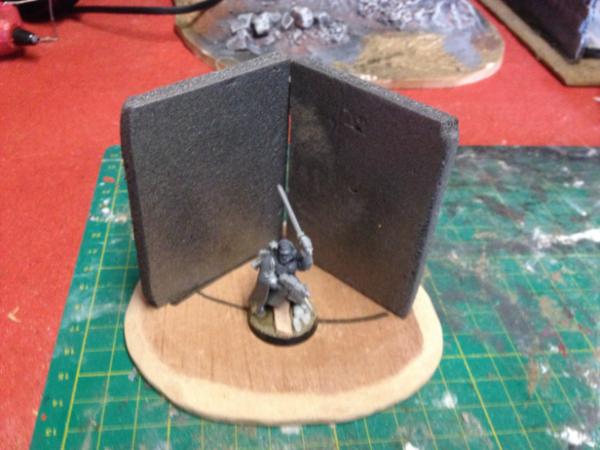
Next up, I drew out my design onto the kapron and cut it out. Using the mini i got a rough idea for the level for the floor.
Another test fit once they were cut out gave me a general idea of the terrain and how it was coming together.
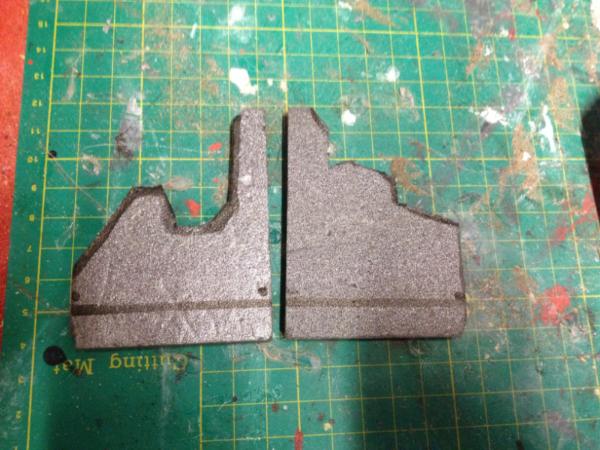
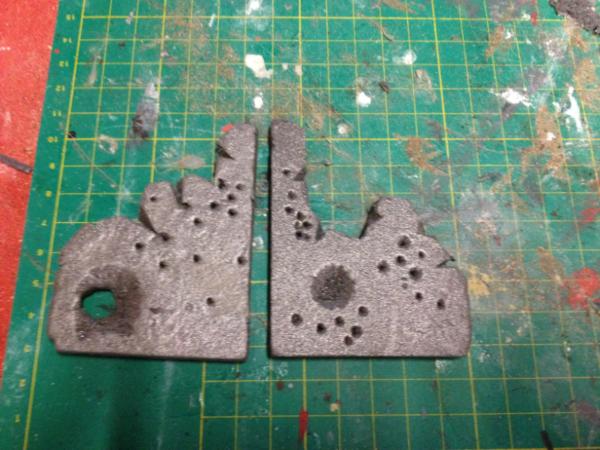
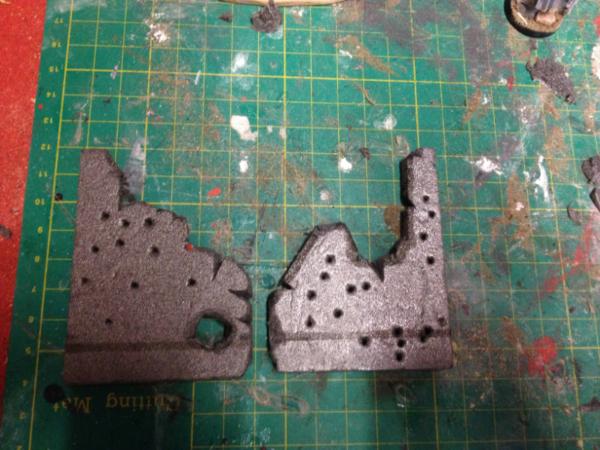
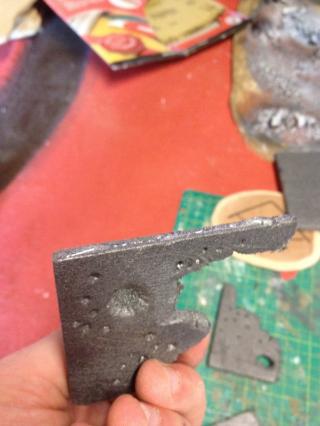
Battle damage time now. This is a simple step where you can let your mind run free, stabbing everywhere you want. The bullet holes were done with various pressures from a pencil, the blasts were done by cutting a circle with the utility knife at about a 30 degree angle to the kapron, and the chips were simply two of the same angled cuts, done at various lengths around the piece. Don't forget the back too!
This is my wonderfully cheap glue gun, if you don't have a glue gun i would strongly recommend one if you're a terrain builder as the glue bonds within 5 seconds.
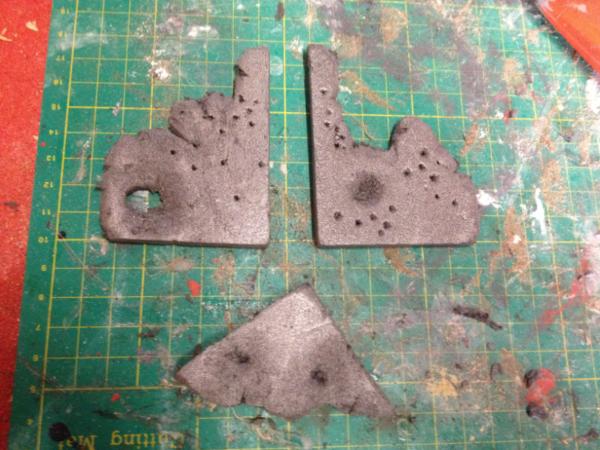
While it was heating up I measured out the floor section for my terrain, cut it out, damaged it, and roughed up all of the pieces' edges with some medium sandpaper, this takes off the new and straight corners and edges and makes the pieces look a bit worn.
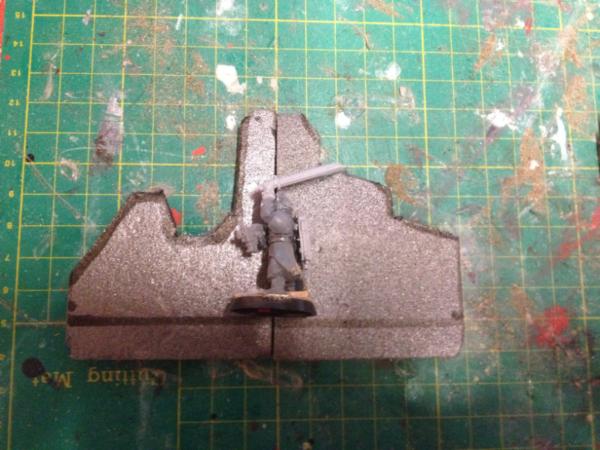
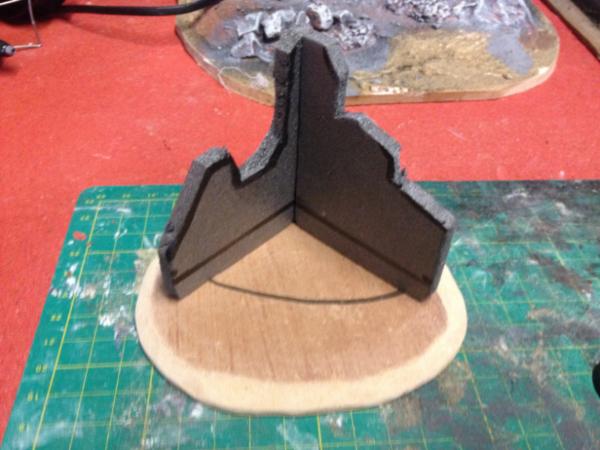
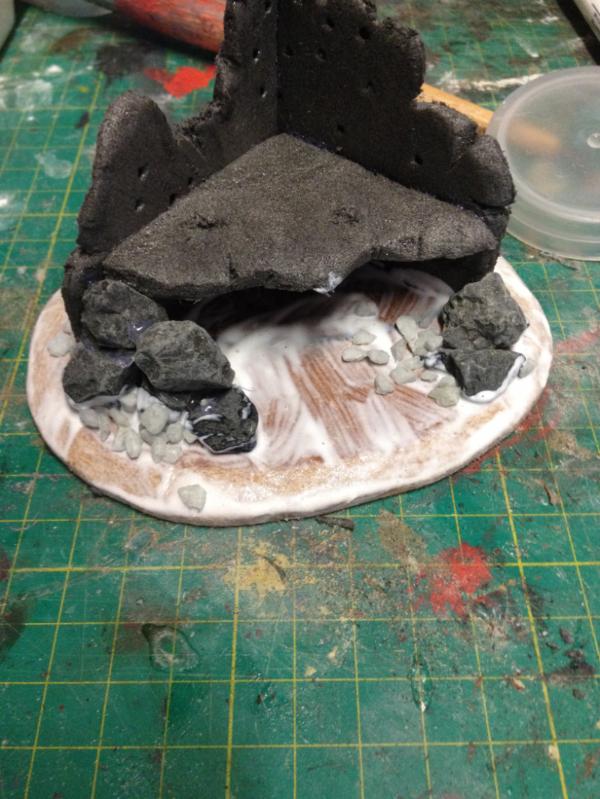
A fine bead of glue along the joins and this baby was set together in no time. I think i used too much glue here, if you can avoid it spilling out the edges that would be better, but with hot glue once it had passed it's super hot moment it is easily smoothed down/wiped off. I also adjusted the level of the floor with the mini for reference, so that decent cover was provided but also allowed the model to be in view.
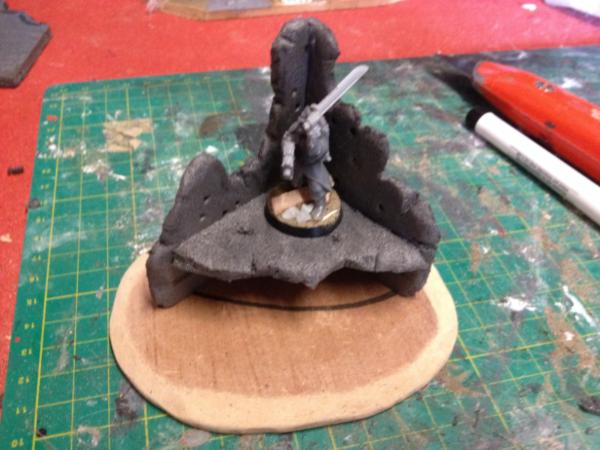
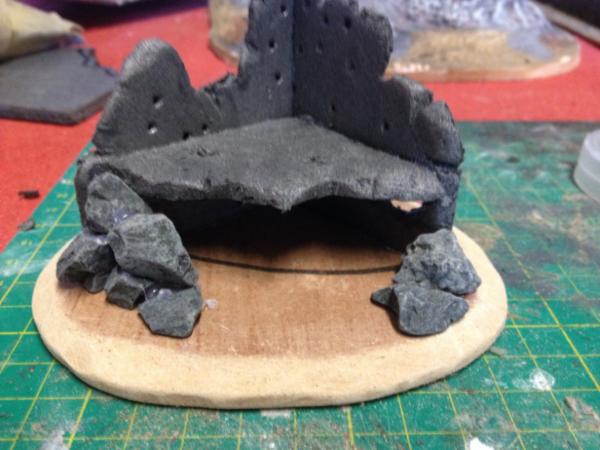
Once glued down to the base, it was essentially a piece of terrain.
These little rocks have come in very handy for me, they were dirt cheap too (excuse the pun). I just added them to the base with hot glue. Once again i put too much on, but i could take care of this by coving it with smaller rocks or sand.
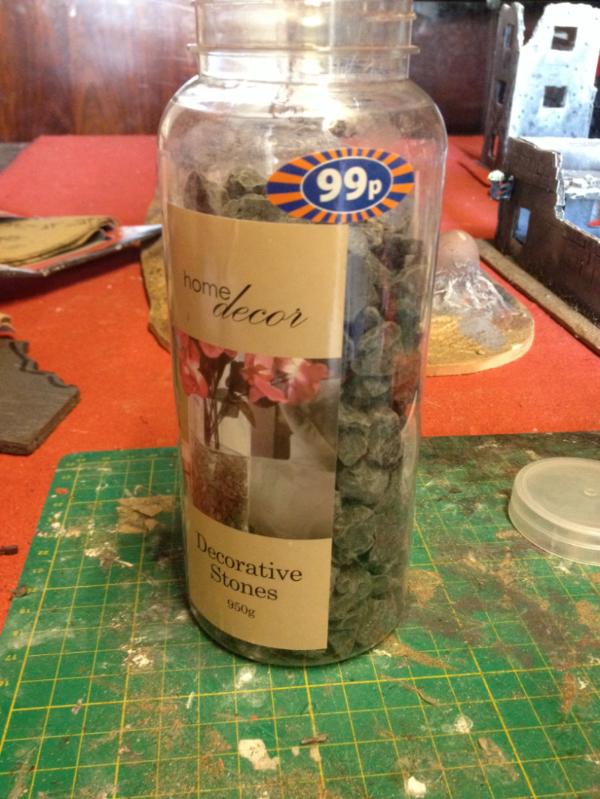
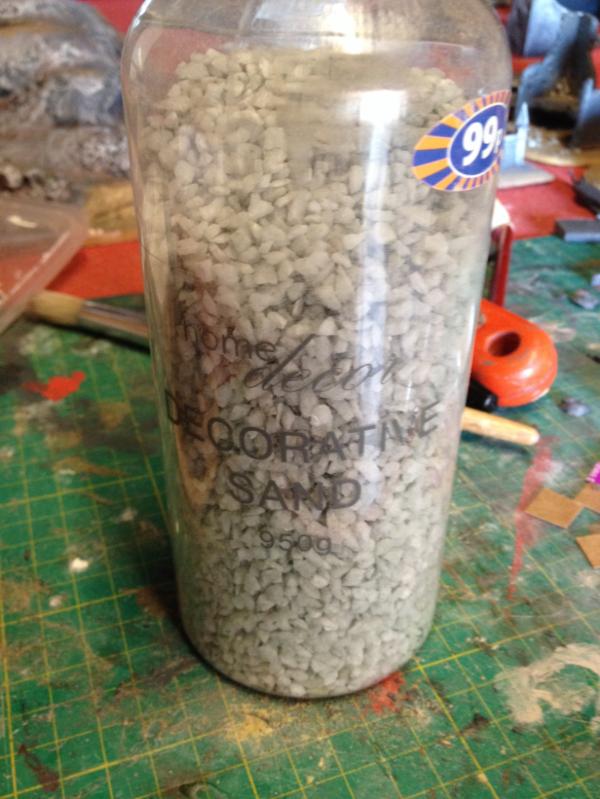
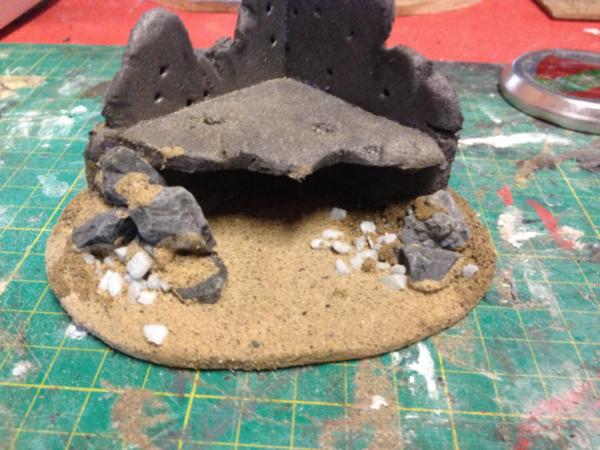
I then applied pva glue all over the base and added some smaller rocks (decorative sand as it's called)
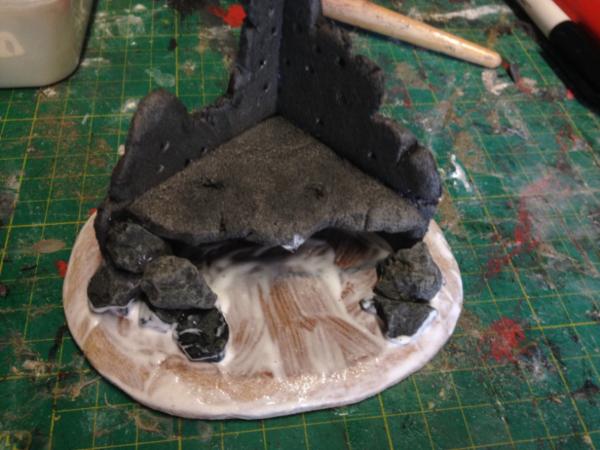
The smaller rocks were on and covered most of the gaps nicely, all that was left was to dunk it in sand to cover the rest of the base.
This would be the point where you start to add trees, clump foliage, plants, rubble or whatever else you have to the piece, depending on your battlefield. I just have a plain red sand-based tyranid desert-planet battlefield, so i have no need for lush green foliage and plants, but that's just me.
Now i just like to use plain old building sand and beach sandto base, with a mixture of my daughter's fine grade sandpit sand thrown in, but at this stage you can use all kinds of basing materials that suit your budget, gaming table or what you have in stock (your terrain materials).
All done now, just another 7 to build. These roughly take about 30mins to build individually from cutting out the base to adding the base materials, which is why i like to work in batches of 8-10 as they can be done in around 2 hours-3 hours.
As for painting, I would do a black undercoat (not with an aerosol spraypaint though as it will eat through this material as it would polysyrene), followed by various drybrushed shades of grey paint from dark to light getting higher up the model with every lighter shade and a drybrush of purewhite on the very tips of the building. some watered down shades of grey paint, applied like rust streaks, also make the building look well weathered.
I know this was a long tutorial, but i hope it was worth it and that you can at least take something from it, be it a new material, some inspiriation, or a technique.
Thank you, Peace out!
iN


