Switch Theme:

My most ambitious model to date WIP  [RSS] Share on facebook Share on Twitter Submit to Reddit
»
Author Message
Advert


Forum adverts like this one are shown to any user who is not logged in. Join us by filling out a tiny 3 field form and you will get your own, free, dakka user account which gives a good range of benefits to you:
  • No adverts like this in the forums anymore.
  • Times and dates in your local timezone.
  • Full tracking of what you have read so you can skip to your first unread post, easily see what has changed since you last logged in, and easily see what is new at a glance.
  • Email notifications for threads you want to watch closely.
  • Being a part of the oldest wargaming community on the net.
If you are already a member then feel free to login now.


Made in us
Regular Dakkanaut


Now its not war gaming, but its modelling none the less. Now it was me and my misuss [insert number of years here because its 7 or 8 but i forgot] anniversary and because she is the best girlfriend ever, she promptly handed me this.


I've spoilered out the nitty gritty so you can insta see where I'm at now

Spoiler:
So there I am thinking "I can glue together a chimera, I can do this" Even after seing the skill level 5 warning thingy.

Now its plastic but its pretty damn big so theres some actual modelling skills that need to be learnt because the kit does have errors (very minor and possibly me being picky) and lots of large parts that need joining. I wanted to use super glue so its easy to take apart should I make some mistakes, however I have now moved over to the "GW super glue sucks balls" crowd. All else I have to hand is the plastic cement from gw which is doing the job admirably.

First thing is the hull and is the largest part. I really wish i had some clamps or a vice because this plastic is very rigid compared to the gw stuff so you need to give it some heavy hands whilst the plastic melts. AS you can see you glue one part then need to glue the rest because it doesnt line up perfectly . Notice how at the bottom of pic 1 and the right of pic 2, that the hull is glued together (with the join line nice and visible) but the fore is still wide open.


Something that I want to rectify later down the line is some of the rivets on the hull, alot of them are nice and exposed but some are almost non existent so will have to add some.


I've just finished putting the stern on and just so you can see the vastness of this model I have placed a centurion and a guardsman on the fore deck. Now, when it comes to painting, I think I'm going to have to use an airbrush. I prefer regular brushing but...I do have to die of old age at some point and would like the model to be finished before then

   
Made in gb
Incorporating Wet-Blending


Wales: Where the Men are Men and the sheep are Scared.

Creative use of bread there.


Made in us
Colonel


This Is Where the Fish Lives

Off to a good start!

I'm getting ready to start working on a submarine model as well, except is a 1/350 scale USS Michigan (SSBN-727). It is for a family friend of mine that served on the boat when he was in the Navy.

Good luck on the build!

 d-usa wrote:
"When the Internet sends its people, they're not sending their best. They're not sending you. They're not sending you. They're sending posters that have lots of problems, and they're bringing those problems with us. They're bringing strawmen. They're bringing spam. They're trolls. And some, I assume, are good people."
 
   
Made in gb
Is 'Eavy Metal Calling?


UK

That's a big'un. My dad has an almost-finished one of those and it is very impressive, you'll have something awesome at the end of this!


Made in us
Near Golden Daemon Caliber


Illinois

Switch to wheat! It may give you a few extra days on the end of your span for which to complete the project

Quite large, good luck


Made in gb
Regular Dakkanaut


Thanks guys. The aft section was a real pain as I had nothing of the correct height to rest it on so out came the bread XD

Anyway, another day and some more glueing and sanding. I've also been reading and looking for extra bits. Its starting to take shape now but it feels like its missing something. Looking online shows up a whole load of extra etched brass details that I feel it really does need. I also want to get a proper laser cut, wooden deck cos the plastic one looks a bit lacking. I guess this is just a disadvantage of injection moulding. You can also get hold of brass weapons. I want some of these because...Well the plastic guns are fiddly and I cant get the barrels right, so they will be a stop gap until I get some brass ones.

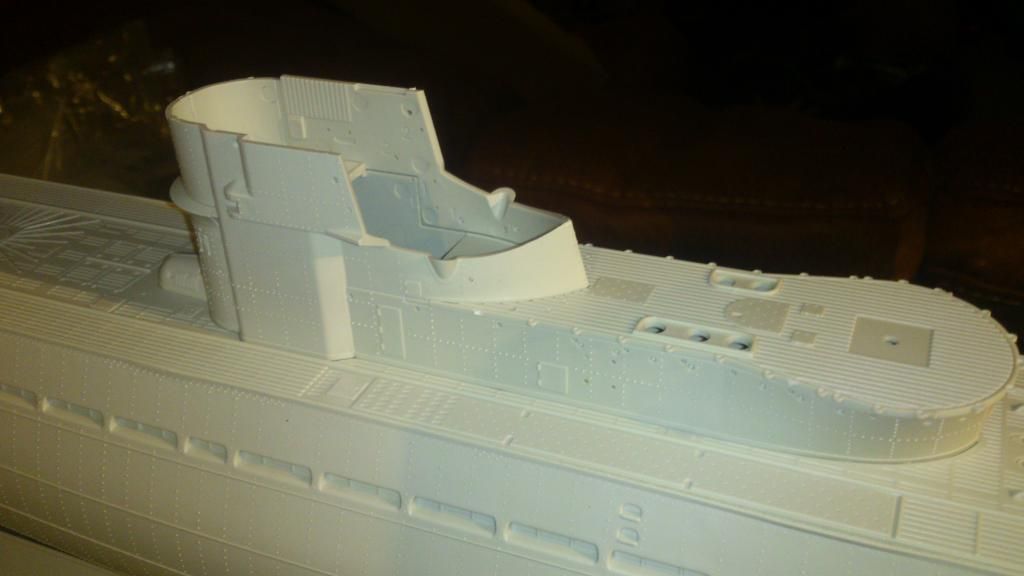
Anyway, some pictures. Please note I still have some sanding and gap filling to do but now the conning tower is test fitted, its starting to take shape and looks good on the window sill.

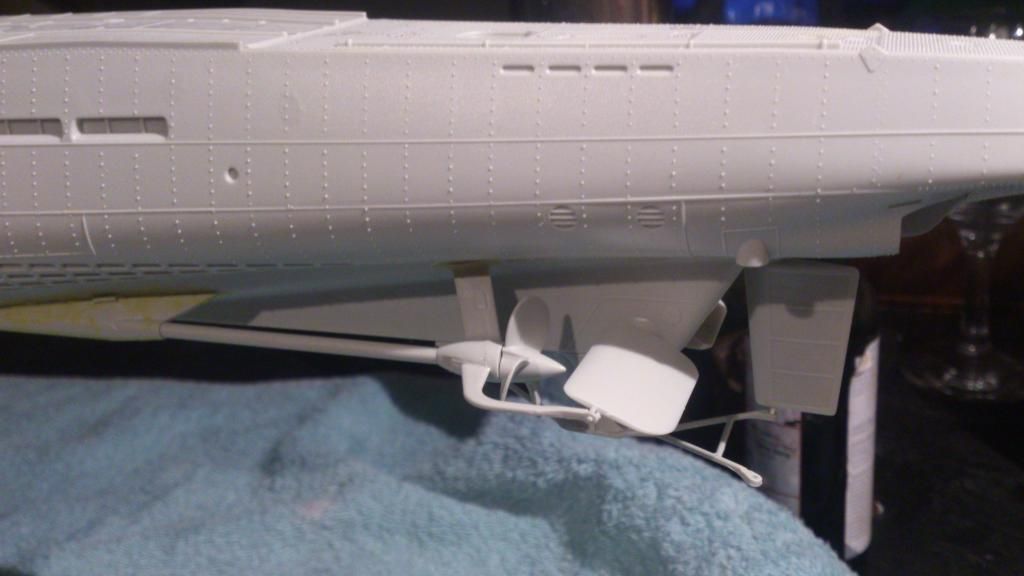
Part of the Propeller assembly (notice the gaps, ewwww


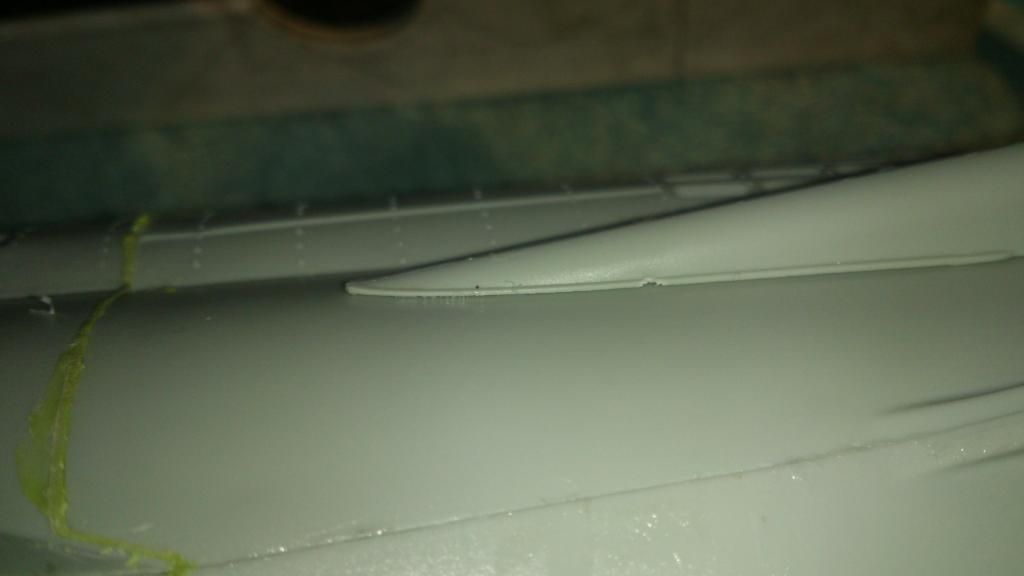
More gaps that need filling


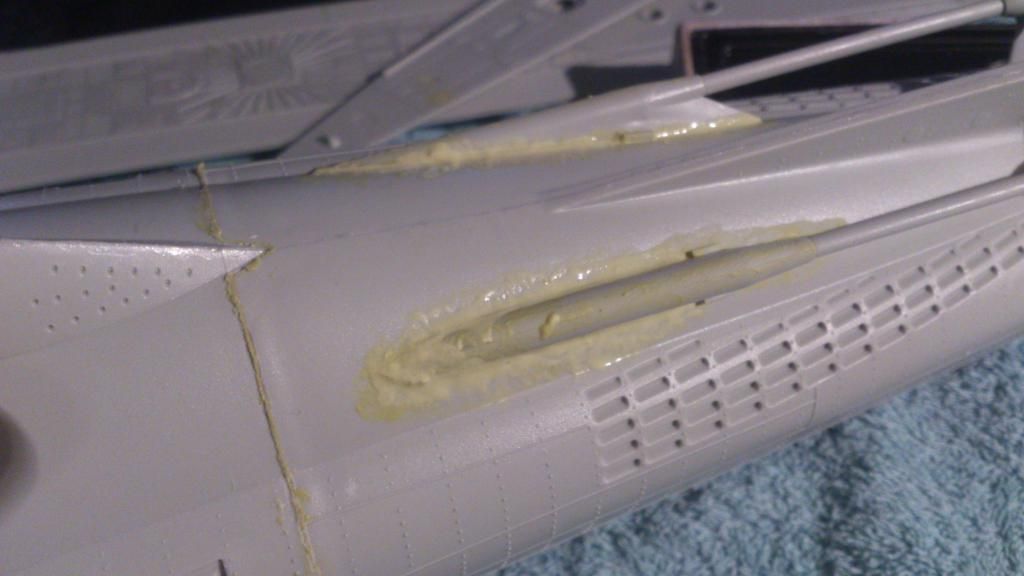
A bit over zealous with the filler :S will sand that back tomorrow me thinks.


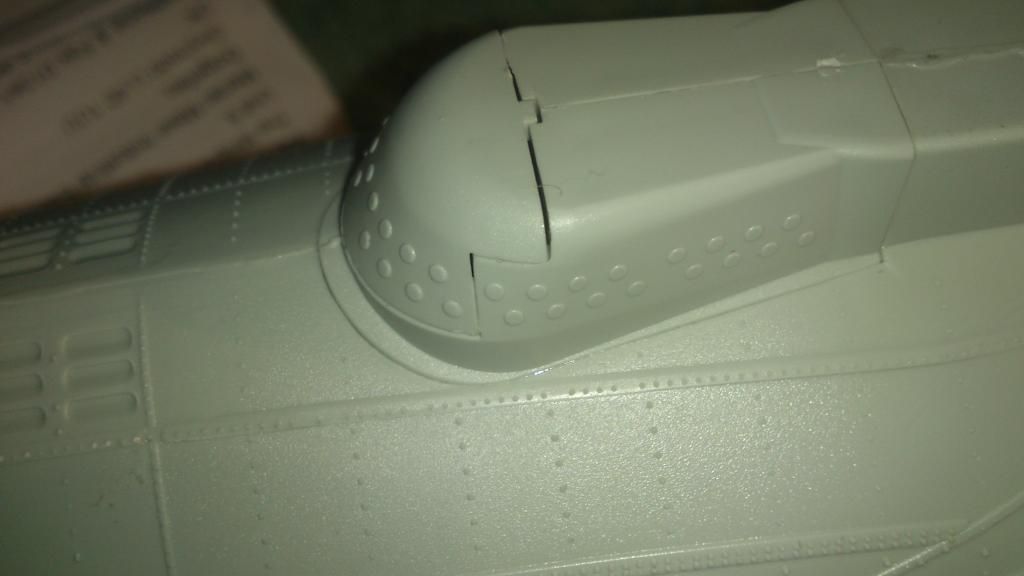
Propellors and rudders (one of the rudders pinged off into the nether somewhere, will have to dig that out at some point


Conning tower test fitted (note the lack of detail on the decking. The wood stuff looks vastly superior from pics I have seen)


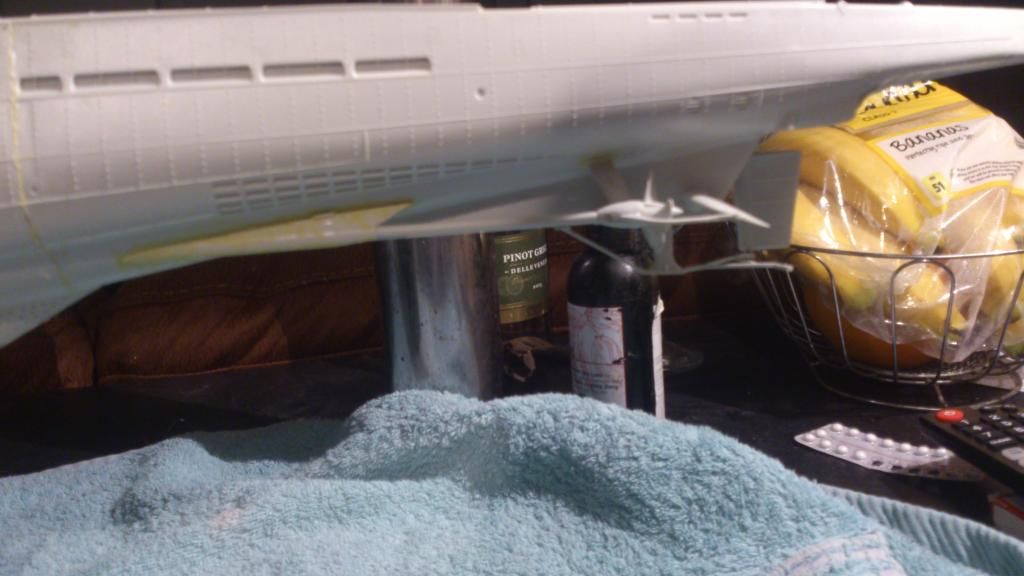
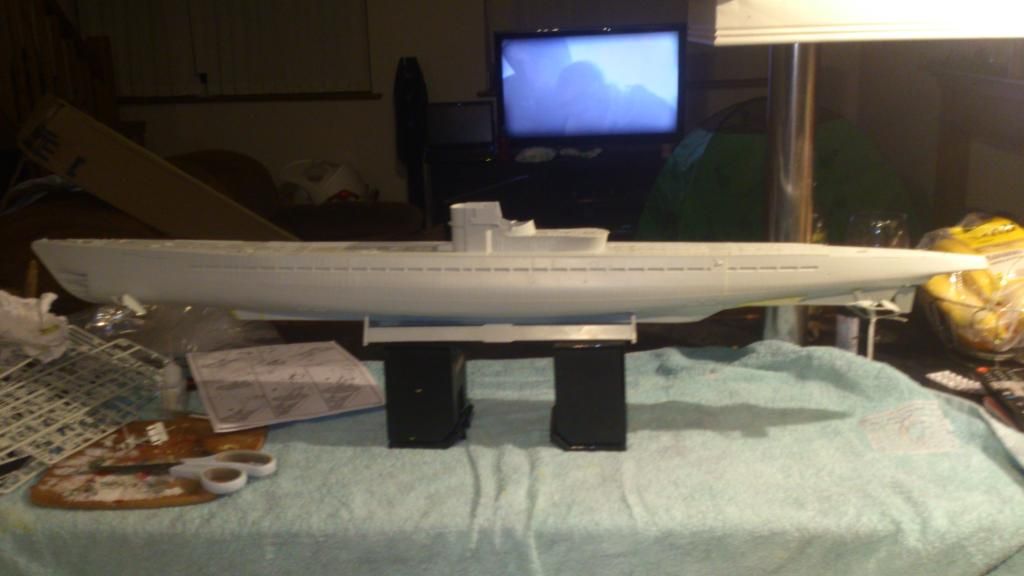
Overall progress shot (please excuse the mess. Small house + baby = dad who is to lazy to clear up when theres a u-boat to be built.)


Also been practising with the air brush in preperation for painting this bad boy

This message was edited 2 times. Last update was at 2014/09/15 00:49:34


Forum Index » Painting & Modeling
Go to: