| Author |
Message |
 |
|
|
|
|
Advert
|
Forum adverts like this one are shown to any user who is not logged in. Join us by filling out a tiny 3 field form and you will get your own, free, dakka user account which gives a good range of benefits to you:
- No adverts like this in the forums anymore.
- Times and dates in your local timezone.
- Full tracking of what you have read so you can skip to your first unread post, easily see what has changed since you last logged in, and easily see what is new at a glance.
- Email notifications for threads you want to watch closely.
- Being a part of the oldest wargaming community on the net.
If you are already a member then feel free to login now. |
|
 |
2014/12/05 19:04:22
Subject: How to improve (this) freehand
|
|

Longtime Dakkanaut
|
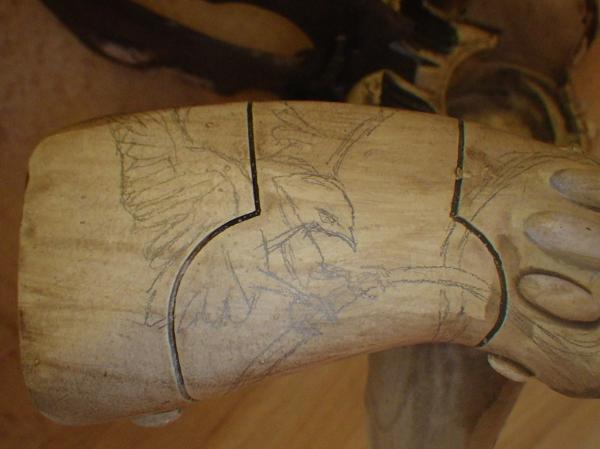
So Im jumping headfirst for the first time into freehand work on this new Revenant titan. It offers large semi flat surfaces that I figure are a good opportunity to learn on.
I am about halfway through this first one, I have to stop painting now that my kids awake and running around. Here's were we are right now:
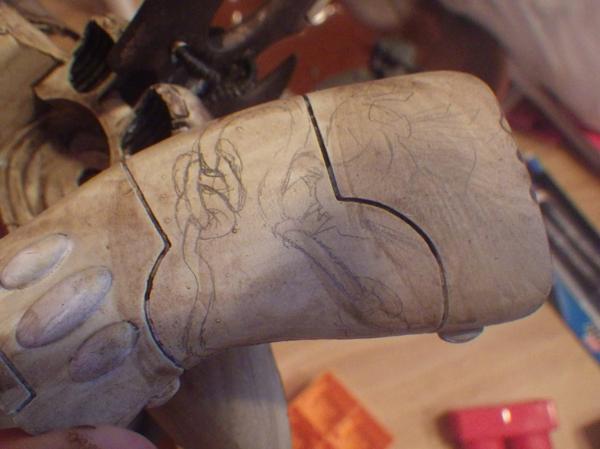
Initial sketch
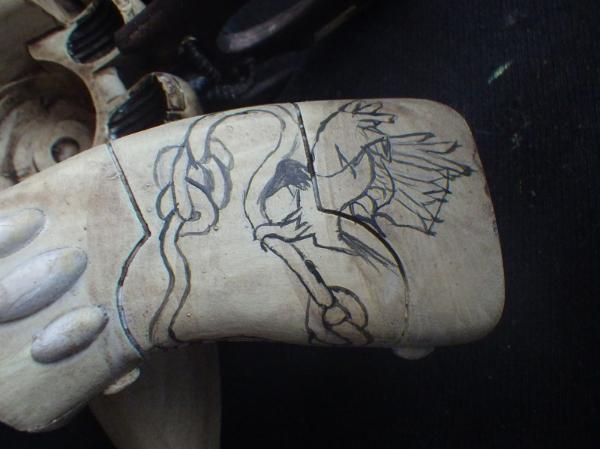
Black
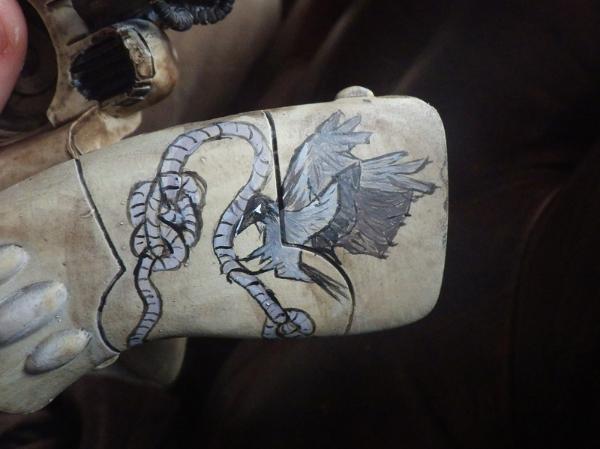
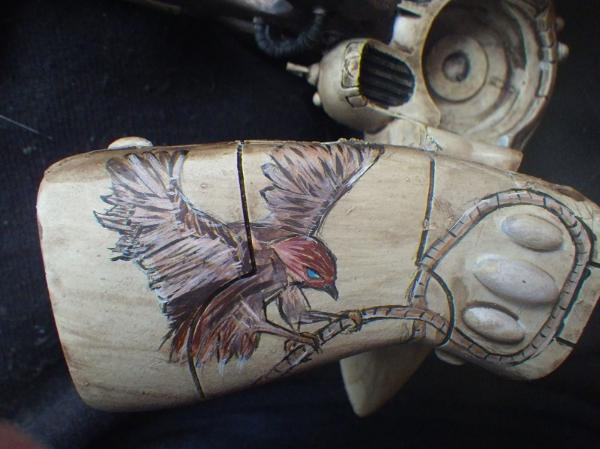
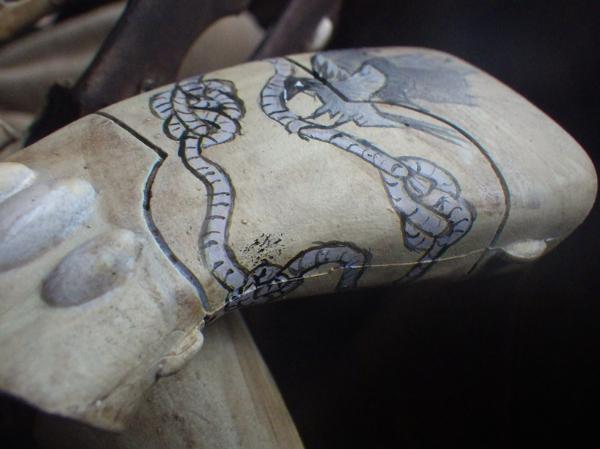
First paint layers
I'm using an Army Painter Insane Detail brush. What Im finding a challenge is getting my paint to get the hell off my brush when I want it to. I am using thinned paint, but it seems that if its thin enough to flow it can be either too thin or runny, I am having trouble finding that
happy balance. It does happen occasionally, but not consistently, so I cant trust my brush stroke which is already nerve wracking for someone new to it. By no means am I expecting perfection but I'd like to find some middle ground before doing the next one on the model.
Aside from that, how would you guys go about filling it in with color? I know I can use white for edging and dimension, but I'd like some ideas, Im new to this area of painting. Thanks all.
|
|
|
|
 |
|
2014/12/05 19:19:57
Subject: How to improve (this) freehand
|
|

Hacking Interventor
|
First off..
Get yourself a better brush. My brush of choice for this would be Winsor&NewtonSeries7 #0
And possibly a touch of drying retarder mixed with the paint.
Possibly some flo aid.
Other than that. Good effort.  keep it up.
|
I may be an donkey-cave, but at least I'm an equal oppurtunity donkey-cave...
 |
|
|
|
|
2014/12/05 19:31:14
Subject: How to improve (this) freehand
|
|
Longtime Dakkanaut
|
Does the drying retarder go with the thinning medium as well? Or replace it?
|
|
|
|
|
|
2014/12/05 21:10:41
Subject: How to improve (this) freehand
|
|
Hacking Interventor
|
I'd use both..
|
I may be an donkey-cave, but at least I'm an equal oppurtunity donkey-cave...
|
|
|
|
|
2014/12/05 21:18:57
Subject: How to improve (this) freehand
|
|

Thane of Dol Guldur
|
purely as an artistic point, i wouldve broken the design down into shapes first, and sketched on with a pencil. maybe even do small sections at a time. you'd find your images looked more realistic and flowed better
|
  Heresy World Eaters/Emperors Children Heresy World Eaters/Emperors Children 
Instagram: nagrakali_love_songs |
|
|
|
|
2014/12/06 14:26:07
Subject: How to improve (this) freehand
|
|
Longtime Dakkanaut
|
As a beginner I'm not sure if it'd help more or less than just sketching the design...its hard enough doing that ATM. I know it needs practice.
|
|
|
|
|
|
2014/12/06 17:57:08
Subject: Re:How to improve (this) freehand
|
|

Dakka Veteran
Eacute cole Militaire (Paris)
|
Why do you paint abird catching a worm on a eldar Titan?
I Would say get some airbrush Transfer paper, and Transfer it from there on the Titan, siez should be enough
|
Do not kill. Do not rape. Do not steal. These are principles which every man of every faith can embrace.
For if you do, one day you will look behind you and you will see us And on that day, you will reap it,
and we will send you to whatever god you wish. |
|
|
|
|
2014/12/06 20:06:06
Subject: How to improve (this) freehand
|
|
Longtime Dakkanaut
|
|
|
|
|
|
|
2014/12/08 18:40:41
Subject: How to improve (this) freehand
|
|
Gargantuan Gargant
|
On the paint flow issue: Two factors may be at play, here. Brush quality matters for detail work. Not just the size of the point, but also the size of the belly (paint reservoir), thickness and material of the bristles, flexation, etc. You may have an easier time using a bigger brush (as long as it still has a fine point), as it will allow you to hold more liquid paint (which also helps keep it from drying on the bristles, almost intantly) and release it evenly - it's like writing with a fountain pen after trying to finger-paint with a tiny, fake finger. World of difference, for me.
Also, you need thin paint for good flow off the brush. What most people neglect to mention in their thinning advice, though, is that you have to adjust your brush-loading, too. Paint thin enough for fine lines is thin enough to run, but only if allowed to. Load your brush a bit more lightly and that same paint will wick down the bristles smoothly, instead all running off in a puddle the moment you touch brush to model. Try painting a line on some scrap with thin paint and a fully loaded brush. Then saturate the brush again and, this time, touch it lightly to a bit of paper towel to wick away some of the excess. Try painting your line again and see if that improves your control.
|
The Dreadnote wrote:But the Emperor already has a shrine, in the form of your local Games Workshop. You honour him by sacrificing your money to the plastic effigies of his warriors. In time, your devotion will be rewarded with the gift of having even more effigies to worship.
|
|
|
|
|
2014/12/09 00:37:54
Subject: How to improve (this) freehand
|
|
Longtime Dakkanaut
|
^ Excellent advice and Ill give it a shot, theres a lot of space on the titan to go and I'll make use of it, Ill post results.
|
|
This message was edited 1 time. Last update was at 2014/12/09 00:37:59
|
|
|
|
|
2014/12/09 00:58:52
Subject: How to improve (this) freehand
|
|

Frenzied Berserker Terminator
|
That looks great man! The first few pics looked kinda gruesome until I realized what I was looking at though. I mean, it looked like a severed hand at first!
Brushes, yeah get a slightly bigger one. Those super fine one are only good for doing eyes or other such things where you're putting down literally one single dot or line. Paint control is key, as mentioned by others, you have to load your brush properly, but also, you have to "train" your bristles into the correct shape.
After you load your brush, touch it to your palette, make a smal twisting motion while pulling the brush towards you. The desired effect is that the brush comes together into a point. This will be perfect for 90% of applications and is exactly what you need for freehand.
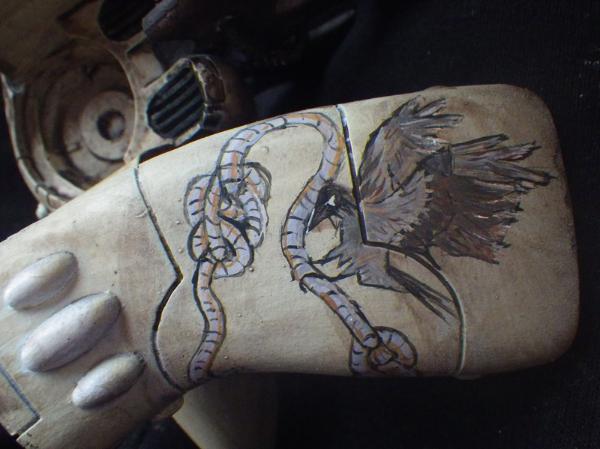
Also, and this is my personal experience speaking, when doing small freehand, you're not trying to paint an exact image, you're looking for the impression of the image. When viewed at a distance, super small details will be totally lost. So don't worry about them being exact. The same goes for colour, don't try to colour an entire area, instead use only enough paint to suggest that colour in that area. A good example is the coils of rope, and I see you've done this here, so good job, but you can take a third colour there and add depth with a tiny stroke right next to the second colour. When you look at it close up it will look a little off, but when viewed from arms length all you will see is the overall effect.
But seriously though, you are on a good path the way you're going. The bird looks great and I can't wait to see more pics!
|
Gets along better with animals... Go figure. |
|
|
|
|
2014/12/09 19:41:14
Subject: How to improve (this) freehand
|
|
Frenzied Berserker Terminator
|
Also just wanted to say, if my advice sounds suspect, or my own photos don't quite look so hot, believe me I'm a rookie painter, just remember where I'm sourcing these tips.
Old white dwarfs. Like old as in still had good modelling and painting tuts and not he paint by numbers you see now. So if I sound like a pro, but my pics don't look pro, trust me I know about it. I'm basically just giving you advice from WD that has worked for me. Your mileage may vary.
|
Gets along better with animals... Go figure. |
|
|
|
|
|
|