Hi dakka, this is my very firts tutorial and i bring a simple way to create a normal bolter into a combimelta, it doent need fancy material or extraordinarie sculp skills, you only need patience and dedication.
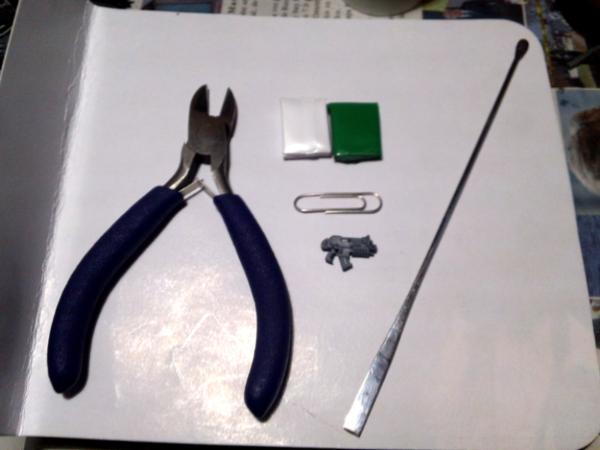
So to begin with the tutorial here i bring a list of the things you will need:
1. A normal Bolter
2. cutting clamp
3.epoxy putty
4. clips (or metal wire, your choice)
5. Presicion cutter
6.our super glue or liquid model cement (your choice)
7. drill (the one we use to make
8. and finally sculpting tools
* oh remember, when working with epoxy you will need water to make easy the handle of the putty
Here a picture from the listed above
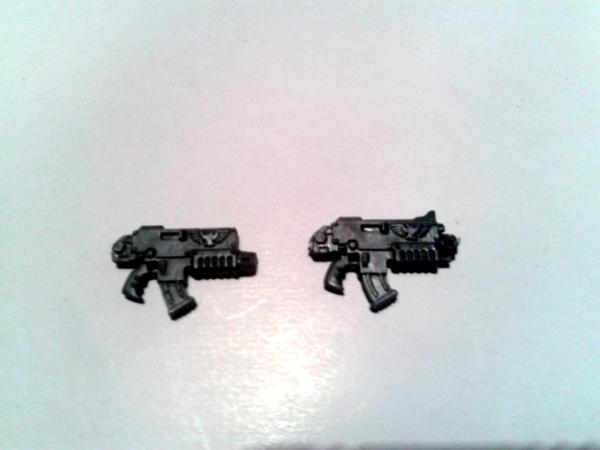
1. Firts, we take our bolter bitz and our presicion cutter, we will cut the muzzle part, we need to make a presicion cut without damaging to much the little part, after, we apply a drop of glue in the lower part of the front part of the bolter (where is supposedly the bayoneta is placed), and glue the muzzle bit, here a picture of the end product (besides a normal bolter to a normal bolter to highlight the changes)
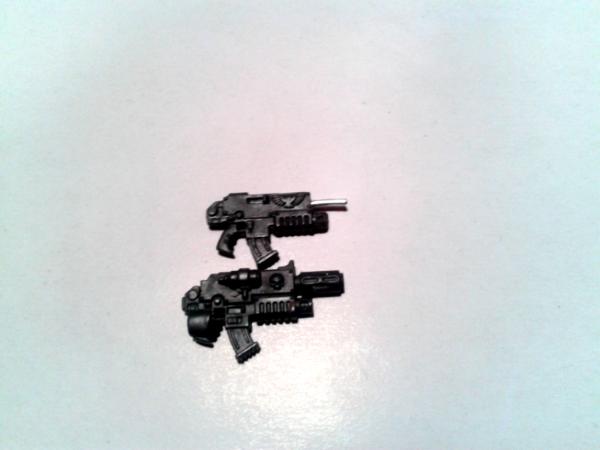
2.Once we have our modified bolter, we proceed to cut a litte piece of metal clip (or wire) the double the lenght of the muzzle, then we drill a little hole in the original position of the muzzle and add place the little piece of clip here, with a drop of super glue, this part will be use as support to create the barrel of the melta part (here is a combi bolter from the new tactical squad box, to use as reference)
3. When the glue is finally dry, we can begin to make the mix with the epoxy putty, we dont need to much, so make sure to prepare a little ball the size of a space marine helmet*, a good way to make the mix is to use a drop of water, this will help you with the handling of the epoxy, but dont use to much water of the epoxy will become very sticky.
*Tip: when working with epoxy is common to have leftover putty after finishing our project, so try to have an alternate project, or some gaps to fill just to not waste your epoxy.
4. Once you have your mix ready, we will make a cylinder using the clip (or wire) as support, the double the size of the muzzle (for the size and diameter if you have a combimelta, from the new tactical or sternguard kits, use it as reference) the accurate measurements are:
lenght: 7mm
diameter: 3mm
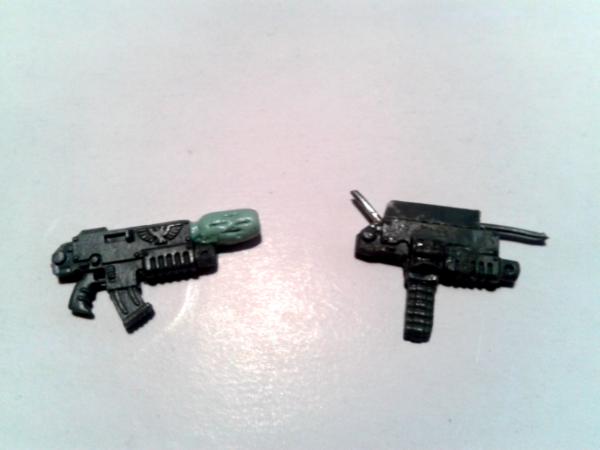
Take your sculping tool and begin to begin pressing the bottom part of the cylinder, were the bolter ends and the barrel of the melta begin, dont make so wide the press, just a bout 2mm wide approx, this to give the unique look of the melta barrel, once finished, we take our presicion cutter and make 4 cuts to create the the characteristic ventilation holes of the melta gun, picture (ignore the bolter of the right, is a
wip combiflamer):
5.To finish, we take a little piece of putty and make a new cylinder, this one is more a short but with the same diameter wide, so the measurement are:
lenght: 4mm
diameter: 3mm
This is going to be our fuel can, once we have the piece, we put it on the side, in the face we alwas see of the bolter, and use the sculping tool to make give it a smoot look and avoid the deformation of the cylinder in the process, once we hace the desired result, we take little pieces of putty, small enough to use it as the tubes that are connect to the gun:
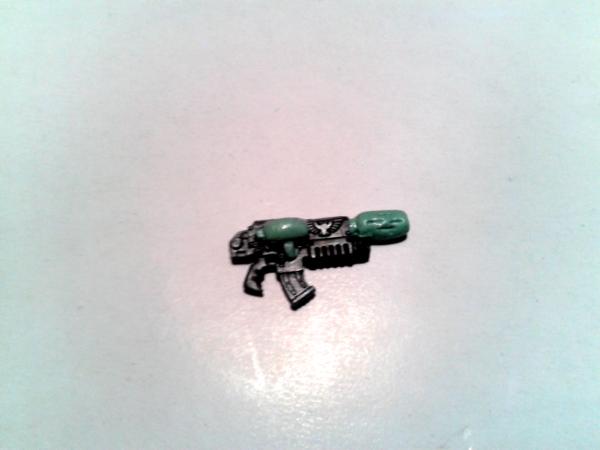
And we have now a new and easy to build home-made combi-melta, here a picture of the end product painted:
I hope it was useful and understandable the tutorial, pardon the bad english, i hope the community could give some feedback, or what it lacks the tutorial (more photos, more explication, more examples, better english

)
Thanks for the reading