I had the great pleasure to fight judgedoug's
DAK this past Saturday. Please see his
DAK thread for his 1000 pt list and
WIP pics of his awesome force. My force consisted of two platoons led by 2nd Lts with two sections of 9 riflemen and a NCO w/SMG plus a MMG and light mortar team. First platoon also had a Boys
AT Rifle team and a Daimler Mk 1
AC. Second platoon was supported by a Matilda Mk II.
We rolled the point defense scenario and I suggested Doug attack given the mobility of his force. He agreed and we used some gun emplacements I recently ordered as the objectives, pretty evenly spacing them down the six foot length of our play space. Doug easily made the 2+ roll for preparatory bombardment, which put at least one pin marker on every single unit I had deployed, i.e., the heavy weapons teams and the vehicles. In the three following turns, I consistently failed my morale tests to activate any of these units other than a light mortar and the
AC. It moved up and picked off a couple of riflemen in a
DAK squad marching up to the British leftmost objective. Doug masterfully laid out his advance in the meantime, setting up his Pak 36 in the center while bringing is Panzer II to bear on my rightmost objective and readying a truckload to spear either center of left. He also called in a Luftwaffe strike which immobilized my Daimler, put five pin markers on it, and pinned my forces on my left objective who had only just gotten underway after the preparatory bombardment.
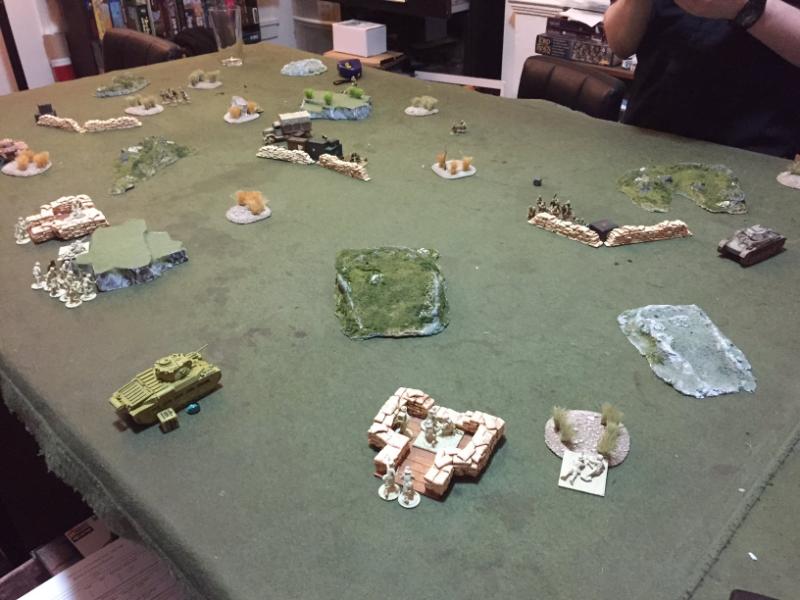
Here's how things stood at the end of Turn 3/beginning of Turn 4:
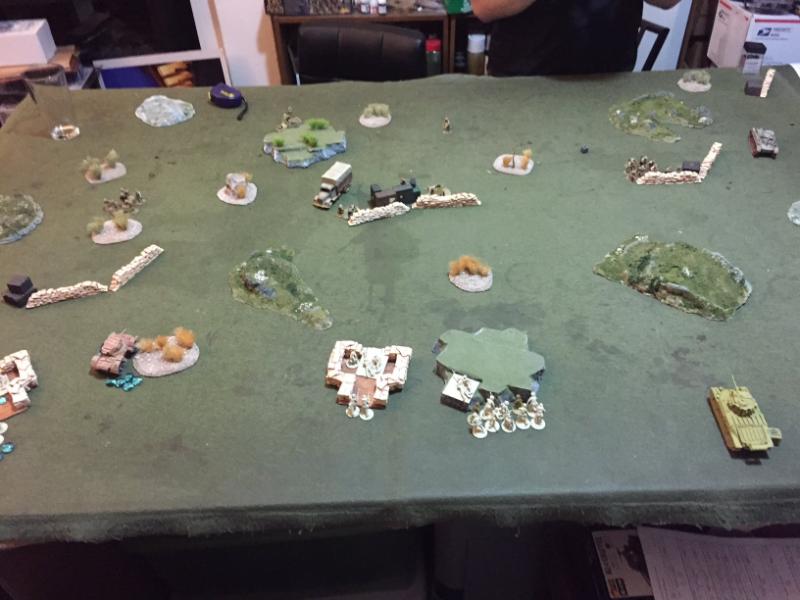
Notice the pin marker on the Matilda. That's from the preparatory bombardment! The damn thing just wouldn't go, leaving the Germans to do as they pleased on their left. Here's another view, where some of my left is visible post-Luftwaffe attack:
The Daimler was out of action for the rest of the game despite me trying to rally it every subsequent turn. Doug kept egging me on to bring over my officer from the center objective to give the
AC a little morale boost but my motto is "never trust a Doug" -- especially when he has a
MG-42 covering the path! It would have paid off, however, on the last turn as I rolled exactly what I needed to rally -- if the officer had been there. Then again, the
AC was already immobilized and may have retained enough pin markers to make activation a problem anyway.
Turn 4 was the climax.
DAK motorcycle troops came around my left flank while an 8-man squad came around my right. I tried to fend off the Kradschutzen but failed my morale test on box cars. The resulting
FUBAR check saw my full squad shooting their compatriots who had just received German fire. Things look very bleak there. On the other side, things were pretty evenly balanced as the Matilda finally moved up just as the Pak was sighting her. I also brought on a squad to counter the flanking Germans. Noting I had already activated my MMG team in the center to try topin his MMG team, Doug took the opportunity to blitz with his Opel Blitz, right down the center, where his squad popped out and shot up mine, giving them another pin marker.
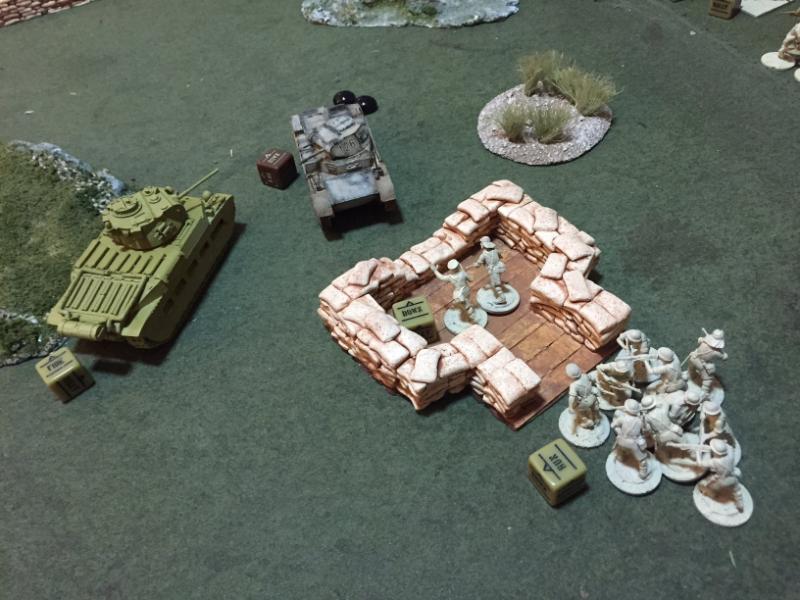
But finally I made a morale check and my boys remembered dear old Blighty. The assaulted the Germans and swept them away. That turned out to be the beginning of the end for the German advance. On my right, the Matilda immobilized the Pz II before being assaulted and immobilized herself by one of Doug's squads. I then shot them up from behind with the squad which had just held the center. Here was the final result on my right objective:
I was pretty chagrinned to not have killed the Panzer II after two point blank shots to the side.
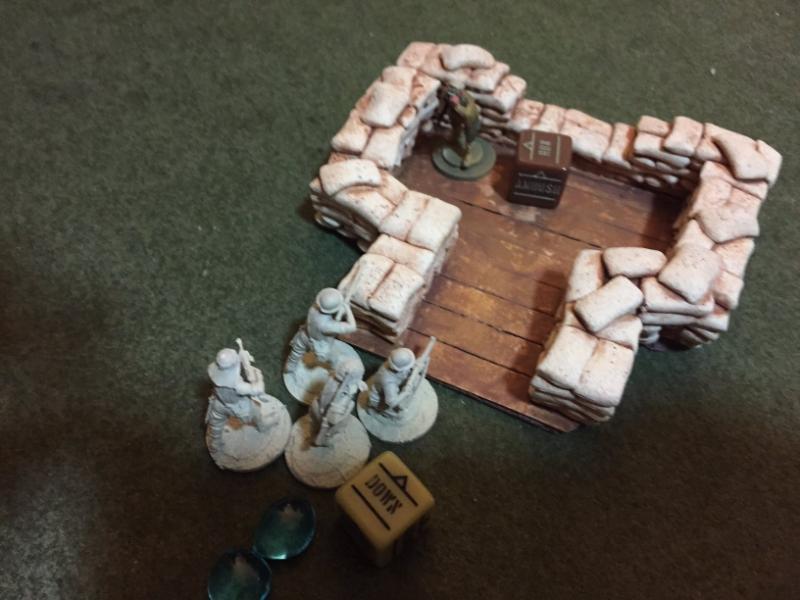
Doug was looking to pull out a draw by capturing the left flank, where his Kradschutzen had so effectively terrorized my riflemen. The survivors of the first section regrouped into the emplacement and fended off a German squad bearing down on them from ahead while the second section figured they'd better try shooting the motorcycle squad after practicing on their own men the last turn, resulting in only a single casualty but an important one -- one more SMG knocked out. Doug tried assaulting on Turn 6, but the Kradschutzen were wiped out by the second section even as the first evaporated under assault by the fanatical
DAK officer:
It was a tense game, with the British pretty well tied up until it counted.


 " - Rick Priestley "I've decided that I'd rather not have you as a member of TMP." - Editor, The Miniatures Page "I'd rather put my testicles through a mangle than spend any time gaming with you." - Richard, TooFatLardies "We need a Doug Craig in every store." - Warlord Games "Thank you for being here, Judge Doug!" - Adam Troke
