Well, I finally got around to painting up Captain Karlaen from the Deathstorm box

I was originally going to keep this just in the Showcase, but I wanted to put up a second zoomup of how I did the Gold, since there was a thread about painting gold a couple of days ago, and I didn't have a good example photographed. First, the completed model:
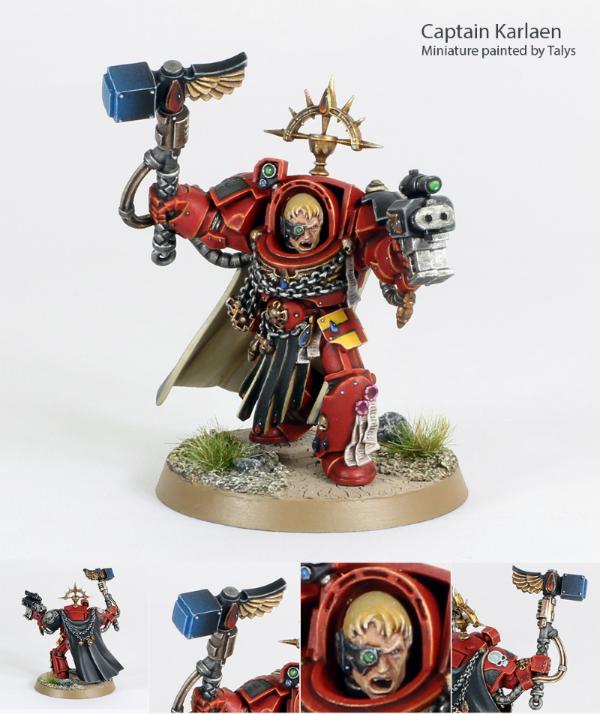
I took off the little shield badge thing on the right shoulder/armpit area. For some reason, those irritate me, because I don't understand how the armor would physically work when the terminator brings their arm inwards (like, what holds it up? How does it not get in the way? How does it not fall off?). More importantly, though, GOLD!
There was a post about painting Gold, and my technique forever used to be to paint a dark brown, and then a gold on top, avoiding the deepest recesses, and then doing a brown wash just around the recesses. On display models, I'd do my gold
NMM, but I was never really happy with
NMM, because on the tabletop, when you look at the model at the wrong angle, the gold just looks funny (it photographs very well, though, as long as the picture is taken at the right angle). Relatively recently (a year or so ago), I tried the
GW technique of layering gold, and I decided that I quite liked the results. Here's a zoom in on the back side of the thunderhammer:
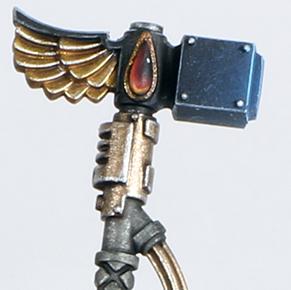
For those interested, essentially, the method is thus. It is very important to thin your paints, because metallic paints are quite thick out of the bottle.
The easy part:
1. Basecoat with thinned Rhinox Hide (
GW doesn't list this, but I still like putting brown underneath)
2. Paint a layer of Balthazar Gold. This is a
GW Base Paint, and with minimal thinning, covers very well. One coat is enough!
3. Layer thinned Gehenna's Gold directly on top. Again, just one coat; don't worry about opacity.
4. Wash all of the gold with Agrax Earthshade, using enough wash to saturate the area with a little bit of pooling, but not so much that pools overflow or or the wash drips.
Now, the detail work. For each step use a CLEAN brush, and keep it clean. With the metallic paints, your brushes get gunked up more quickly, impeding your ability to paint fine details:
5. Carefully paint slightly thinned Balthazar gold over top of the areas except for the recesses. Because it's a layer paint, and thinned, it will go on translucent, and you'll actually still catch a bit of the shading, even on areas that you hit with the metallic paint. But, it's important to leave the deepest recesses untouched, to get the dark shadown.
6. Using a clean, very fine brush, paint a layer of Auric Gold, leaving some of the previous layers untouched. Esentially, the higher relief areas.
7. Again, using a clean, very fine brush, paint Runefang Steal on points, and the highest peaks of the model.
It's a lot of steps to paint gold, but I really like the end result. The red gem on the picture above also illustrates a relatively easy way to paint nice looking teardrop-shaped jewels, though a little bit of blending is required to soften it. Oh yes, and I cheated on the hammer end. That's just airbrushed, and then an edge highlight. Another extra step I took was a bit of blending on the black cape. Since it's on the back of the model, I often just leave black capes alone, but I took a bit of extra time this go around to finish the back.
That's about it! As always, I would love any C&C!


