After much anticipation, I got my first real game in with my new Harlequins! Yes, I was able to use the Death Jester, Solitaire, and Shadowseer previously at the Twinner Tourney in a "Heroes Path" formation, but this would be my first time using the Troupes, Troupe Master, and Skyweavers! In honour of making a good show, MisterAG drew up a force of those damn fine soldiers who form the Astra Militarum. Here's the lists!
Yarium:
1 Shadowseer (
lvl 2, Mask of Secrets)
1 Solitaire
1 Death Jester
5-man "Light" Troupe w/4x Fusion Pistols
5-man "Dark" Troupe w/4x Embraces
5-man "Twilight" Troupe w/ Caresses, Troupe Master w/Starmist Rainment, Warlord (4++
Inv)
2 Skyweavers w/Haywire Cannon & Star Bolas
1 Eldar Spiritseer
10 Guardians w/Wave Serpent (Twin-Linked Scatterlaser, Shuriken Cannon)
1 Wraithknight w/Scatter Laser, Suncannon, Scattershield
1 Dark Eldar Archon w/Webway Portal
1 Dark Eldar Raider
Note: We were trying to play with as many of my painted Harlequins as possible, and so we played this as Unbound, but used the Masque Detachment special rules for the Harlequins. This was also done so we could fit the Dark Eldar Raider into the game for some pictures! This Dark Eldar Raider was donated to us by
Skared and SlapDash Minis to be given away at the next Rumble in the North.
MisterAG:
Company Command Squad w/Lascannon (Warlord: Gains extra order)
Commissar
Platoon Command Squad w/3 Flamers w/Chimera
Infantry Squad w/Flamer w/Chimera
Infantry Squad w/Flamer w/Chimera
Platoon Command Squad w/Autocannon
Infantry Squad w/Missile Launcher
Infantry Squad w/Missile Launcher
Infantry Squad w/Missile Launcher
Special Weapon Squad w/3 Snipers
Heavy Weapon Squad w/3 Heavy Bolters
Heavy Weapon Squad w/3 Mortars
Hellhound
Leman Russ w/Heavy Bolter
Leman Russ Demolisher w/Lascannon
Leman Russ Demolisher w/Lascannon
Wow! That's a lot of bodies (84) across 19 units, thrown down the way only the Imperial Guard can! Outnumbered at about 2.5 to 1, the Harlequins will need to be slaughtering units to even make a dent in that kind of
MSU.
Mission - Cleanse
Our mission was something we had concocted to hearken back to the day's of the 3rd edition mission "Cleanse".
The table was split into 4 table quarters. Two of these quarters would be our deployment zone, less 12" from the center point. The middle of the table holds a Maelstrom Objective, and the other two quarters each hold another Maelstrom Objective.
Primary, 4 points: Hold more table quarters than your opponent! Units in two quarters can only hold one quarter (not both).
Secondary, 3 points: ITC Maelstrom; 1-3 Hold Objective 1-3, 4 Destroy an Enemy Unit, 5 Have a unit in enemy's deployment zone, 6 Have more units in No Man's Land than Opponent
Tertiary, up to 3 points: First Blood, Slay the Warlord, Last Laugh (the last unit killed in the game is worth a victory point to the opponent)
 Psychic Powers:
The Shadowseer rolled on the Harlequin powers, gaining Veil of Tears, Peal of Discord, and Dance of Shadows.
The Spiritseer rolled on Telepathy, gaining Terrify and Invisibility.
I was very excited with this group of powers! Dance of Shadows is a powerful blessing that grants super-cover to anything, and Invisibility is also pretty super-powered too.
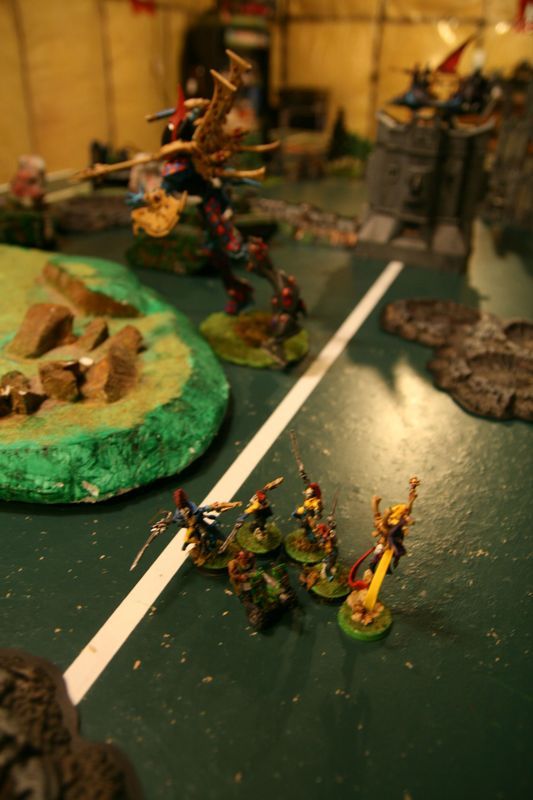
As such, I decided to group the Archon, Spiritseer, and Shadowseer together with the Light Troupe to form the "Terror Team".
Harlequin Deployment:
We rolled, and Night was not to be for the first turn. The Harlequins would have to wait until Turn 5 to be shrouded by darkness.
The Harlequins kept the Terror Team in Deep Strike Reserves, loaded into a Raider. The hope was to use the Webway Portal to zero-scatter those Fusion Pistols and Leadership Shenanigans to scare the Astra Militarum off the table. Of course, to do that, I'd first need to get them out of their tanks!
The Wave Serpent filled with Guardians deployed behind a hill, just in case the Guard seized the initiative, and the Harlequin Jetbikes deployed behind it. I absolutely buried the Twilight and Dark Troupes in the ruins, hoping to leap from cover to cover and keep out of line of sight. In the future, more Shadowseers will join the ranks to help protect these Troupes should they be caught in the Light, but for now, hugging cover was the answer. And hey, Flipbelts are awesome for that (just ignore that terrain!).
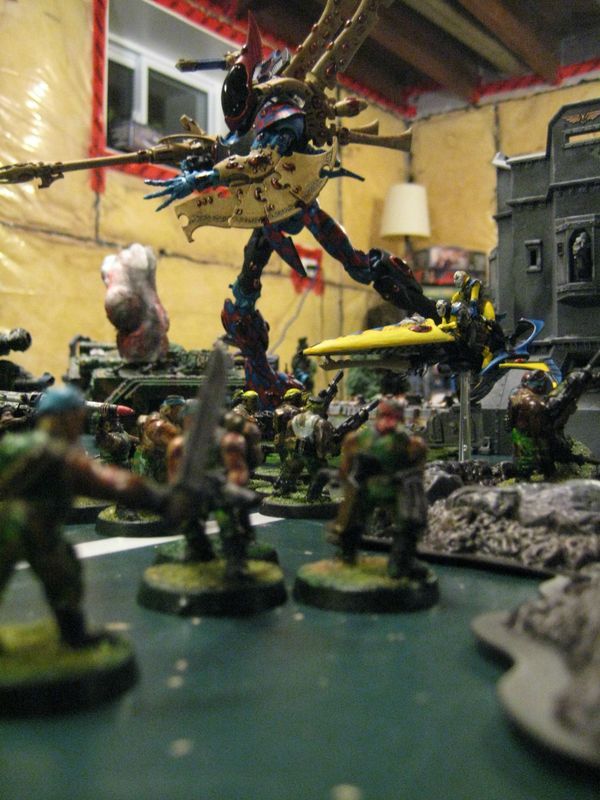
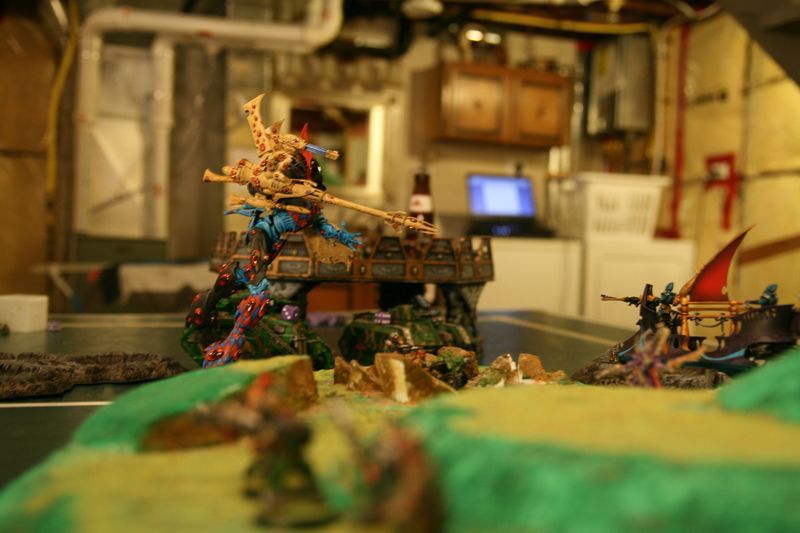
Towering over the battlefield, the Wraithknight took front and centre position against the Guard. It would be practically immune to all but their heaviest ordinance, and still was difficult to draw line of sight to it through the central bastion.
The Solitaire and Death Jester waited in Infiltrators to deploy after the Guard.
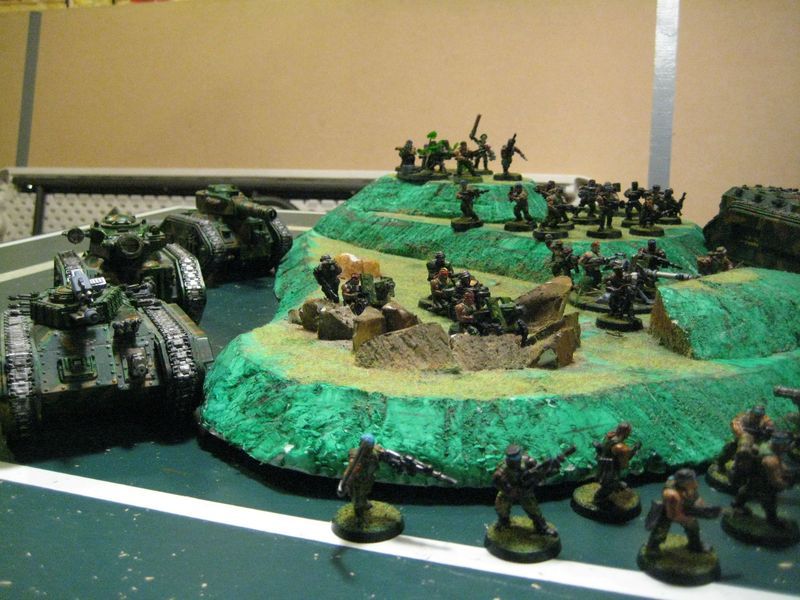
 Astra Militarum Deployment:
The Guard had mostly a huge hill, some ruins, and some craters to deploy in. Having been historically "trapped" in his deployment zone when playing Astra Militarum, MisterAG put a wall of metal on both flanks, and lots of troopers to hold the center. Remembering the Death Jester from the Twinner Tourney, he deployed his Company Command Squad deep in the rear, and attached the Commissar to the front squad that had been grouped into a blob of 20 men!
The Company Command squad was hoping to issue many orders in hopes of dealing some damage to the Wraithknight, and remove cover from the Wave Serpent or anyone caught in the open.


 Infiltrators:
The Solitaire deployed in the forests of Table Quarter 2. The Death Jester, meanwhile deployed behind the landing pad's leg, deeply out of line of sight.
 Seize the Initiative:
MisterAG rolled a 4 - the Harlequins would go first as planned!
Maelstrom Turn 1:
Harlequins - Hold Objective 2, Have a unit in enemy's deployment zone
Astra Militarum - Hold Objective 3, Have a unit in enemy's deployment zone
Harlequins Turn 1:
One thing had to happen right away - the Company Command Squad had to die. Three orders per turn, with many of them stripping much-needed cover saves, twin-linking weapons, and hunting monsters was going to hurt a lot. The first move was to get the Wave Serpent up on a hill, hopefully behind some cover of a ruined bunker. Unfortunately, when it landed on the hill, the soul-circuitry fried, and it was Immobilized. Uh-oh! The Wave Serpent was no longer be able to jink. However, it still had a good angle, and aside from a few weapons, not much could hurt it. I was very careful to measure to those Demolisher Cannons, so I'd survive them for the turn for sure, even though immobilized.
The Wraithknight moved up, keeping just behind the bastion. The puny Guardsmen in front of it would soon fall if they didn't get out of its way - but for now, it's eyes were set on the Company Command Squad.
Being incredibly fearful of the Hellhound, the Twilight Troupe jumped out of cover towards the bastion, then ran 6" to get right behind it, completely obscured from anywhere the Hellhound could go. The Dark Troupe also broke cover, moving laterally towards the 2nd table quarter for whatever missions came up.

The Solitaire moved 12" towards the
IG northern flank, then ran 5" to get right behind a wall. The only possible risk here was being charged by the Special Weapon Team, but that was incredibly unlikely.
The Death Jester took a new position atop the Sky Shield. It'd have cover from just about everything, hard to hit with line of sight still from most things, and could see the Commissar in the front squad just in case things went perfectly.

I started the shooting phase (after doing the run moves), by having the Death Jester fire at the 20-man blob with the Commissar, and was shocked to see two precision shots make it through (though the third shot missed)! I assigned one to a Heavy Weapon team and another to the Commissar. Failing to make his Look Out Sir! roll, the Commissar turned from a leader of men into a fine mist. We could only imagine the Guard being surprised by the appearance of these colourful enemies, and look to the Commissar for guidance - only to see him slaughtered the moment he opened his mouth. The Heavy Weapon team also bit the dust. Miraculously, the squad (now at Ld6) pass their Leadership Test and held firm.
The Wraithknight then also smiled behind a featureless face. His Scatter Laser failed to cause any harm to the Company Command Squad, but following the laser-targeting, the Suncannon landed three perfect hits - each hitting four men, and despite going to ground, the unit was vaporized. First blood, and Slay the Warlord from a single attack!

The Wave Serpent opened up on the Snipers, and was able to bring them down to just 2 men (only got 3 shots with Serpent Shield) - though they passed their
Ld and stuck around. Without being in range, the Skyweavers just shot a couple blasts into the blob squad, but they failed to cause any harm. I now realize I had forgotten these were blasted Eldar jetbikes, and so I should have jet them back again, but oh well.
Astra Militarum Turn 1:
Despite a complete loss of the chain of command, the Platoon Sergeants took charge and readied a response. Forces moved towards the Death Jester and Objective 3, while the northern flanked prepared to erase the Dark Troupe from the board. Rallying to defend the body of the fallen Commissar, who never (had the chance to) hurt anyone, the blob squad moved forwards to try and take down the jetbikes. The Hellhound drove across the hill and over the crater to ready its immolating ammunition.

Chimeras and autocannons tried to hit the only thing worth targeting - the Wave Serpent. Despite still having 12 front armour, it resisted all of the erosive laser and shell fire! One Demolisher was unable to see anything else, yet fired only its Lascannon at the now vulnerable Serpent, but also failed to hit. In an attempt to remove the Death Jester from existence, two of the Heavy Bolters fired at the smiling skeletal figure - the third being unable to see him - and took 1 wound off of him. With little better to shoot at, the Demolisher and Leman Russ both also shot at the Death Jester, each scoring a direct hit. But when the smoke cleared, the Death Jester remained, incorporeal against the massive blasts surrounding him. The blob squad in the middle was ordered to First Rank Fire, Second Rank Fire, and killed one of the Jetbikes.


On the northern flank, the Hellhound released its deadly cargo upon the Dark Troupe, bathing three of them in light, but the holo-suits of the Harlequins are tricky, and one survived the immolation. However, once the Multilasers, snipers, and embarked guardsmen fired their weapons into the firey fog, there was no where to leap to, and the Dark Troupe met its end.
The big worry came when I realized that by hiding so effectively from the Hellhound, I had grouped the Twilight Troupe too tightly. The Mortars fired their barrage into the air... and it came down on the Wraithknight instead! It was still close enough that a "return flip" could have done something, but both the second and third shot went even further off target, so the Twilight Troupe was safe.
Maelstrom Turn 2:
0, StW,
FB - Harlequins; Kill an enemy unit, have a unit in enemy deployment zone.
1 - Astra Militarum; Kill a unit, hold objective 1
Harlequin Turn 2:
The Terror Team didn't show up, but with so much left alive after Turn 1, I felt great! The Solitaire snuck around the surviving Snipers, and went for the Mortar Team - I couldn't have them throwing these shots wherever they wanted! The Twilight Troupe jumped around the Bastion to threaten a charge on the Hellhound (flip belts are amazing), and the Wraithknight took position to fire at and charge the Demolisher. The Death Jester took a new position where it'd be even harder to shoot at him aboard the Skyshield, but with the Heavy Bolters in view. The remaining Jetbike moved towards the blob squad, hoping to shoot, charge, kill a couple guys in close combat, maybe take 1 wound in return, then hopefully scare them off. Without having Objective Secured, and not thinking about holding Objective 2, I did not use them like the less survivable Eldar Jetbikes that they were.
During the shooting phase, the Death Jester killed two of the Heavy Bolter squad, but yet again his target refused to get the joke and stayed put! At least this time he forced them to go to ground, so it'd be snap shots only next turn. The Wave Serpent shot and killed a Chimera in front of the Demolisher, and MisterAG placed his men to try and block the movement of the Wraithknight. Unfortunately, the Wraithknight took precisely none of that. It fired its scatter laser at the tank to gain a target lock on the armour just behind the tightly grouped squad. A massive Suncannon salvo later and the entire squad was flash-fried to the tank's hull.
In close combat the Solitaire charged the Mortars, but missed with its Kiss of Death attack. Seven S4 attacks at a much higher weapon skill still made short work of the rest of the squad (even without any 6's for the Caress). Down to Ld3, the squad broke and was instantly caught by the whirling devil. The Twilight Troupe charged 6" into the Hellhound. The men inside must have thought they were attacked by ghosts, as arms reached inside the tank and pulled out the men's hearts, leaving it a wreck. However, the jumping behemoth, the Wraithknight, failed its 4" charge against the Demolisher, and it survived to see another day. This left the Twilight Troupe and Solitaire facing down a big gun, and a Chimera filled with three flamers.


The Jetbike met a well deserved end. After charging in, it got hit by six Flashlight hits, and took a wound from them. It then proceeded to kill 1 guardsman with a hammer of wrath hit before taking a boatload of attacks back. This squad must have truly loved their Commissar, for they just kept making those Leadership checks! I counted too heavily on Fear here for sure in a charge I should never have done even if it would have been successful.
 Astra Militarum Turn 2:
The Harlequins were drawn well out of position. Sure there were already many dead guardsmen, but there were many, many more still waiting to die! The south flank Demolisher rumbled forward to start hitting the Wave Serpent, and the south flank Chimera moved up to Skyshield. The men inside made a full 6" difficult terrain test, and every model in the squad was now on the Skyshield, with the squad's flamer pointed at one clown with a big gun. Everything else was repositioned to get better shots, with the northern Chimera getting ready to absolutely slaughter the Solitaire.

But the Solitaires live half in the Warp, and even legends consider them legendary. Despite having a boatload of shots made at him, he suffered a mere 2 wounds. Sensing a rise in the tempo, the Twilight Warlord used the zero-g technology of his flip belt to redirect a Demolisher's earthquake shell back at it, killing a member of team blob-squad, and inflicting a glancing hit on the demolisher itself!
The Death Jester, meanwhile, was not so lucky. After taking a promethium bath, he got lit up like a Christmas tree and was taken out.

The second Demolisher fired at the Wave Serpent, but the lascannon couldn't connect. The other Demolisher, however, was able to hit it, scoring a glancing hit and reducing it to a single hull point.
The tiny men around the Wraithknight threw stones and shot lights on it, and a Heavy Bolter round was even able to crack through its tough shell, leaving it with only 5 more wounds left!
Maelstrom Turn 3:
2,
FB, StW - Harlequins: Objective 3, Have more forces in No Man's Land
2 - Astra Militarum: Kill an enemy unit, have a unit in enemy deployment zone
Harlequin Turn 3:
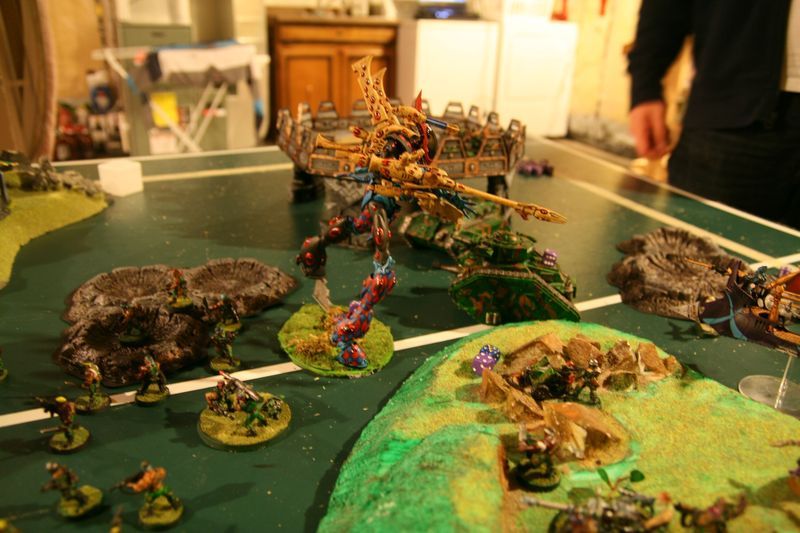
Despite not actually having suffered many loses, the Harlequin's position on the table appeared thin. So it was with great relief that the Terror Team showed up! With zero-scatter deep strike precision, the Raider landed in the Guard's backfield. The Archon got out and went towards the three remaining units of infantry, causing despair and misery with a -2Ld debuff within 6", and the Spiritseer came out in the opposite direction. The Wraithknight jumped over the blob squad to get a charge on the Demolisher. The Solitaire moved up the rear hill to make a charge against either the Chimera of Flamers, or the remaining Missile Launcher squad. The Twilight Troupe moved into a similar position.

In the Psychic Phase, I got the Shadowseer's nova off, dealing 5 hits to three of the surrounding squads. One squad broke, but the two others remaining put - and the Heavy Bolter heavy weapon still survived! All other powers failed.
In the shooting phase, the Wraithknight shot at the southern flank Demolisher out of frustration for it's AV14 armour, and prepared to charge it. The Terror Team lived up to its name, with a Plasma Grenade killing one guardsman, the Raider itself getting a debilitating penetrating hit on the southern flank Demolisher, and the Fusion Pistols inside firing out to destroy the Leman Russ!
In close combat, the Solitaire erased the Guardsmen from the face of the earth (killed 4 men in combat, then with -8 to their
Ld they failed and were chased down instantly by the Initiative 10 legend). The Twilight Troupe charged the Chimera and Demolisher, losing only 1 model to the flamer overwatch! The Leman Russ took a glancing hit from the Troupe Master's caress, then I wrecked the Chimera with the rest of the squad's caresses. The Wraithknight again failed its charge, despite only needing 5" (got 4").
 Astra Militarum Turn 3:
The Harlequins could be pushed back - but the Wraithknight would be an issue. Still, he couldn't kill enough of them - so the Astra Militarum went to work on gumming the Harlequins up. The men that just got out of the destroyed Chimera (who passed their
Ld check) positioned themselves to annihilate the Twilight Troupe with their flamers. The Leman Russ Demolisher moved forwards to try and take out the Wave Serpent that was still backfield and providing support with its Demolisher Cannon. The Chimera turned around to put its front against the Raider, and the falling back squad failed another test and continued running away.

When it came time to shooting, what was left of the blob squad opened up on the Solitaire. Eventually, a lucky las-shot found its mark, and ended the dancer's reign of terror. The flamers torched the Twilight Troupe, but it took them, plus every other infantry around them, to take them down and score Slay the Warlord against the Twilight Troupe Master.
What weapons were still available aimed into the Dark Eldar Archon. As he was really just purchased for his Webway, he had no special armour beyond his cover and feel no pain saves. Heroically, he was only brought down to 1 wound (though it took going to ground to achieve it). There were a couple of pot-shots too at the Raider, but with Invisibility, it was impossible to harm.
Amazingly, when the Demolisher shot at the (still alive, immobilized, and with 1
hp left) Wave Serpent, it scored a penetrating hit! But of course, the Wave Serpent's holo-fields saved the hit... on a 6+ cover!
Maelstrom Turn 4:
2,
FB, StW - Harlequins: Objective 3, Have a unit in enemy deployment zone
3 - Astra Militarum: Objective 3, Have more units in no man's land than opponent
Harlequins Turn 4:
The Harlequins were killing lots, but there were still many small men running around that all had objective secured - and they needed to die if the Harlequins were to be victorious. Not remembering how shooting out a transport works, I moved the Raider up close to the Skyshield, hoping to blast one Chimera apart, and take another hull point off the Demolisher with the guys within (forgot that it's snap shots only after 6"). The Wraithknight jumped back to the now freed Demolisher.

In the Psychic Phase, all the power failed, except Invisibility on the Raider.
Most of the remaining blob squad was trying to block its path to the Demolisher for close combat, but when the Wraithknight painted the demolisher with its targeting scatter-laser, the very precise hits from the Suncannon hit enough guardsmen that they were also erased from around it (save one). I realized I had probably killed about 100 points of infantry that game by shooting at vehicles with the Wraithknight.
It was at this point that I discovered my rules error. The Raider missed its regular shot at the Demolisher's aft, and when I went to roll for the Fusion Pistols on the Chimera, I thought 2 of the 4 had hit, but MisterAG quickly pointed out that none had in fact hit. I was now really keeping my fingers crossed with Invisibility!
In the assault phase, the Wraithknight finally decided that kicking things might be more fun than shooting them, and got into the northern Demolisher, wrecking it. The Spiritseer also charged the squad that was still falling back. Since they were within range of the Dark Eldar Archon, they disappeared instantly.
 Astra Militarum Turn 4:
The Guard lines were lost, but there were small pockets of Objective Secured items everywhere. A Heavy Bolter heavy weapon team and the flamer squad on the hill. A squad on the Skyshield, and their Chimera right under it. Even the Snipers too - who had done nothing all game except take failed pot-shots, were ObjSec. The Demolisher repositioned to be closer to the Wave Serpent. The most amazing move was done by the last Chimera, declaring a Ram against the Invisible Raider! After the ram check, a single Penetrating hit was done, causing snap-shots only, but the guys inside passed their
Ld test and were fine.


Pot shots went off in all directions this turn. The Archon and the Spiritseer both fell, and the Demolisher finally took out the Wave Serpent, but didn't roll high enough for an explode, merely wrecking it. The Guardians inside dutifully got out and continued drinking whatever the Eldar consider to be swill.
Maelstrom Turn 5:
3,
FB, StW - Harlequins: Kill a unit, Have more units in no man's land than opponent
5 - Astra Militarum: Objective 1, Have more units in no man's land than opponent
Harlequins Turn 5:
The Astra Militarum were only a little ahead on Maelstrom, but had covered lots of the tables with small squads and units. I was pretty sure they had the game at this point, but if it stretched out, I should be able to take care of the rest quickly. The Light Troupe jumped out of the Raider then flip-belted their way onto the Skyshield. The Wraithknight moved towards the remaining Demolisher. The Guardians moved to the other side of the hill, trying to hold that quarter and hopefully battle-focus forward to kill the last remaining member of the blob-squad, who had never failed a
Ld test, no matter how bad things got.

It was Night now, and the Shadowseer used his psychic powers to again blast off the nova - causing 4 hits against both the Chimera and the remaining full-strength Infantry squad, killing 3 of them, and causing them to fall back. The Wraithknight shot at the Demolisher, just to get it out of his system. The Guardians only Battlefocused forward 2 inches - rerolled - then got 2 inches again. With only 3 models in range of the last member of the blob squad, they got off 6 shots. 4 missed, but 2 hit, and though he had cover from the attack, he failed and was slain.

In the assault phase, the Infantry squad was charged by the Light Troupe, making its Leadership test and turning to face. But the Light Troupe just annihilated them, even without any special combat weapons. The Wraithknight also made his charge and wrecked the Demolisher.


 Astra Militarum Turn 5:
If the game ends, they win, with 3 table quarters to 2 remaining. MisterAG repositioned as best as possible to keep them alive. In the shooting phase, Stealth & Shrouding under the Skyshield protected the Light Troupe from harm, and the Sniper tried and failed to wound the Wraithknight.
Maelstrom Turn 6:
4,
FB, StW - Harlequins: Objective 1, Objective 3
5 - Astra Militarum: Objective 2, Kill an Enemy Unit
Harlequins Turn 6:
Moved up and fusion pistolled the Chimera to death. 1" explosion = no dead Harlequins. The Wraithknight shot and killed the flamer squad in the back. All that was left now were the Snipers, and a Heavy Bolter weapon team.
Astra Militarum Turn 6:
Go to ground! Keep hiding! We still win from Objective Secured and Maelstrom if it ends![/u]
Maelstrom Turn 7:
6,
FB, StW - Harlequins: Objective 1, More units in no man's land than opponent
5 - Astra Militarum: Objective 2, Kill an enemy unit
Harlequins Turn 7:
It didn't end, but the Guard did. The Snipers survived, but that was it.
 Astra Militarum Turn 7:
Hand extended. The Harlequins, in Turn 7, scored Primary, Secondary, and all the Tertiaries (the Heavy Bolter weapon team was the last unit to die).


TOTAL SCORE:
Harlequins: 10 (4+3+
FB+StW+
LL)
Astra Militarum: 1 (StW)
Harlequins Post-Game Thoughts:
I had a blast. There was a LOT of tom-foolery this game, but when MisterAG and I play, the impossible tends to happen. I couldn't believe the luck in getting a precision shot off on that first turn on the Commissar! Having the blob squad then rally around their fallen favourite slave master was shocking to say the least.
I made a bunch of tactical mistakes, mostly because I was so excited to play this army for the first time. In the second turn I forgot to even find out what my Maelstrom objectives were until the start of MisterAG's turn - so that was a turn I fell quite behind in. I was very lucky for the game to go the full 7 turns and let me claw it back. I would have lost had it ended any turn earlier! I also should have started with my Shadowseer on the board to start making immediate use of her psychic powers, and brought down the Raider in front of the Guard's lines rather than behind it to take out the flamer squad's chimera so I could just have charged them that turn, rather than letting them kill the Twilight Troupe right away. I'll also endeavour never to forget that extra Eldar jetbike movement in the assault phase.
Oh, and in case I haven't spelled it out enough, Flip belts are awesome. Not having to worry about rolling dice and just moving my guys the way I want for movement is both a huge time saver, and allows you to really just get where you want to go all the time.
The Harlequins definitely require a more precise game play style. I really need to get better at being more precise with my models and movements due to just how vulnerable they are when placed improperly, but how strong they can be when moved properly. I also want a lot more Shadowseers and Death Jesters! I also need to come up with a plan for how to continue including Eldar in the army. I love the Wraithknight and Wave Serpent - they provide some very useful hard-hitting ranged elements to my army, but I need a way to keep things "harlequin-y". I guess we'll see!
Astra Militarum Post-Game Thought:
1) Playing on a board with a decent amount of terrain (and varying levels) made for some interesting
LOS situations, particularly with single model units like Yarium's Solitare and Death Jester. Those things are so little that they can sneak around anywhere.
2) The Harlequin units themselves didn't seem overpowered at all. They were fast enough to dictate the pace of the game, but the Wraithknight was the centrepiece of Yarium's army that really went to work.
3) My Leman Russ tanks showed why people shouldn't take Leman Russ Ordnance. A single shot weapon is just a single dice roll away from being useless every time it shoots.
4) Leaving my Company Command Squad on the top of the hill to start the game, while heroically thematic was a horrible decision. I really needed the Senior Officer orders.
And that's it! Thanks for reading!


