===================================================================================================
Welcome! Thanks for stopping by. About a year and a half ago I was umm-ing and arr-ing about what solution I was going to use as a gaming board. Fat Mats?
MDF and plaster?
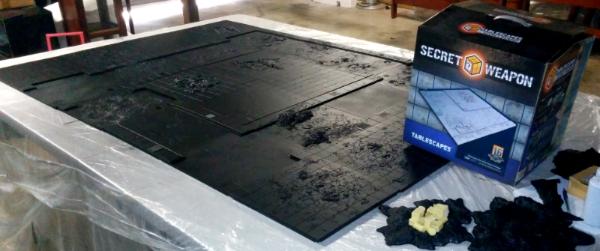
RoB? I just couldn't make up my mind. Then I saw the SWM Tablescapes campaign on Kickstarter and the decision couldn't have been easier!

I thought the excitement would kill me, but I survived only to then think the WAIT would kill me. After all that anticipation (and NO disappointment!!), it is on my hobby tables. I now firmly believe the PAINTING and WEATHERING is what will kill me.

It is so detailed and I really want to put my best into it.
I'm going to drop all my processes and progress pics here and would love any suggestions, tips or feedback you are willing to offer.
I've stocked up on paints, washes, powders, primers and varnishes. I'm no brand snob so I'm going to be using a whole host of stuff. I'll note what I use along the way and how it was applied (airbrush, sponge, paintbrush or forehead etc).
I've taken some inspiration from a few who have undertaken this endeavour and will be using some of their methods but putting my own spin on them. I'll be happy to produce anything close to what I've already seen around Dakka and the greater web.
Wish me luck! I aim to have this finished by the end of September!
====================================================================================================
Step 1 - Primer
Using a
Badger 350, I applied
Vellajo Black primer on all sections. Went through almost a whole 200ml bottle! My arm and the knuckle in my index finger hurt for 4 days afterwards. Suffer for your art!!!
====================================================================================================
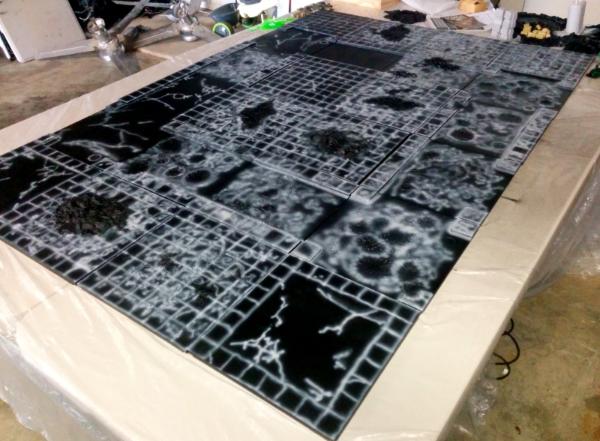
Step 2 - Pre-highlights
Using a
Badger Patriot 105 I applied
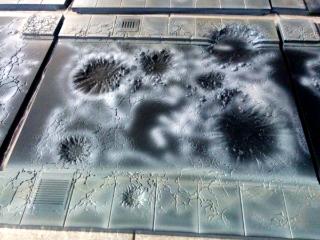
Vellajo grey primer along cracks and edges of each concrete slab to add some edge highlights. I was not sure how this would look but my test piece showed it that it would be toned down a fair bit after the other layers were added.
====================================================================================================
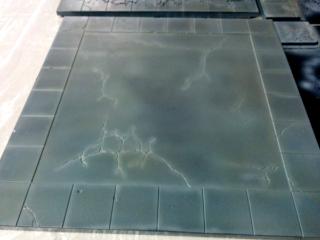
Step 3 - Cement Slab & Cement wash
Putting the workhorse (
Badger 105) to task again, I applied
Minitaire Concrete Slab and
Secret Weapon Miniatures Concrete Wash over all the non-road sections. Used the wash through the airbrush worked well and dabbing it lightly with a paper towel worked to break it up a little.
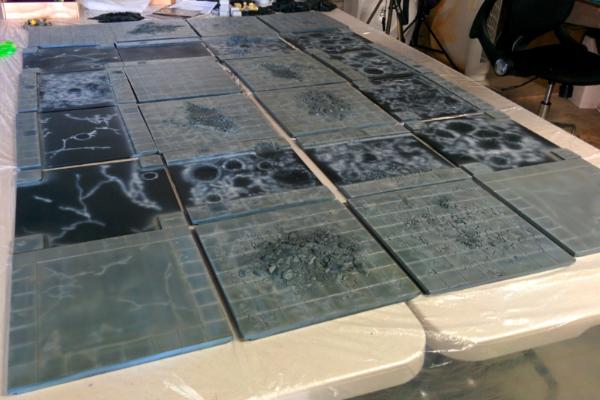
I was happy with the results, but unsure if I need to add some more wash to some sections.....
Again, any questions, feedback or encouragement is welcome! See you in a few days!
Kr00gZ


