| Author |
Message |
 |
|
|
|
|
Advert
|
Forum adverts like this one are shown to any user who is not logged in. Join us by filling out a tiny 3 field form and you will get your own, free, dakka user account which gives a good range of benefits to you:
- No adverts like this in the forums anymore.
- Times and dates in your local timezone.
- Full tracking of what you have read so you can skip to your first unread post, easily see what has changed since you last logged in, and easily see what is new at a glance.
- Email notifications for threads you want to watch closely.
- Being a part of the oldest wargaming community on the net.
If you are already a member then feel free to login now. |
|
 |
2015/10/09 22:26:51
Subject: A Tale of 3 Tabards: Layer vs Glaze vs Wet Blend
|
|

Fixture of Dakka
|
I Just thought I'd share this -- 3 tabards painted with essentially the same paints, one with glazing, one with wet blending (wet on wet), and one with a wash followed by layering and highlights. Mostly, I did this to break things up a little, because I had a lot of tabards to paint in my lil army 
First the pics:
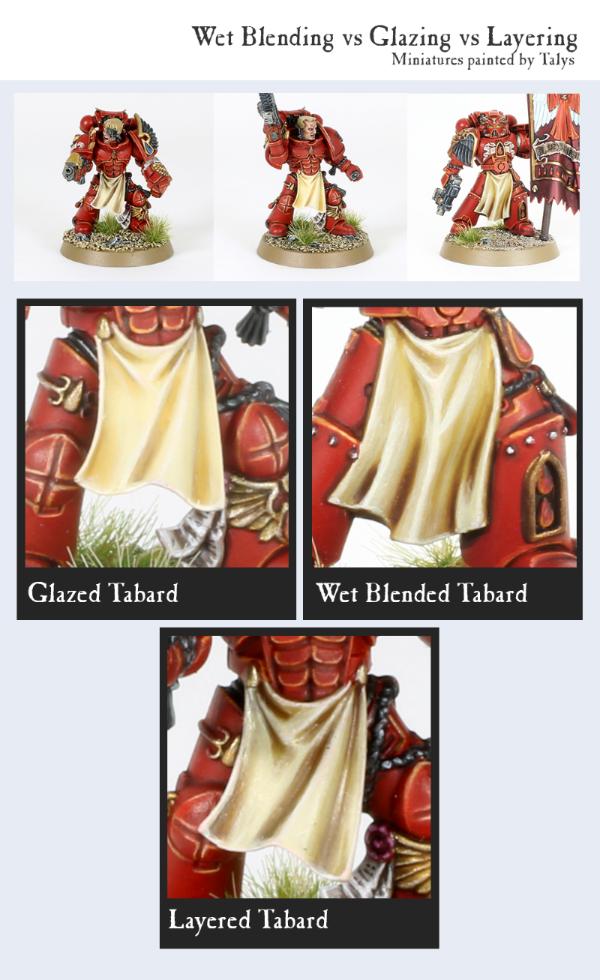
As you can see, when you stand back a little and are not blowing things up to 10x the size, they all look just fine. On the tabletop, one isn't really distinguishable from the other, so there certainly isn't a best way to do these.
On closer inspection, however, you can really see the difference between the techniques, even though all of them essentially use Ushbanti Bone, Screaming Skull, Pallid Wych Flesh, and Seraphim Serra (wash). Just to go over them:
1. The Leftmost sergeant is painted using the most basic method: basecoat, wash, then layer up.
The real advantage is speed and ease -- it's really easy to do, and doesn't take a lot of effort. The downside is that even though I've feathered the edges a little, you can definitely see the bands of colors, as well as the brushstrokes, if you hold it up close. Because layering works by leveraging the translucency of acrylic paints, you can see some areas work out better than others, and in some cases, colors peek through a little where it's not desired. The problem with layering is that a lot of these problems aren't easy to solve because while it's easy to layer UP (brighter) it's much harder to undo that and layer down towards the next band. So, if you're fixing a problem, you want to make sure you're not making it worse by over brightening a band.
2. The second sergeant is painted using a glazing, followed by highlights.
I like the soft look and very smooth transition of glazes. You can see that even when blown up, you don't really see any brushstrokes at all. The downside is that glazes take forever. Essentially, a glaze is a bit of paint mixed with medium (like Lahmian), applied onto the surface, and then feathered out with more medium with no paint at the edges. The challenge here is that, if you want it to be smooth, you need to gradually darken the surfaces. That means lots of lightly tinted glazes, because once you overdarken it, you're in trouble, because lighting it (with a glaze) is not really trivial. To do that takes a zillion thin layers of a lighter glaze, and you run the risk of the whole thing looking milky and not crisp. You also REALLY have to wait til each glaze dries, or it just turns into a mess.
Practically, what this means is that, because I'm not patient enough, my glazed tabards don't have less contrast.
On the plus side, glazes are dead easy to apply. They require a little bit of practice, and hardly any skill. If you're doing a whole bunch of bits at the same time, the wait time between glazes is a little less aggravating.
3. The third model, the standard bearer, has his tabard wet blended.
You can see that there are some brushstrokes (though few, and I like the way they reinforce the flow of the cloth), but this technique has two huge advantages. First of all, if you're decent at it, it takes hardly any time at all, and you can go back and forth between lightening and darkening the areas. Second, you can get a lot more controlled contrast in a lot less time, and it allows you to have the very thin slivers of dark that you can't get using glazing. Personally my favorite technique, but it definitely requires the most practice to master.
Hope that helps
|
|
This message was edited 2 times. Last update was at 2015/10/10 02:16:47
|
|
|
 |
|
2015/10/09 22:31:29
Subject: A Tale of 3 Tabbards: Layer vs Glaze vs Wet Blend
|
|

Rotting Sorcerer of Nurgle
|
great artical - cheers.
|
Check out my gallery here
Also I've started taking photos to use as reference for weathering which can be found here. Please send me your photos so they can be found all in one place!! |
|
|
|
|
2015/10/09 22:33:29
Subject: A Tale of 3 Tabbards: Layer vs Glaze vs Wet Blend
|
|

The Marine Standing Behind Marneus Calgar
|
Nice to see techniques side by side. Roughly how long did each take you?
|
|
|
|
|
|
2015/10/10 00:10:20
Subject: A Tale of 3 Tabbards: Layer vs Glaze vs Wet Blend
|
|
Fixture of Dakka
|
@bubber - thanks!
 Nevelon wrote: Nevelon wrote:Nice to see techniques side by side. Roughly how long did each take you?
Not including the time to get a smooth basecoat -- that's 5-6 coats to get opaque Ushbanti over red -- I'd say less than 10 minutes to wet blend it, less than 5 minutes to layer it, and glazing... well, 99% of the time is just waiting for the last glaze to dry, so it's kind of hard to tell. But... too long waiting. 
|
|
|
|
|
2015/10/10 00:11:11
Subject: A Tale of 3 Tabbards: Layer vs Glaze vs Wet Blend
|
|

Dakka Veteran
|
I love it! Great lesson! You get a exalt!
|
|
|
|
|
2015/10/18 16:27:50
Subject: A Tale of 3 Tabbards: Layer vs Glaze vs Wet Blend
|
|
Ruthless Rafkin
|
 Talys wrote: Talys wrote:@bubber - thanks!
Nevelon wrote:Nice to see techniques side by side. Roughly how long did each take you?
Not including the time to get a smooth basecoat -- that's 5-6 coats to get opaque Ushbanti over red -- I'd say less than 10 minutes to wet blend it, less than 5 minutes to layer it, and glazing... well, 99% of the time is just waiting for the last glaze to dry, so it's kind of hard to tell. But... too long waiting.
I was just about to inquire about that. I usually prime black and paint using a layered technique, but I'm guessing glazing requires a lighter basecoat. Still, I'll have to look at glazing. I love the result.
|

-Loki- wrote:
40k is about slamming two slegdehammers together and hoping the other breaks first. Malifaux is about fighting with scalpels trying to hit select areas and hoping you connect more. |
|
|
|
|
2015/10/18 18:38:59
Subject: A Tale of 3 Tabards: Layer vs Glaze vs Wet Blend
|
|
Decrepit Dakkanaut
|
Fantastic, thank you for putting this together.
Must admit I still don't really understand what wet blending is, but the comparison is really helpful.
|
|
|
|
|
|
2015/10/18 19:10:55
Subject: A Tale of 3 Tabards: Layer vs Glaze vs Wet Blend
|
|
Is 'Eavy Metal Calling?
|
Good stuff, thanks for the run-down. I tend to agree about the wet-on-wet blending, in terms of time-to-effectiveness ratio I find it the best.
 Buttery Commissar wrote: Buttery Commissar wrote:Must admit I still don't really understand what wet blending is, but the comparison is really helpful.
Basically, it's layering, but instead of waiting for each layer to dry, you go straight to the next highlight while the last coat is still wet. Both layers are wet, and this means you can (essentially) 'mix' your two layers at their edges to a mid-tone between the two on the model itself rather than a palette, thus getting an almost imperceptible transition. Obviously you need to be pretty speedy with this, and/or use some kind of drying retarder, and you definitely need thin paint, but it means you can get much smoother gradients than just layering or glazing.
|
|
|
|
|
|
2015/10/18 19:55:32
Subject: A Tale of 3 Tabards: Layer vs Glaze vs Wet Blend
|
|
Decrepit Dakkanaut
|
That much I gathered, but the application and theory eludes me if I'm honest.
|
|
|
|
|
|
2015/10/18 20:22:33
Subject: A Tale of 3 Tabards: Layer vs Glaze vs Wet Blend
|
|
Ruthless Rafkin
|
I liked this so much, exalted it, and linked to it on the Wyrd Boards; I hope you don't mind.
|
-Loki- wrote:
40k is about slamming two slegdehammers together and hoping the other breaks first. Malifaux is about fighting with scalpels trying to hit select areas and hoping you connect more. |
|
|
|
|
2015/10/18 20:25:39
Subject: A Tale of 3 Tabards: Layer vs Glaze vs Wet Blend
|
|

Ancient Space Wolves Venerable Dreadnought
I... actually don't know. Help?
|
Nice article, I'll have to try out wet blending myself.
|
|
|
|
|
|
2015/10/18 20:55:41
Subject: A Tale of 3 Tabards: Layer vs Glaze vs Wet Blend
|
|

Incorporating Wet-Blending
|
https://www.youtube.com/watch?v=0x5th4ExIWk&feature=player_detailpage#t=1051
This was a good example that I've seen previously. It is less technical than it sounds.
|
|
|
|
|
2015/10/19 08:49:34
Subject: Re:A Tale of 3 Tabards: Layer vs Glaze vs Wet Blend
|
|
Longtime Dakkanaut
|
This is a really cool comparison Talys, thank you for sharing. And really nice work too. I think the glaze definitely looks the best here, really smooth. It's worth mentioning that you can also combine these techniques. I usually glaze over layered highlights to smooth them out more, and I wet blend into glaze medium over dry layers, which is kind of like a mixture of all three, and it's very fast and easy to do.
I painted this little spaceship to teach my friend blending (sorry for the bad photo, it's actually a really tiny ship)... It was only quick, it took maybe 5 mins (the same amount of time as it would take to do 5 different layers of colour). It's not quite as clean as yours, partly because it was very rough, and partly because the glaze medium can run a bit and make stuff go a bit "washy". But you can see it's still smooth, and you can force loads of contrast in quickly: I'm about 2/3rds through the spectrum on this blend. It's great for speed painting and tabletop stuff.
|
|
|
|
|
2015/10/19 21:04:17
Subject: Re:A Tale of 3 Tabards: Layer vs Glaze vs Wet Blend
|
|

Veteran Wolf Guard Squad Leader
|
Very informative, thanks.
|
I let the dogs out |
|
|
|
|
2015/10/20 01:26:21
Subject: Re:A Tale of 3 Tabards: Layer vs Glaze vs Wet Blend
|
|
Last Remaining Whole C'Tan
|
As a relatively poor painter with no real ambition to improve myself, I nonetheless found this to be a great read and it broke down the mechanics in a clear fashion.
I'd like to see more detail, but not sure you can do that without a video. Nonetheless, good stuff.
|
|
This message was edited 1 time. Last update was at 2015/10/20 01:27:02
 lord_blackfang wrote: lord_blackfang wrote:Respect to the guy who subscribed just to post a massive ASCII dong in the chat and immediately get banned.
 Flinty wrote: Flinty wrote:The benefit of slate is that its.actually a.rock with rock like properties. The downside is that it's a rock
|
|
|
|
|
2015/10/20 07:39:35
Subject: A Tale of 3 Tabards: Layer vs Glaze vs Wet Blend
|
|
Jovial Plaguebearer of Nurgle
|
Im pretty new to the hobby myself and want to improve my painting abilities seems like my layering needs some work to get to your level haha. really enjoyed the read. Thanks
|
Facts are chains that bind perception and fetter truth. For a man can remake the world if he has a dream and no facts to cloud his mind. |
|
|
|
|
2015/10/20 07:46:28
Subject: A Tale of 3 Tabards: Layer vs Glaze vs Wet Blend
|
|
Executing Exarch
|
Glazing looks so good... don't have the patience for it myself. I do layering and then a little glazing on the seams.
|
|
|
|
|
2015/10/20 08:17:38
Subject: A Tale of 3 Tabards: Layer vs Glaze vs Wet Blend
|
|
Grizzled Space Wolves Great Wolf
|
Looks really nice, Talys. Did you ever grab some oils (I remember we discussed them in another thread)? I really like the results I can get from wet blending and drybrushing oils though I lack the skill to do anything worth showing
|
|
|
|
|
2015/10/20 15:36:56
Subject: A Tale of 3 Tabards: Layer vs Glaze vs Wet Blend
|
|

Skillful Swordmaster
The Shadowlands of Nagarythe
|
Exalted!
I would love to see these techniques applied to DA robes side by side as the colour scheme you're using seems exactly the same as the one I use for my robes (though I am nowhere as good)
|
|
|
|
|
|
2015/10/20 17:30:08
Subject: A Tale of 3 Tabards: Layer vs Glaze vs Wet Blend
|
|
Fixture of Dakka
|
Buttery Commissar wrote:Fantastic, thank you for putting this together. Must admit I still don't really understand what wet blending is, but the comparison is really helpful.
Paradigm had it down pat Here are three techniques (there are lots of others, too): 1) The way that a lot of people use to learn to wet-on-wet blend is to take two similar colors (say a light blue and a dark blue), paint them on a sprue (that's been primed) with about a 1.5mm gap between them. Let that paint dry. Then apply the first color on the edge of left, the second on the edge of the right (again with a gap), and with a clean brush, before they dry, move the brush back and forth in the gap space. 2) Paint light blue and dark blue right beside each other on the sprue, and let it dry. Then, paint light and dark blue right beside each other on the border. Before it dries, take a clean, slightly damp brush and zigzag down the middle. 3) I saw this on some Painting Buddha video. It's actually pretty cool. With the two colors on the sprue, take a brush and put dark blue on it, then put a little bit of light blue. Then as you paint on and use up the light blue, the paint gradually turns to the dark blue. It's a really neat trick. For #1 and #2, as you are learning, drying retarder really makes it easier. It's certainly not necessary, but until you have the confidence to "just do it", the paint ends up drying while you're trying to figure things out. Blue is a really good learning color, because it covers well and blends well, and every range has a zillion blues, so you can pick a couple that are close together. Incidentally, wet blending is really critical if you wan to paint nice jewels (like Blood Angels teardrops, or targeting thingies on space marines), because there often isn't enough space on there to use many other techniques if you want a smooth transition. Valhallan42nd wrote:I liked this so much, exalted it, and linked to it on the Wyrd Boards; I hope you don't mind.
Thanks! AllSeeingSkink wrote:Looks really nice, Talys. Did you ever grab some oils (I remember we discussed them in another thread)? I really like the results I can get from wet blending and drybrushing oils though I lack the skill to do anything worth showing
Yes, I did! I played around with them a little, using some old brushes. I don't think they're for me, because cleaning up brushes after is a pain (do you use turpentine?), and the stuff takes forever and a year to dry. I finally took a hairdryer to it because I got so impatient, LOL. Lithlandis Stormcrow wrote:Exalted!
I would love to see these techniques applied to DA robes side by side as the colour scheme you're using seems exactly the same as the one I use for my robes (though I am nowhere as good)
Thank you =) I'll post up some DA robes the next time I paint some I make my way through DA here and there 
|
|
This message was edited 1 time. Last update was at 2015/10/20 17:33:09
|
|
|
|
|
2015/10/20 18:22:01
Subject: A Tale of 3 Tabards: Layer vs Glaze vs Wet Blend
|
|
Longtime Dakkanaut
|
Talys wrote:I don't think they're for me, because cleaning up brushes after is a pain (do you use turpentine?), and the stuff takes forever and a year to dry. I finally took a hairdryer to it because I got so impatient, LOL.
You should get proper oil diluent / brush cleaner. It works way better, and it smells way way better. For quicker drying you can use resin mediums and stuff. Oils are actually every bit as flexible and easy as acrylic if you get into them.
|
|
This message was edited 1 time. Last update was at 2015/10/20 18:22:45
|
|
|
|
|
2015/10/20 18:56:53
Subject: A Tale of 3 Tabards: Layer vs Glaze vs Wet Blend
|
|
Ancient Space Wolves Venerable Dreadnought
I... actually don't know. Help?
|
maybe I'm a bit dumb, but I don't really understand how you 'glazed' it, did you make a homemade shade or...?
|
|
|
|
|
|
2015/10/20 19:12:22
Subject: A Tale of 3 Tabards: Layer vs Glaze vs Wet Blend
|
|
Decrepit Dakkanaut
|
Thanks for the explanations, Talys.
I think I'm confused because I took a short lesson with someone who tried to explain how to wet blend, NMM and rub your head at the same time, and I really didn't understand what was happening.
I came away thinking it was far more difficult than needs be.
|
|
|
|
|
|
2015/10/20 20:53:24
Subject: A Tale of 3 Tabards: Layer vs Glaze vs Wet Blend
|
|
Is 'Eavy Metal Calling?
|
 Matthew wrote: Matthew wrote:maybe I'm a bit dumb, but I don't really understand how you 'glazed' it, did you make a homemade shade or...?
That's the gist of glazing, yep. Either use a pre-made glaze paint like the ones GW do, or mix regular acrylic paint with a medium (like Lahmian Medium, which is great for all sorts and general neatness by the way) to create your own. The method Talys described is a bit more in-depth as he then added pure medium at the edges to blend the glaze even better, but at its most basic level making your own glazes is easy and can be very useful.
|
|
|
|
|
|
2015/10/21 05:08:04
Subject: A Tale of 3 Tabards: Layer vs Glaze vs Wet Blend
|
|
Fixture of Dakka
|
Matthew wrote:maybe I'm a bit dumb, but I don't really understand how you 'glazed' it, did you make a homemade shade or...?
A glaze is just a more translucent paint, achieved by adding acrylic medium to acrylic paint. I love Lahmian Medium, but you can use Liquitex, or whatever (there are lots of mediums). Glazes are useful for all sorts of things, like taking the harshness off of drybrushing. In this particular case, I used a glaze to accentuate the recesses, the way you would with a wash. But instead of just plopping it on and letting it settle where there are recesses, I put a little bit of the colored glaze, and then smoothed out the edges with untinted medium. If I don't do that, one of two things happen: If I treat the glaze like a wash, and just glaze everywhere, I'll accomplish nothing but darken the model; if I treat the glaze like a layer paint and just apply to the recess, then it will dry with a visible line. The feathered edge takes that out, and leaves one of the smoothest gradients that you can achieve with a paintbrush (ie not airbrush), and at the same time, offers you tremendous control. On the downside, it takes annoyingly long to dry, plus, you cannot use a hairdryer to speed it up, because that would move the glaze around. I guess maybe a heat lamp Glazes are a little different than shades, in that the ideal shade is more like an ink and should slide into a recess, while an ideal glaze should cover and adhere to the entire surface. Before we had nice shade paints, the easiest way to make a shade was with Klear (the floor polish) -- just add Klear to your paint, and voila! Now we are spoiled. In theory, you would apply glazes over a matte surface (because you want it to stick), and you would apply shades onto a gloss surface (because you want it to slide into recesses). In practice, unless you are painting up a competition piece, few people have the patience to do this In reality, a lot of people just treat glazes and shades the same way, because you can make a glaze do pretty much the same thing as a shade just by being more generous in the application (slop on more ).
|
|
This message was edited 3 times. Last update was at 2015/10/21 05:15:32
|
|
|
|
|
2015/10/21 05:17:30
Subject: A Tale of 3 Tabards: Layer vs Glaze vs Wet Blend
|
|
Grizzled Space Wolves Great Wolf
|
 Smacks wrote: Smacks wrote: Talys wrote:I don't think they're for me, because cleaning up brushes after is a pain (do you use turpentine?), and the stuff takes forever and a year to dry. I finally took a hairdryer to it because I got so impatient, LOL.
You should get proper oil diluent / brush cleaner. It works way better, and it smells way way better. For quicker drying you can use resin mediums and stuff. Oils are actually every bit as flexible and easy as acrylic if you get into them.
I use soap to clean the brushes. Turps is pretty harsh on brushes.
If I'm dry brushing oils (which, so far, seems to be the best brush-blending technique I've encountered) I don't thin them at all, I just squeeze it on to my palette and work from there and when it comes to cleaning up the brush I just use regular hand soap and water (swish it in the water, rub in some soap, wash the soap out, repeat a few times until the brush is clean).
For oil drybrushing, because of the slow drying time I've been base coating with an acrylic (usually the lightest colour I want) and then drybrush the oil in to the crevices.
The difference between oil drybrushing and acrylic drybrushing, with an acrylic it's basically cured far enough by the time it hits the model that if it looks scratchy, you're stuck with it. With oil drybrushing if it looks a bit scratchy you can just keep brushing it and it'll smoosh the streakiness together to create a smooth blend.
|
|
|
|
|
2015/10/21 05:19:59
Subject: A Tale of 3 Tabards: Layer vs Glaze vs Wet Blend
|
|
Fixture of Dakka
|
Actually, I never tried drybrushing oils. I'll give it a try! But how do you drybrush into the crevice? I mean, it's not the usual fast, back-and-forth motion with a brush with almost no paint... right?
|
|
|
|
|
2015/10/21 06:20:05
Subject: A Tale of 3 Tabards: Layer vs Glaze vs Wet Blend
|
|
Grizzled Space Wolves Great Wolf
|
Talys wrote:Actually, I never tried drybrushing oils. I'll give it a try! But how do you drybrush into the crevice? I mean, it's not the usual fast, back-and-forth motion with a brush with almost no paint... right?
There's a couple of approaches and it depends how large the area you're trying to blend is and how contrasting the colours are. If it's a large area that doesn't have sharp detail, you do it similar to acrylic drybrushing but instead of just brushing over the entire model, you focus on the crevices and the paint will build up. If it's a sharp corner or fine detail, the drybrush won't want to fit in to the crevice, so you can use a regular brush to paint a line of oil paint in to the crevice (unthinned, straight from the tube) and then use a small soft drybrush (small filbert or something like that) to blend it in to the surrounding area. Here's an example I did just now on a model I had sitting on my desk... I must stress this is using VERY contrasting colours, it's light grey base with a van dyke brown (very dark brown) drybrush so it looks very stark. Just like any blending technique, if you do a couple of intermediate colours it's better when you're trying to do very sharp transitions. If you used more reasonable colours (like a light beige base and a brown drybrush like your tabards) the blend would look much smoother, lol. I'm also not a very skilled or talented painter so I'm sure someone with some artistic ability could do a better job, lol. Excuse the terrible photos as well, I should probably make an actual tutorial for the technique. Step 0: The crevice 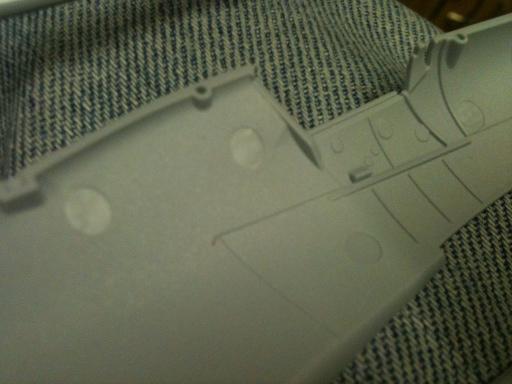 Step 1: Squeeze some oil paint on to a piece of paper, don't thin it. Used a small round brush (#1 I think) to just paint the unthinned oil paint in to the crevice. 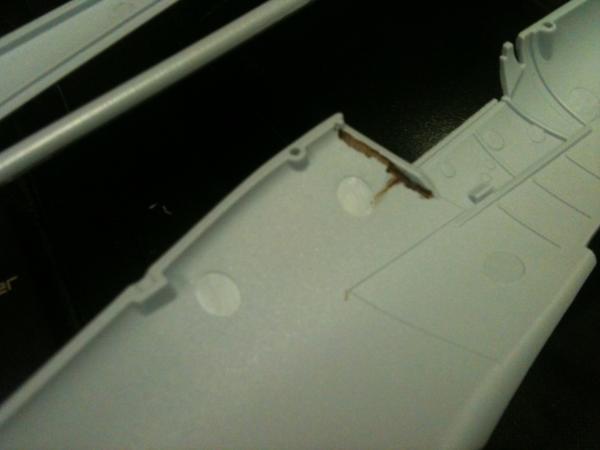 Step 2: Use a small drybrush to blend them together 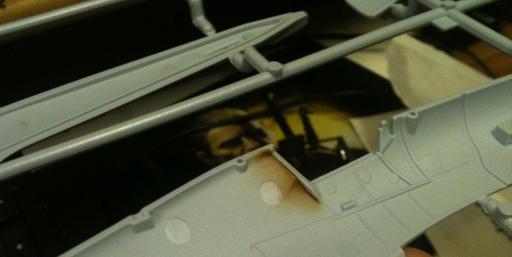 Pretty simple. You can mix it up, like this area where I want the blend to occur over a much larger area. Step 1: Drybrush in to the areas I want darker 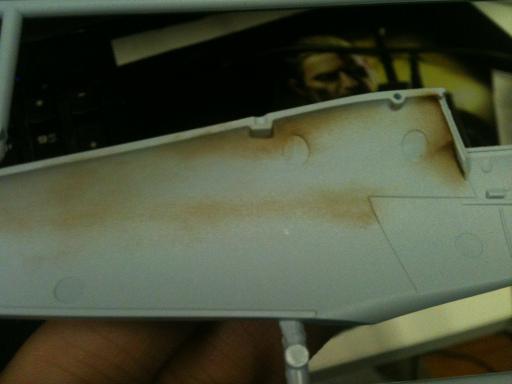 Step 2: Realise the brush was too large to fit in to the small crevices, so do Step 1 from before (paint unthinned oil in to the crevice with a #1 round brush) 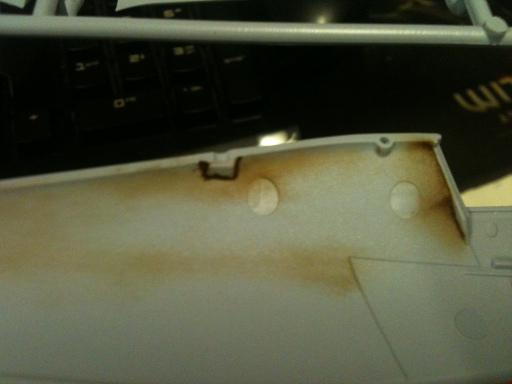 Step 3: Pick up the drybrush again and blend it in 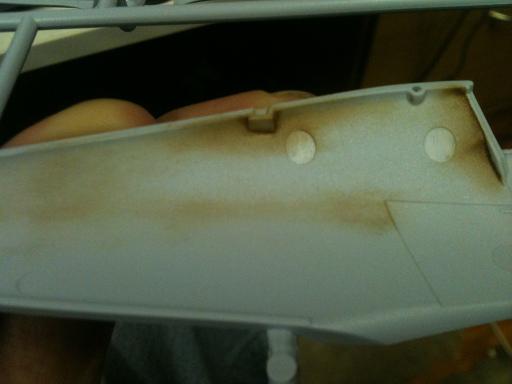 Step 4: Realise that my excessively large drybrush left some paint on the raised area, so I cleaned off my #1 round with soap and water, then I swished the brush in the some water, rolled it through my soap again and wiped it on a tissue (so the brush is a bit soapy but not dripping wet) and used that to clean the paint off the raised area. 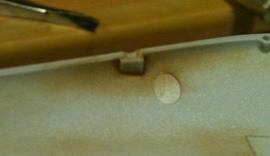 Step 5: I probably could have left it there, but the cleaning step 4 left a line that was a bit too prominent, so I went back to the drybrush, cleaned as much of the paint off as I could on a tissue (because I didn't want to get the brush wet!) and blended the line from Step 4 in again. 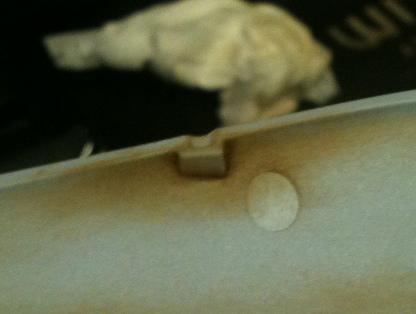 I probably make it sound more complicated than it is, the whole thing only took me a couple of minutes including stopping to take photos It's taken me significantly longer to upload the photos and type this than it took me to paint, lol. Automatically Appended Next Post: EDIT: I just smoothed out the blends a little bit and took a better photo to give a better idea of the final result: 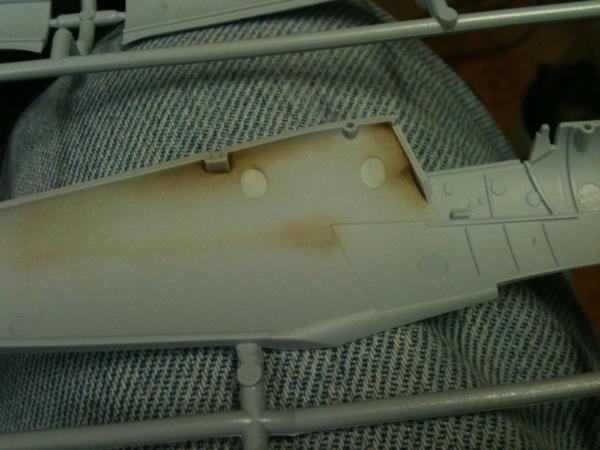 I would do a step by step on a tabard but I can't think of any models in my collection that have tabards that I can use as an example
|
|
This message was edited 5 times. Last update was at 2015/10/21 11:16:45
|
|
|
|
|
2015/10/21 14:58:18
Subject: Re:A Tale of 3 Tabards: Layer vs Glaze vs Wet Blend
|
|
Fresh-Faced New User
|
Great work on those tabards Talys, they look great! Also such an interesting technique with oils AllSeeingSking, going to have to give that a shot and see how it works. I can see it being really effective on model kits and larger type models especially.
I would add for those reading the thread that there doesn't have to be a contrast difference between different blending techniques. In the example above, each of the three examples has a different level of contrast (likely due to the difference in the "severity" of the folds), with the "wet blending" achieving the darkest shadows. One can achieve that same high level of contrast through any blending techniques.
I know that it is very common to come at the challenge of blending paint from the perspective of using one technique or the other and sticking with that technique everywhere. In my own experience I've found that I now tend to use many different blending techniques, often on the same part of the mini. For example, I was working on the lower portion of the attached Librarian backpack for a bit the other night...
On the larger surfaces (like the triangular panel with the holes) I would "rough in" a basic gradient with a feathering-style blend, then smooth the area out with successive glazes. On other smaller areas I might go right to glazing in shadows and "half-loaded brush" for highlights. On very large areas, particularly larger, smooth, panels on space marines, like the fronts of terminator legs, I might use a wet-in-wet blending to get a smooth effect quickly on a large area. On the lower part of this backpack I think I used wet-in-wet, feathering, glazing, as well as the "half-loaded brush" variant of the technique Ben K @ Painting Buddha uses that is mentioned above (where instead of loading the base of the brush with thin base color, you use water). All on different parts and in different combinations.
I also find that different techniques are more or less helpful with different types of paints, different colors, and even different stages of highlight/shadow. For example, for shadows I find glazing extremely effective even for establishing the initial effect. For highlights, however, I prefer to use another technique to establish the basic effect of the gradient and then use glazes to "smooth it out" because glazing "up" to a lighter color can be frustrating and very time consuming. Working with more opaque paint for highlight blends can get the process started faster, and can always be smoothed out with glazes later.
I'd suggest to try to learn all of these techniques and use them together. They'll all either help you out or hinder you depending on the surface, paint, and desired effect but using them together will get you where you want to go every time. I'd venture to say that you could create the exact same "look" with any technique, the question is which single technique or combo gets you where you want to go most efficiently.
![[Thumb - backpack-small.jpg]](/s/i/at/2015/10/21/ab1668289623fc61b8e88698a1678b12_85389.jpg__thumb)
|
|
|
This message was edited 2 times. Last update was at 2015/10/21 19:43:19
|
|
|
|
|
2015/10/22 04:35:15
Subject: A Tale of 3 Tabards: Layer vs Glaze vs Wet Blend
|
|
Fixture of Dakka
|
@Skink - Awesome! Thanks for the pics and the tutorial =)
@RogueShader - I totally agree that these are all different techniques that are great of different situations. One thing that I didn't demonstrate is feathering paint (rather than a glaze), which is also really useful, especially if you want edges highlighted with a paintbrush without a contrasty line.
It's also nice to use different techniques to do different parts to break up a squad a little, and so that an army doesn't end up looking too repetitive, if you're not investing in a zillion different bits that are physically different.
|
|
|
|
|
|
|
 Ultramarines, 3rd Co. and friends, 16k+
  4k
4k  4k Points
 Competition Index


 ~2800 points