He got the 'Don't Scatter Deep Strike'
WL Trait on the re-roll and put all 6 Crisis Suits in reserve. I later found out that this was Illegal. He's still new, and I still won so can't complain too loud.
Tau Deployment. (His Obj is right in front of the Riptide on the right)
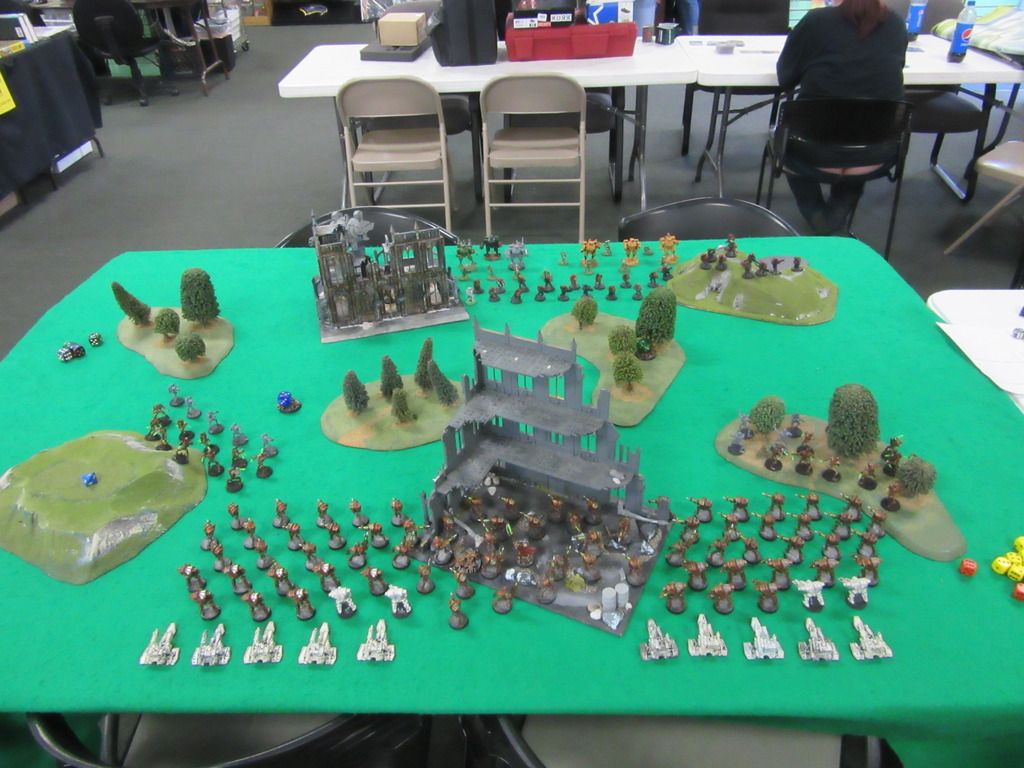
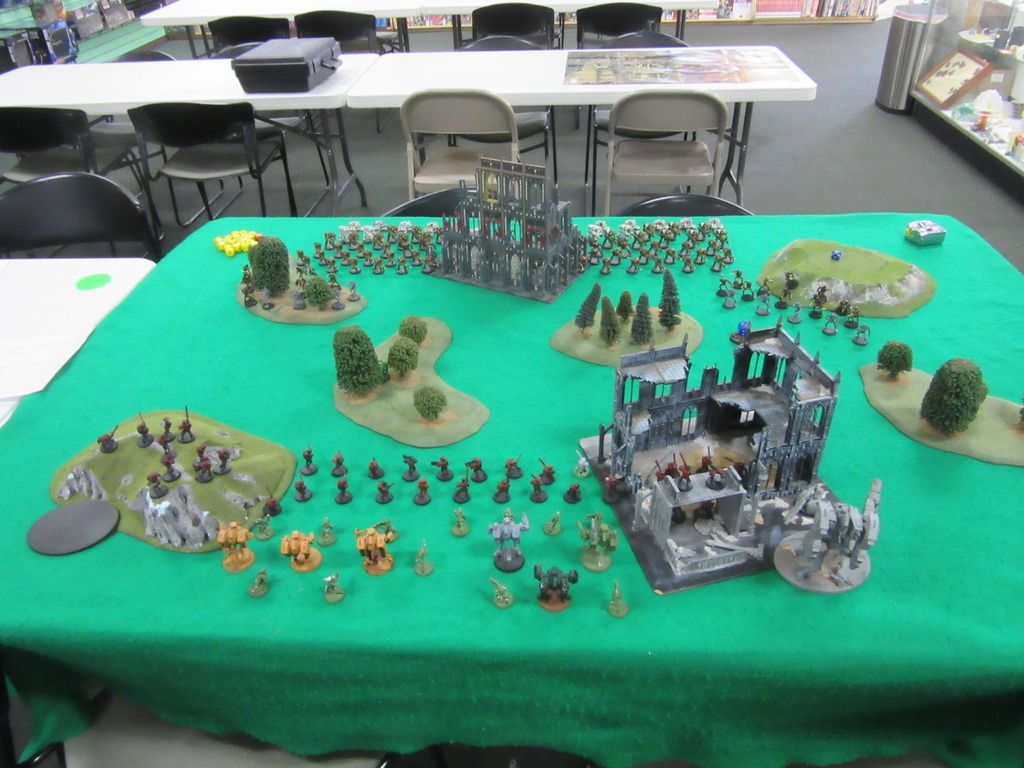 Necron Deployment (My Obj is the Scarab base)
 ITC Mission 1
Tau win Turn 1, Failed to 'Seize'
Night Fight
Turn 1
Tau: (3,4) Scoring Unit in Opposing DZ, Kill a Unit
Cron: (1,5) Objective 1, Kill a Unit
Tau: TRIES to move the 9 man unit up to Objective one (rolled a 1,2 for Difficult Terrain). Ends up running 5" to try to contest it. Pours both Riptides, both Broadsides, and 2 units of Firewarriors into the Flayed Ones that are close to Obj 1, leaves 3 alive. (0 pts)
Cron: Warriors and Tesla Immortals blow the 9 man unit off the board. The other 2 units of Warriors and Immortals work on the other units of FireWarriors. Both units of Tomb Blades end up Turbo-boosting, one unit to secure Objective 1. 2 of the Firewarrior units break. 2nd unit of Flayed Ones runs 5". (2 pts)
Turn 2
Tau: (5,6) Kill a Unit, 3 units in own DZ
Cron: (2,5) Objective 2, Kill a Unit
Tau: 1 Unit of Firewarriors fails to rally, off board. Reserves do NOT show up. The remaining Firewarriors, Riptide, and both units of Broadsides take out the Tomb Blades on Obj 1. The other Riptide kills 2 of the Tomb Blades. (2 pts)
Cron: Zahndrekh switches Warlord trait to 'Target Priority'. Tomb Blades and Flayed Ones advance on Riptide. 3 man unit of Flayed Ones runs away to get out of range of guns. Warriors/Immortals move up to cover both Maelstrom objectives and remove all traces of Firewarriors. Tomb Blades manage to put a wound on the Riptide. Tomb Blades charge, forcing Overwatch so the Flayed Ones could charge. Flayed ones fail the charge, but they're sitting 4" away from Tau 'Emporer' Objective. 1 Tomb Blade dies in
CC. (2 pts)
Turn 3
Tau: (3,5) Have a Scoring unit in opposing DZ, Kill a unit
Cron: (4,2) Destroy a unit, Objective 2
Tau: Reserves show up. He had a tough call here. He had to decide to get the 2
VP's or cover his 'Emporer' Objective. He probably had the best opportunity to get the 2
VP's since he doesn't scatter, and there was a 3 man unit of
FO's in the back that he could've killed. However, he didn't want to waste all those Plasma on 3 guys and decided to fight for the objective. So they Deep Strike in the back, near his Objective. One unit of Broadsides then decides to actually move to get
LoS on the Flayed Ones sitting there. 7 Flayed Ones left after all said and done. The last Riptide and Broadsides went after the 3 man unit of Flayed Ones for the
VP. The combination of range, and going to ground, and
LoS, left me with 1 Flayed One. He survives until end of game. The Riptide kills 1 more Tomb Blade in
CC. (0 pts)
Cron: (Keep Warlord Trait) Flayed Ones changed focus, and bypass the
HQ blob, and head into building to go after the Broadsides that had moved in his turn. The Warriors and 1 Immortal did some Crossfire shooting (firing at the further away targets), which worked, as it prevented 1 unit of supporting fire to the Broadsides that the
FO's were intending to assault. The last Immortals put a wound on the other Riptide. The Flayed Ones charged the Broadsides, losing 2 to Overwatch from both the Broadsides, and the Crisis Death Squad. The remaining 5 survived, despite striking last and put too many wounds on the unit. The Tau chose to lose the Drones first, which meant I won combat by 4. They broke, and made it off the board. Amazingly, he failed to even hit the last Tomb Blade in
CC. (2 pts, Big Game Hunter)
Turn 4
Tau: (1,4) Objective 1, Destroy a Unit
Cron: (3,4) Scoring unit in opposing DZ, Destroy a Unit
Tau: With a Riptide, Broadside and the Crisis Death Squad left, he didn't have much. the Death Squad finished off the Flayed Ones since he didn't want them near his Emporer's objective. The last Riptide and Broadsides went to work on the Warriors on Objective 1. He attempted to charge the remaining Warriors, with the intent of killing them, then consolodating onto Obj 1 for the
VP. He failed the charge. Sadly, he failed to kill the lone Tomb Blade in
CC with the other Riptide. (1 pt)
Cron: 1 unit of Immortals headed back to my Objective at this point, 1 unit of Warriors (which hadn't taken a single casualty at this point), just ran at the Death Squad, contesting that Objective and landing me a unit in his DZ. The remaining Warriors/Immortals secured Obj 1, and took potshots at the Broadsides. Again, the lone Tomb Blade proves too resilient for the Riptide (1 pt)
Turn 5
***** Game Called *****
We were approaching the 2 hour mark at this point, and it didn't help that we had an 'Opinionated Spectator' constantly interrupting, commenting on the things not relevant to the game, and offering advice to the Tau player (Despite several requests to not help him from both of us, since it was Tourney practice). He had also seen enough to know how both the scenario worked, and how his army functions in the format.
We did a rushed T5, I didn't write what Objectives we rolled, because it was 7,3 at this point. Mostly he wanted to vindicate himself by killing the last Tomb Blade, which he failed to on both his and my turn. The Immortals went back and secured my Objective, the Warriors that survived from the Death Squad, went and sat on the objective, while Zahndrekh and his unit were moving in to try and take it for the next turn.


 <Dynasty>
  War Coven of the Coruscating Gaze
  ~3000pts
 Thrice-Damned Plague Corps
  ~3250pts
 Admech (TBN)